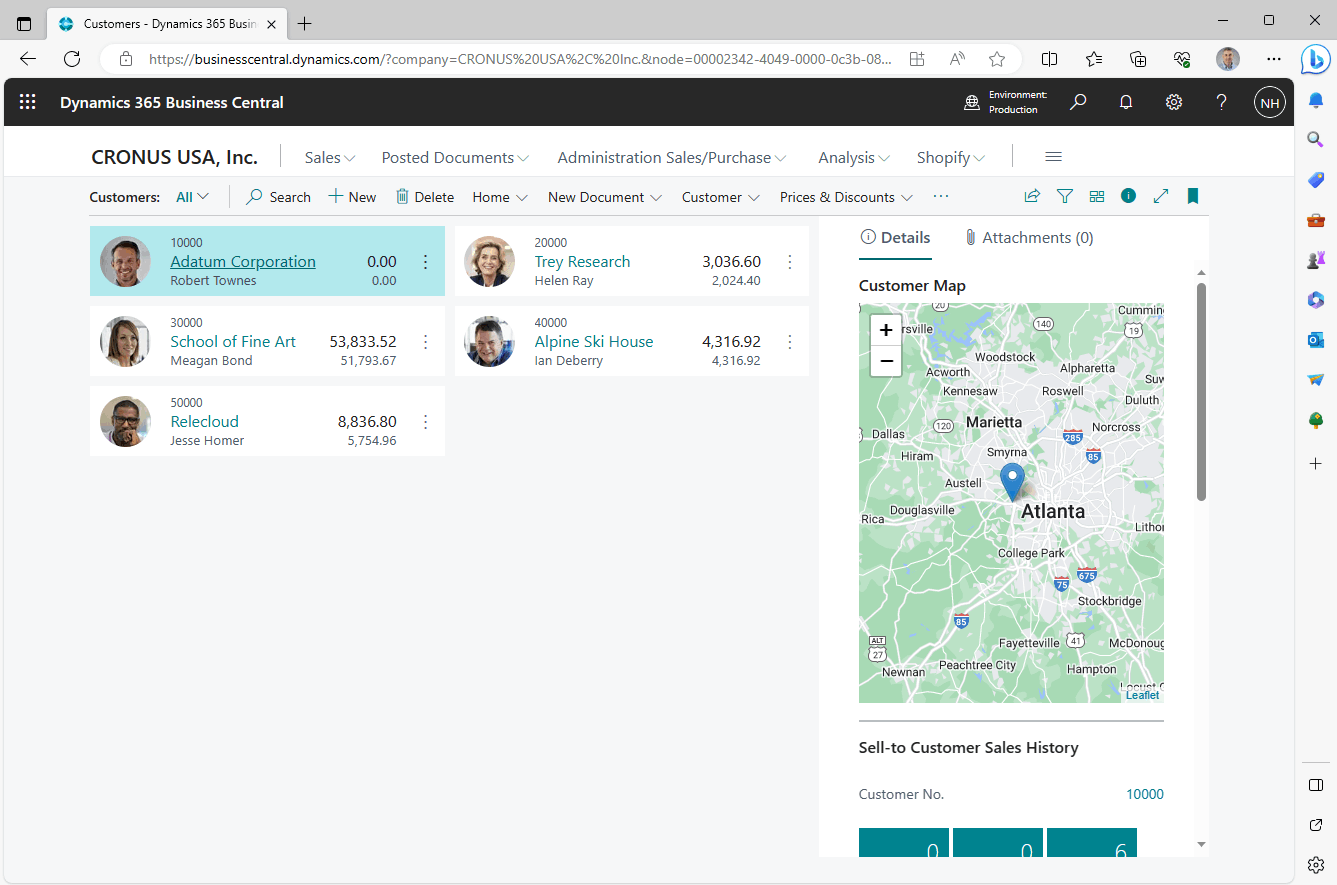
The Microsoft Dynamics 365 Business Central Extension described here allows users to view Customer locations in a map.
Please explain this Business Central AL code
The provided Business Central AL (Application Language) code is defining an extension for a Business Central application that adds a Leaflet map visualization to customer-related pages in the application. Let's break down the code step by step:
Control Add-in Definition (LeafletMapsFactBox):
This section defines a control add-in named LeafletMapsFactBox. Control add-ins are used to integrate external controls or web content into Business Central pages.
RequestedHeight and MaximumHeight specify the height of the control.
VerticalStretch and VerticalShrink control the vertical resizing behavior.
HorizontalStretch and HorizontalShrink control the horizontal resizing behavior.
Scripts specifies JavaScript files that are needed for the control add-in. It includes two URLs, one for Leaflet.js and another for LeafletMapsFunctions.js.
Stylesheets specifies the CSS styles needed for the control add-in, including the Leaflet CSS.
The ControlReady event is defined, which will be triggered when the control is ready. Additionally, there's a procedure CreateSidebar defined.
Page 50101 (LeafletMapsCustListFactBoxPart):
This section defines a page named LeafletMapsCustListFactBoxPart. It is a fact box part that extends the Customer table and is intended to display on a card page.
PageType specifies that this is a card part.
SourceTable specifies that this part is related to the "Customer" table.
In the layout section, it defines a user control (Sidebar) that references the LeafletMapsFactBox control add-in defined earlier. This user control will be placed in the "Content" area of the page.
The OnAfterGetRecord trigger is defined. It is executed after a record is retrieved. It calls the CreateSidebar procedure defined in the LeafletMapsFactBox control add-in, passing the customer's number and city as parameters.
Page Extension 50102 (LeafletMaps Cust Card):
This section defines a page extension that extends the "Customer Card" page. It adds a fact box part, LeafletMapsCustListFactBoxPart, to the "Customer Card" page.
It places the fact box part in the "FactBoxes" area.
ApplicationArea specifies that this extension is applicable to all areas.
Caption sets the caption for the fact box part to "Customer Map."
SubPageLink indicates that this fact box is linked to the customer number ("No.").
Page Extension 50103 (LeafletMaps Cust List):
This section defines a page extension that extends the "Customer List" page. Similar to the previous extension, it adds the LeafletMapsCustListFactBoxPart fact box part to the "Customer List" page.
It also places the fact box part in the "FactBoxes" area.
ApplicationArea specifies that this extension is applicable to all areas.
Caption sets the caption for the fact box part to "Customer Map."
SubPageLink indicates that this fact box is linked to the customer number ("No.").
In summary, this code extends customer-related pages in a Business Central application to include a fact box displaying a Leaflet map. The map is populated with customer data, and users can interact with it to visualize customer locations. The LeafletMapsFactBox control add-in provides the functionality for rendering the map, and the code specifies when and where this control should be displayed on customer card and list pages.
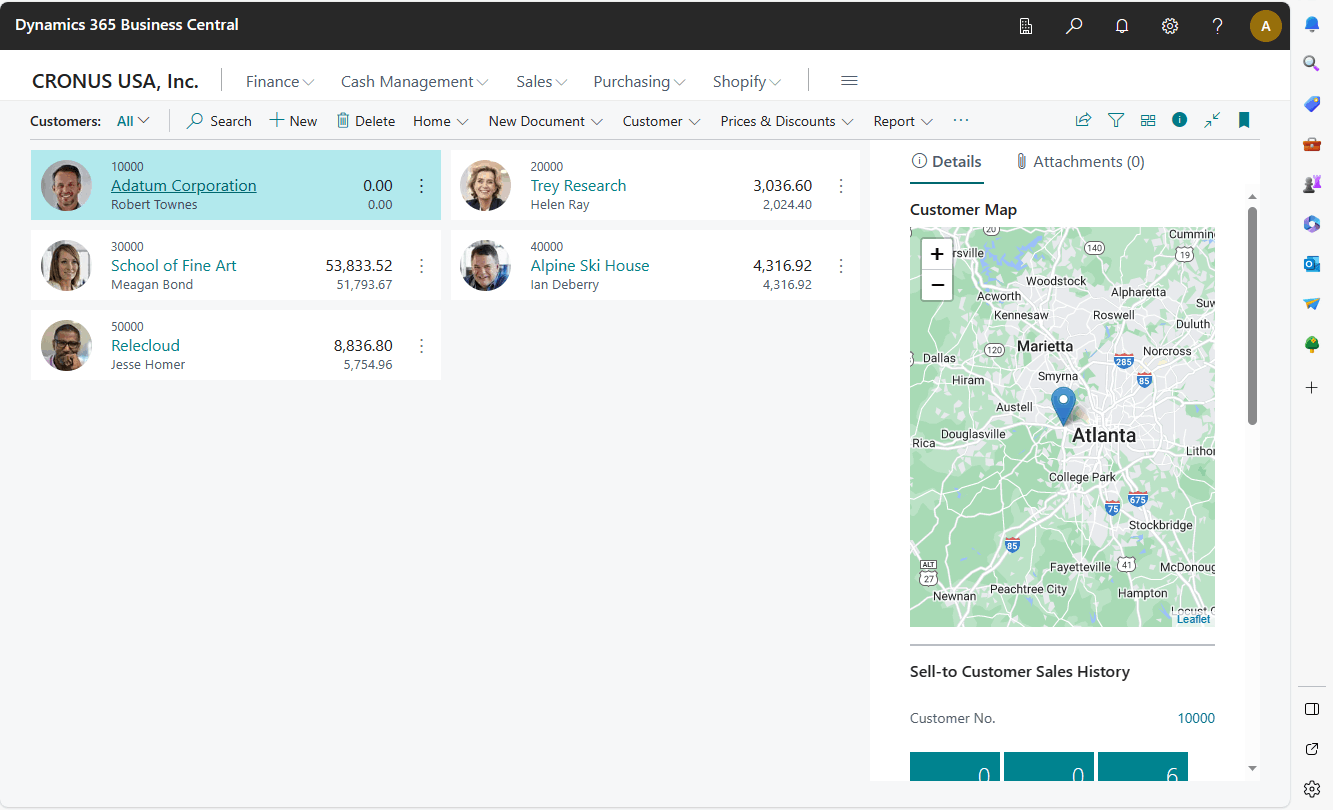
Customer Adatum Corporation is based in Atlanta
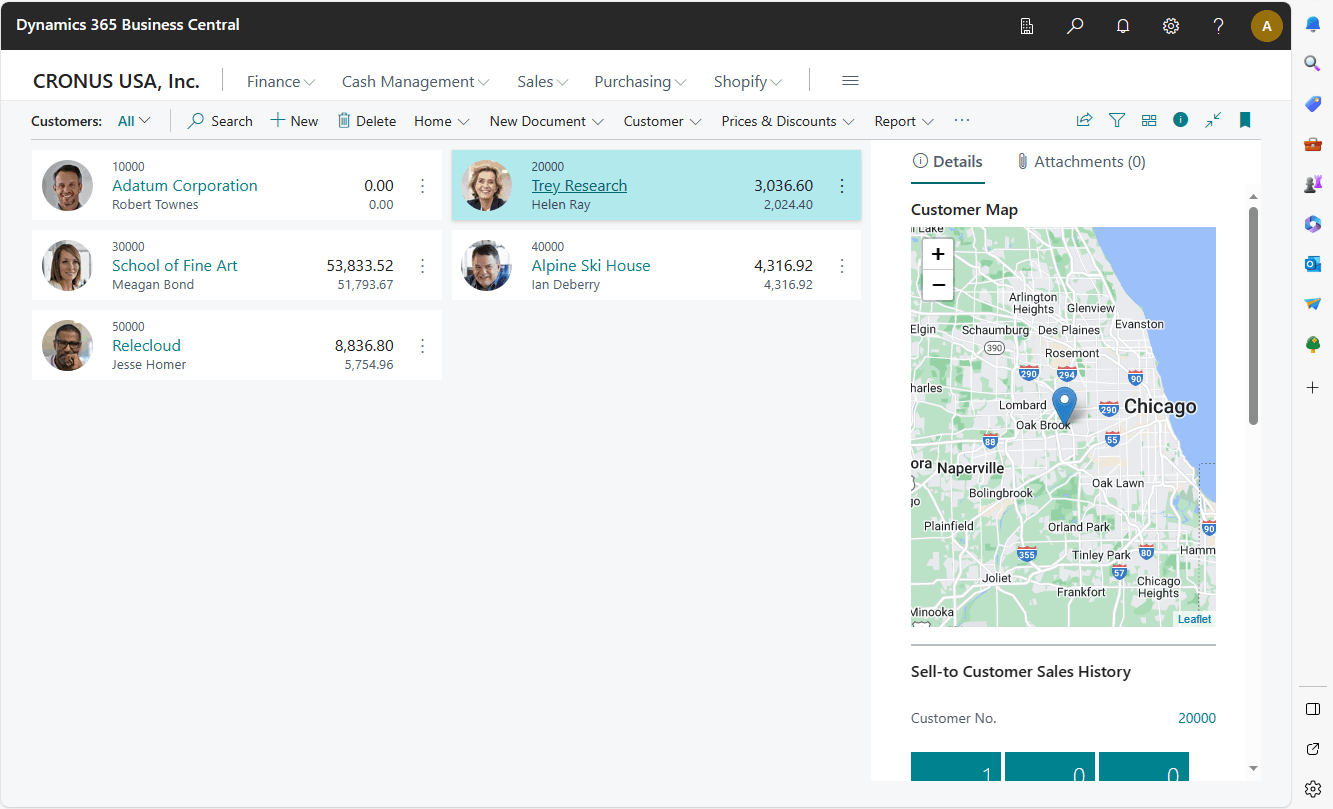
Customer Trey Research is based in Chicago
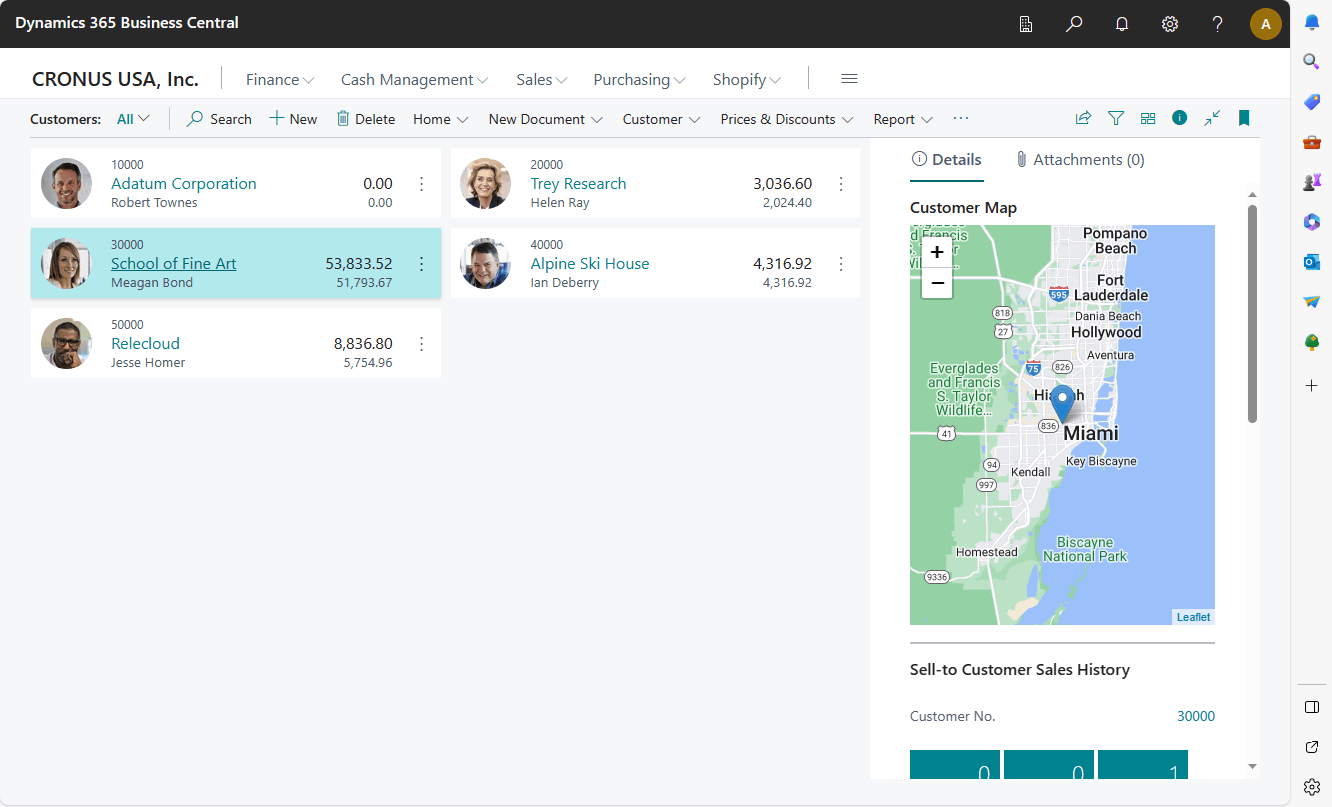
Customer School of Fine Art is based in Miami
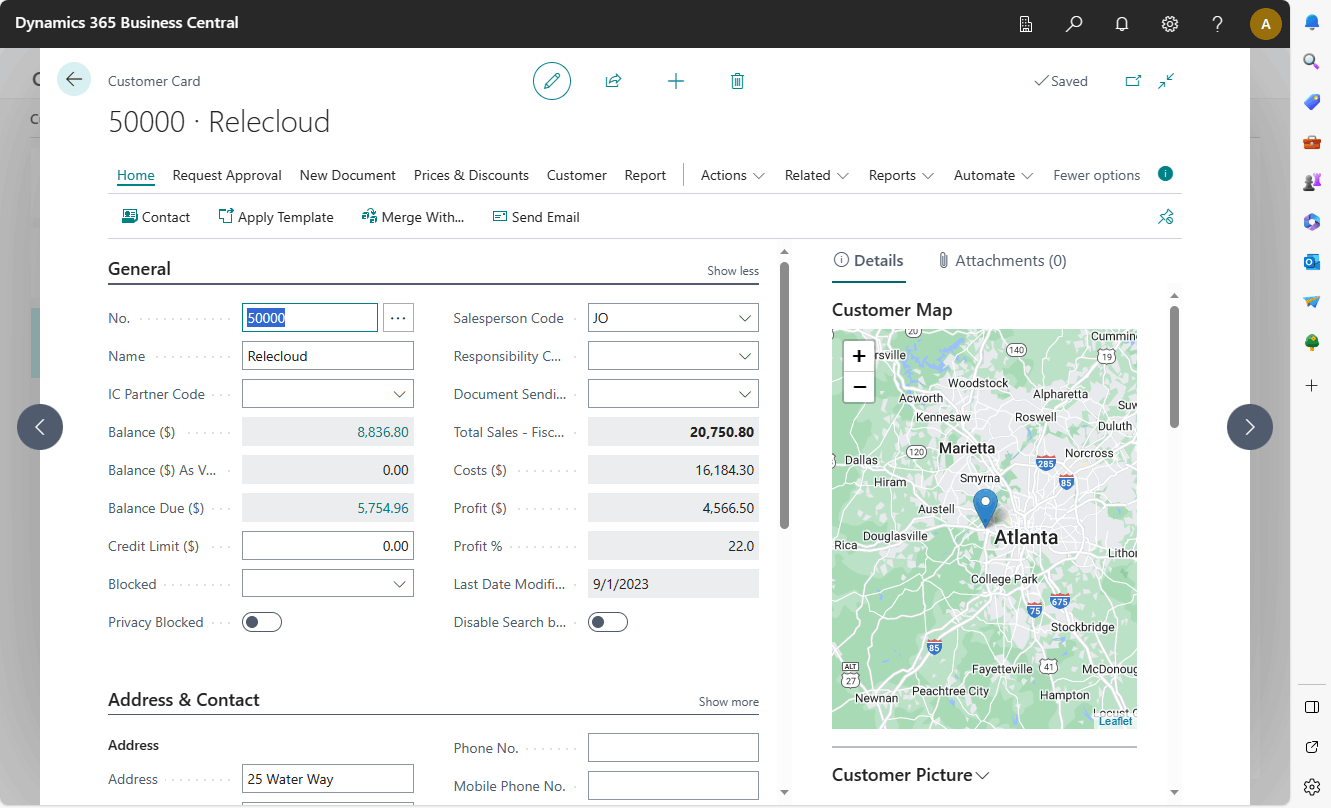
Customer Relecloud is based in Atlanta
LeafletMapsExtension.al
LeafletMapsFunctions.js
To upload and deploy an extension to Microsoft Dynamics 365 Business Central, you'll need to follow a series of steps. Extensions in Business Central typically come in the form of .app files or .zip files containing the extension's artifacts and metadata. Here's a step-by-step guide on how to do this:
Prerequisites:
You should have an extension package ready (either a .app file or a .zip file) that you want to upload and deploy.
You should have the necessary permissions to perform these actions in your Business Central instance.
Steps:
Access Your Business Central Environment:
Log in to your Microsoft Dynamics 365 Business Central environment with the appropriate credentials.
Access the Extension Management Page:
Depending on the version of Business Central you're using, the exact path to the Extension Management page may vary. Generally, you can find it under "Extension Management" or "Extensions."
Upload the Extension Package:
Look for an option to "Upload Extension" or something similar. This will allow you to select and upload the extension package (the .app or .zip file) from your local machine.
Provide Necessary Information:
Depending on your extension, you may need to provide some configuration details or permissions. Follow the on-screen instructions to configure the extension correctly.
Install the Extension:
After uploading the extension, you'll typically see an option to "Install" or "Publish" it. Click this option to initiate the installation process.
Monitor Installation Progress:
Business Central will begin installing the extension. You can monitor the installation progress, and if any issues arise, you'll receive error messages indicating what needs to be resolved.
Check the Status:
Once the installation is complete, check the status of the extension to ensure it's successfully installed and deployed. You should see it listed among your installed extensions.
Enable or Configure the Extension:
Depending on the extension, you may need to enable or configure it further to make it functional. This can include setting up permissions, defining data mappings, or configuring integration points.
Test and Validate:
Before using the extension in a production environment, it's a good practice to thoroughly test it in a sandbox or testing environment to ensure it works as expected and doesn't conflict with existing functionality.
Go Live:
Once you are satisfied with the extension's performance in your testing environment, you can deploy it to your production environment by following similar steps. Make sure to have a backup and a rollout plan in case any issues arise during deployment.
Remember that the exact steps and options may vary slightly depending on the version of Business Central you're using and the specific requirements of the extension you are deploying. Always refer to the official documentation for your version of Business Central for detailed instructions and troubleshooting guidance.
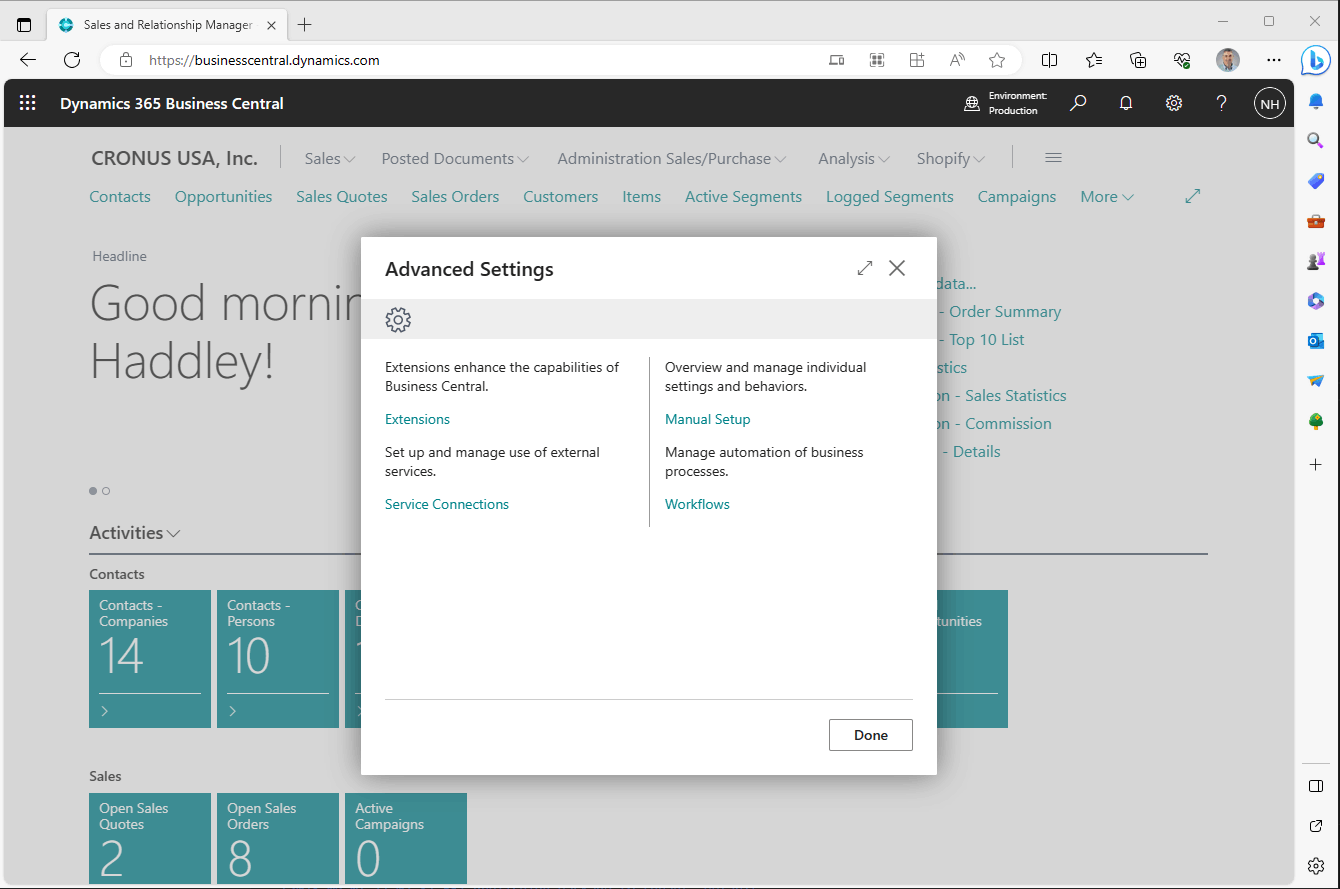
Advanced Settings
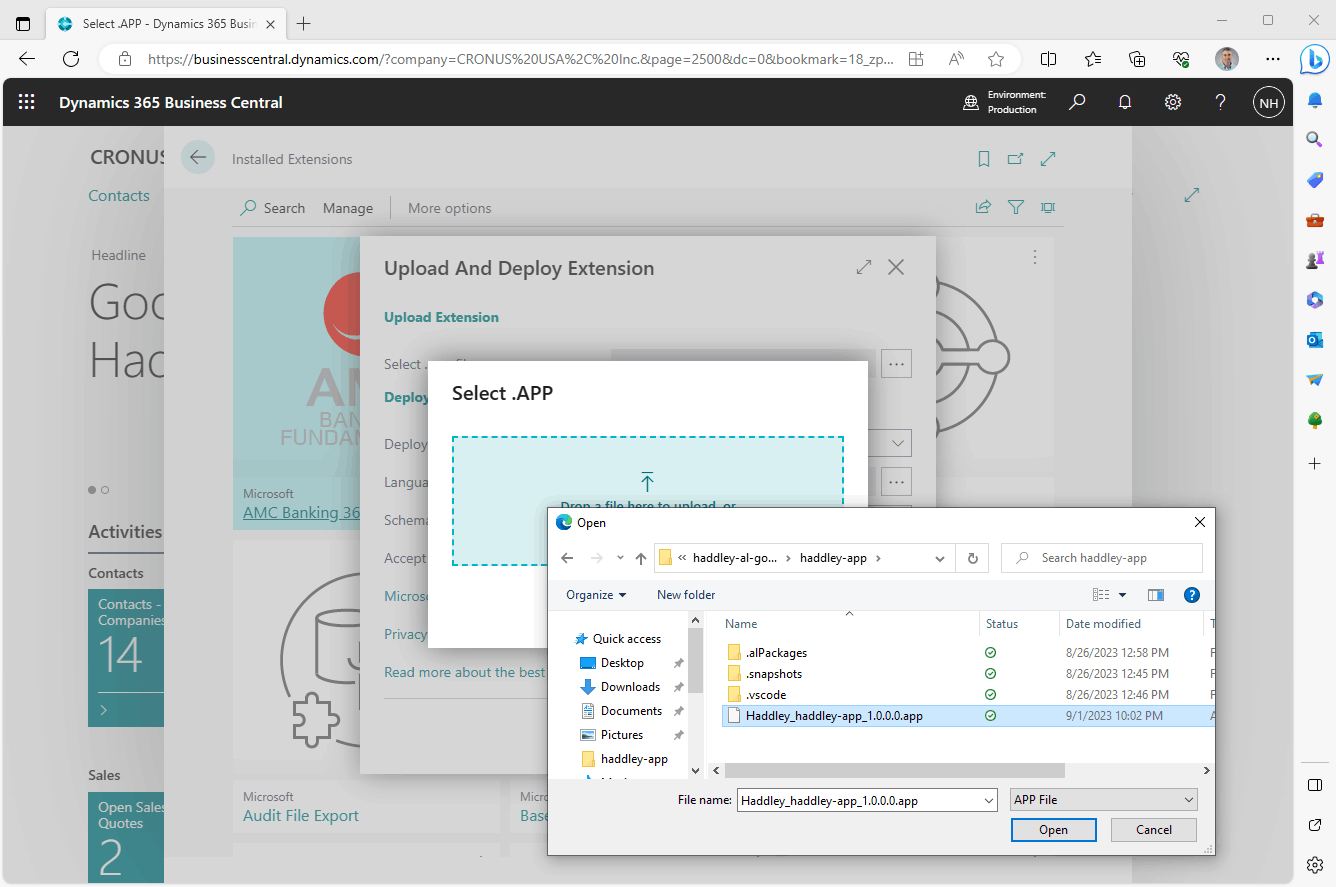
Upload And Deploy Extension
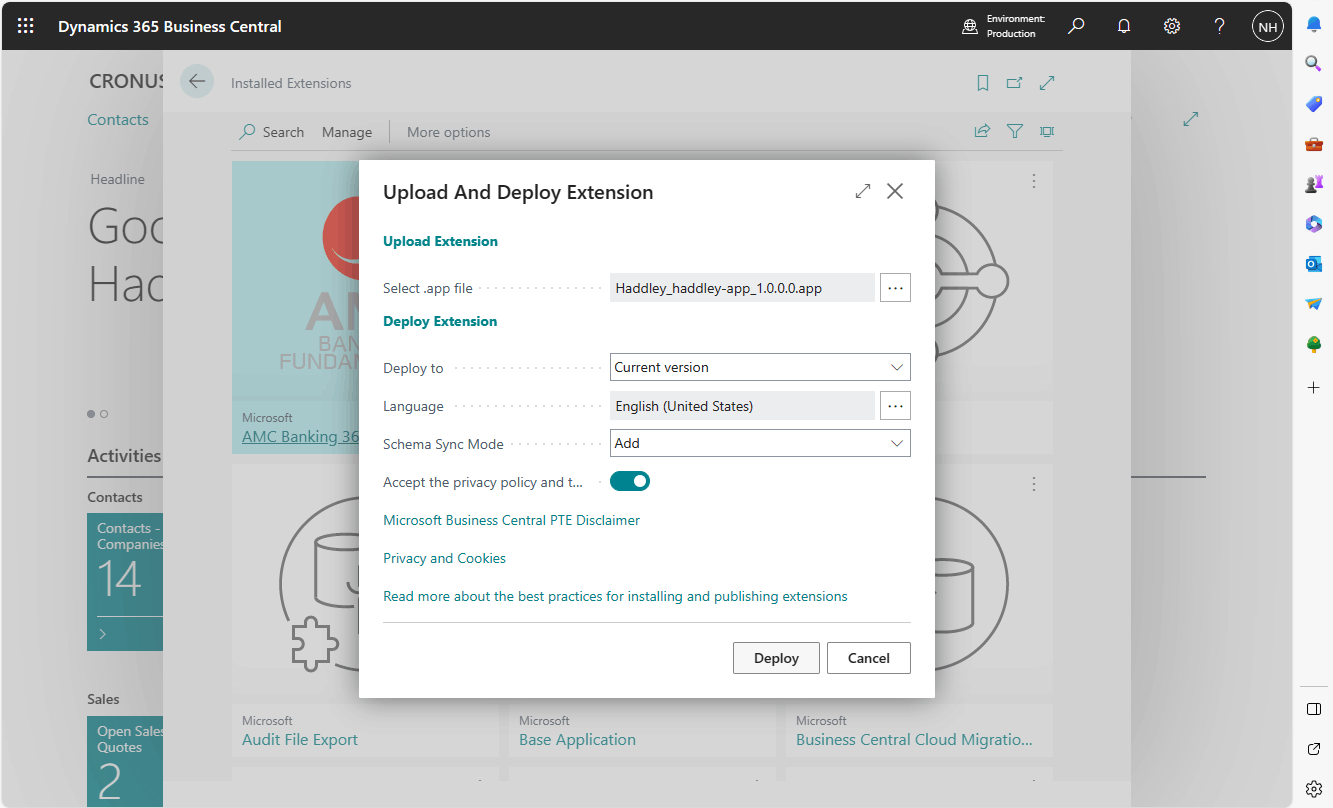
Deploy
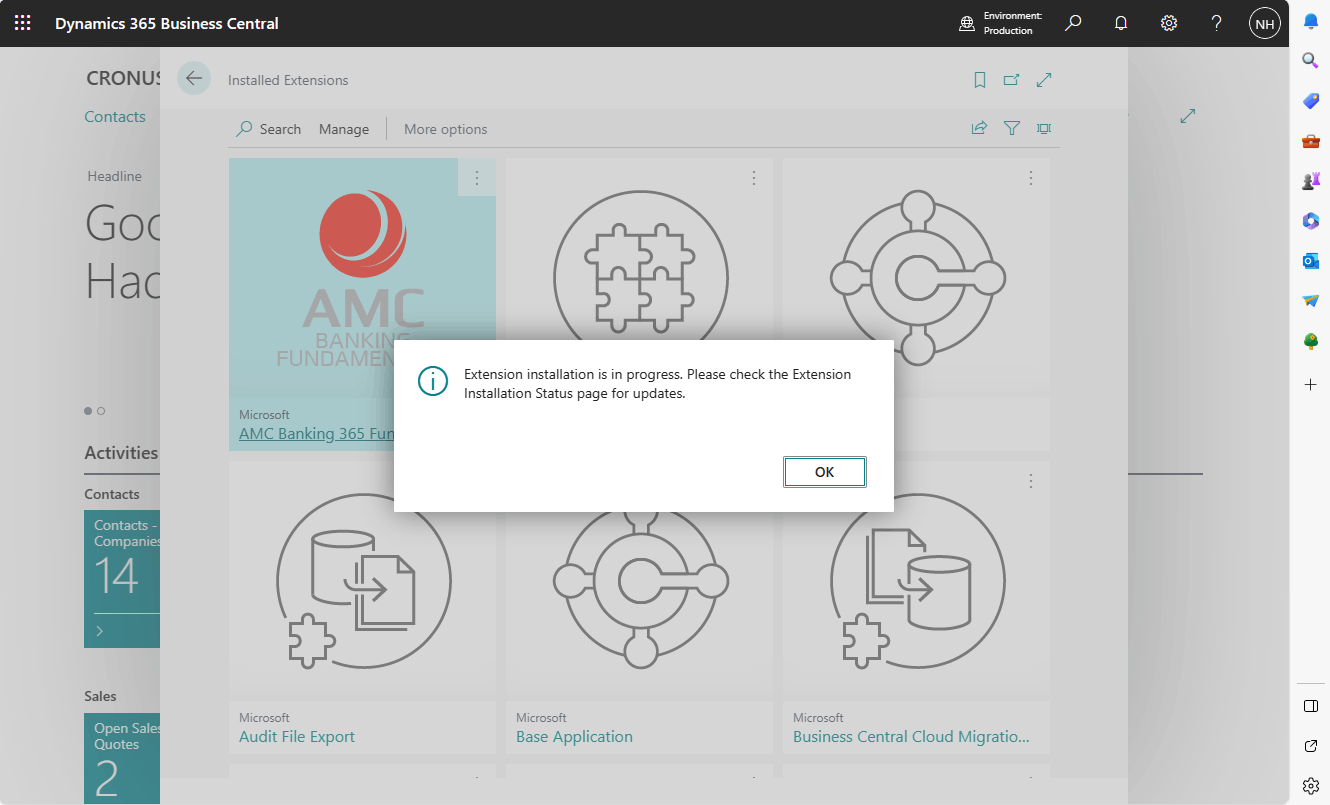
Installation in progress
Extension running in the cloud
