Power Apps, Custom Connectors and Application Registrations
Neil Haddley • August 9, 2021
Power Apps, Custom Connectors and Application Registrations
Creating a Custom Connector
To create a PowerApps Azure Active Directory Custom Connector I needed to provide:
Client id
Client secret; and
Resource URL
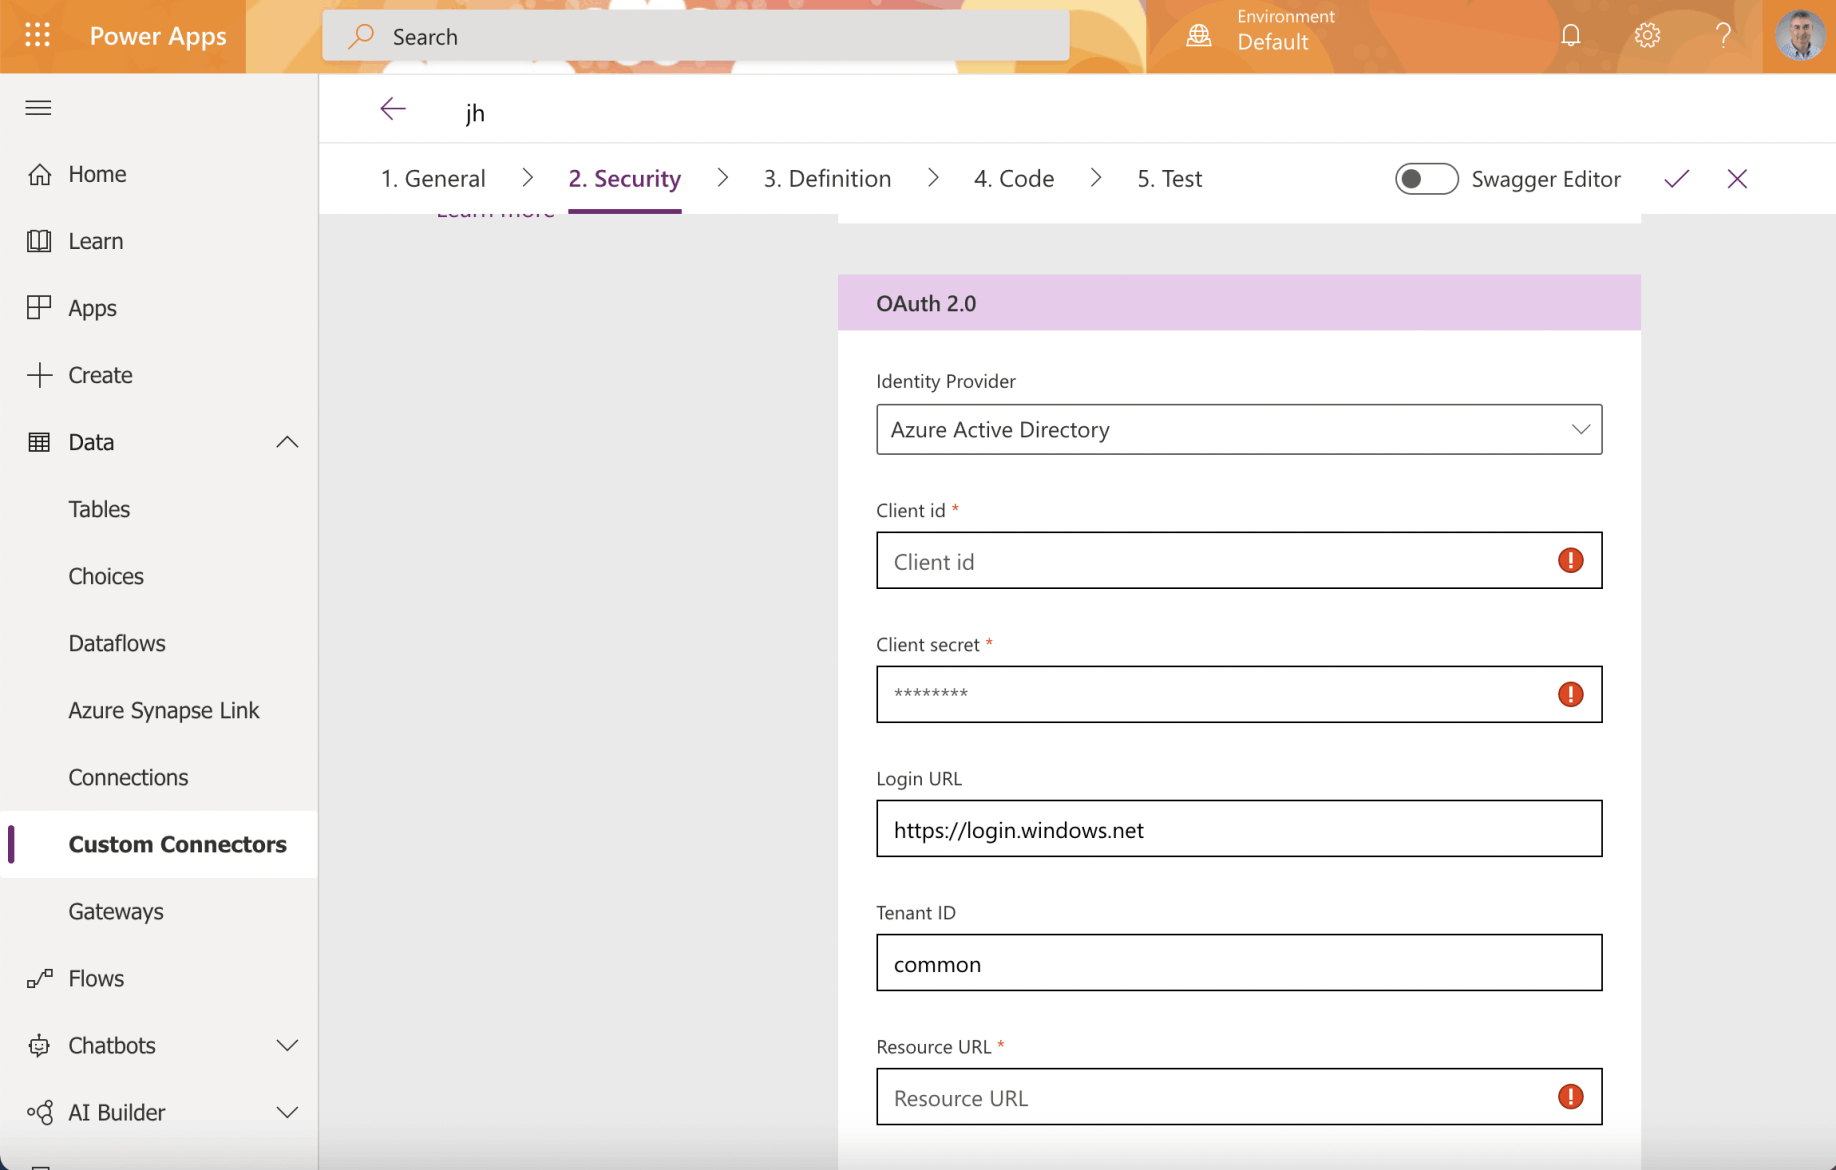
I reviewed the Custom Connector OAuth 2.0 Active Directory settings
The Custom Connector is the Client Application
In OAuth 2 an application accesses a resource on behalf of a user.
In OAuth 2 the application does not store the user's username and password.
When setting up a Power Apps Custom Connector that will allow a user to access an API Service the Client Application is the Custom Connector and the Resource (Application) is the API Service.
Only three values are needed to create a Power Apps Custom Connector.
The three values needed to create a Power Apps Custom Connector are: the Client id (the client application registration ID), the Client secret (password); and the Resource URL (the resource application registration ID)
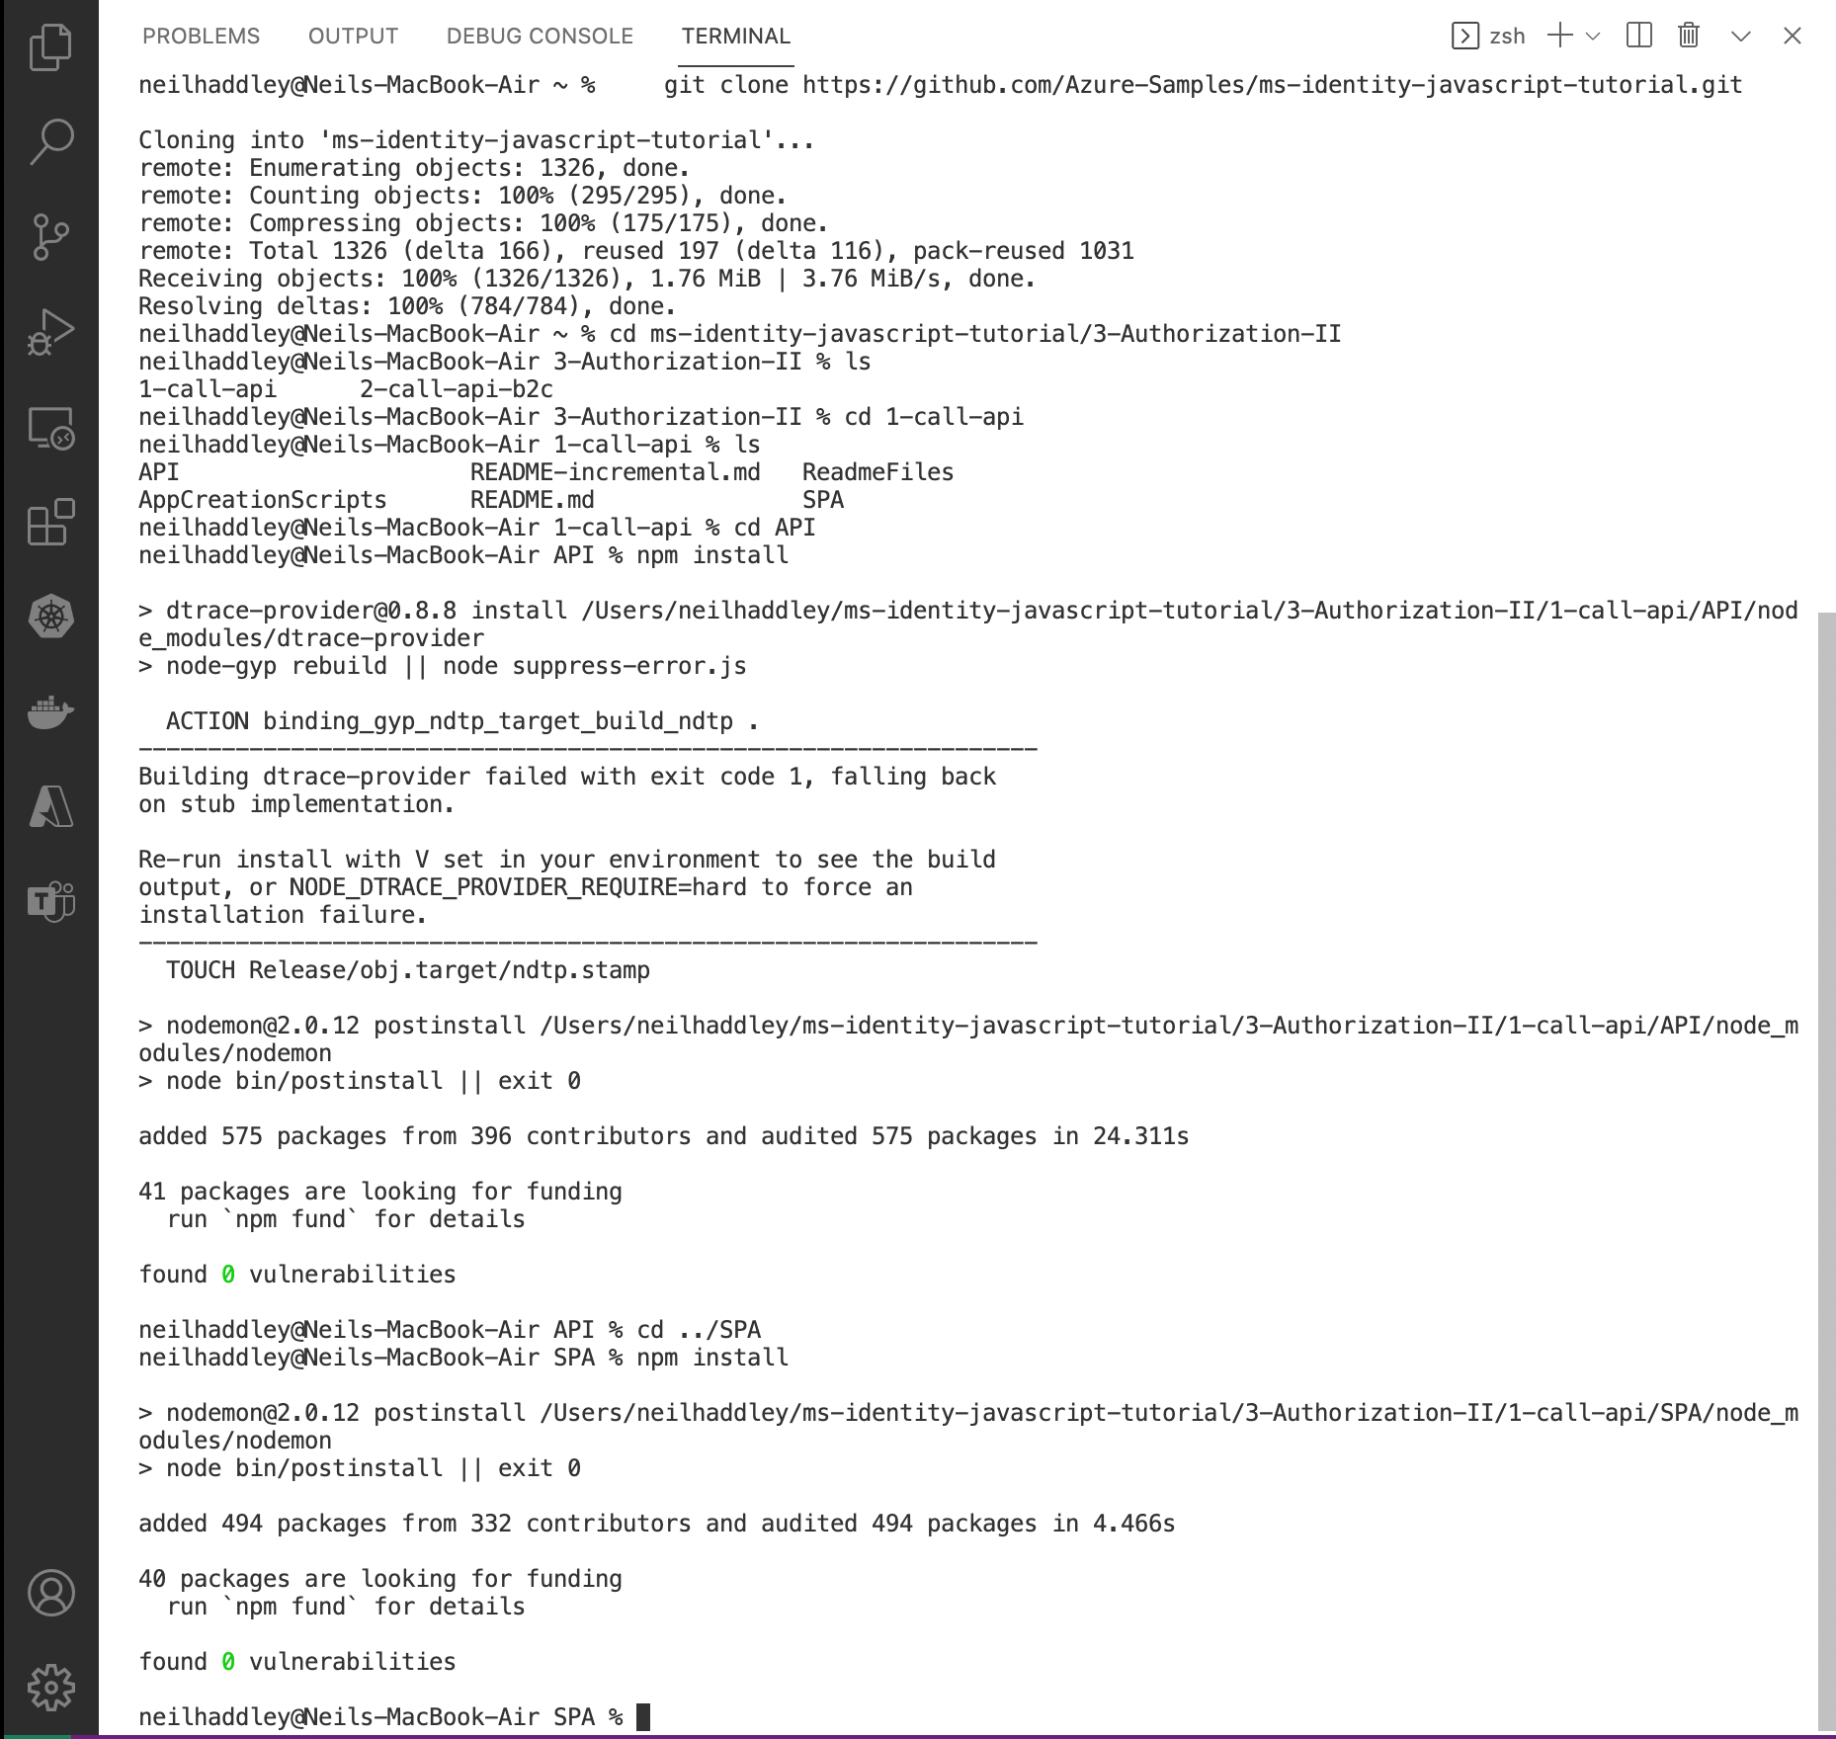
Here I extended the Vanilla JavaScript single-page application (SPA) using MSAL.js to authorize users for calling a protected web API on Azure AD tutorial to show how to configure a Power Apps Custom Connector using Azure application registrations.

topology_callapi by Doğan Erişen is licensed under MIT License
A JavaScript tutorial using MSAL
The Vanilla JavaScript single-page application (SPA) using MSAL.js to authorize users for calling a protected web API on Azure AD tutorial demonstrates how to configure Azure Application Registrations for an API and for a Single Page Web Application (SPA) that calls an Application Programming Interface Service (API).
I cloned the git repository using this command:
BASH
1% git clone https://github.com/Azure-Samples/ms-identity-javascript-tutorial.git
esp8266
Resource application registration
Before updating the Application Programming Interface (API) Service I needed to create the resource application registration.

I created the resource application registration

I provided the resource name
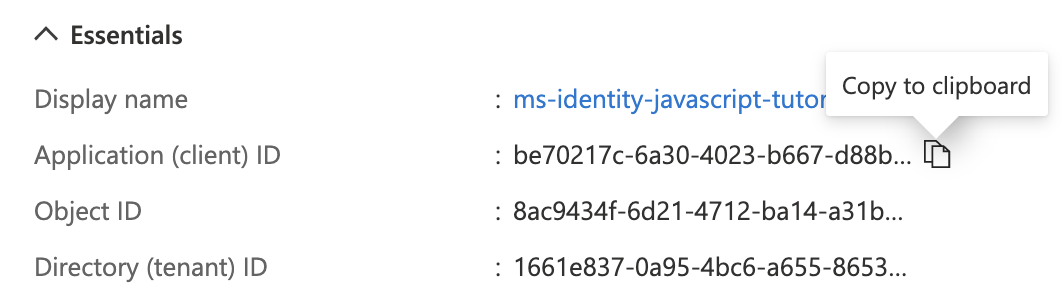
I copied the "Application (client) ID" value
Resource URL
The "Application (client) ID" value from the resource application registration is the Resource URL value I needed later to create the custom connector.
be70217c-6a30-4023-b667-d88bf222b94a

I clicked the "Expose an API" menu item

I clicked the Set link
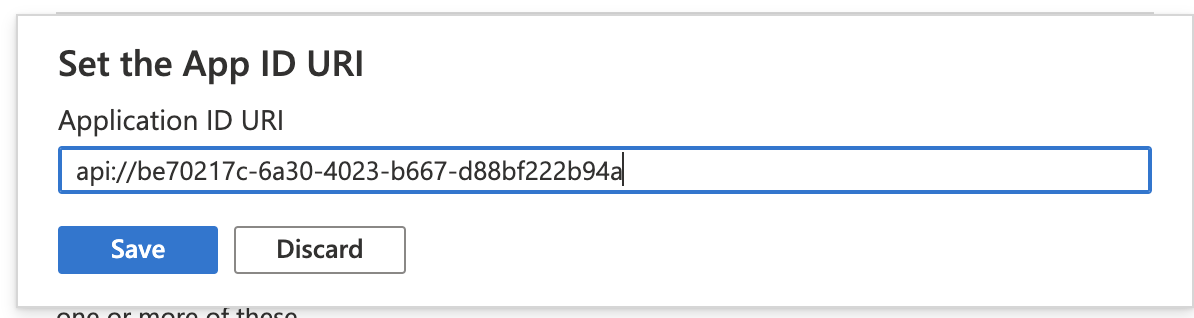
I saved the generated Application ID URI (the URI api:// followed by the resource application client ID)

esp8266
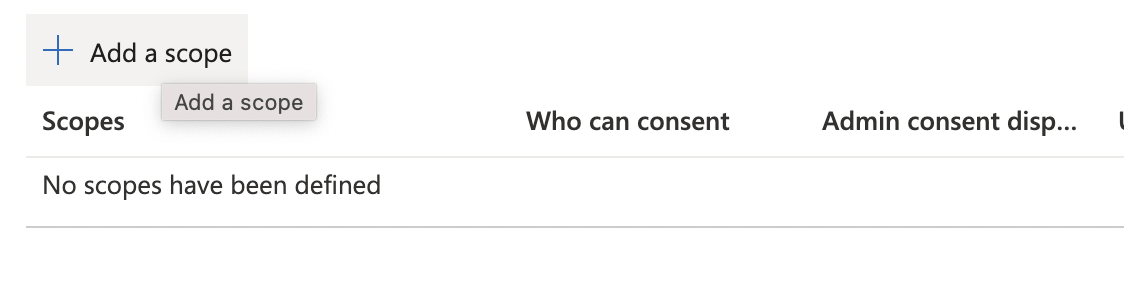
I noted that the resource must provide at least one scope

I added the "access_as_user" scope

I updated the application registration manifest

The application registration manifest provided a way to export and update application registration settings

The Directory (tenant) ID is a tenant wide setting
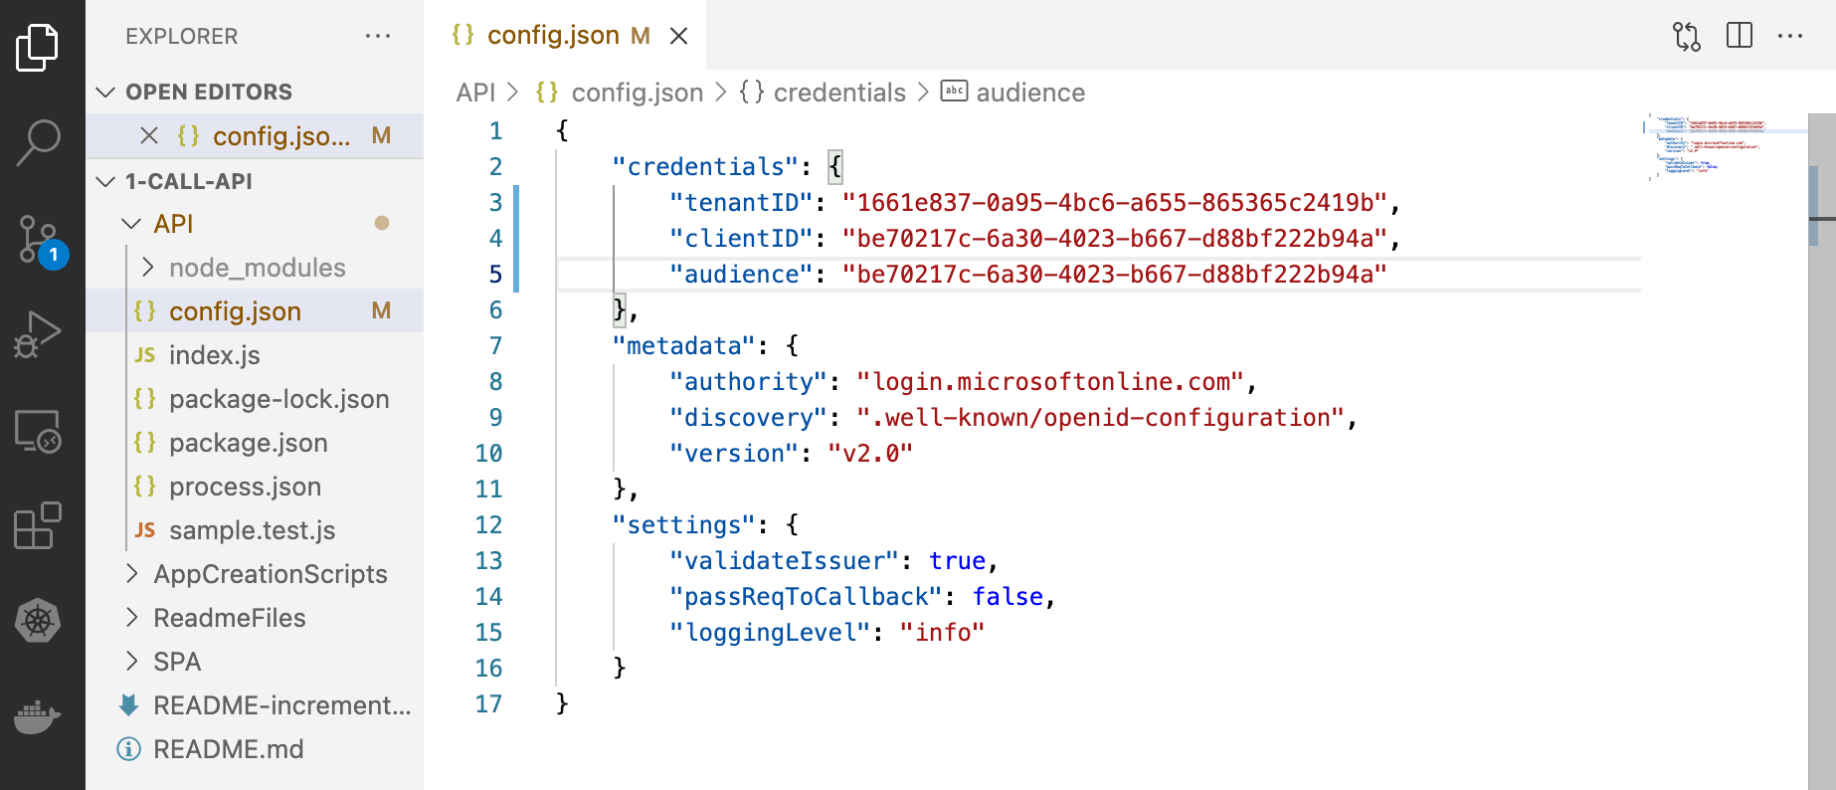
I updated the sample API code to include the tenantID and the clientID
Client application registration
If I was following the Vanilla JavaScript single-page application (SPA) using MSAL.js to authorize users for calling a protected web API on Azure AD tutorial I would have created the client application registration for a Single Page Application (SPA) next.
Instead I created a client application registration for the Power Apps Custom Connector.
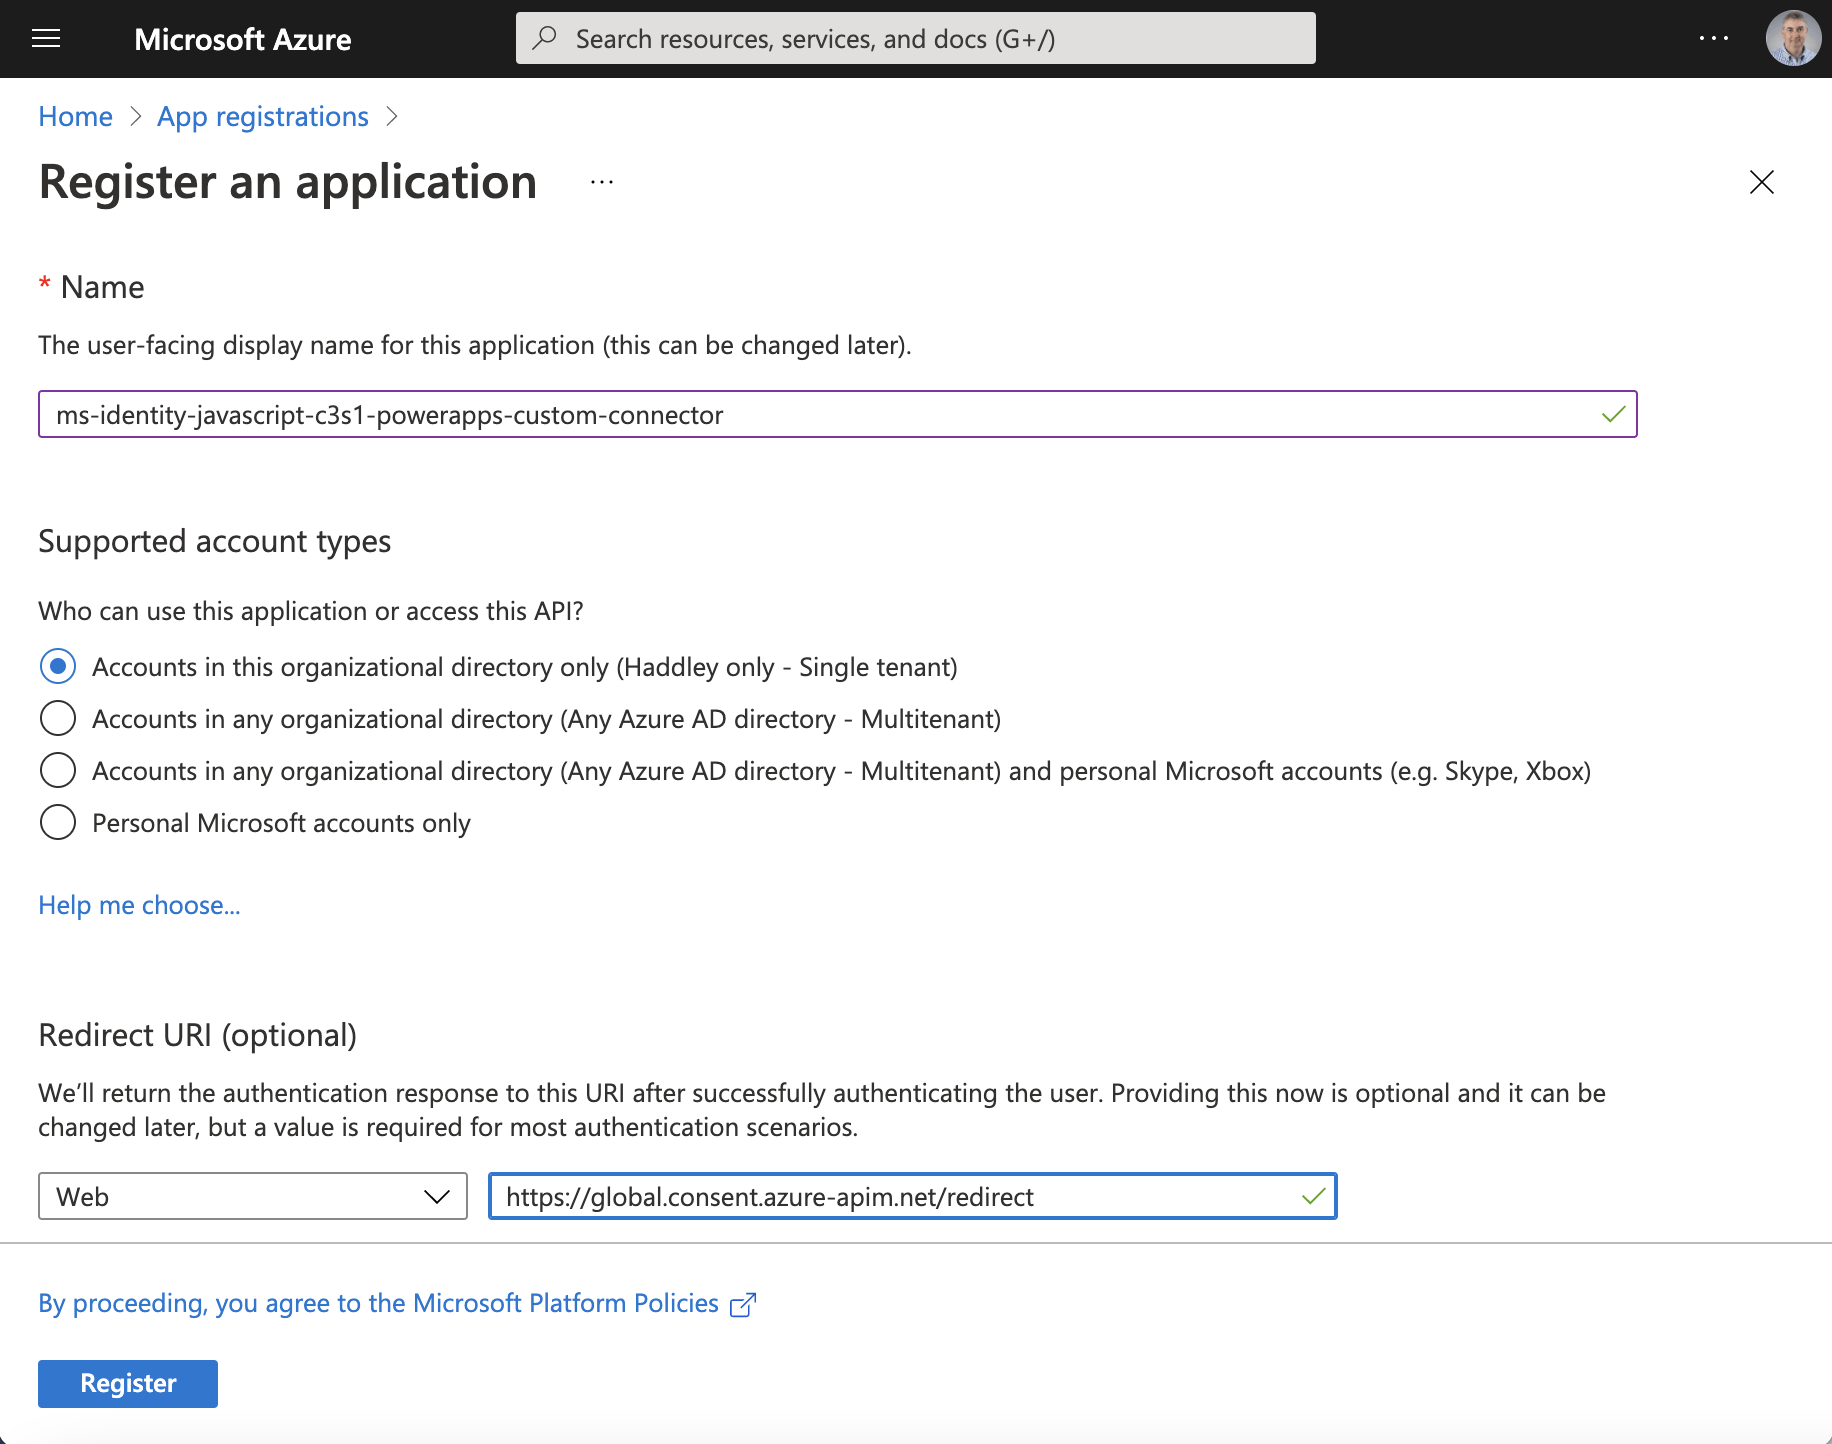
I noticed that the redirect URL was set to https://global.consent.azure-apim.net/redirect

I copied the Application (client) ID
Client id
The "Application (client) ID" value from the client application registration is the Client id I needed to create the custom connector.
59259fa1-c2e1-486d-a8e6-92209abf090c

The client application would be allowed to access the resource application registration (the API)
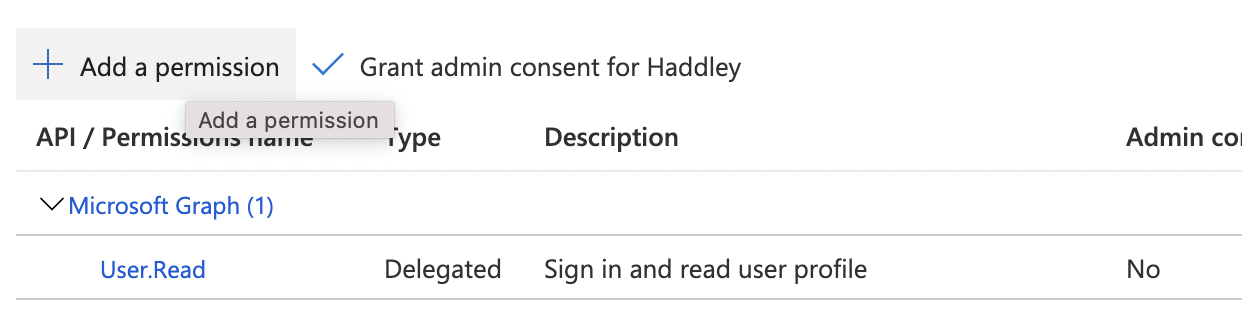
I clicked the + Add a permission link
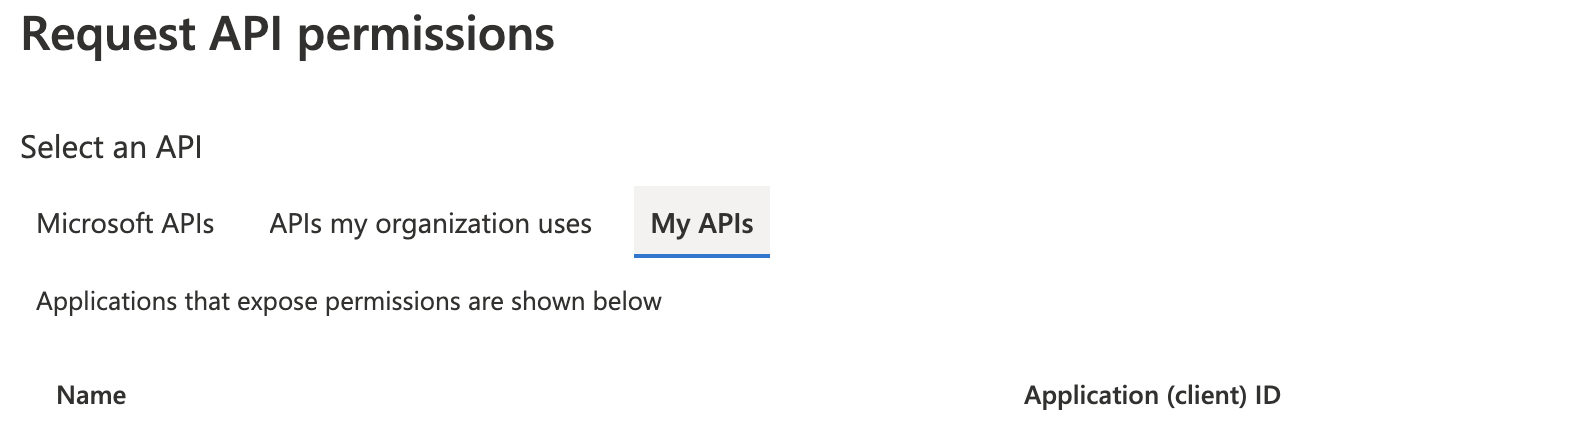
I selected the "My APIs" tab

I selected the resource application registration (the API)
I clicked the access_as_user checkbox
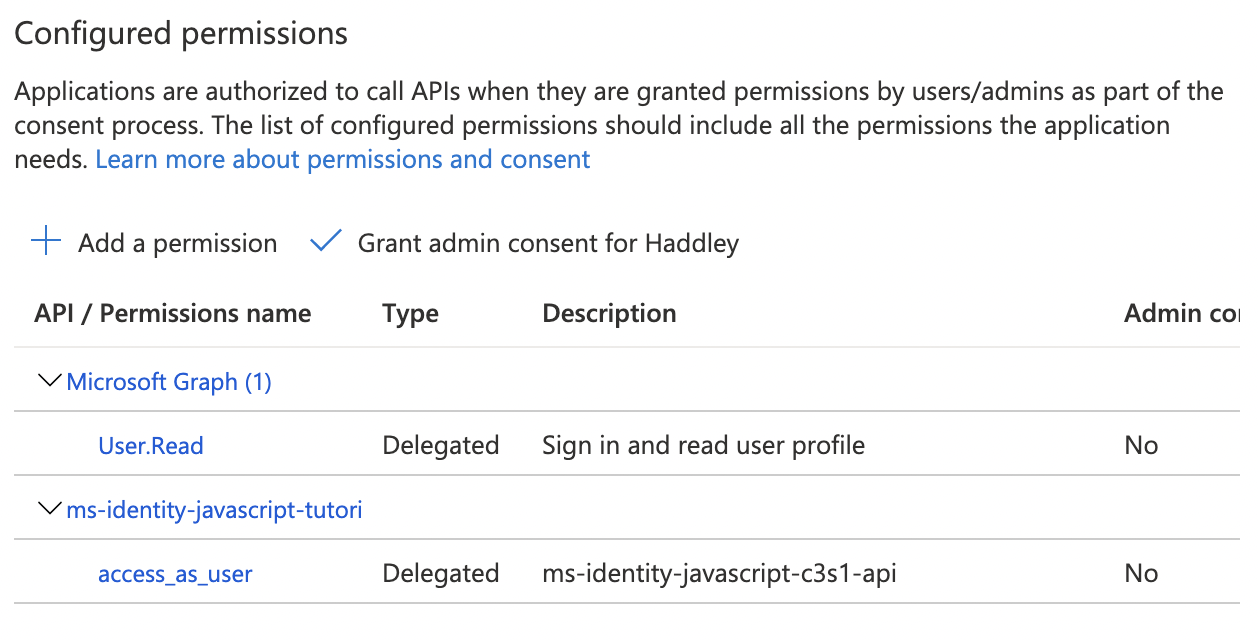
The access_as_user scope was added
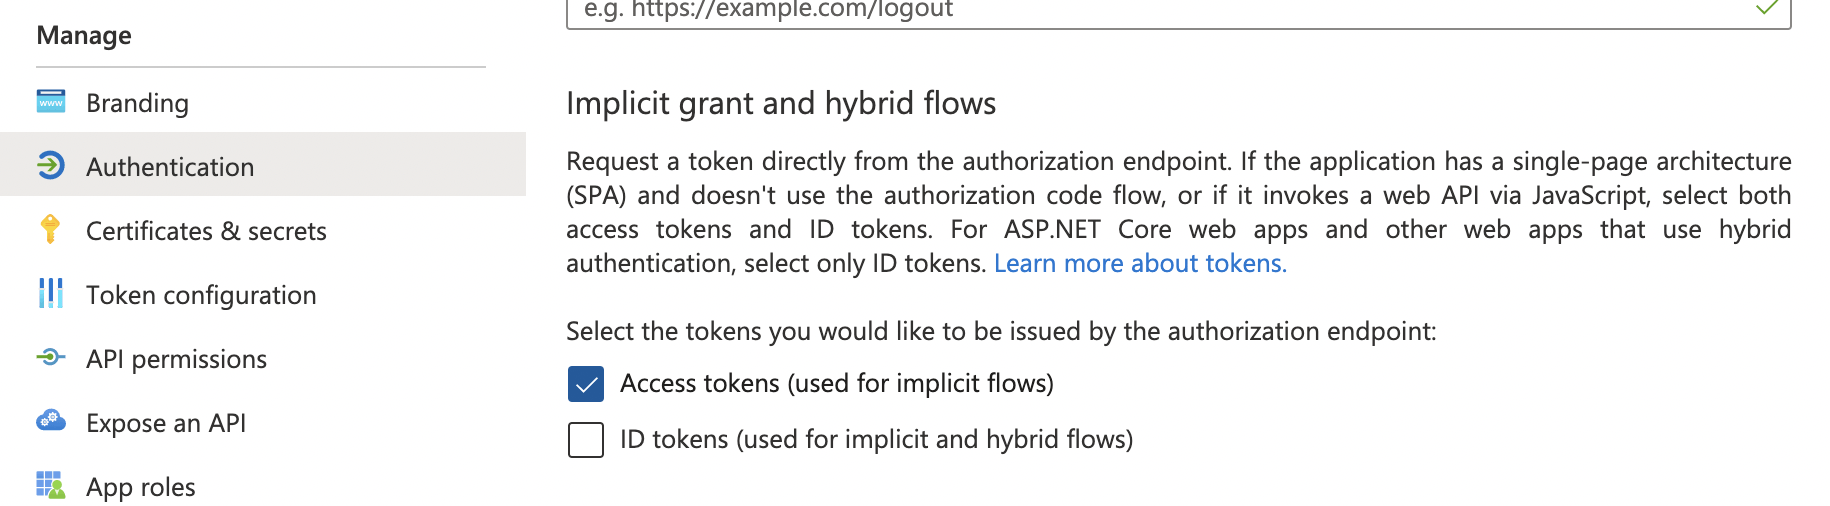
I clicked the Authentication menu item and enabled "Access tokens"
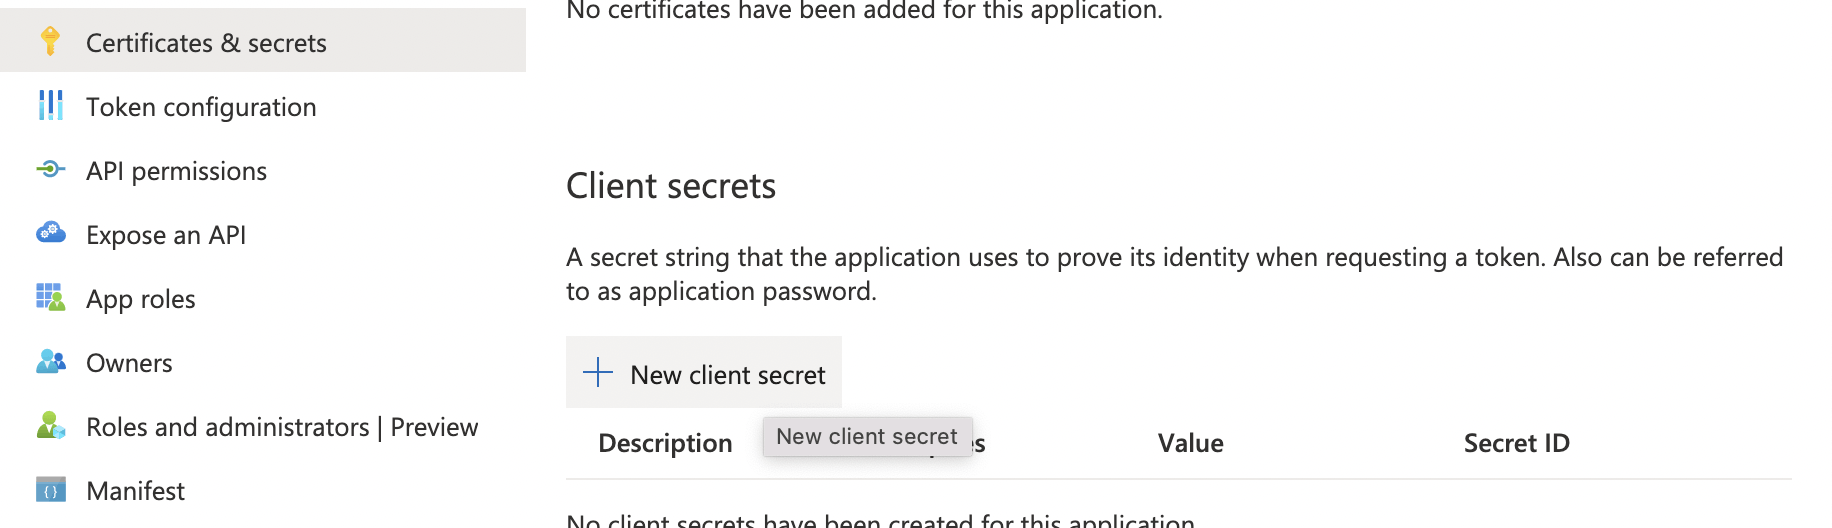
I clicked on the Certificates & secrets menu item
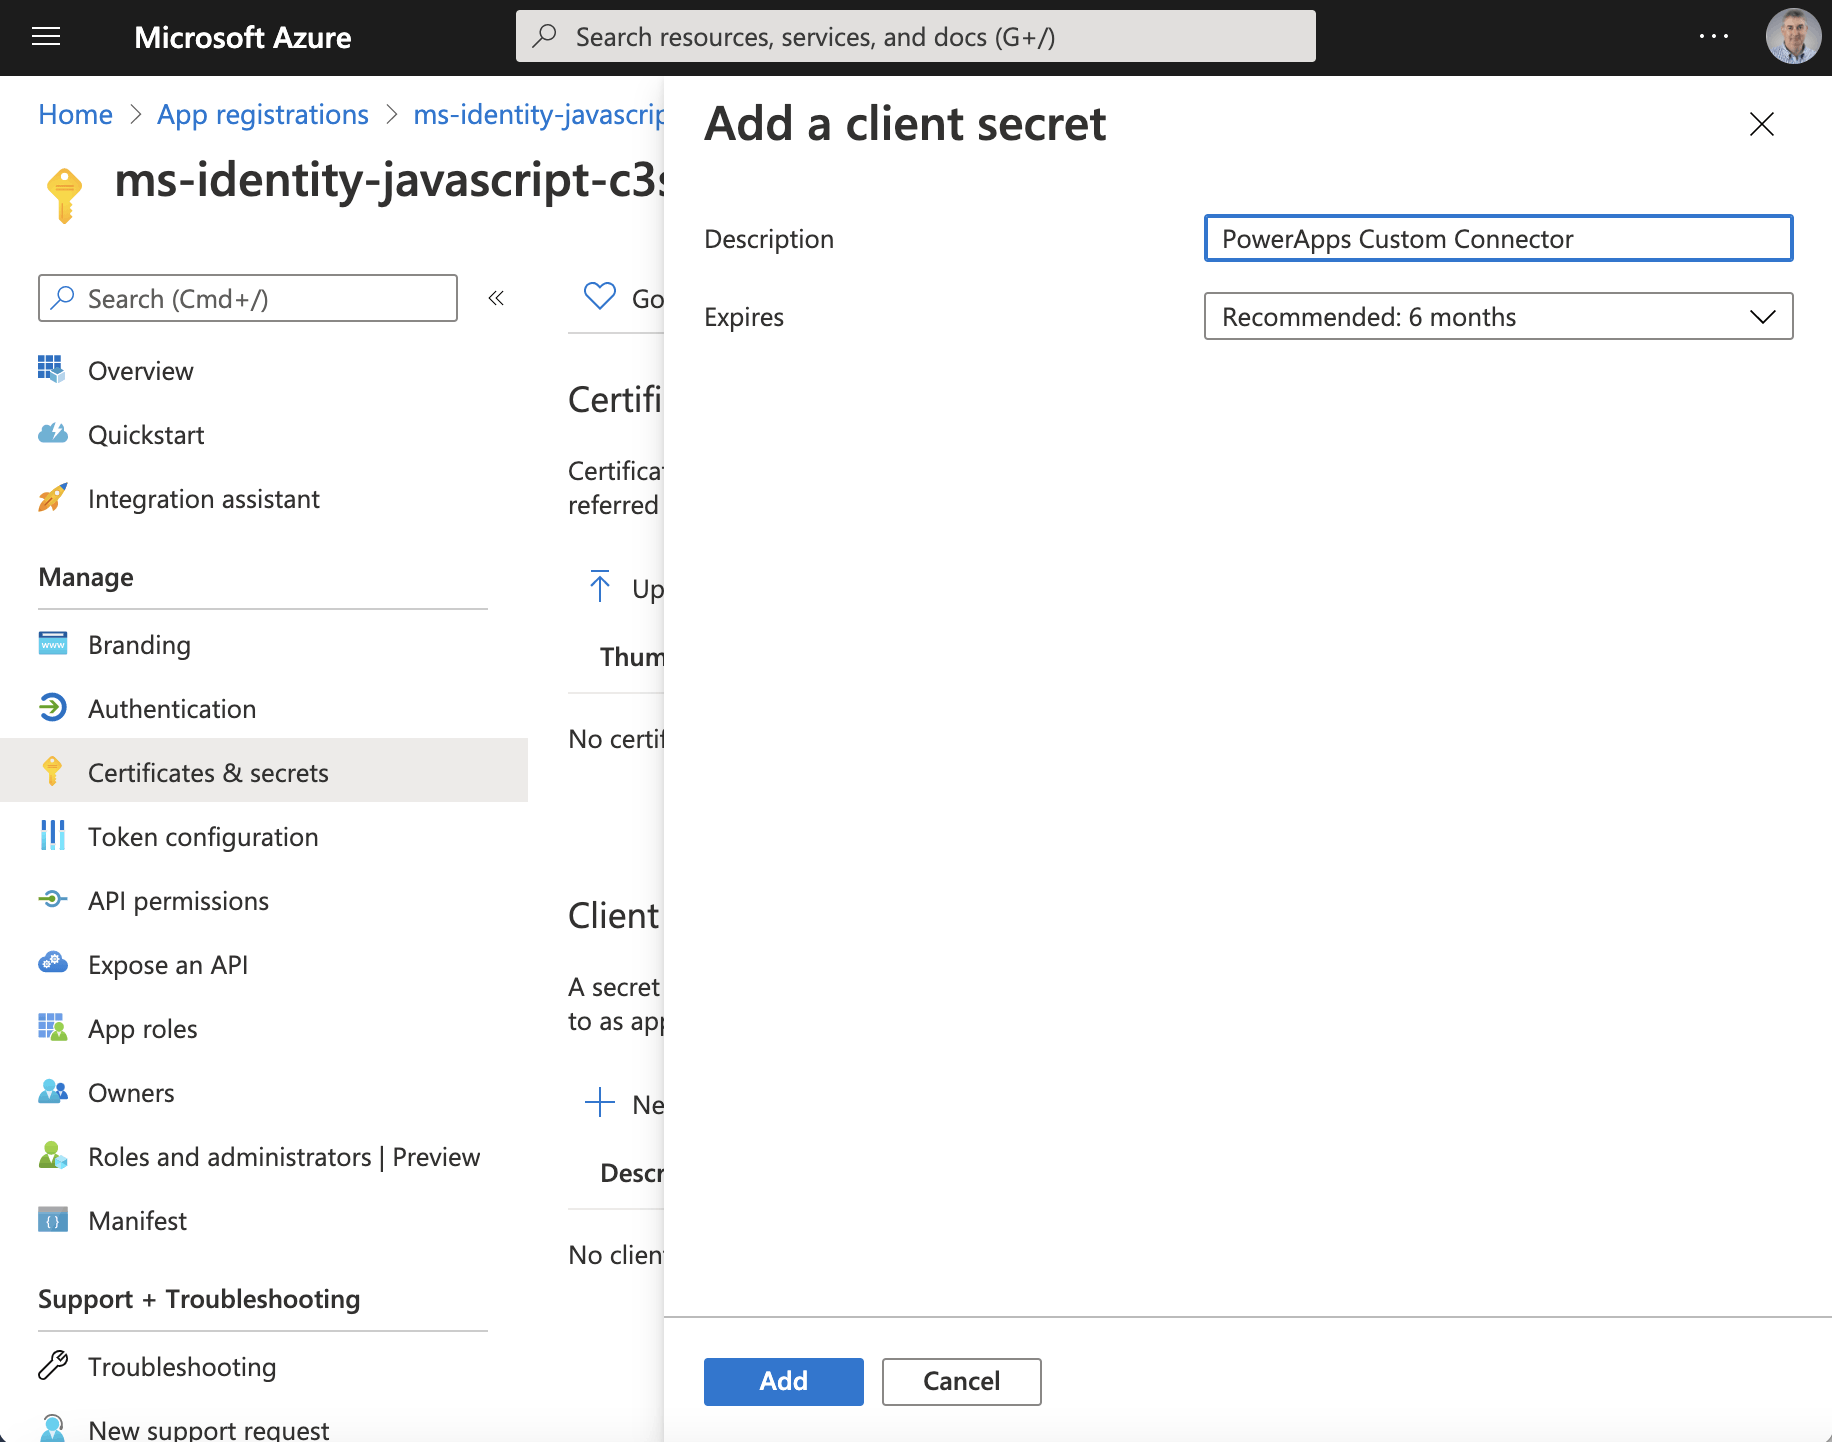
I added a client secret
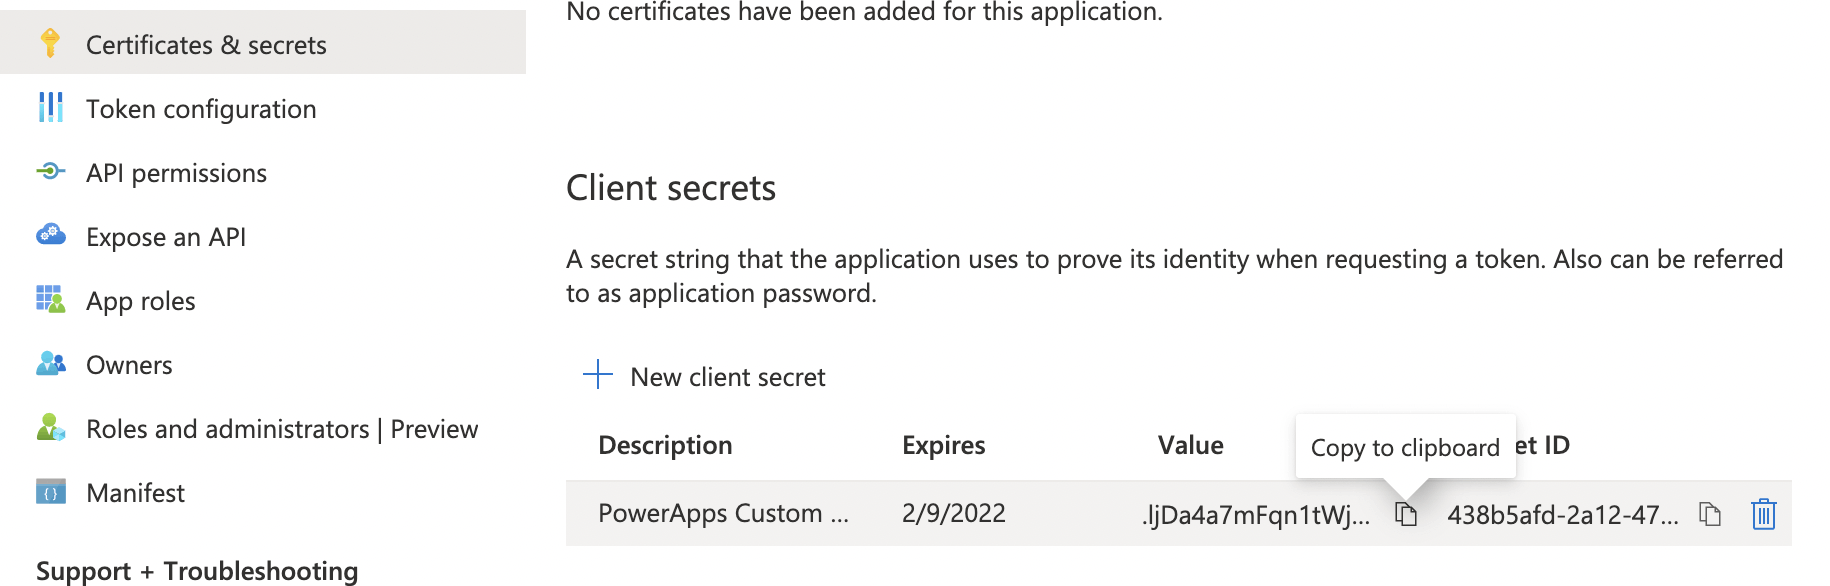
I copied the "client secret" value
Client secret
The generated "Value" is the Client secret I needed to create the custom connector.
.ljDa4a7mFqn1tWj0wyPQ6X5L6B_3V.x~f

I created a new custom connector (from blank)
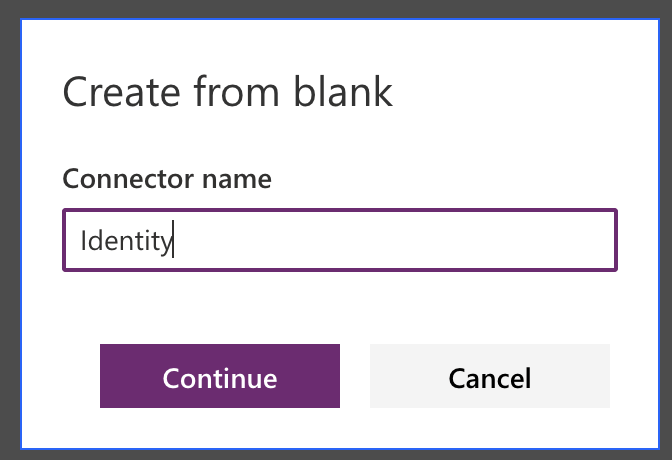
I provided a name for the custom connector
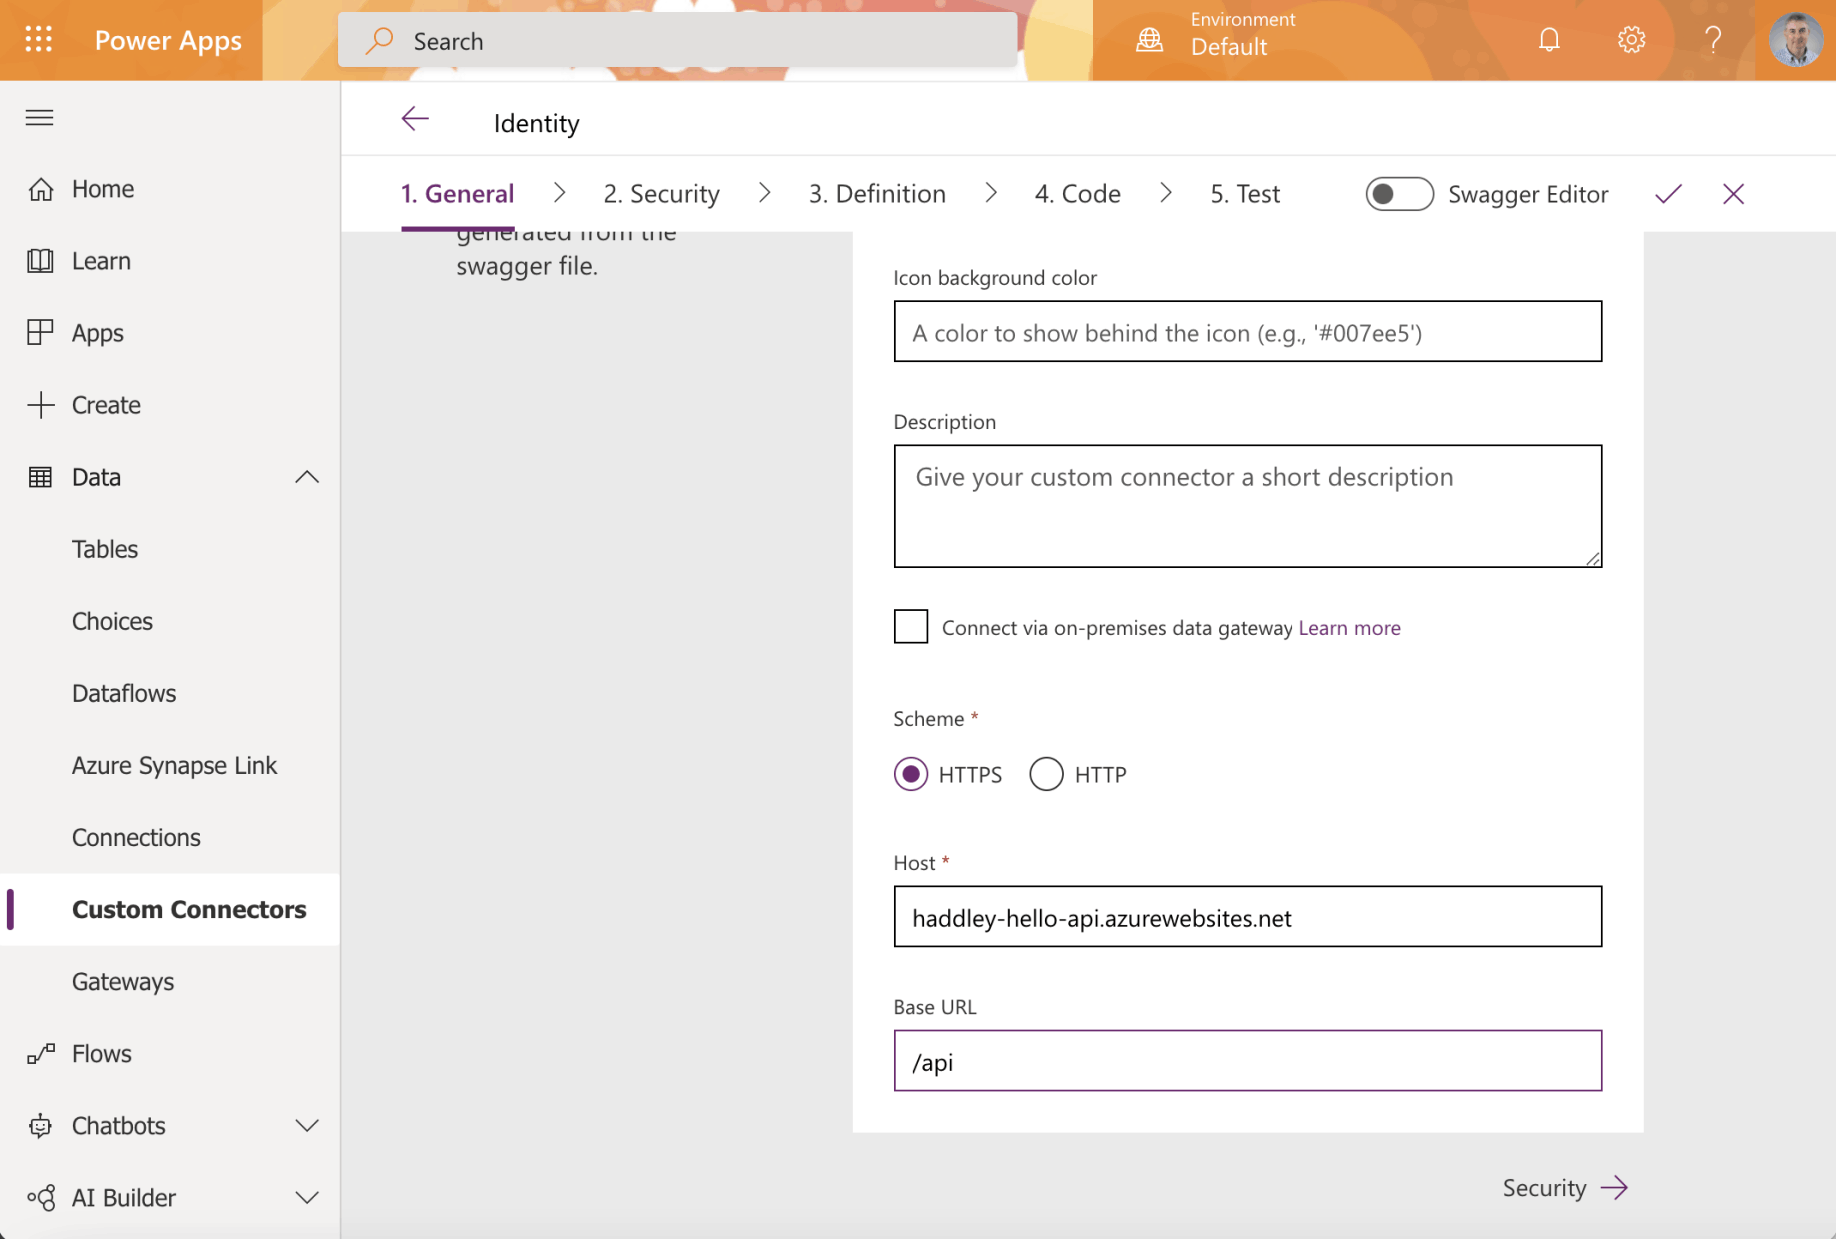
I entered the URL of the host API service and the base URL
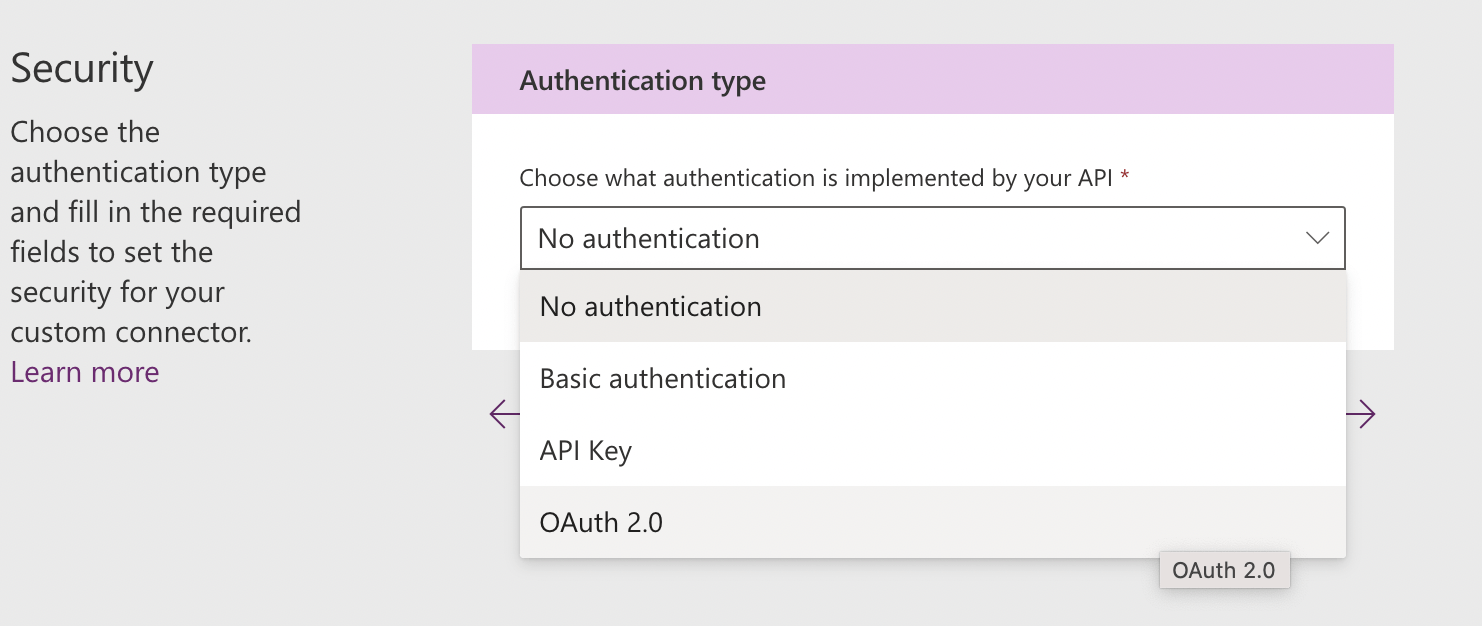
I selected Authentication type OAuth 2.0
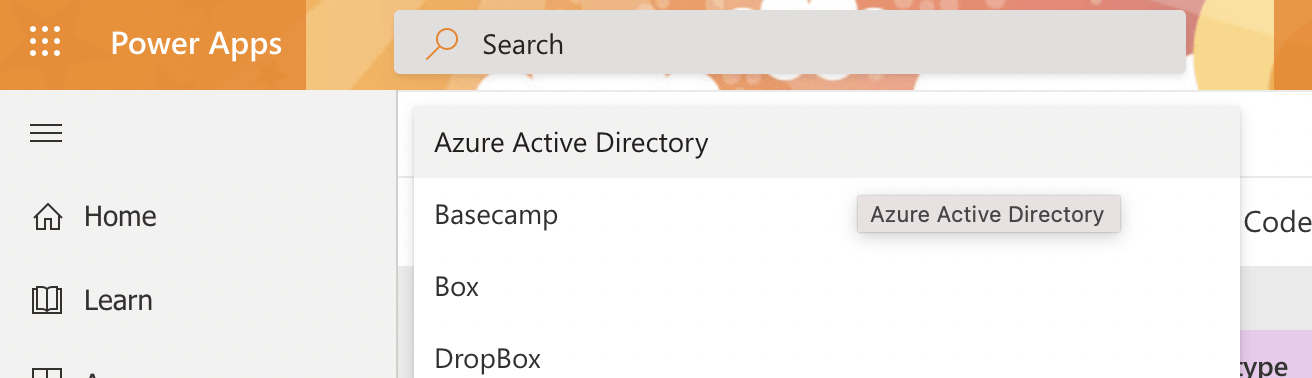
I selected "Azure Active Directory" as the Identity Provider
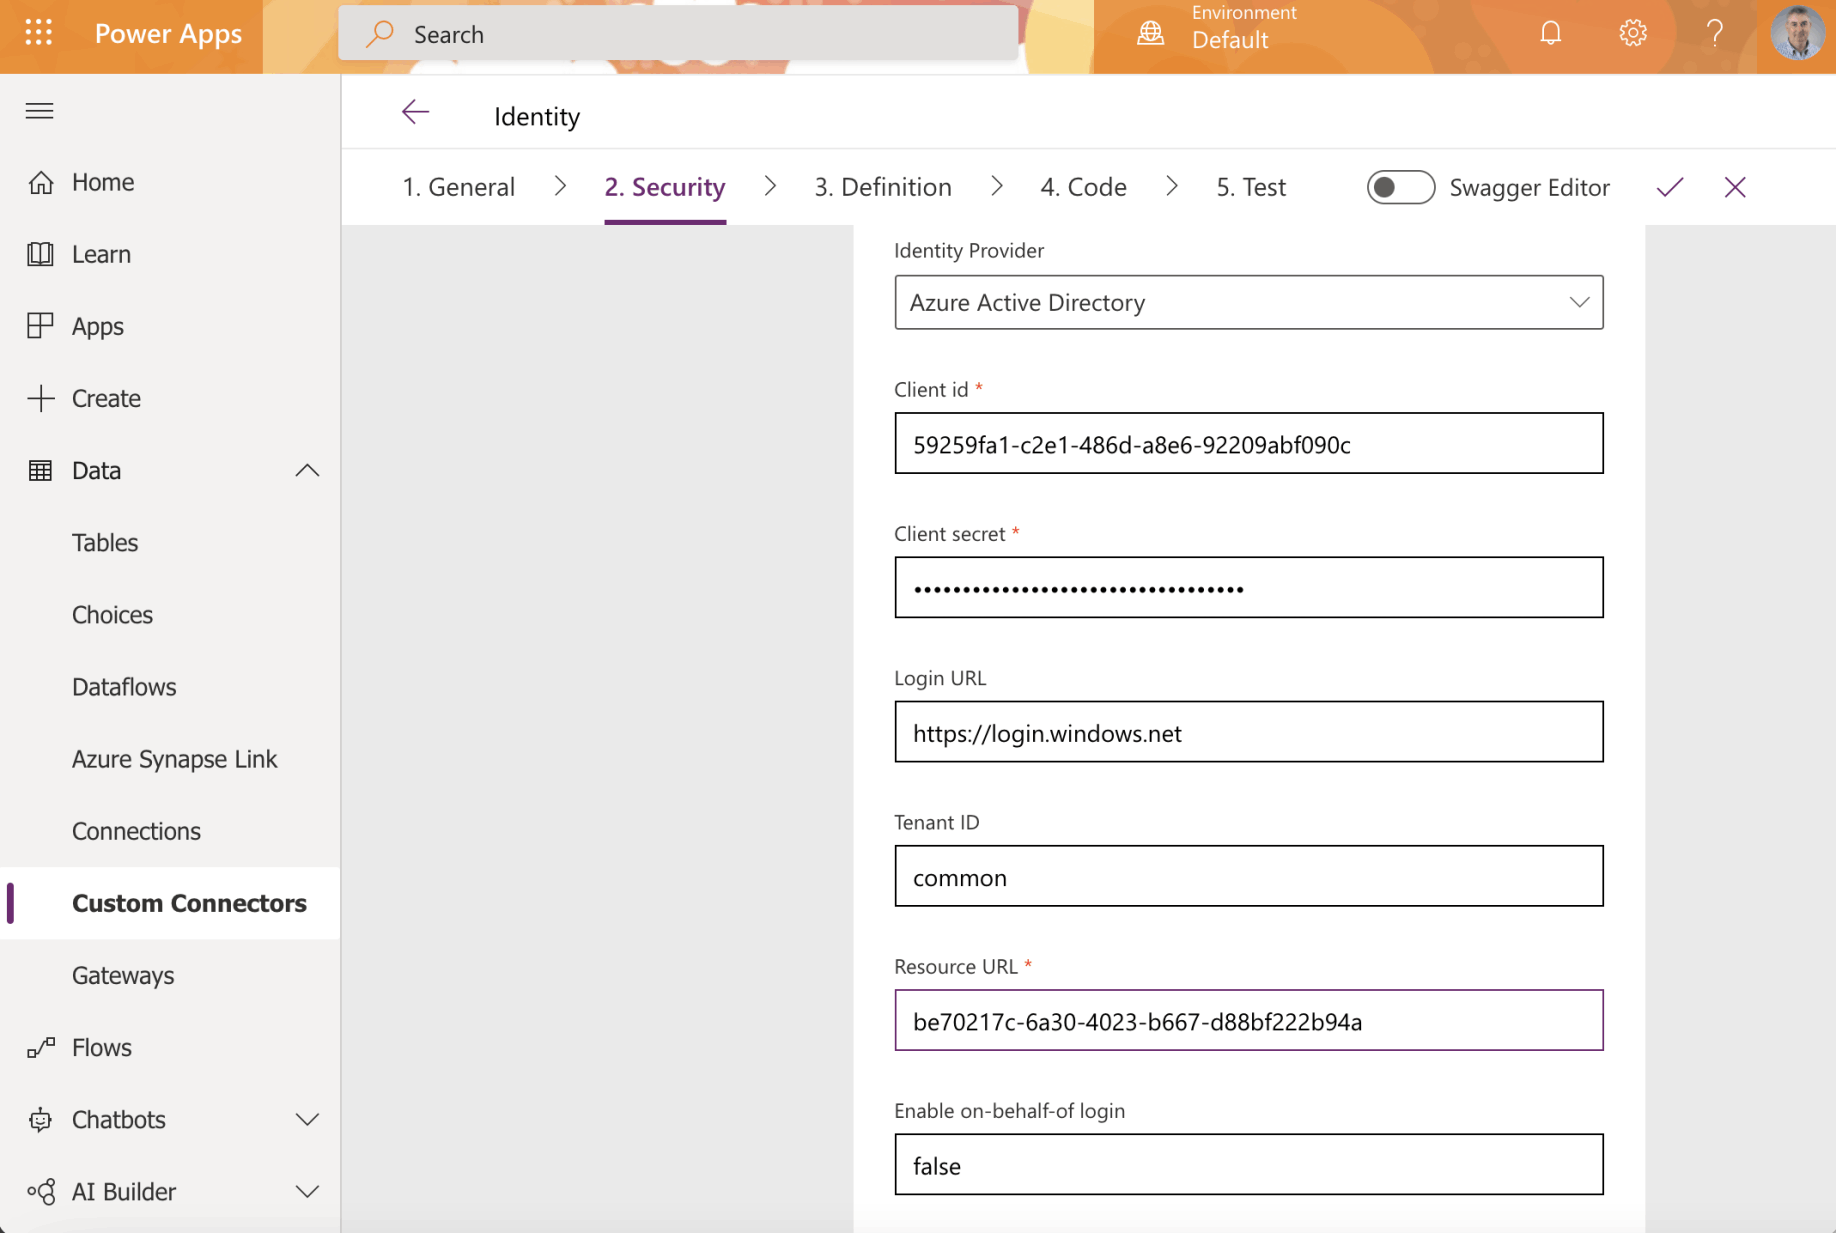
I entered the Client id, Client secret and Resource URL

The API published a single action
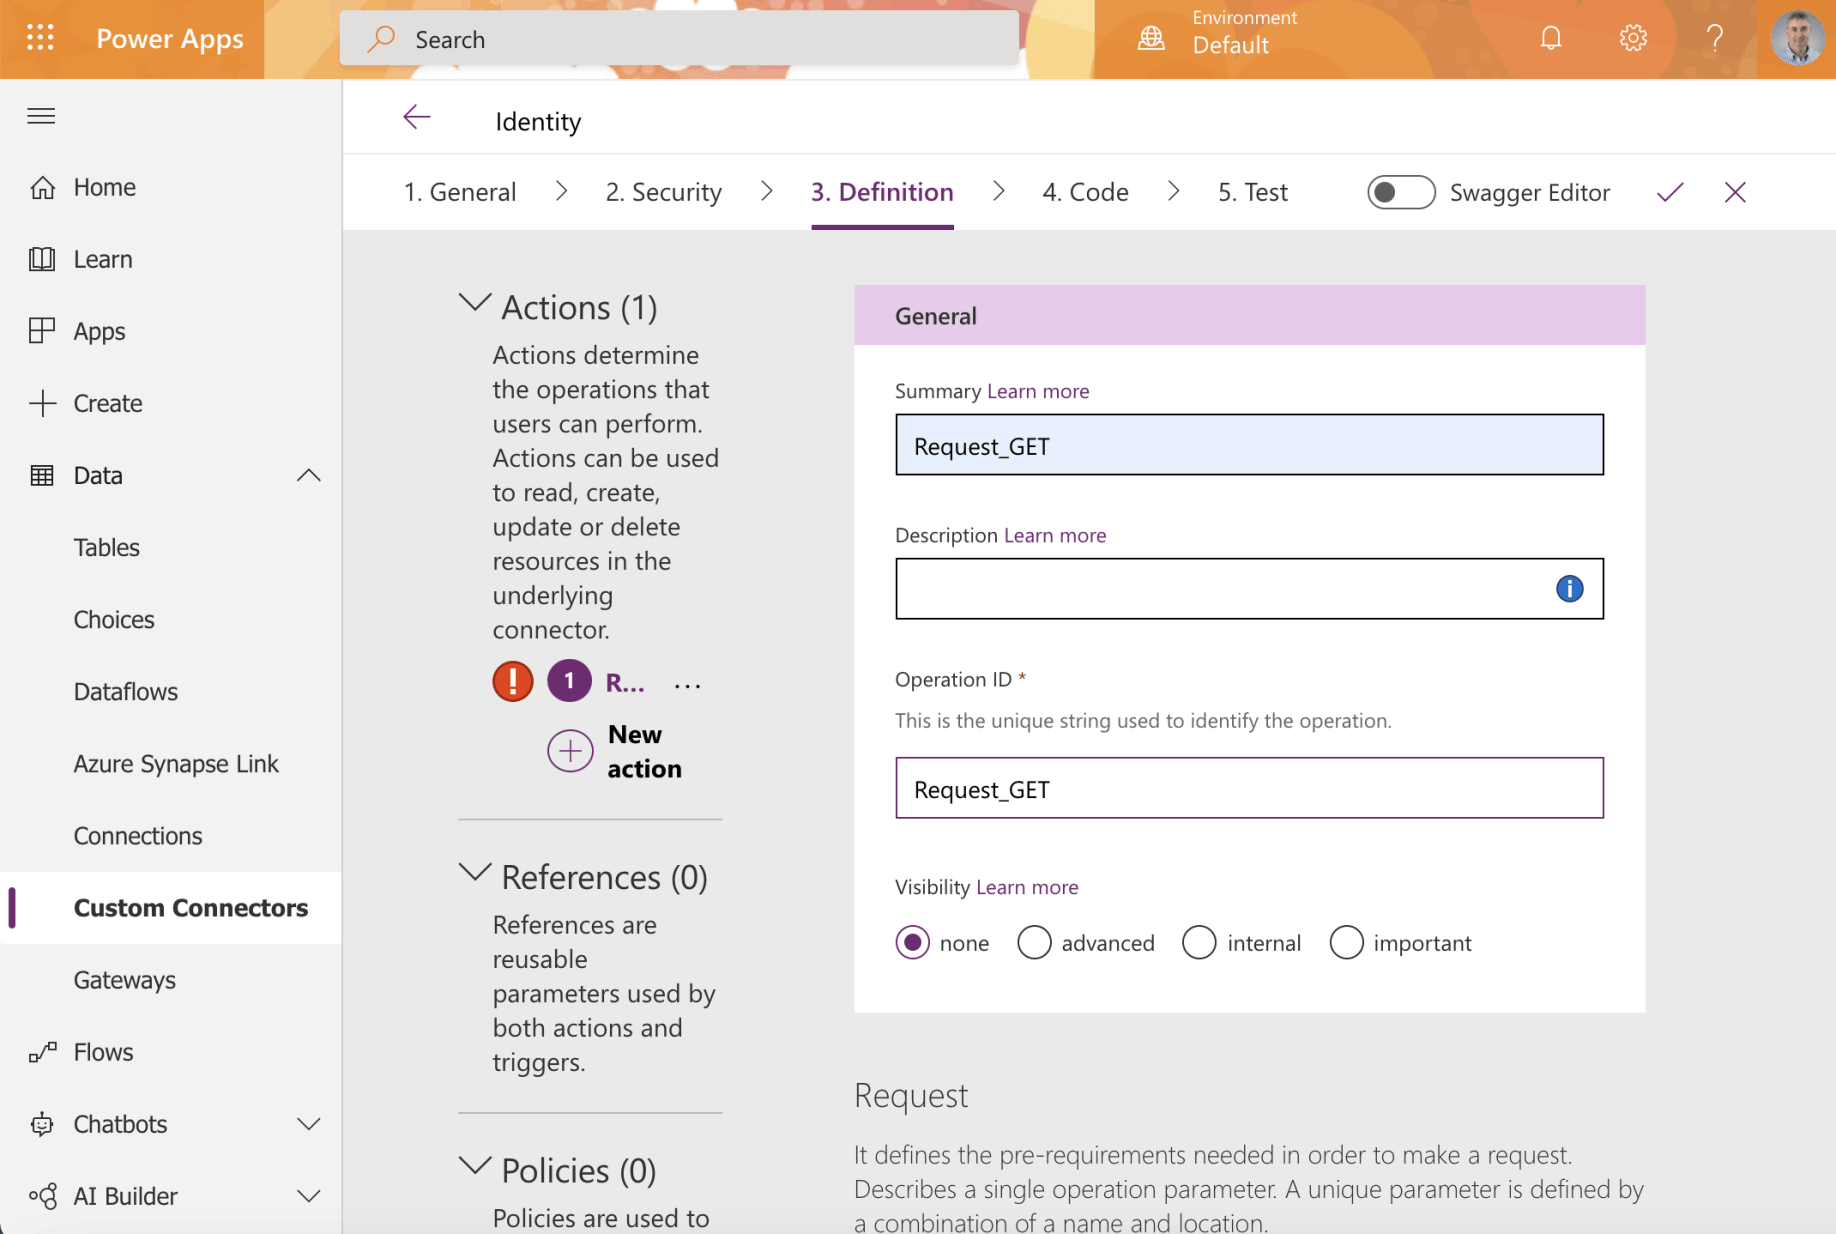
I provided a name for each action
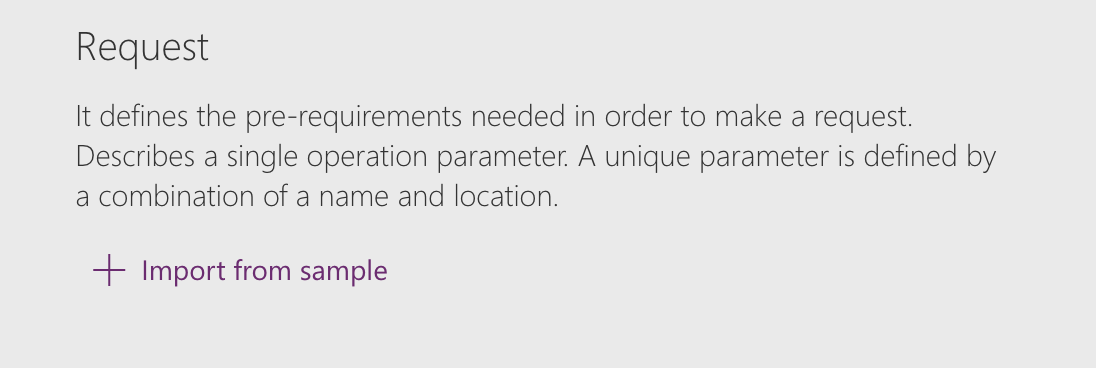
I clicked Import from sample to describe the action
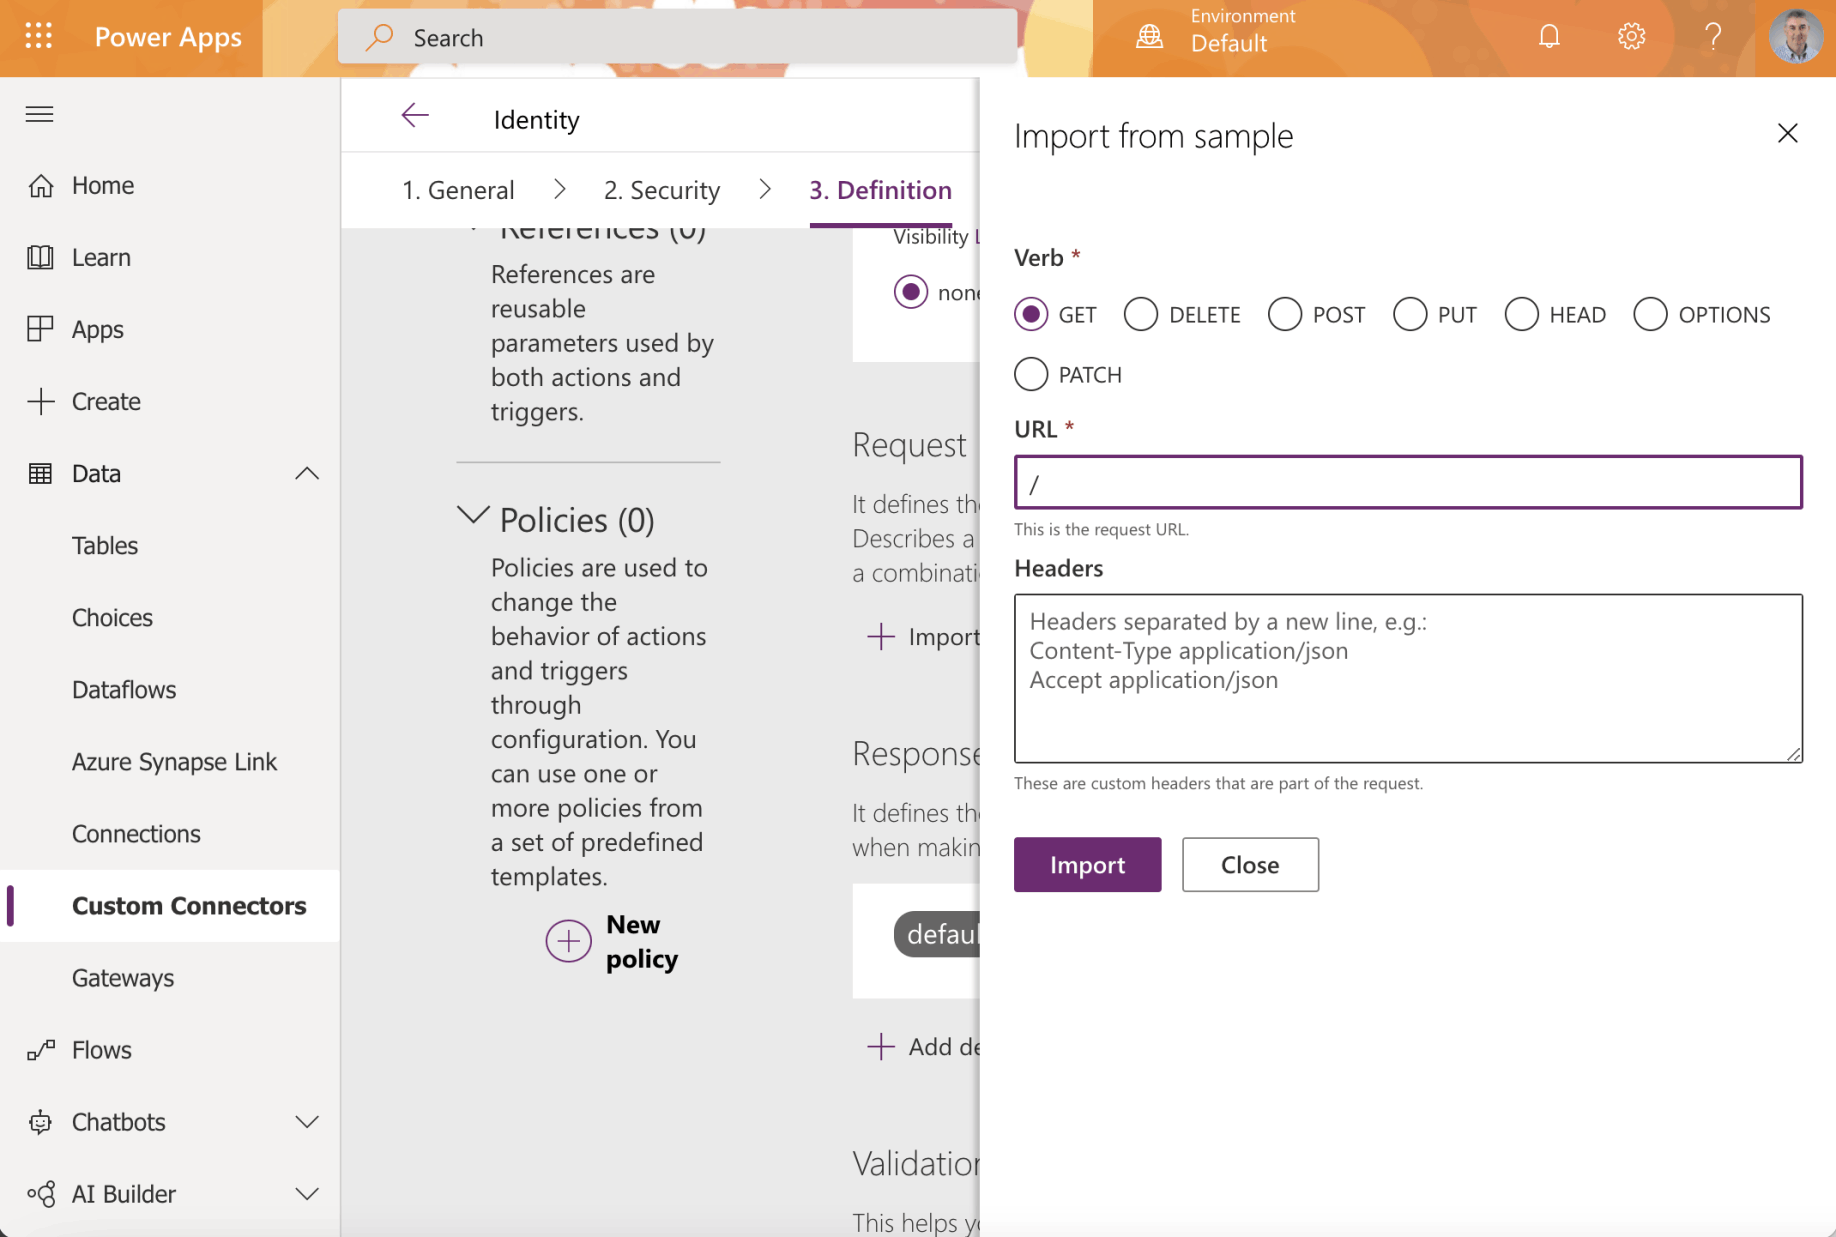
The /api/ path returns identity information
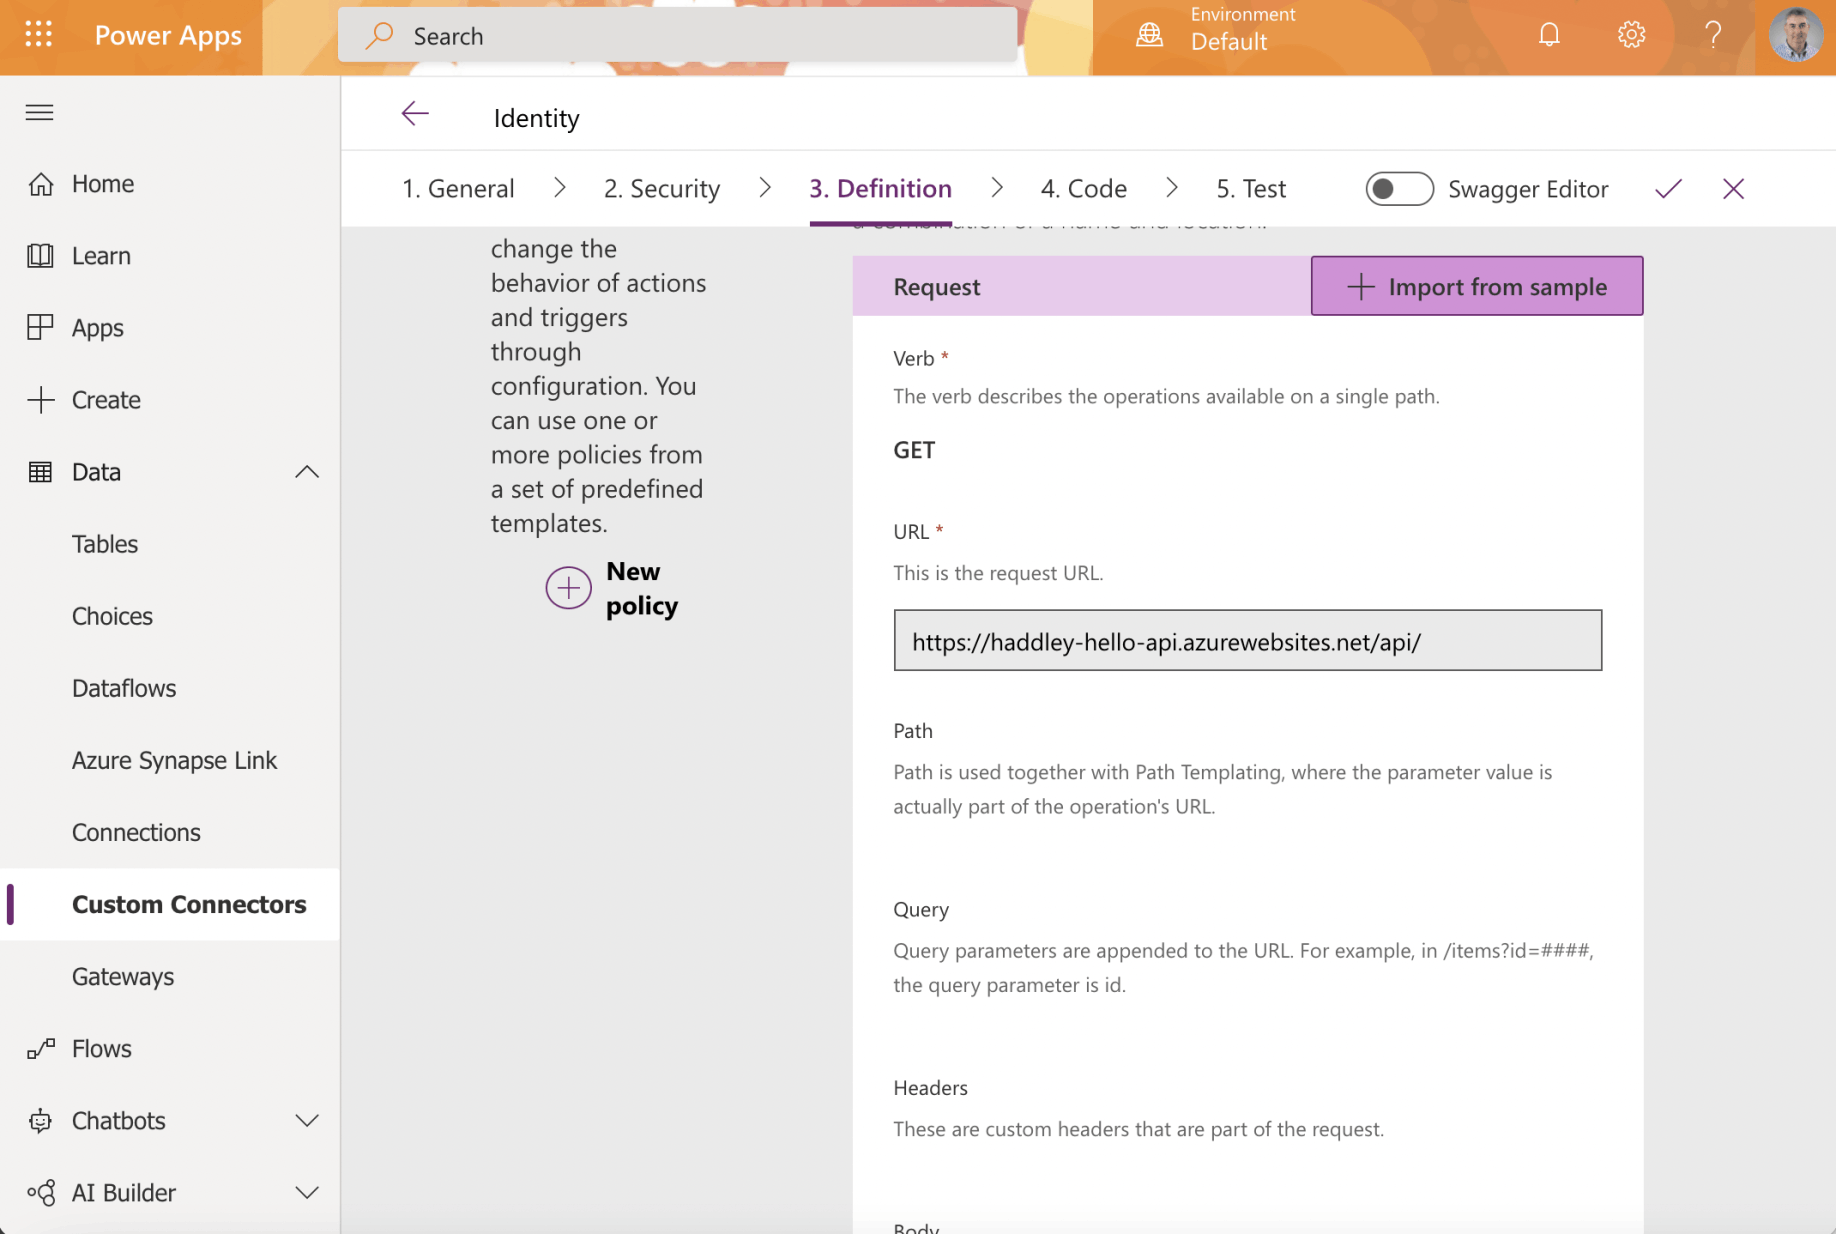
The action request was described
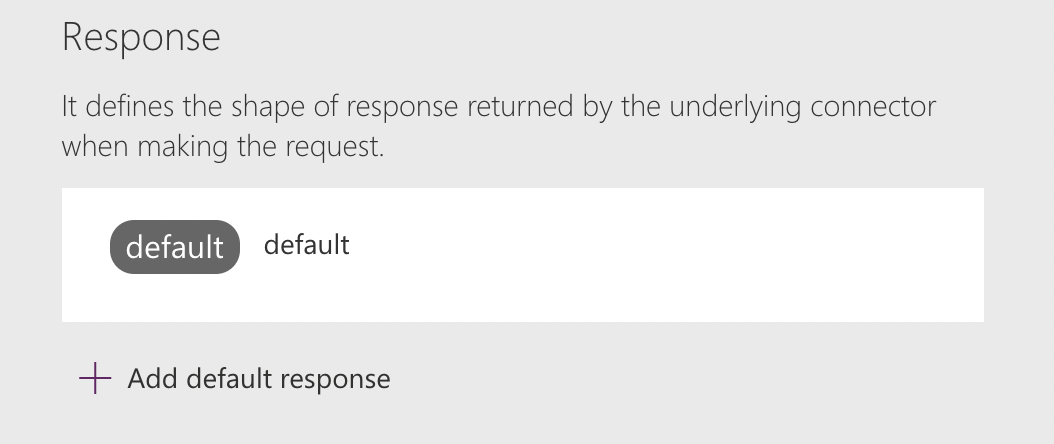
I clicked the + Add default response link
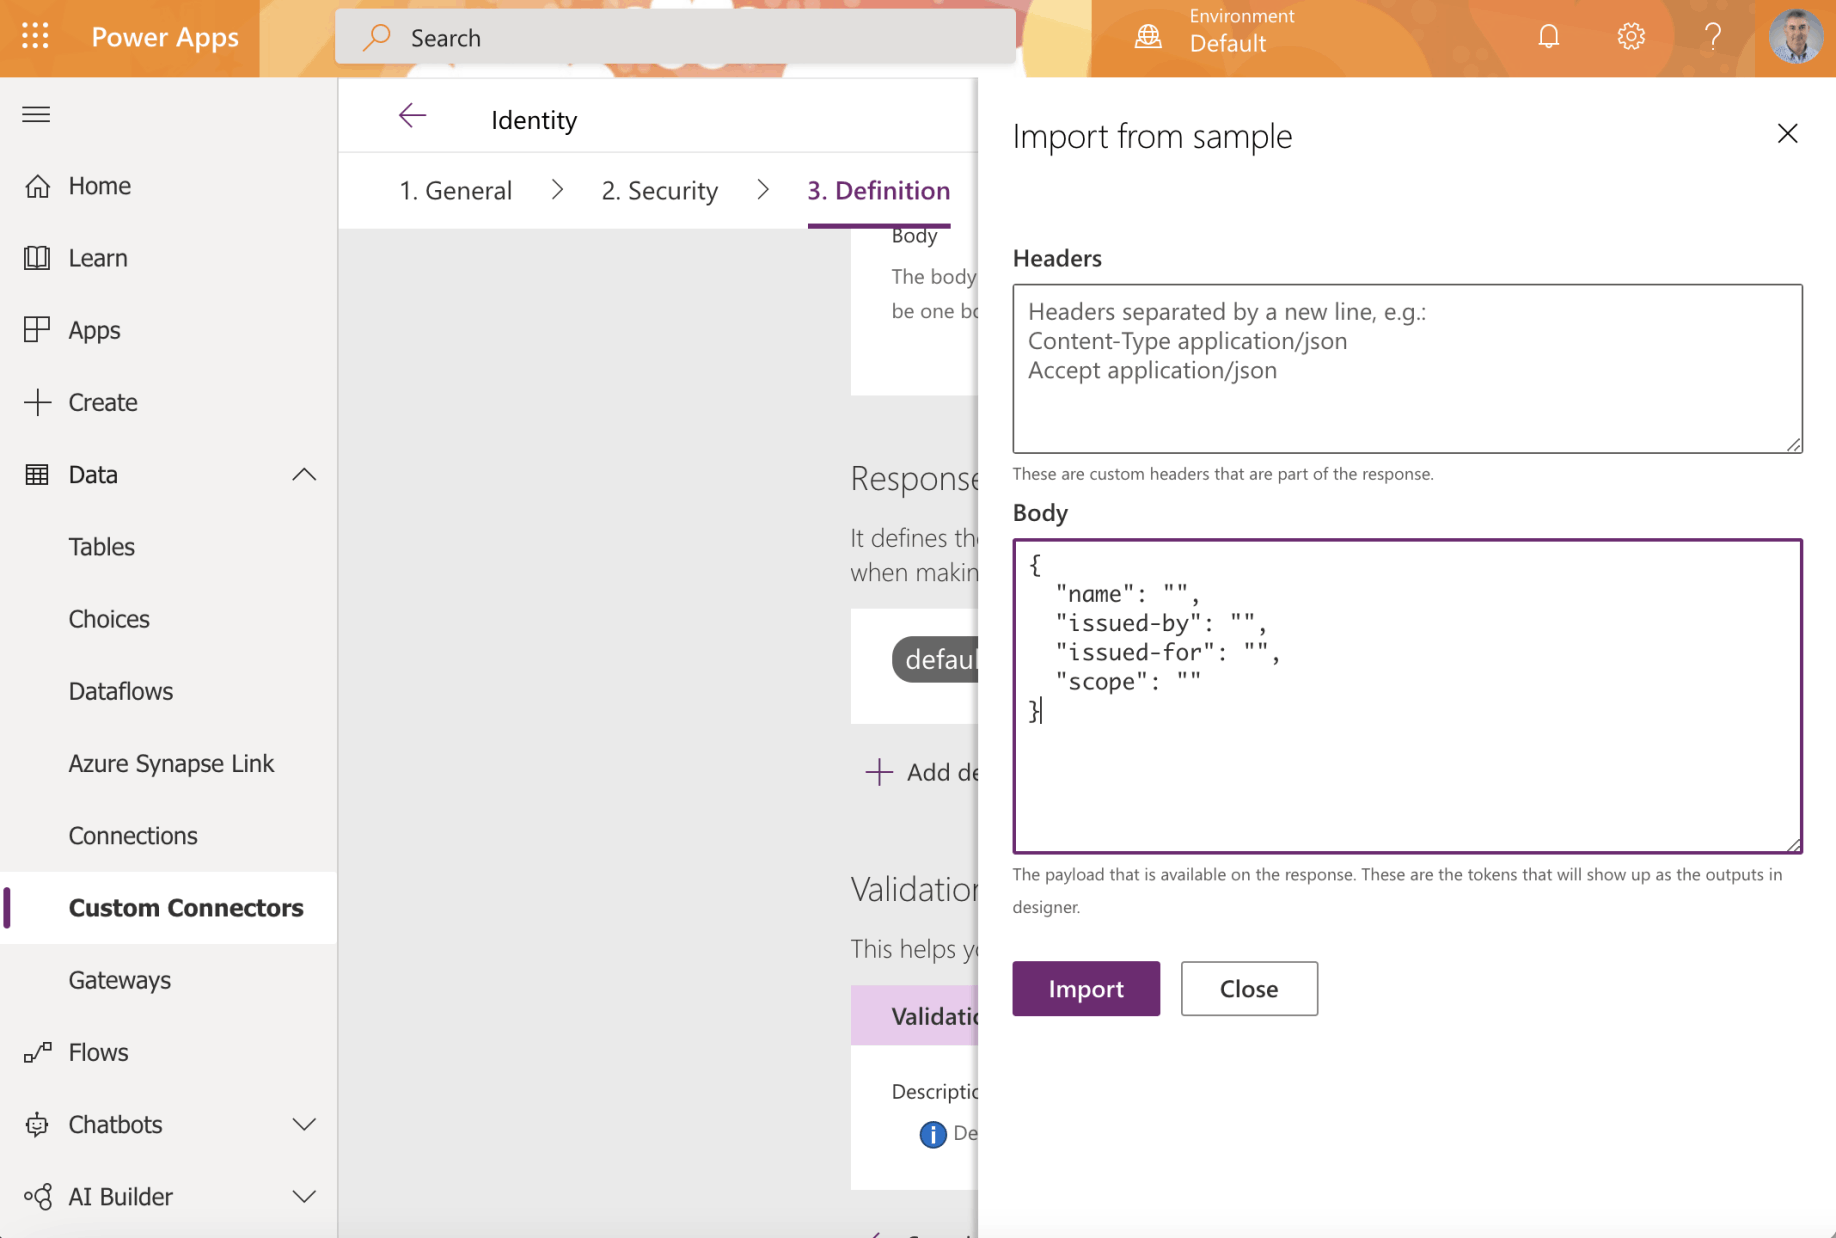
I provided an example API response

I clicked the tick to create the custom connector
I clicked the + New connection link to create a new connection
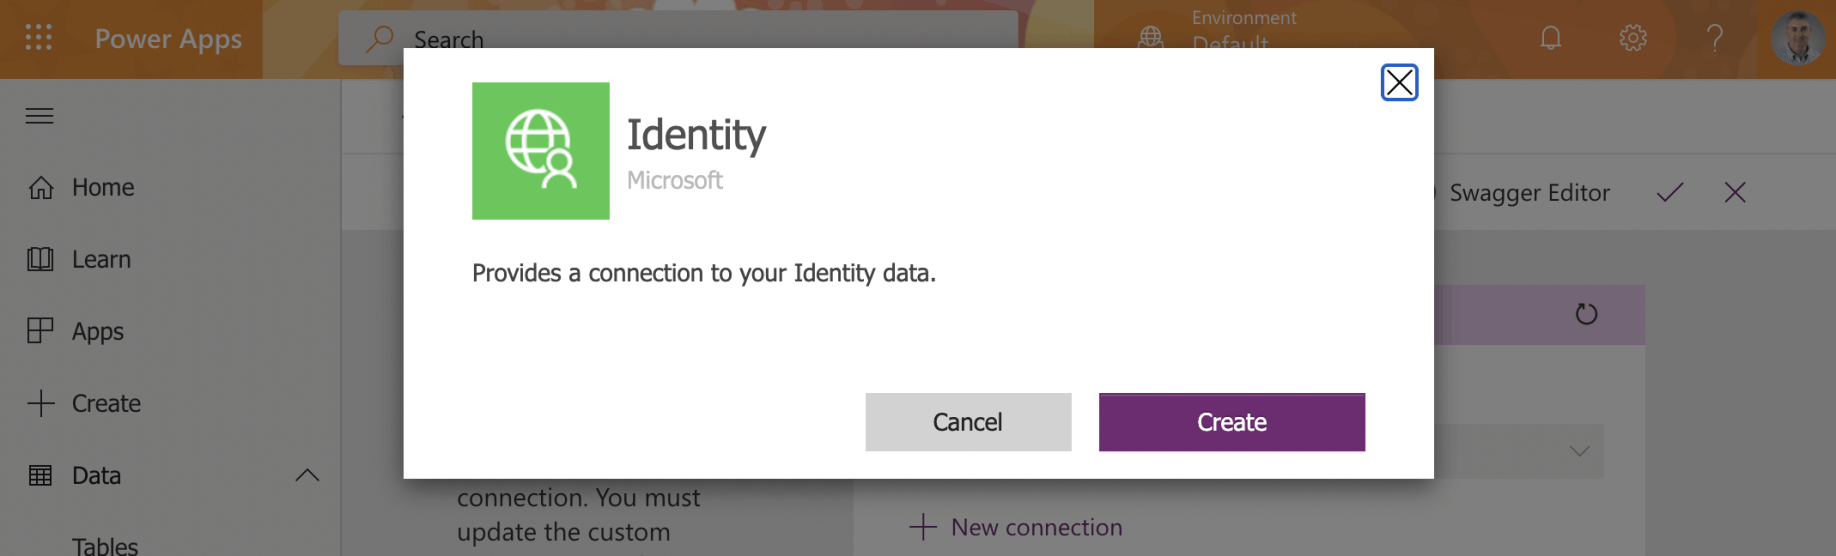
I clicked Create
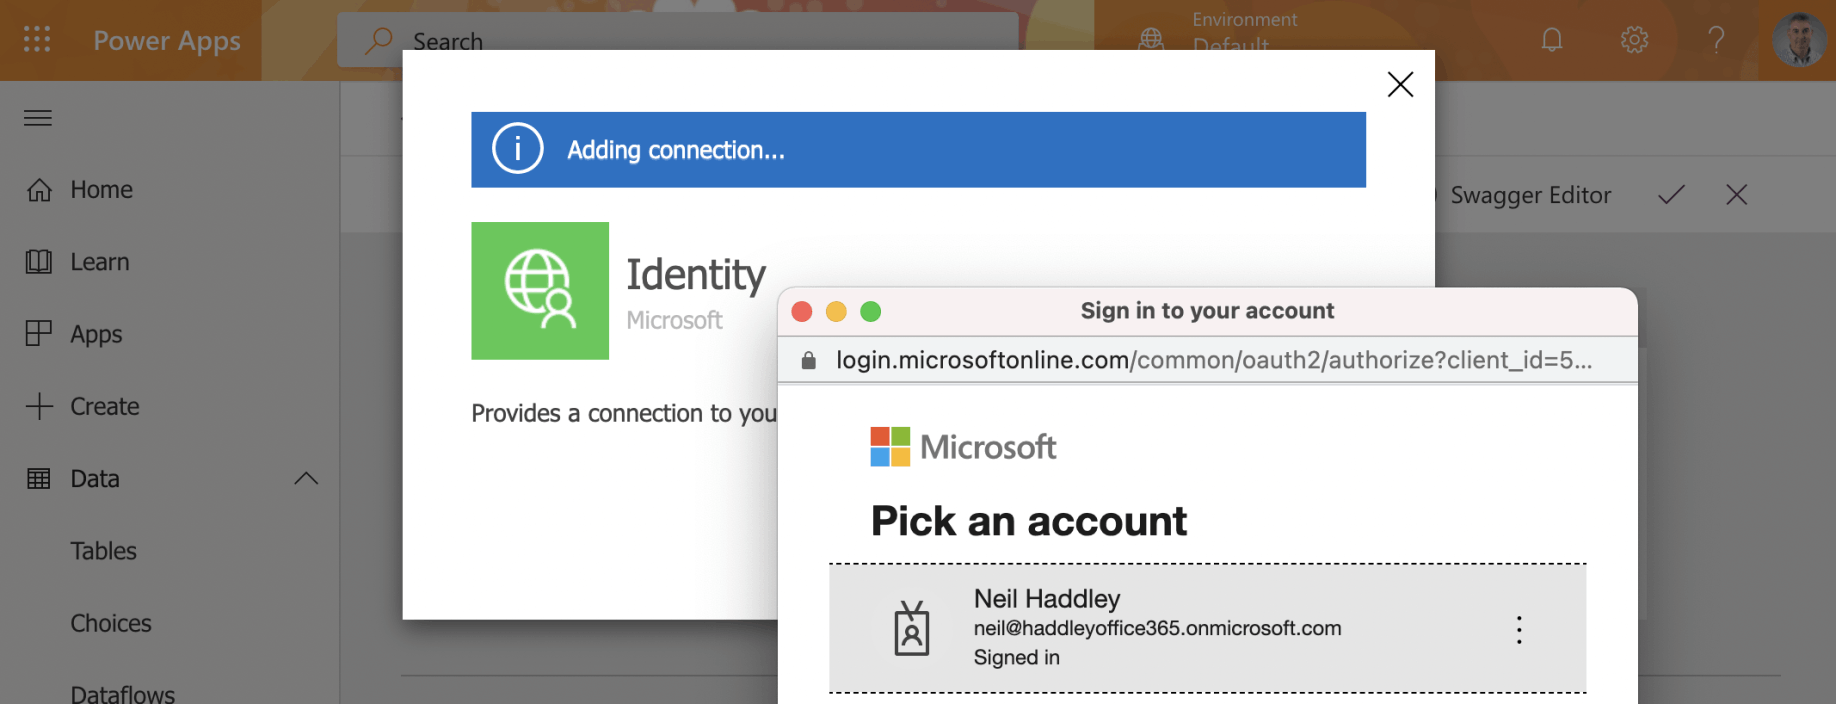
I provided my Azure Active Directory credentials
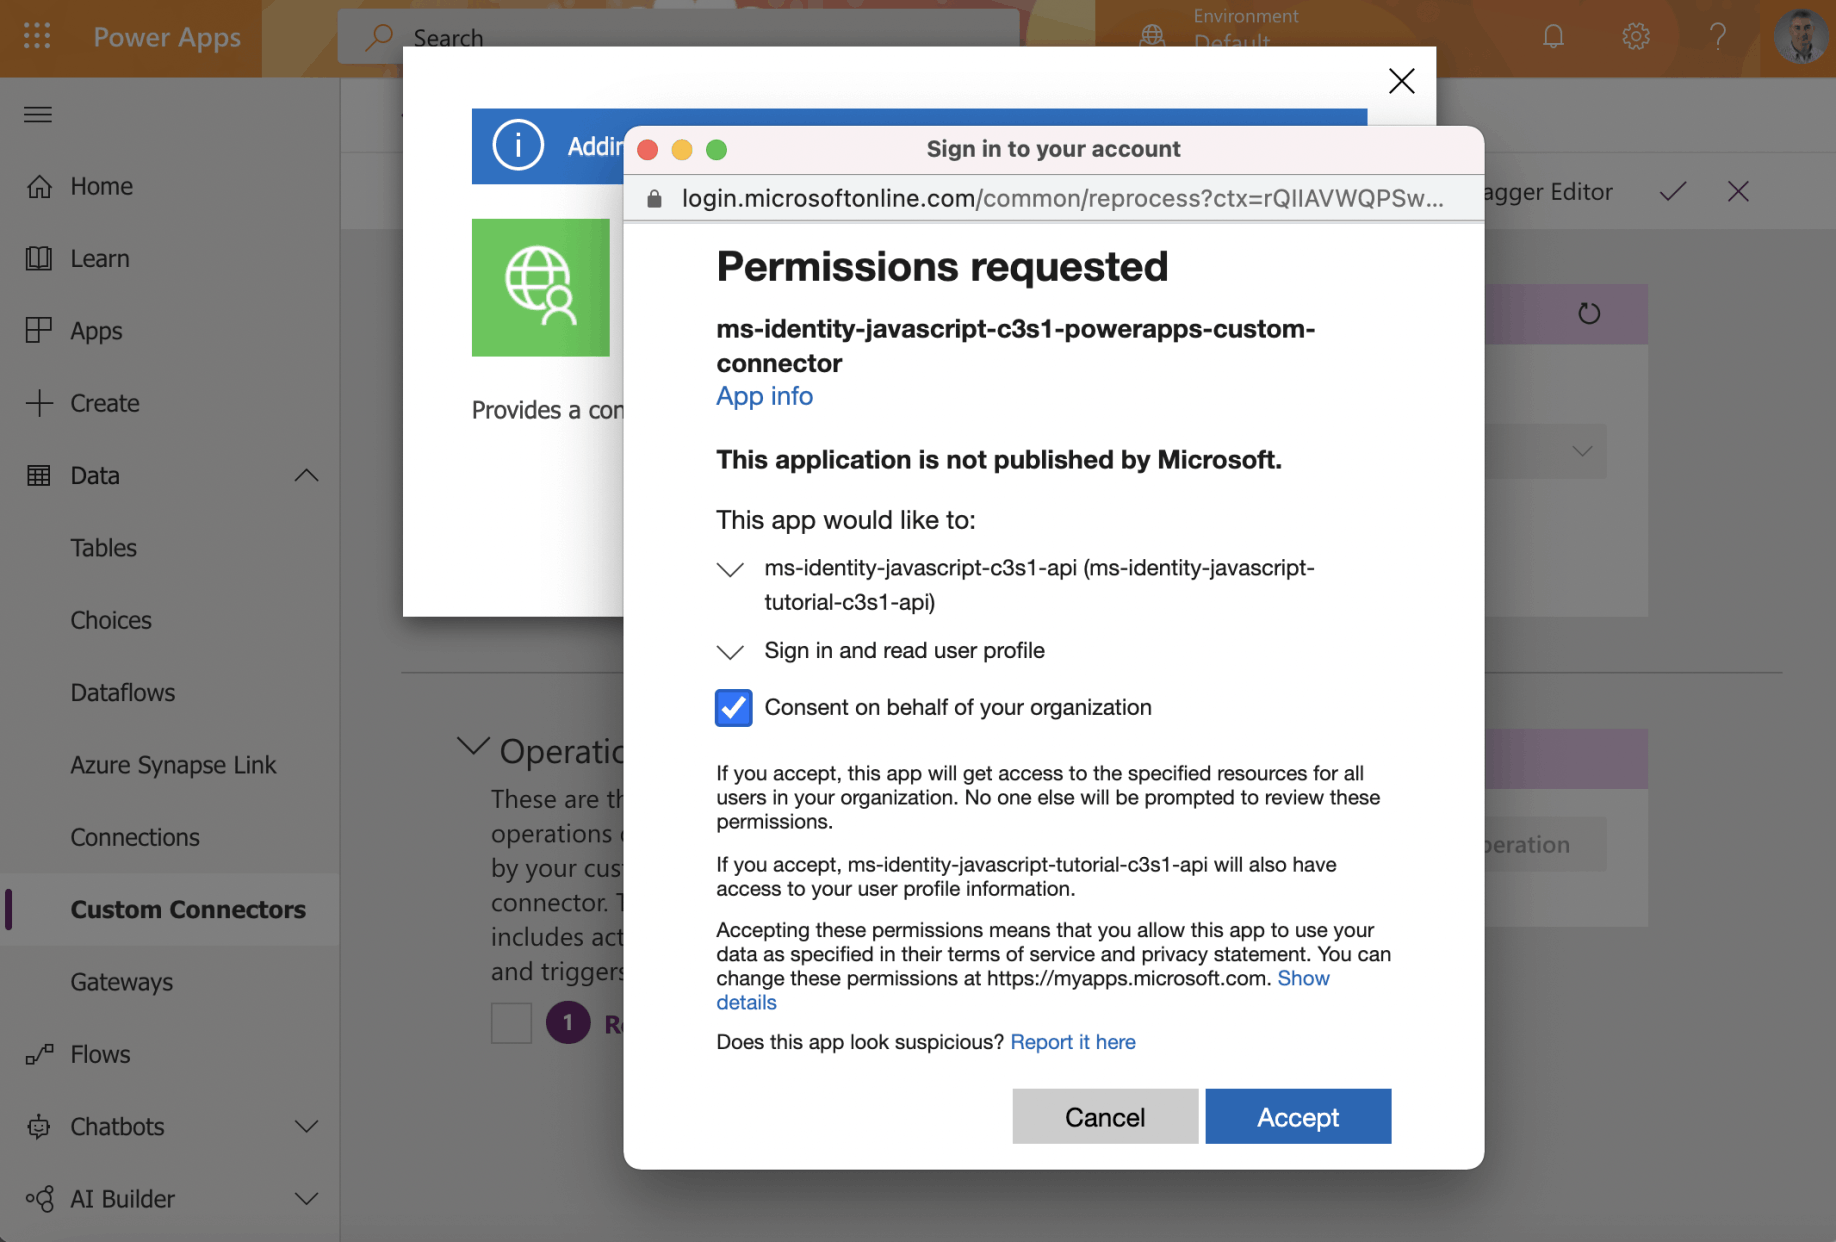
I consented
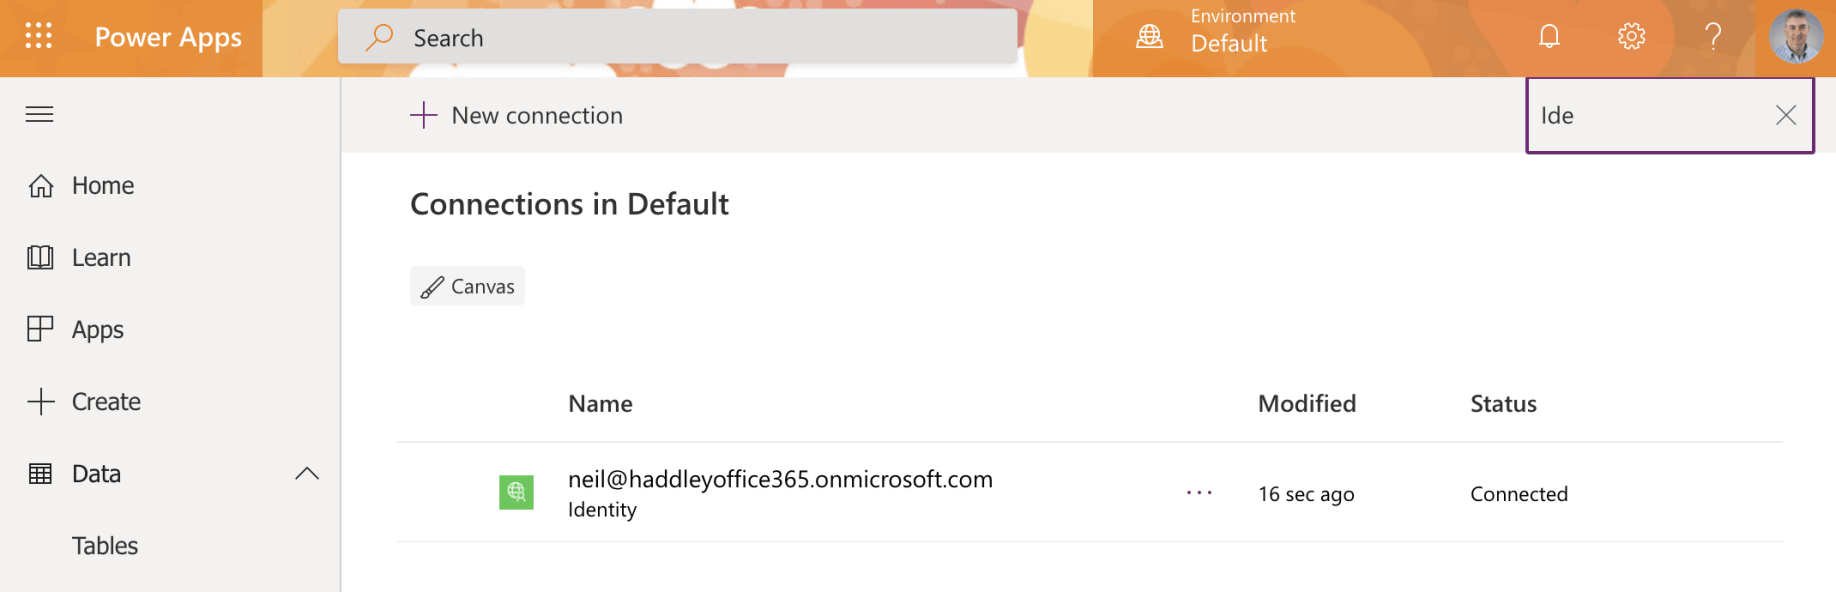
The connection was created
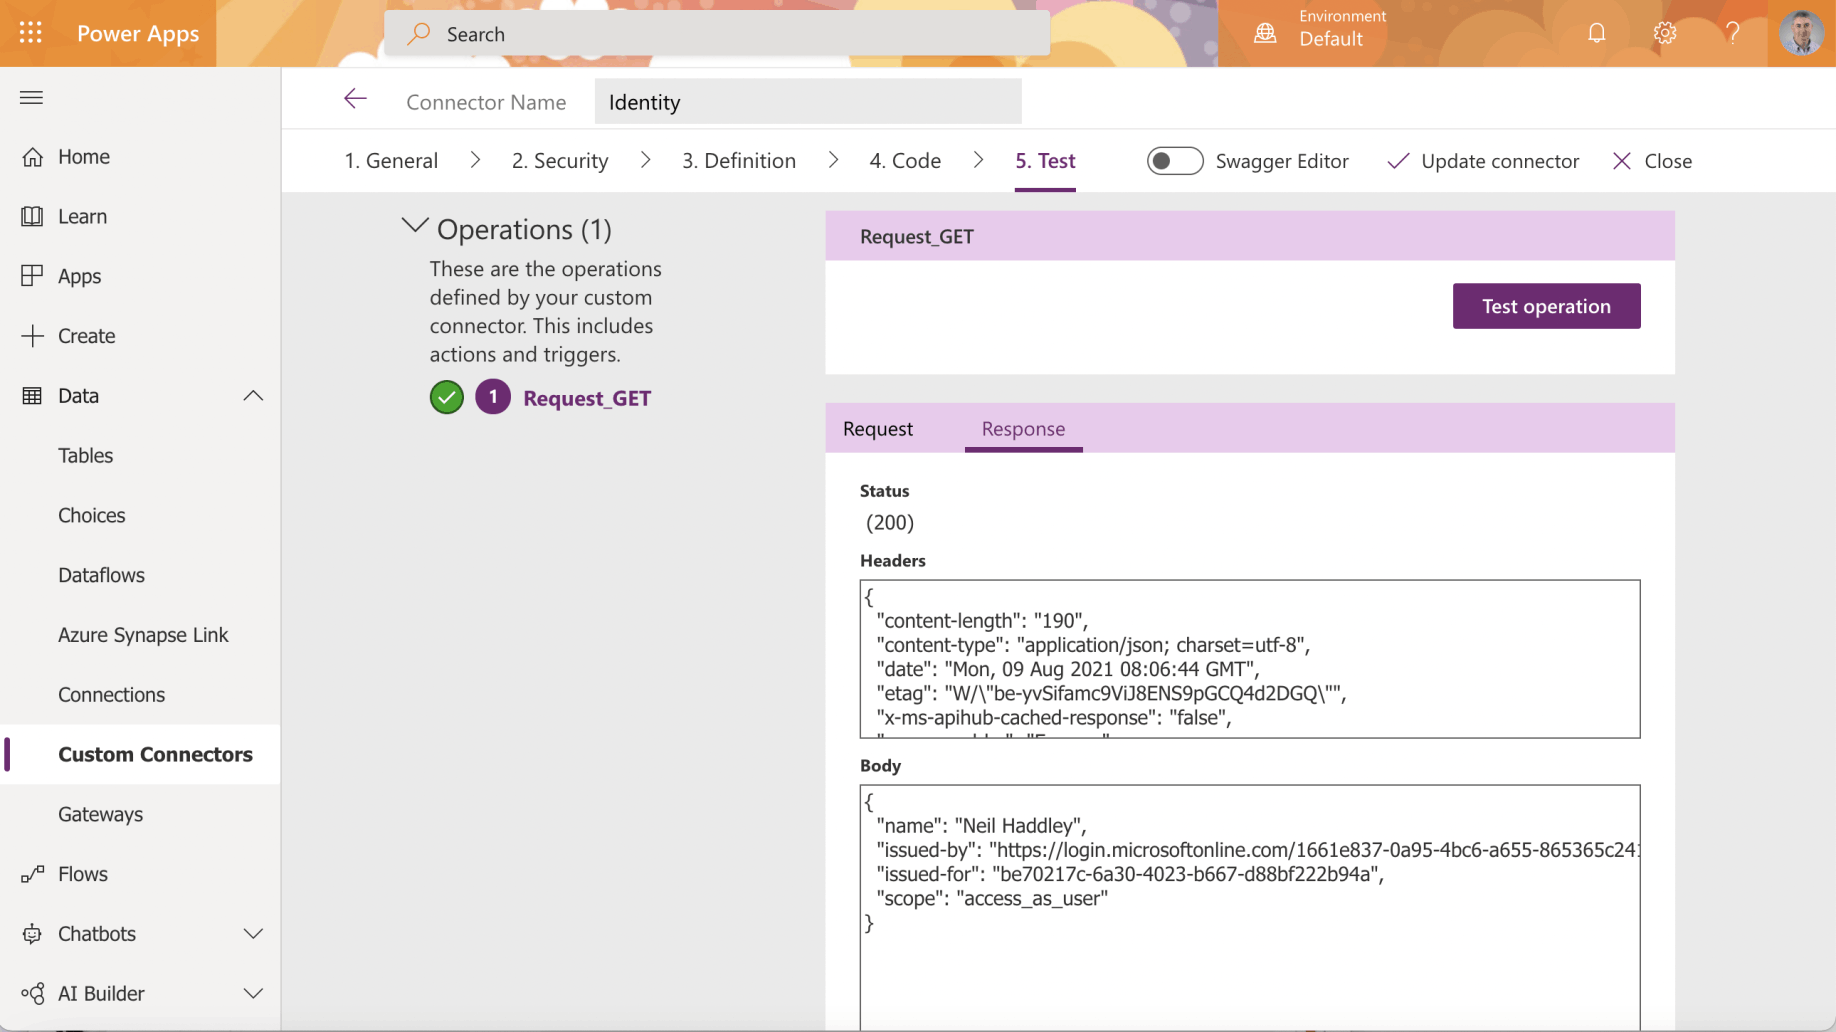
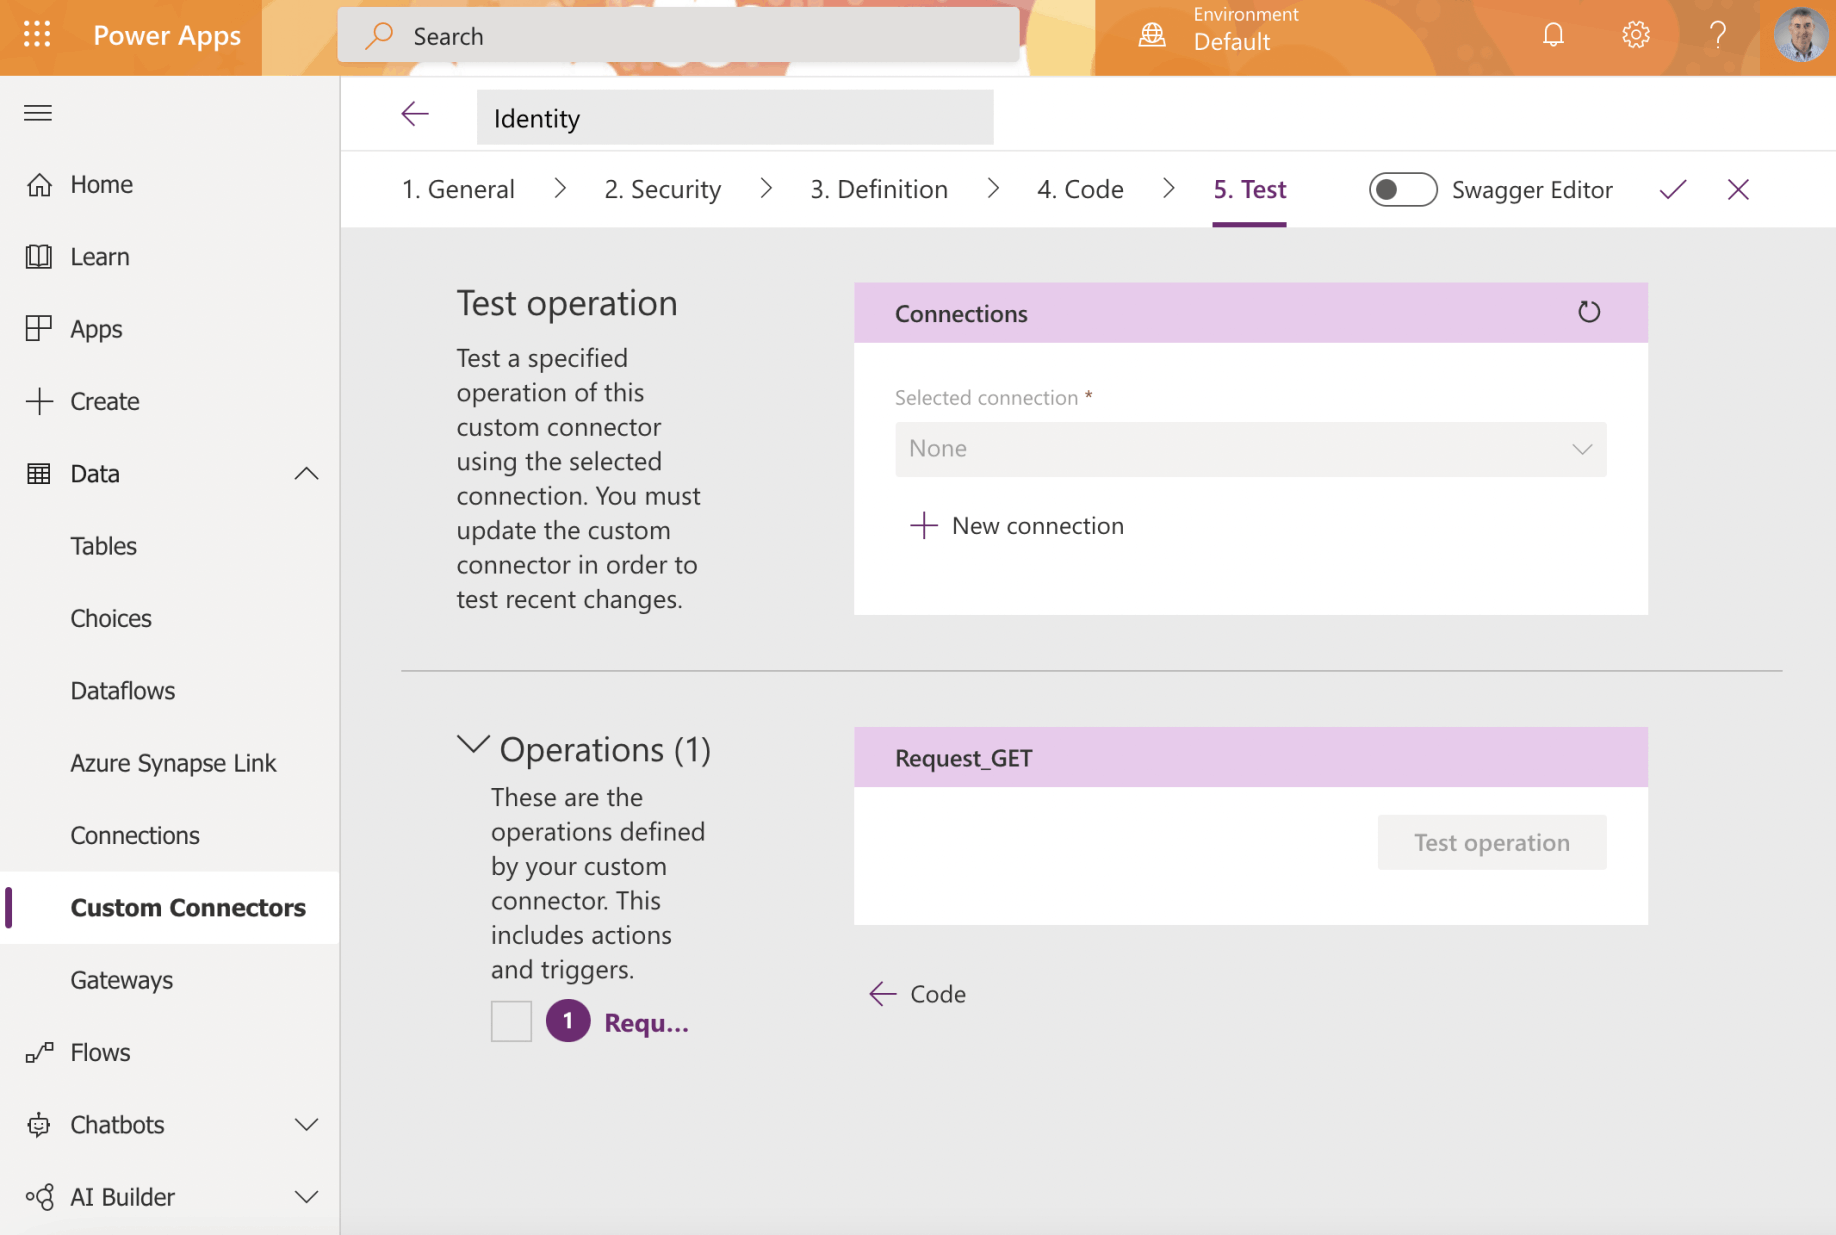
I tested the operation
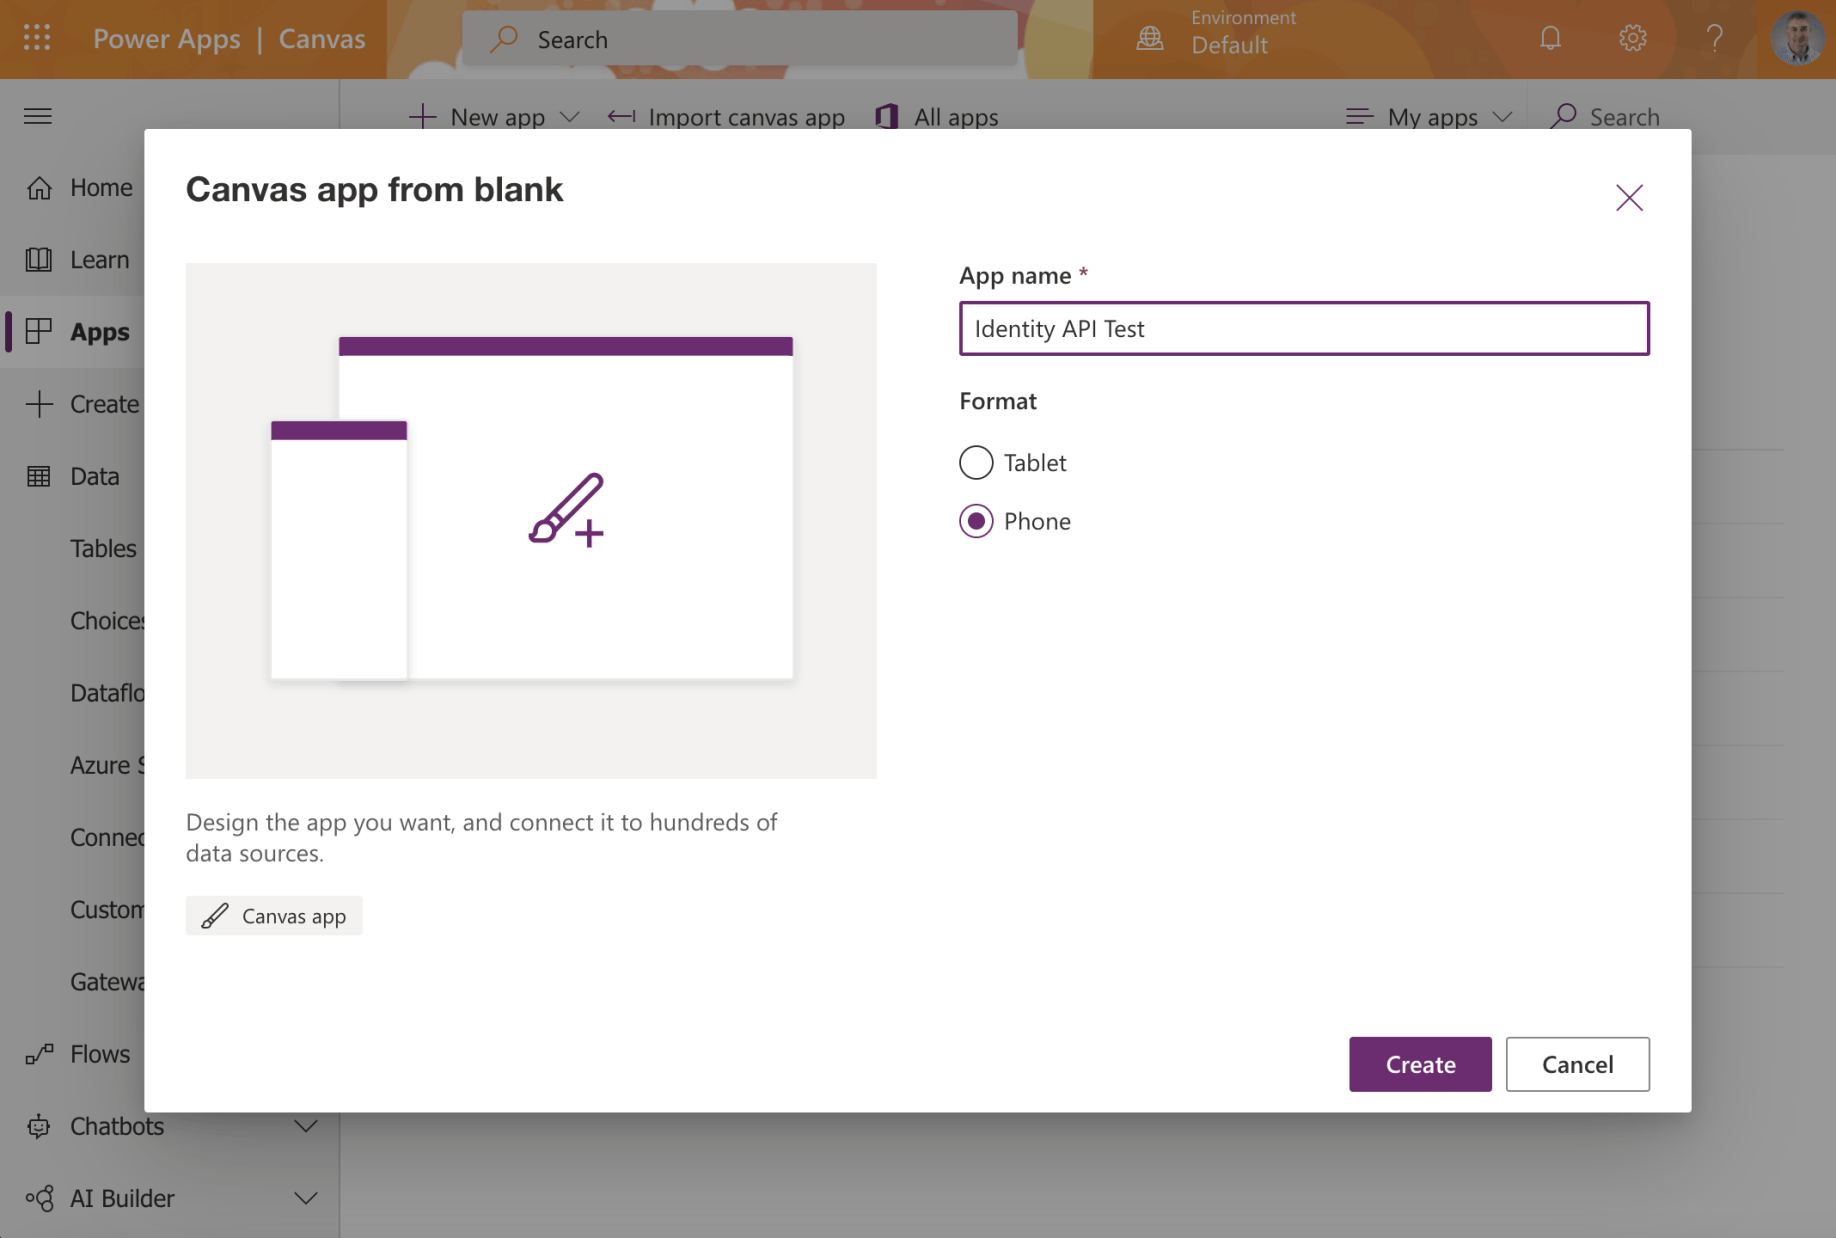
I created a PowerApp Canvas app
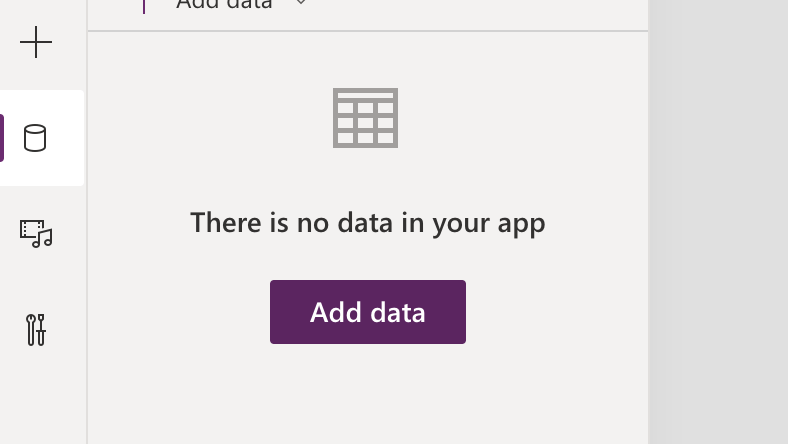
I selected the data menu item and clicked the Add data button
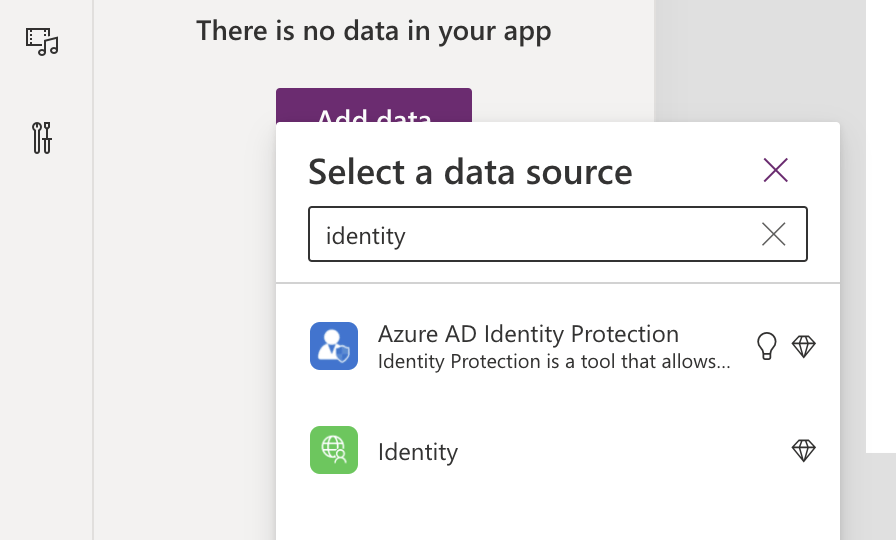
I selected the Identity connection
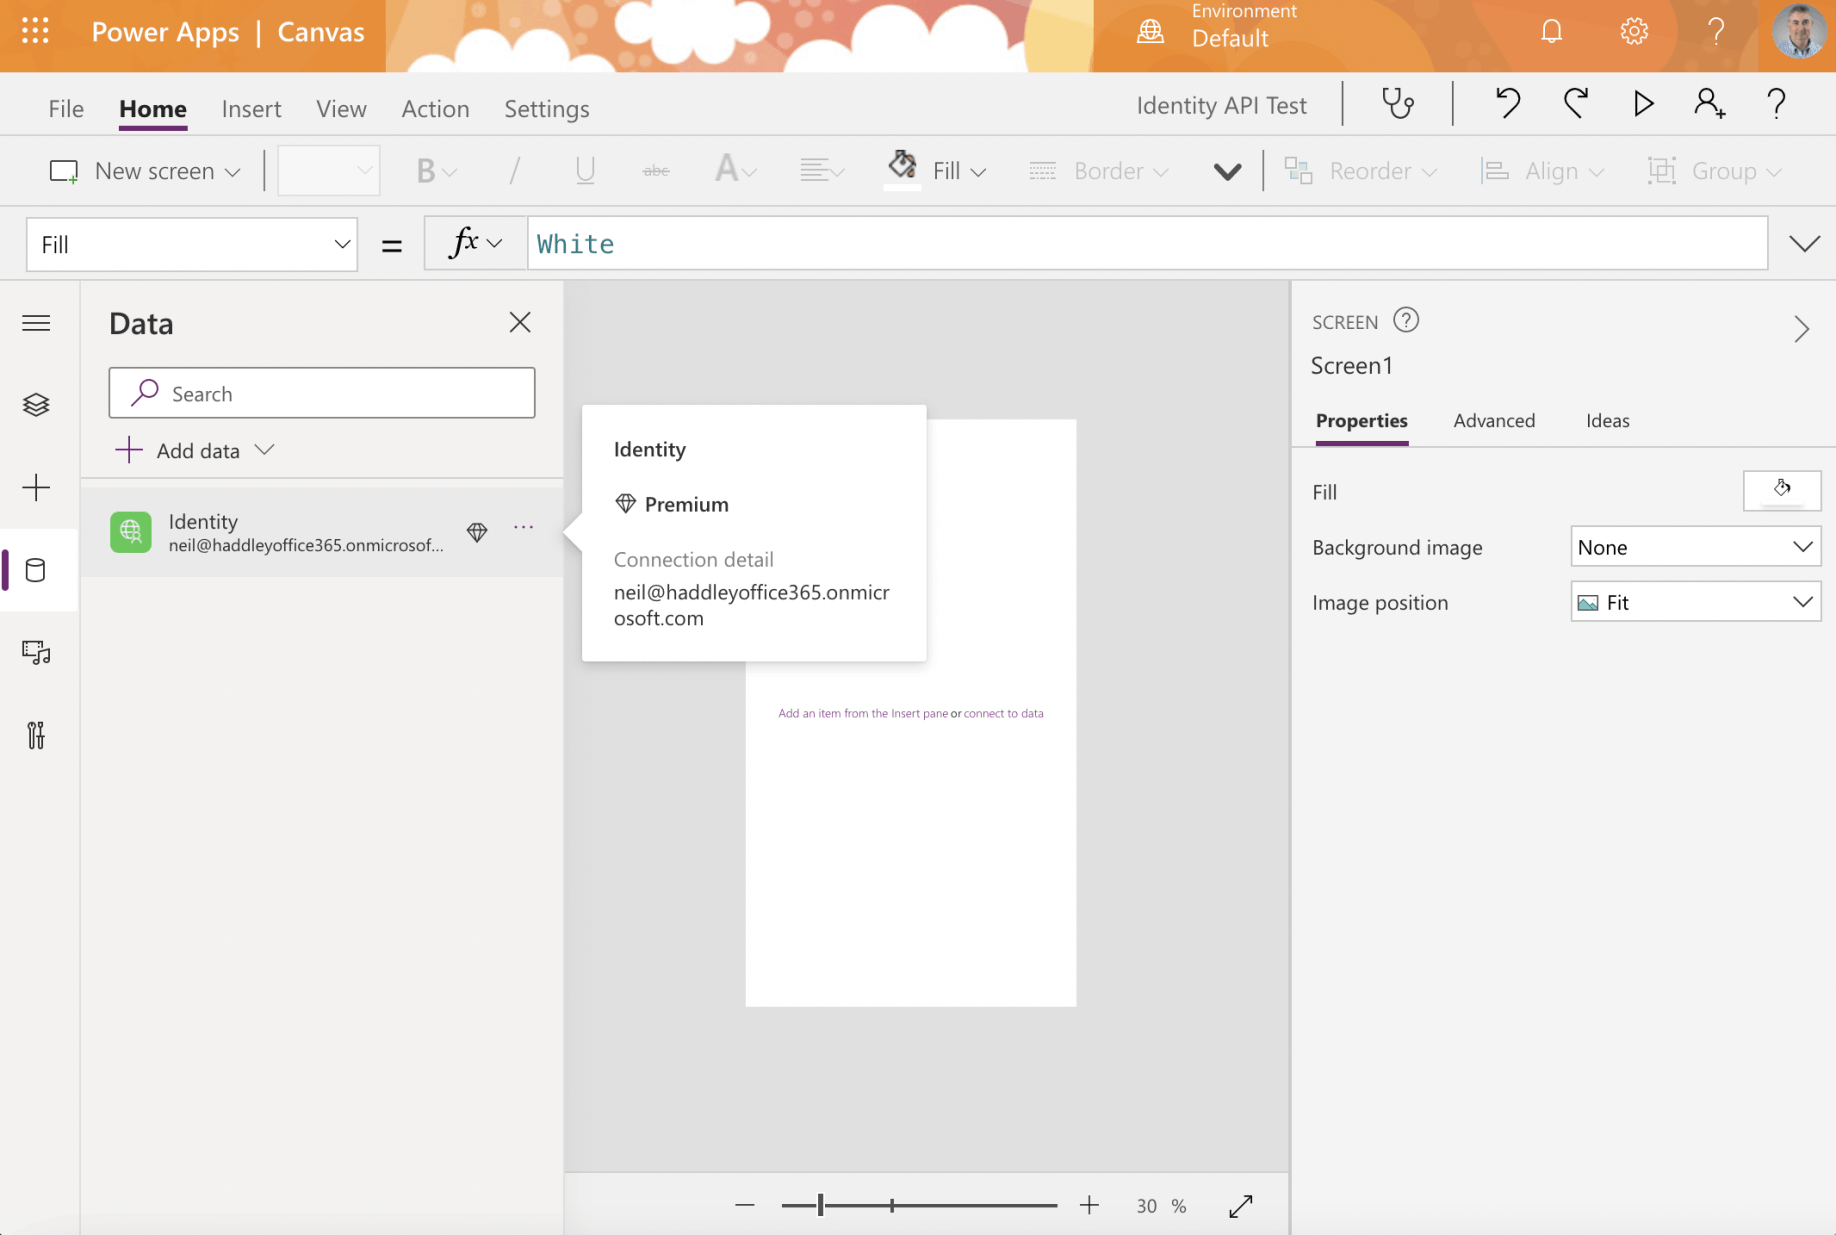
I noticed that using the Identity Connection requires a Premium PowerApps license
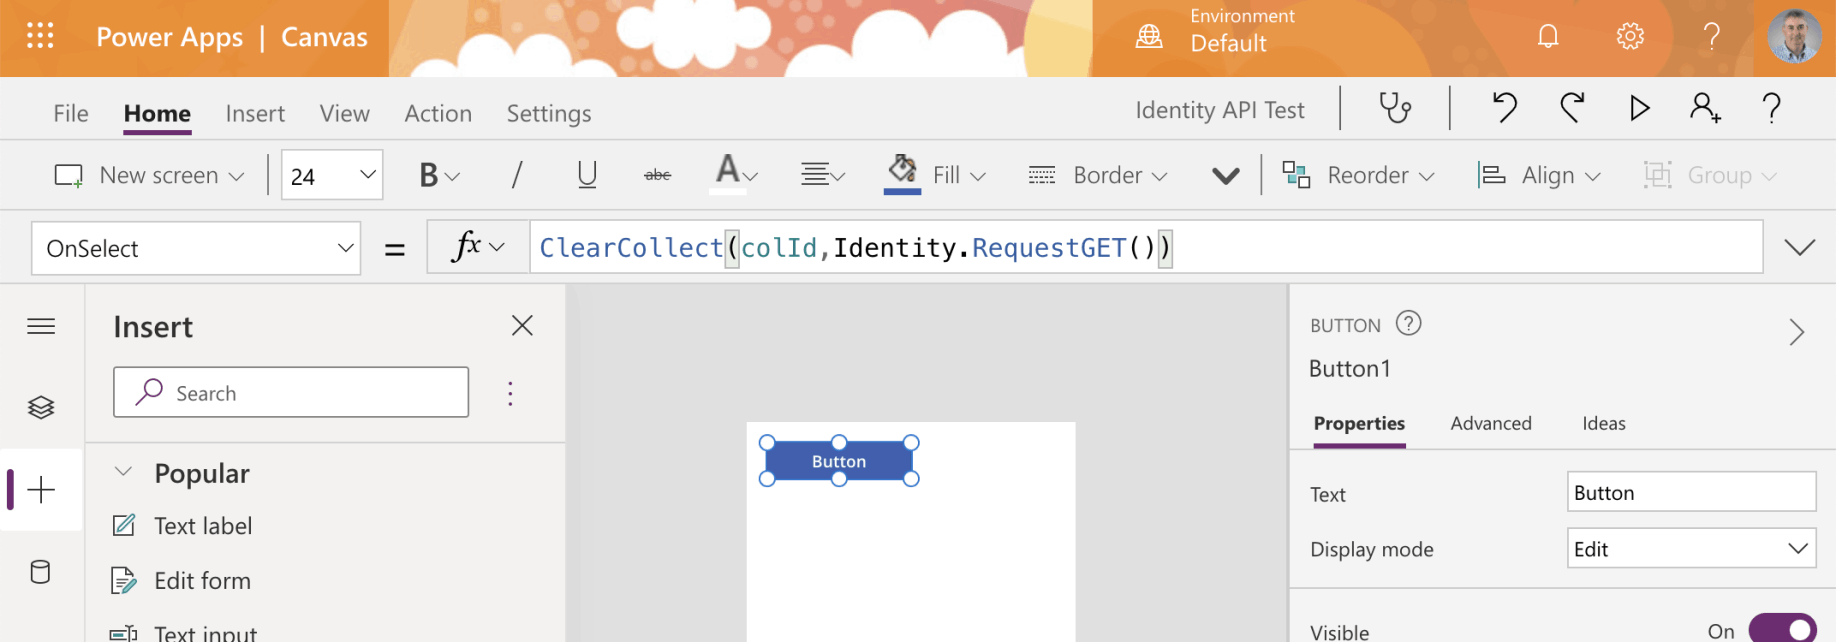
I added a button to the app screen and used the ClearCollect operation to call the API

I ran the app
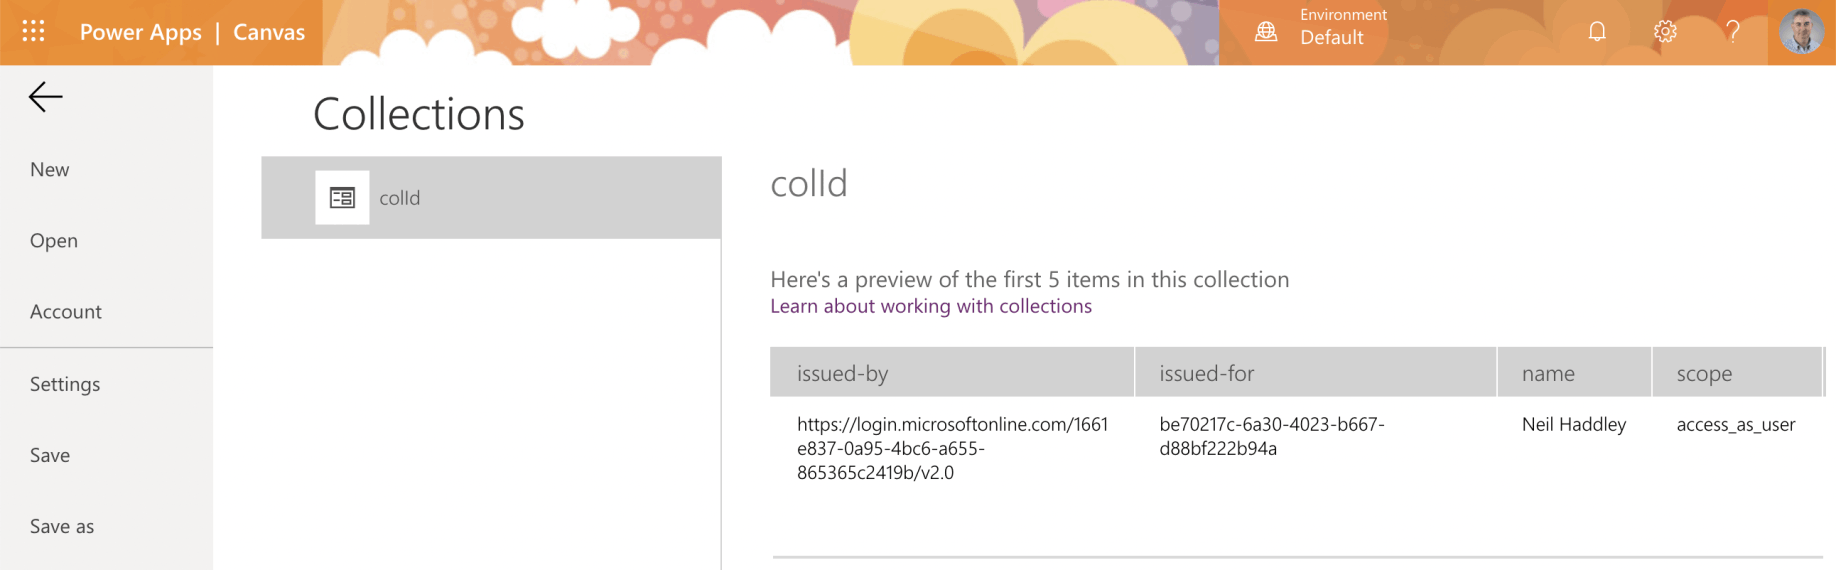
I switched to the Collections page to see the results of the API call
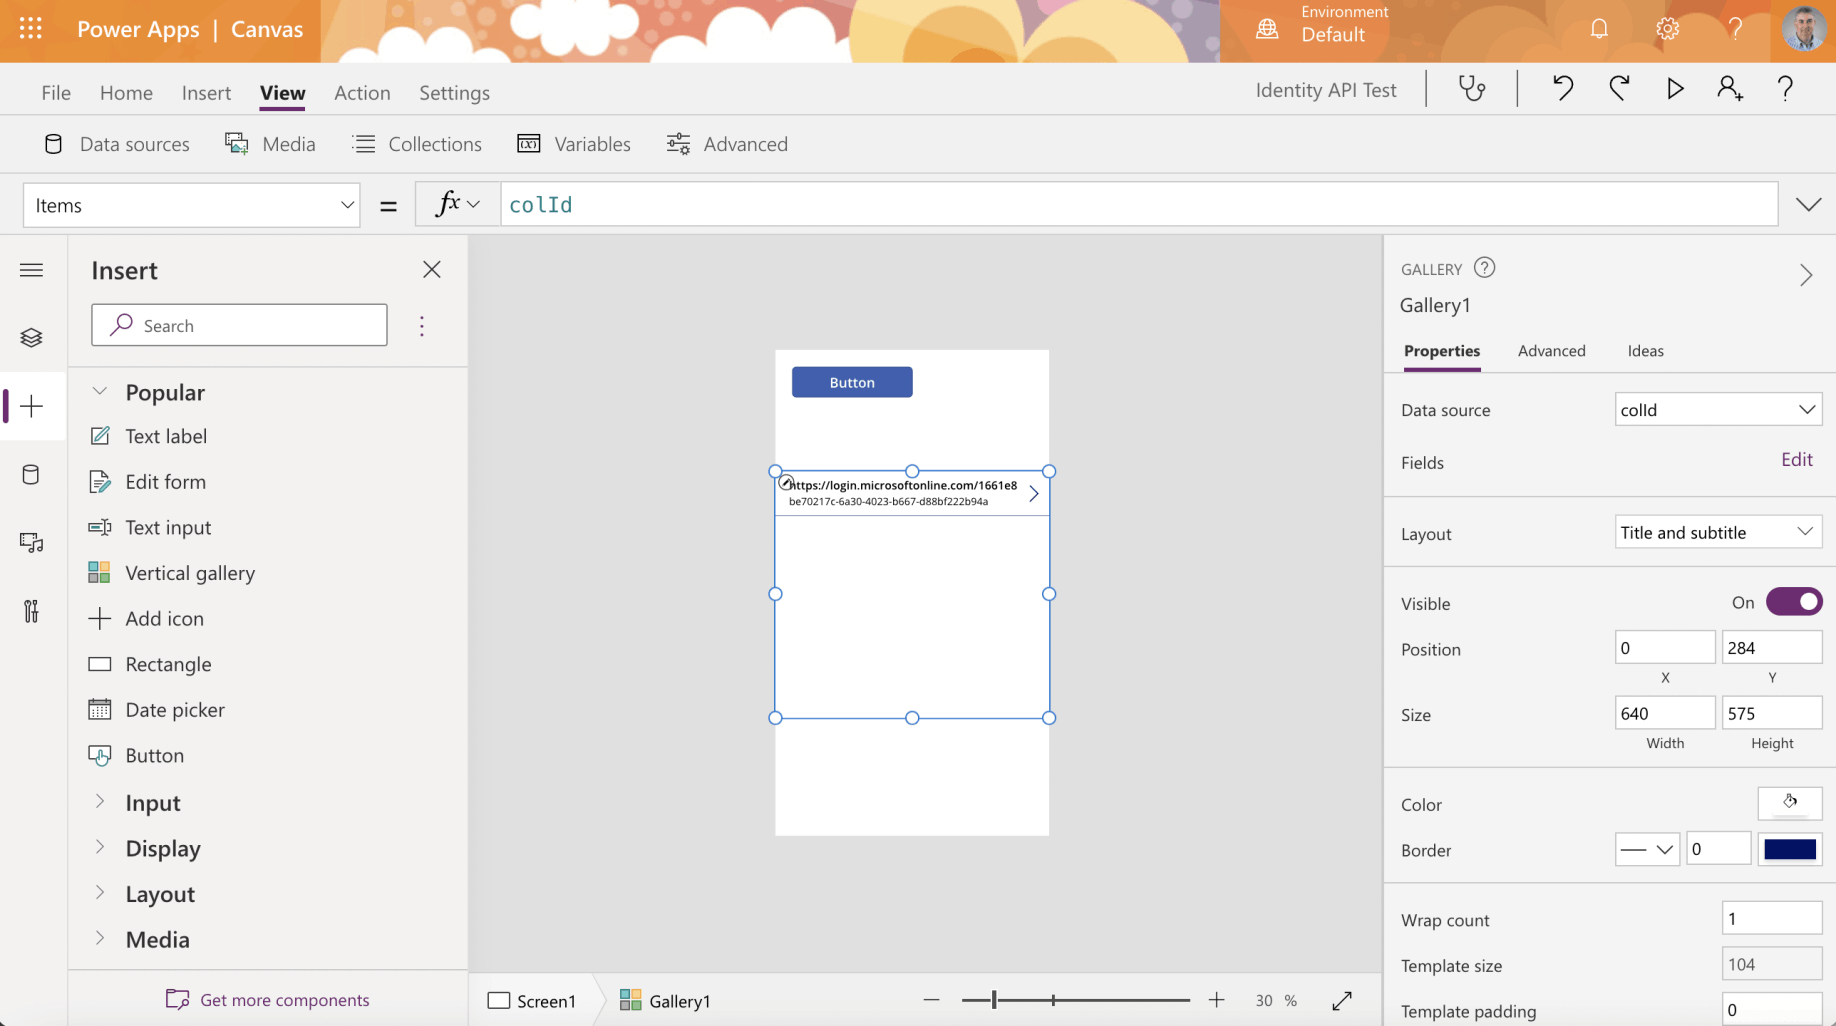
I added the collection to a Vertical gallery control
Enterprise Applications
A service principal is created in each tenant where the application is used.
The service principle in each tenant references the globally unique application registration.
The service principal defines what the app can do in the specific tenant, who can access the app, and what resources the app can access.
The service principal objects are what you see when you select the Enterprise applications page.
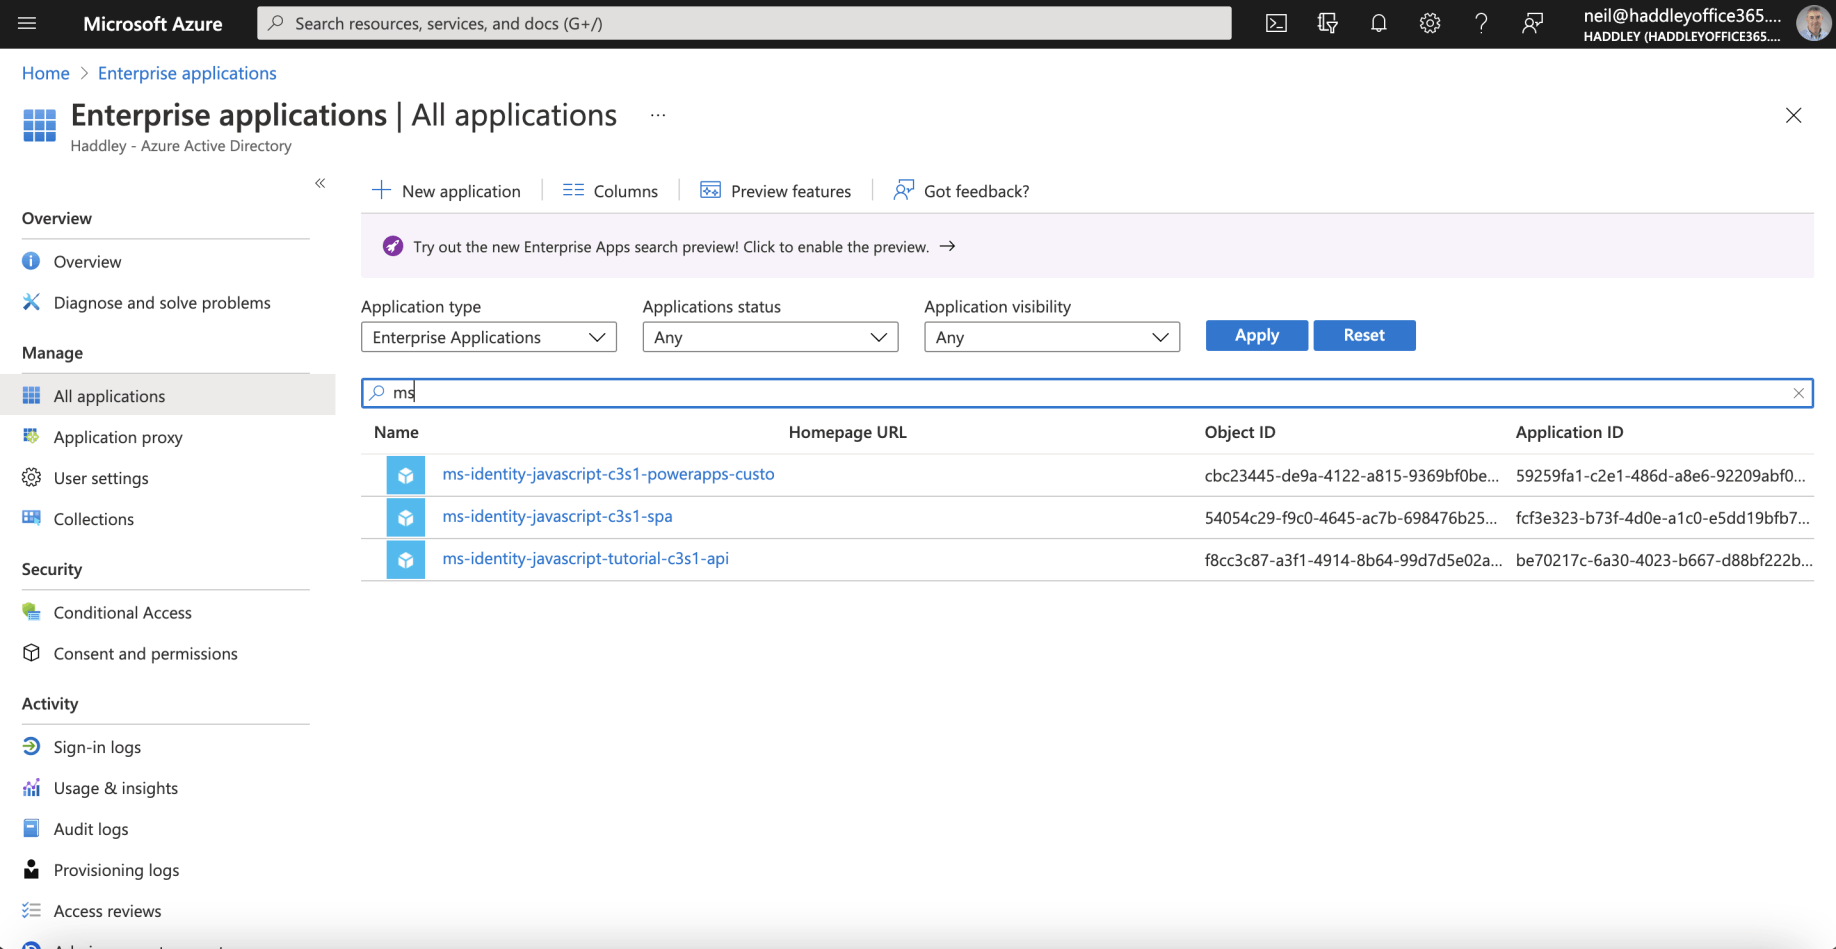
I reviewed the Service Principal Objects on the Enterprise applications page
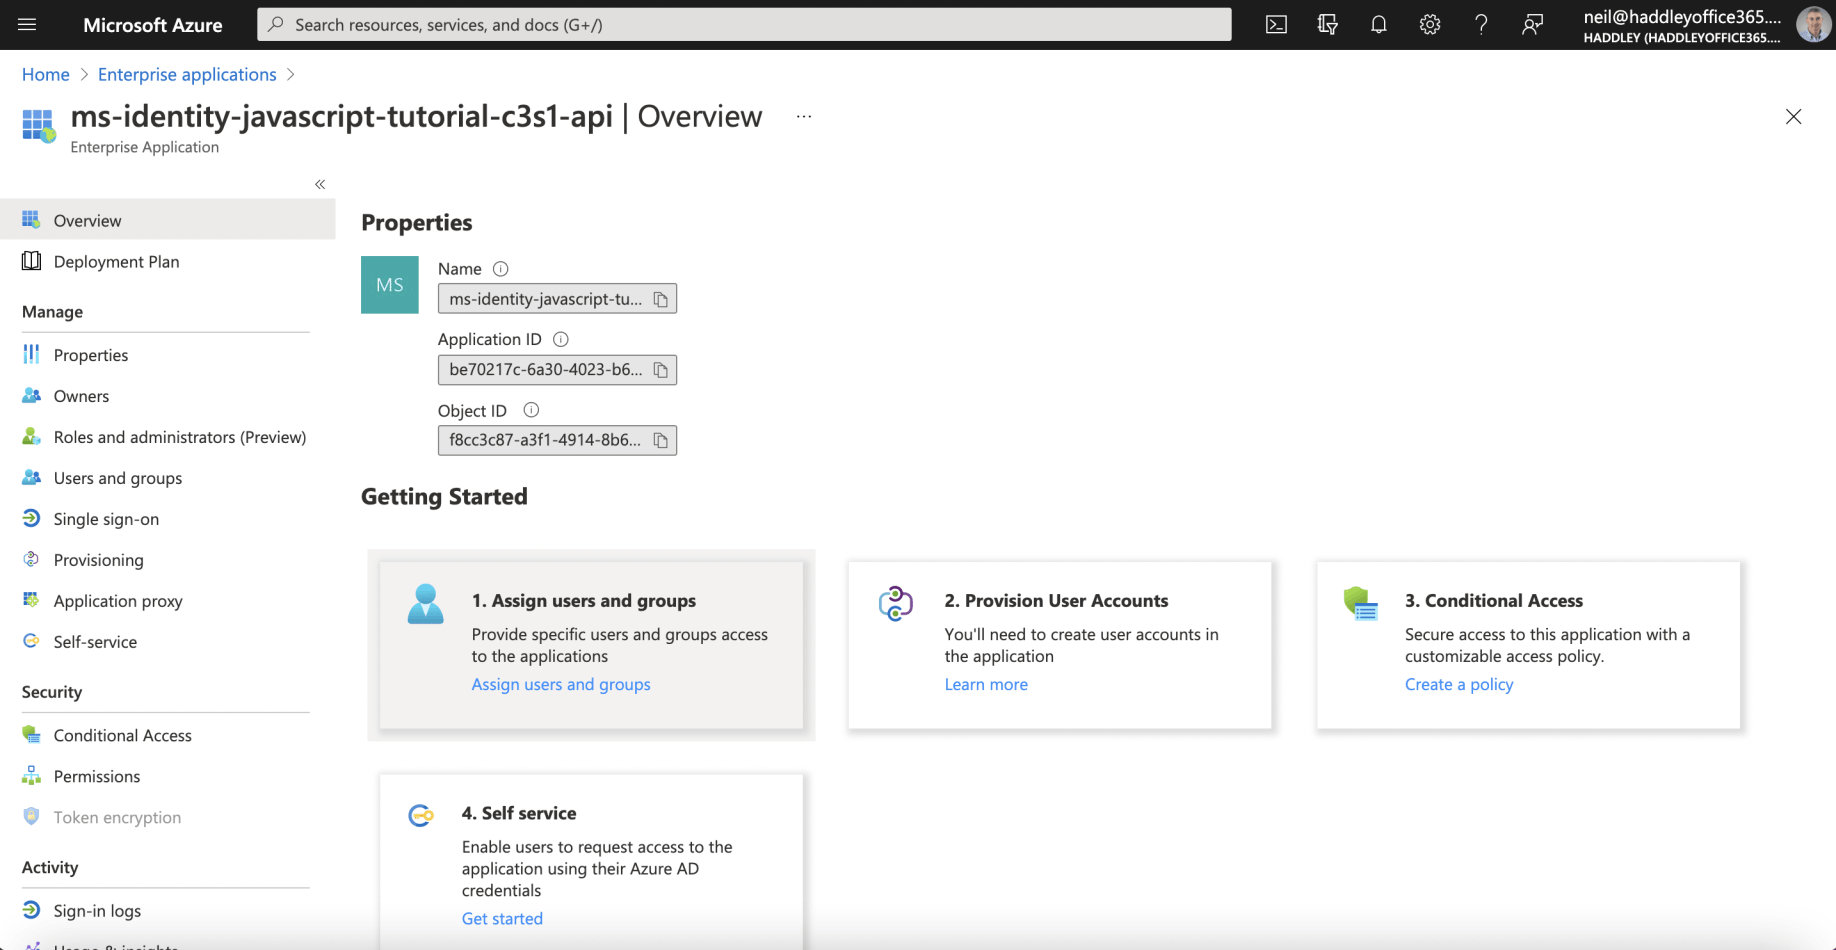
I reviewed the API's Enterprise Application configuration

I reviewed the Custom Connector's Enterprise Application configuration
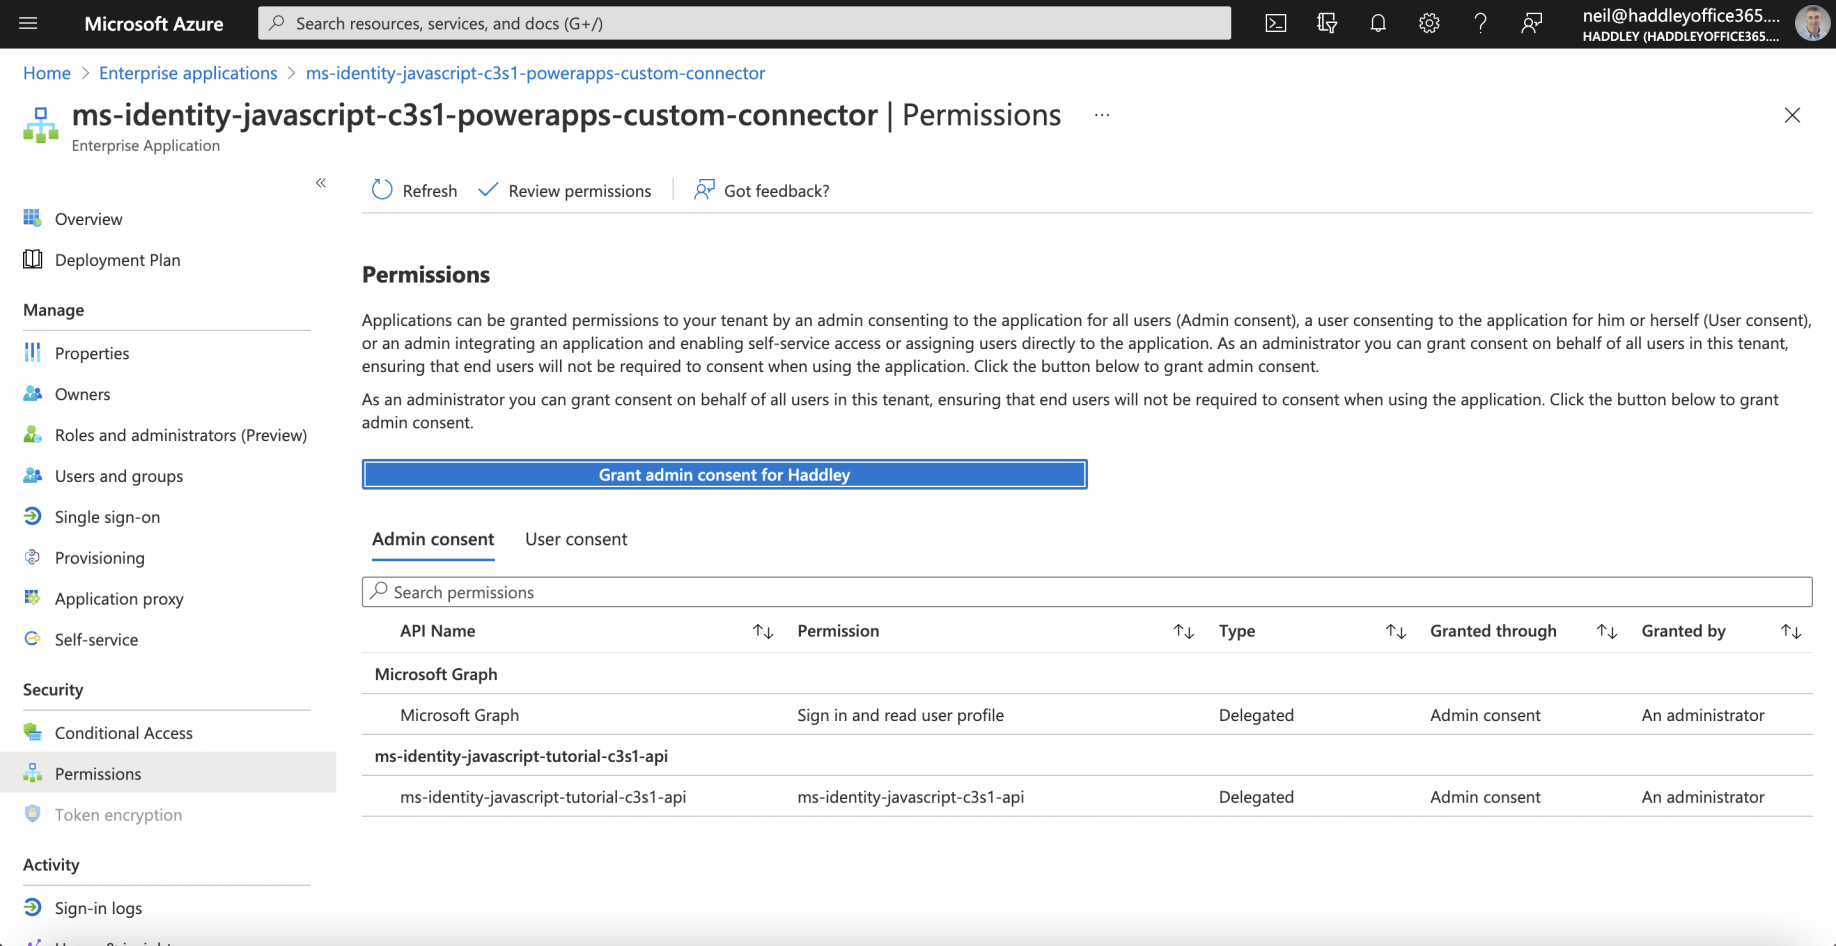
I reviewed the Custom Connector's Permissions
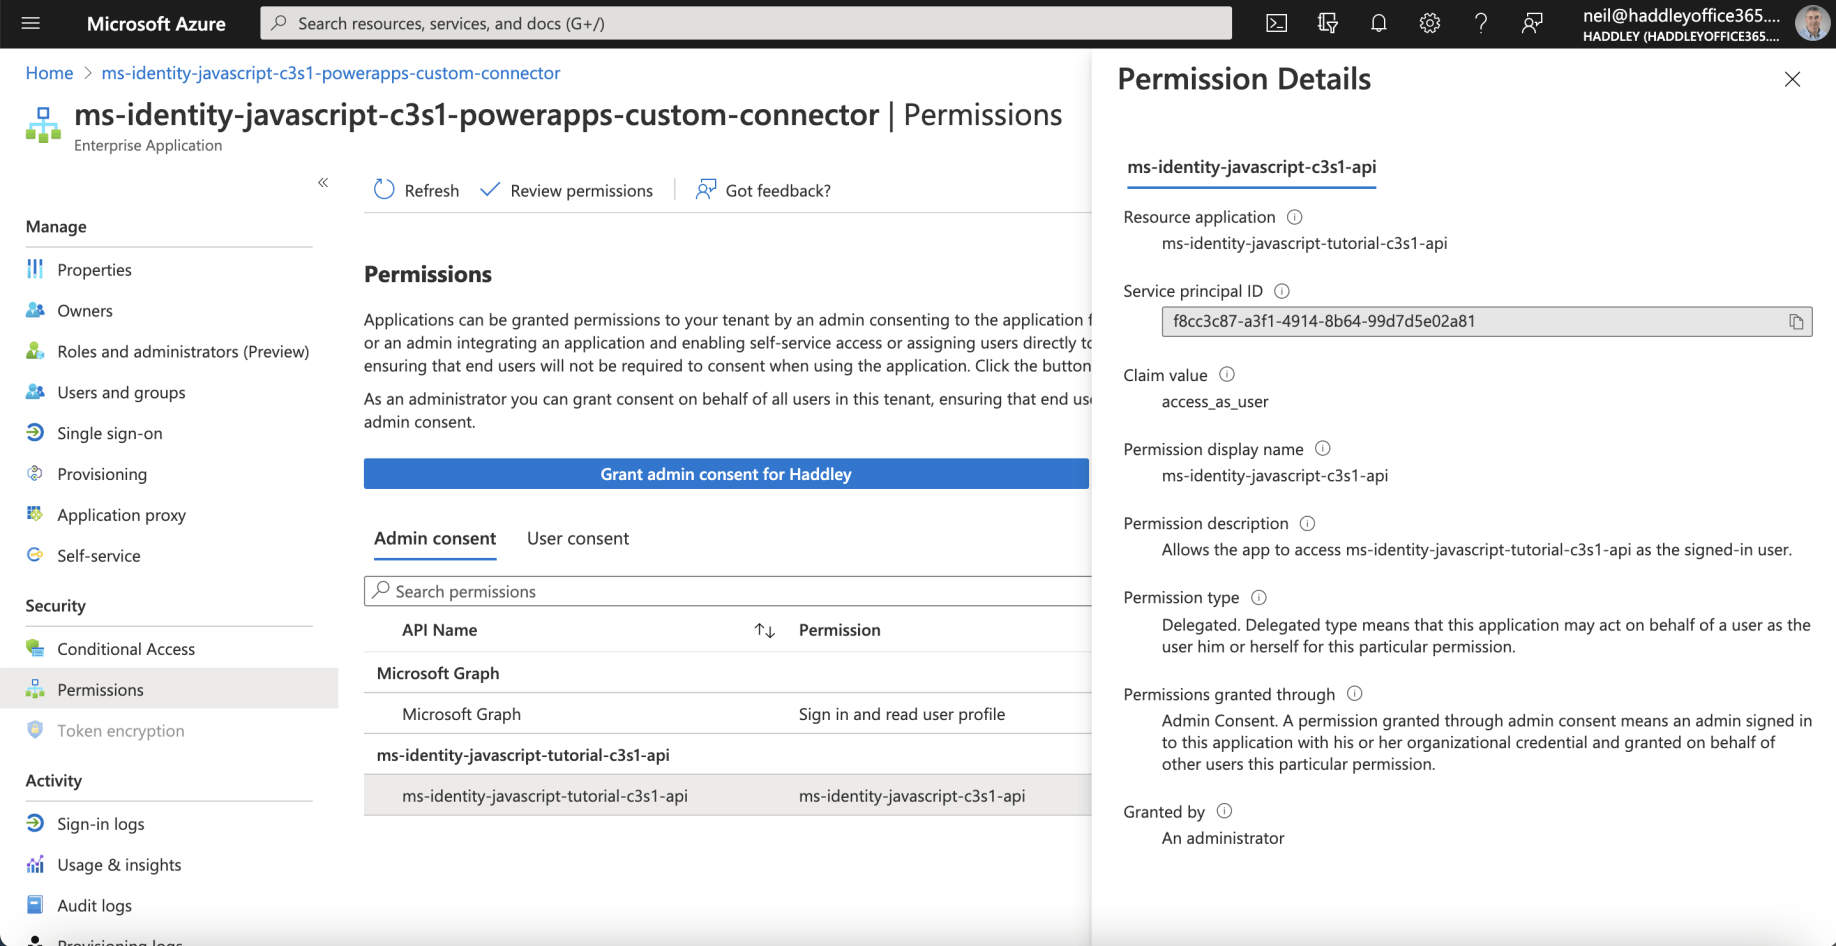
I reviewed the Permission Details
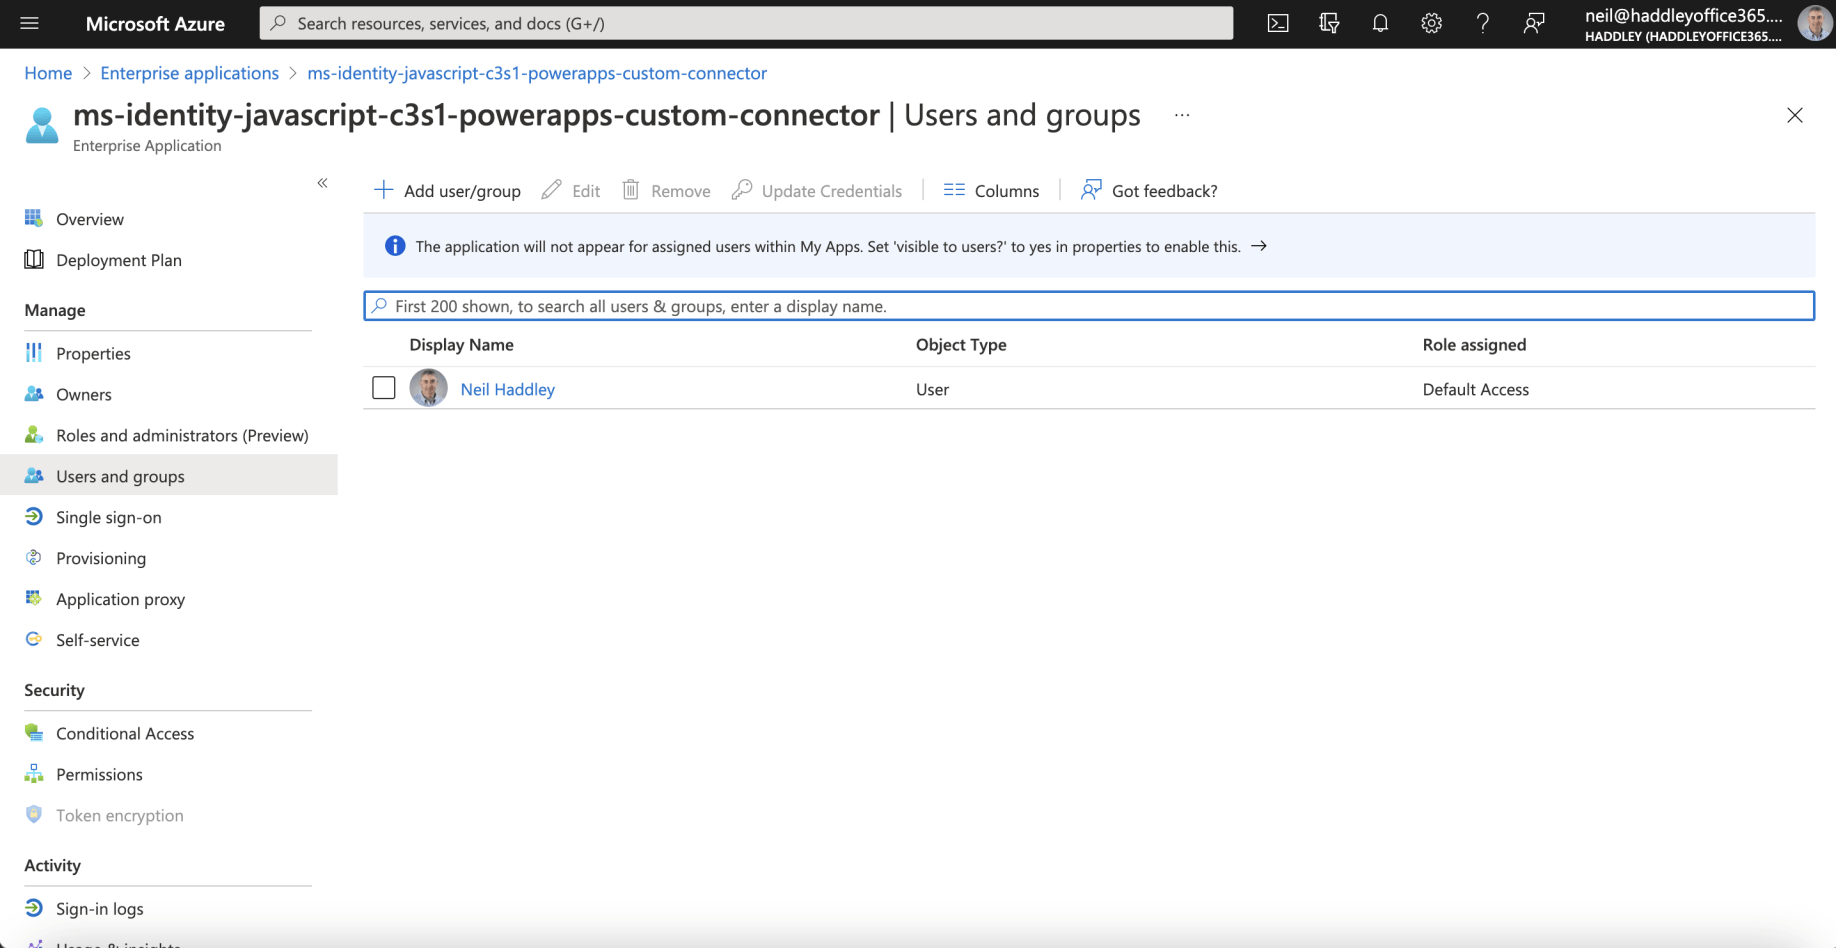
I reviewed the Custom Connector's Users and Groups

I reviewed the Custom Connector's Properties