Internet of Things (Part 1)
Neil Haddley • March 3, 2021
ESP8266 is a low-cost Wi-Fi microchip, with a full TCP/IP stack and microcontroller capability.
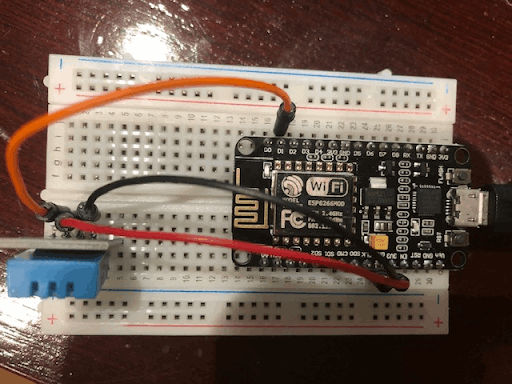
Breadboard
Here an ESP8266 device is connected to a DHT11 temperature and humidity sensor.
With the hardware assembled, I created and configured the Internet of Things (IoT) software.
An MQTT publish/subscribe broker is at the center of the software configuration. I uploaded code to the ESP8266 that allowed the ESP8266 device to communicate with other devices via the MQTT broker.
ESP8266 with DHT Sensor
Arduino IDE setup
The Arduino Integrated Development Environment (IDE) can be used to create and upload C++ code to an ESP8266.
To add support for ESP8266 boards to the Arduino IDE, I selected the "Arduino|Preferences..." menu item and added this url to the "additional boards manager" text box:
http://arduino.esp8266.com/stable/package_esp8266com_index.json
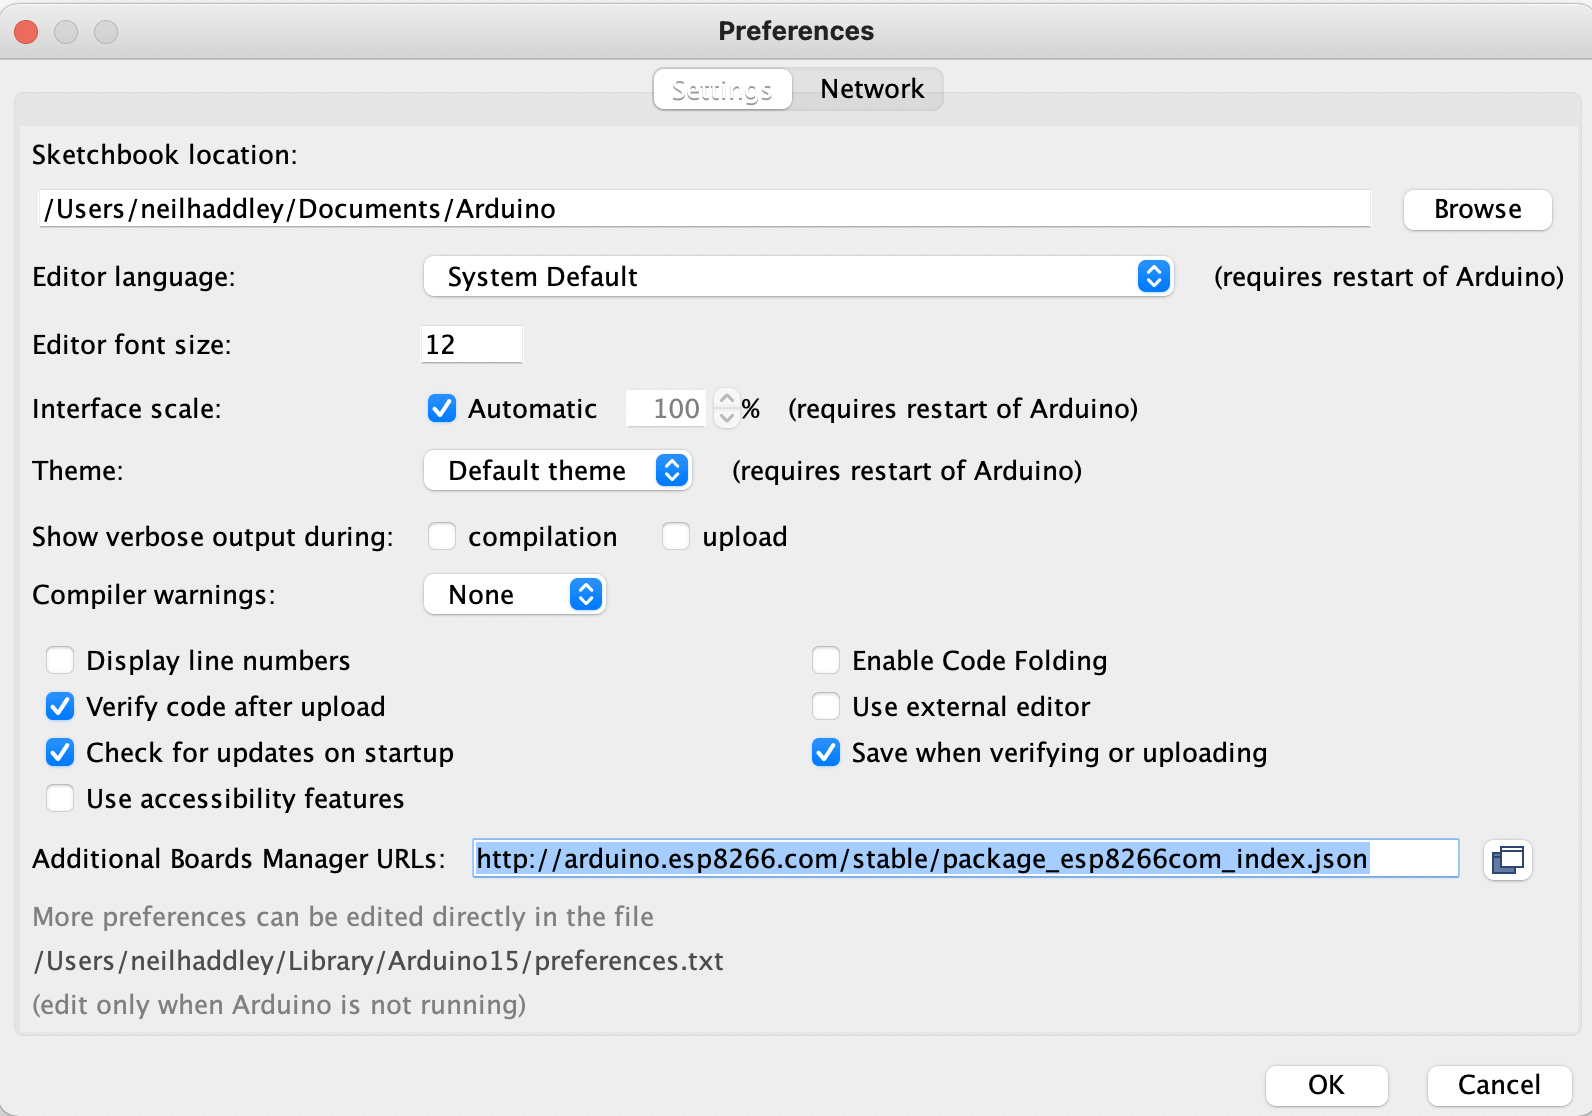
I reviewed Arduino IDE Preferences
Support for the ESP8266 board
I used the "Tools|Board|Boards Manager..." menu item to install support for the ESP8266 boards.

I opened Boards Manager...
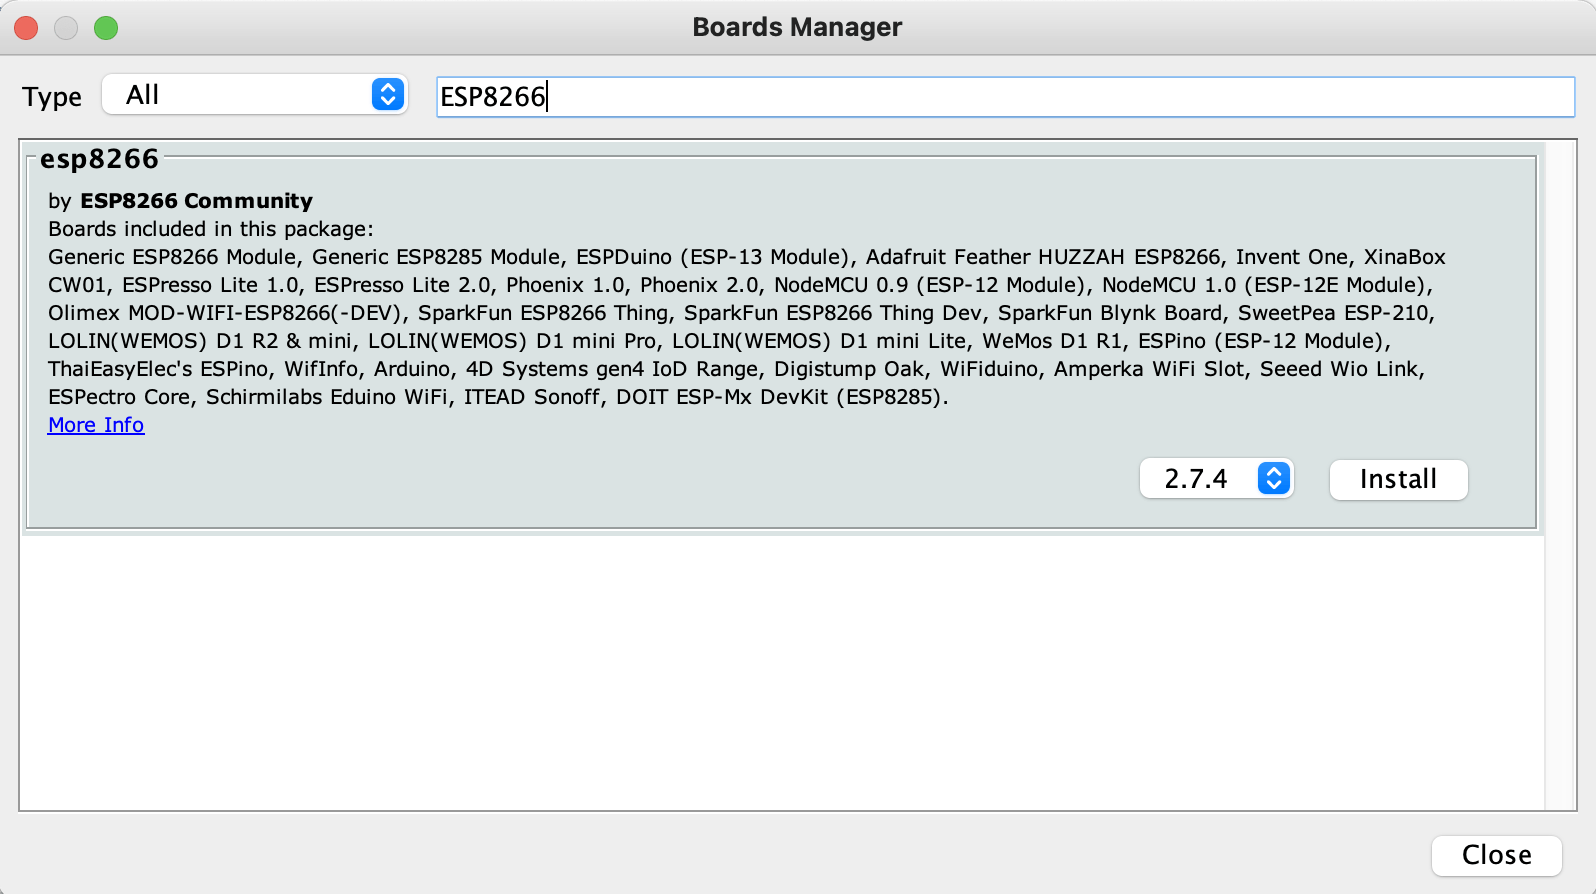
I installed the Boards package
GitHub boards
The ESP8266 boards information is maintained in a GitHub repository
https://github.com/esp8266/Arduino
Once the boards package was installed, I selected the correct ESP8266 board.
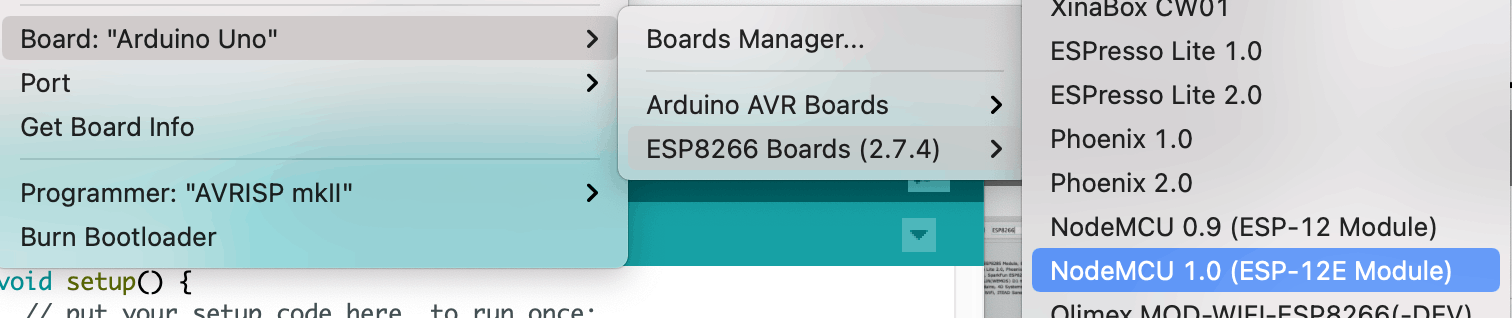
I selected "NodeMCU (ESP-12E Module)"
ESP8622 Libraries
I downloaded Arduino libraries using the "Tools|Manage Libraries..." menu item.
The PubSubClient library allows the ESP8266 to connect to an MQTT broker.
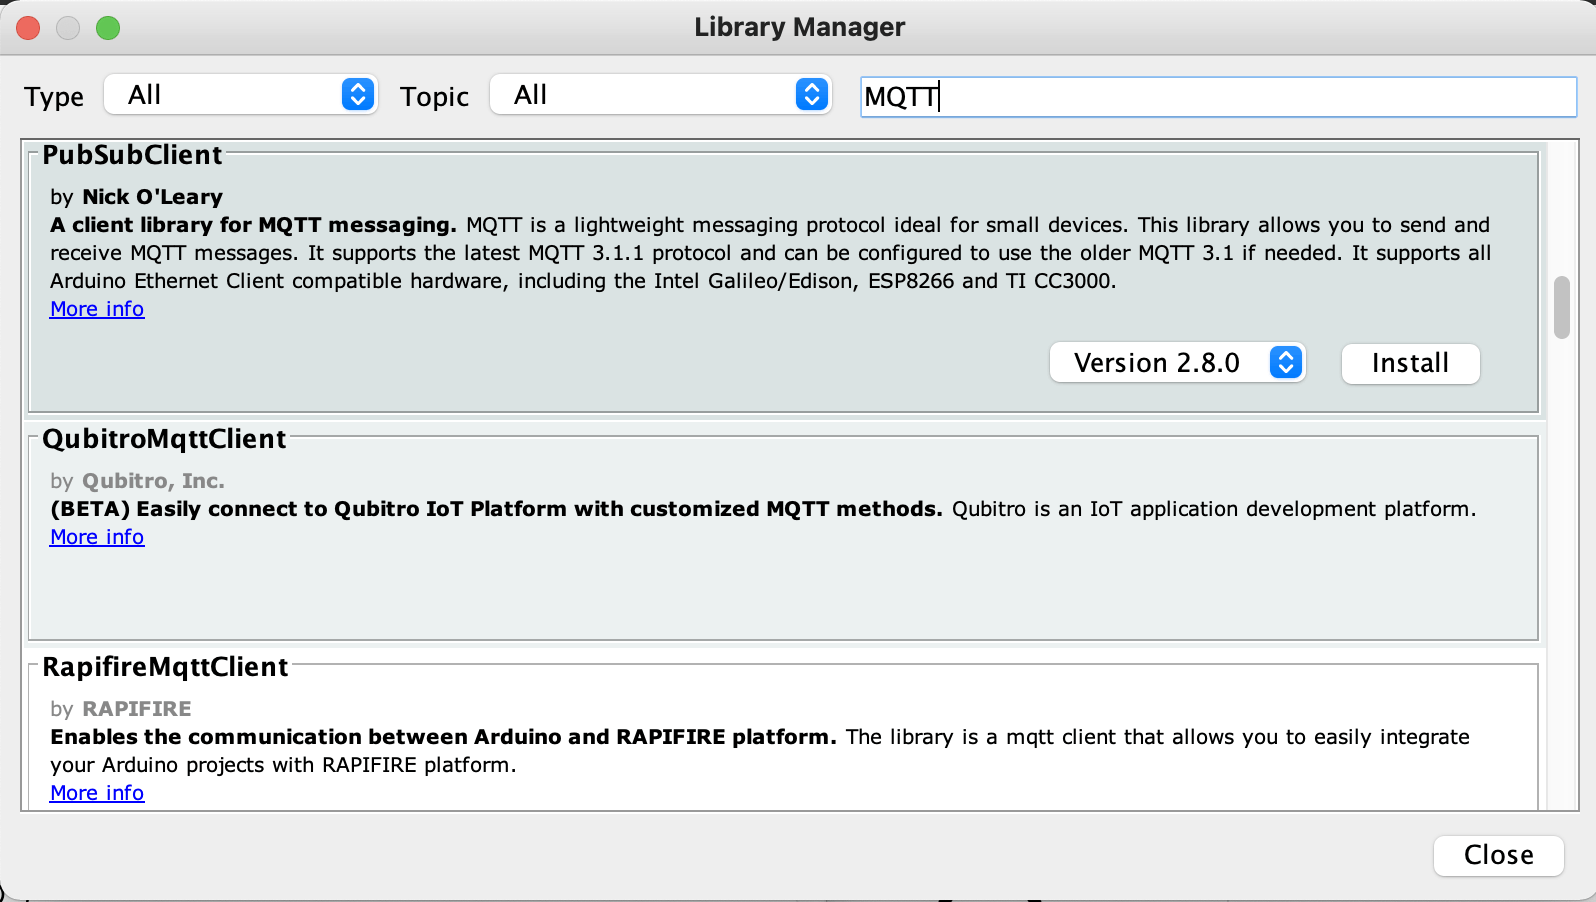
I installed the PubSubClient Library
PubSubLibrary example
knolleary/pubsubclient is licensed under the MIT License.
Once the PubSubClient Library was installed, the mqtt_esp8266 example sketch was added to the "File|Examples" Menu.
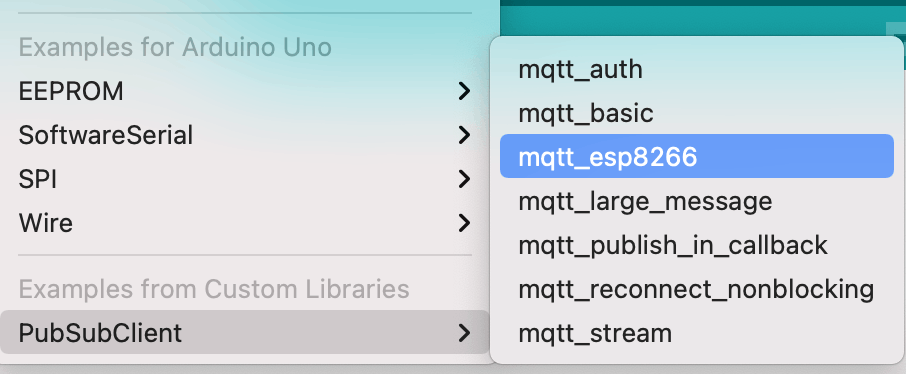
I reviewed an example ESP8266 sketch
The mqtt_esp8266 example sketch
The mqtt_esp8266 example sketch subscribes to an MQTT server's "inTopic" messages.
When an "inTopic" message is received by the ESP8266 the example code's "callback" function is executed. If the payload of the "inTopic" message is the string "1" the ESP8266's builtin LED is turned on.
Every two seconds the example sketch publishes a "hello world" message to "outTopic".
MQTT
MQTT is a publish/subscribe messaging system commonly used by IoT devices.
The 'eclipse-mosquitto' Docker container image can be used to establish a test MQTT broker.
BASH
1$ docker run -it -p 1883:1883 -p 9001:9001 eclipse-mosquitto:1.4.8
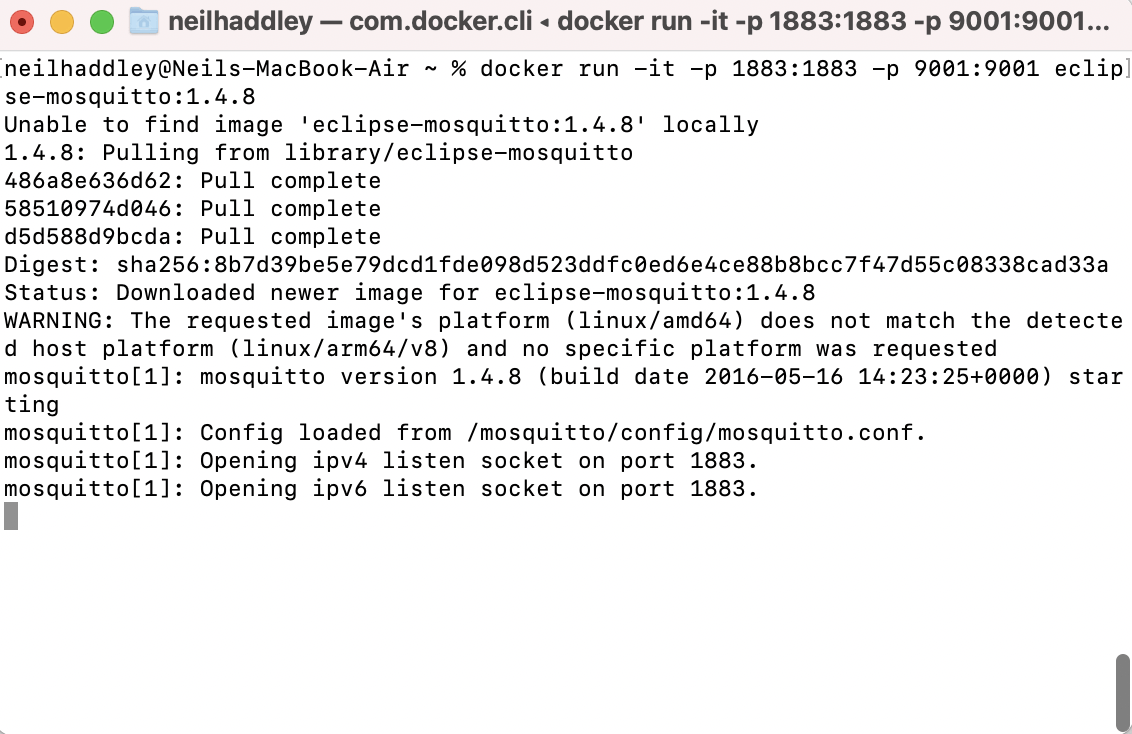
I ran the eclipse-mosquitto Docker image
MQTT Explorer
Desktop and mobile applications are able to connect to an MQTT broker showing messages that are being published. Desktop and mobile applications allow users to manually publish messages to an MQTT broker.

I connected MQTT Explorer to the MQTT broker
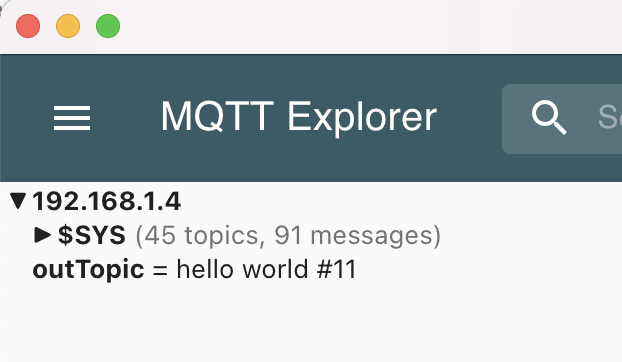
The ESP8266 published "outTopic" messages to the MQTT broker
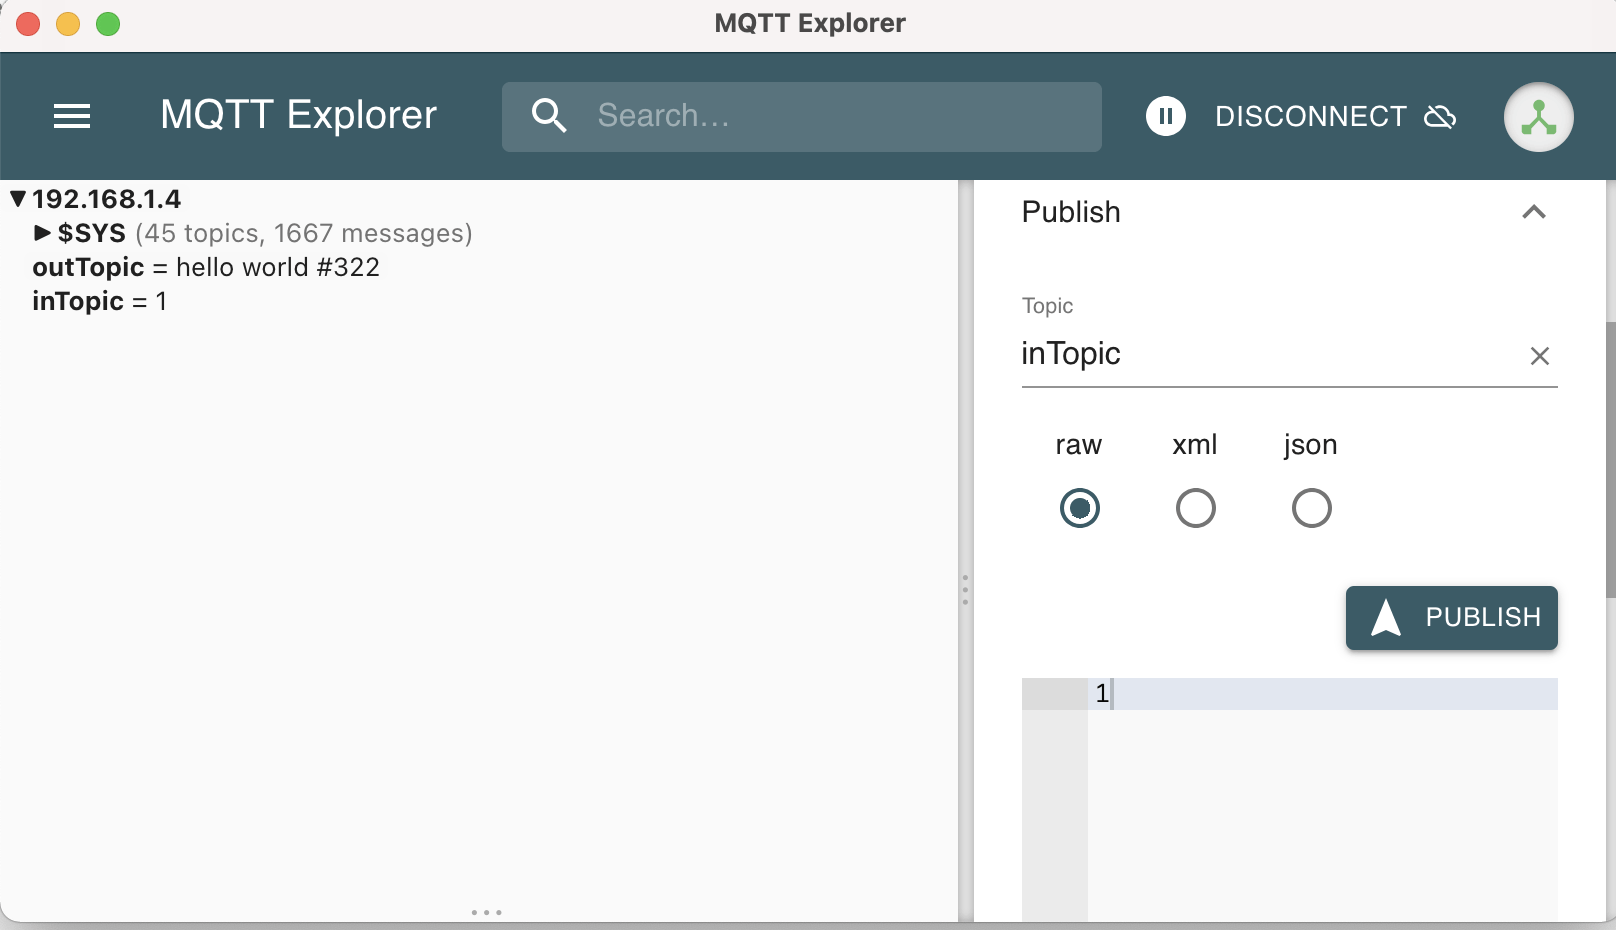
I published an "inTopic" message with payload "1" to the MQTT broker and the ESP8266's LED turned on.
mqtt_esp8266.ino
C++
1/*
2 Basic ESP8266 MQTT example
3 This sketch demonstrates the capabilities of the pubsub library in combination
4 with the ESP8266 board/library.
5 It connects to an MQTT server then:
6  - publishes "hello world" to the topic "outTopic" every two seconds
7  - subscribes to the topic "inTopic", printing out any messages
8    it receives. NB - it assumes the received payloads are strings not binary
9  - If the first character of the topic "inTopic" is an 1, switch ON the ESP Led,
10    else switch it off
11 It will reconnect to the server if the connection is lost using a blocking
12 reconnect function. See the 'mqtt_reconnect_nonblocking' example for how to
13 achieve the same result without blocking the main loop.
14 To install the ESP8266 board, (using Arduino 1.6.4+):
15  - Add the following 3rd party board manager under "File -> Preferences -> Additional Boards Manager URLs":
16       http://arduino.esp8266.com/stable/package_esp8266com_index.json
17  - Open the "Tools -> Board -> Board Manager" and click install for the ESP8266"
18  - Select your ESP8266 in "Tools -> Board"
19*/
20
21/**/
22
23#include <ESP8266WiFi.h>
24#include <PubSubClient.h>
25
26// Update these with values suitable for your network.
27
28const char* ssid = "........";
29const char* password = "........";
30const char* mqtt_server = "broker.mqtt-dashboard.com";
31
32WiFiClient espClient;
33PubSubClient client(espClient);
34unsigned long lastMsg = 0;
35#define MSG_BUFFER_SIZE	(50)
36char msg[MSG_BUFFER_SIZE];
37int value = 0;
38
39void setup_wifi() {
40
41  delay(10);
42  // We start by connecting to a WiFi network
43  Serial.println();
44  Serial.print("Connecting to ");
45  Serial.println(ssid);
46
47  WiFi.mode(WIFI_STA);
48  WiFi.begin(ssid, password);
49
50  while (WiFi.status() != WL_CONNECTED) {
51    delay(500);
52    Serial.print(".");
53  }
54
55  randomSeed(micros());
56
57  Serial.println("");
58  Serial.println("WiFi connected");
59  Serial.println("IP address: ");
60  Serial.println(WiFi.localIP());
61}
62
63void callback(char* topic, byte* payload, unsigned int length) {
64  Serial.print("Message arrived [");
65  Serial.print(topic);
66  Serial.print("] ");
67  for (int i = 0; i < length; i++) {
68    Serial.print((char)payload[i]);
69  }
70  Serial.println();
71
72  // Switch on the LED if an 1 was received as first character
73  if ((char)payload[0] == '1') {
74    digitalWrite(BUILTIN_LED, LOW);   // Turn the LED on (Note that LOW is the voltage level
75    // but actually the LED is on; this is because
76    // it is active low on the ESP-01)
77  } else {
78    digitalWrite(BUILTIN_LED, HIGH);  // Turn the LED off by making the voltage HIGH
79  }
80
81}
82
83void reconnect() {
84  // Loop until we're reconnected
85  while (!client.connected()) {
86    Serial.print("Attempting MQTT connection...");
87    // Create a random client ID
88    String clientId = "ESP8266Client-";
89    clientId += String(random(0xffff), HEX);
90    // Attempt to connect
91    if (client.connect(clientId.c_str())) {
92      Serial.println("connected");
93      // Once connected, publish an announcement...
94      client.publish("outTopic", "hello world");
95      // ... and resubscribe
96      client.subscribe("inTopic");
97    } else {
98      Serial.print("failed, rc=");
99      Serial.print(client.state());
100      Serial.println(" try again in 5 seconds");
101      // Wait 5 seconds before retrying
102      delay(5000);
103    }
104  }
105}
106
107void setup() {
108  pinMode(BUILTIN_LED, OUTPUT);     // Initialize the BUILTIN_LED pin as an output
109  Serial.begin(115200);
110  setup_wifi();
111  client.setServer(mqtt_server, 1883);
112  client.setCallback(callback);
113}
114
115void loop() {
116
117  if (!client.connected()) {
118    reconnect();
119  }
120  client.loop();
121
122  unsigned long now = millis();
123  if (now - lastMsg > 2000) {
124    lastMsg = now;
125    ++value;
126    snprintf (msg, MSG_BUFFER_SIZE, "hello world #%ld", value);
127    Serial.print("Publish message: ");
128    Serial.println(msg);
129    client.publish("outTopic", msg);
130  }
131}