I set up Unity for Meta Quest virtual reality (VR) development. I learned how to:
- Set up a Unity 3D project that runs on Meta Quest VR headsets
- Add VR interactions to a Unity scene
- Preview my app on a Meta Quest 3
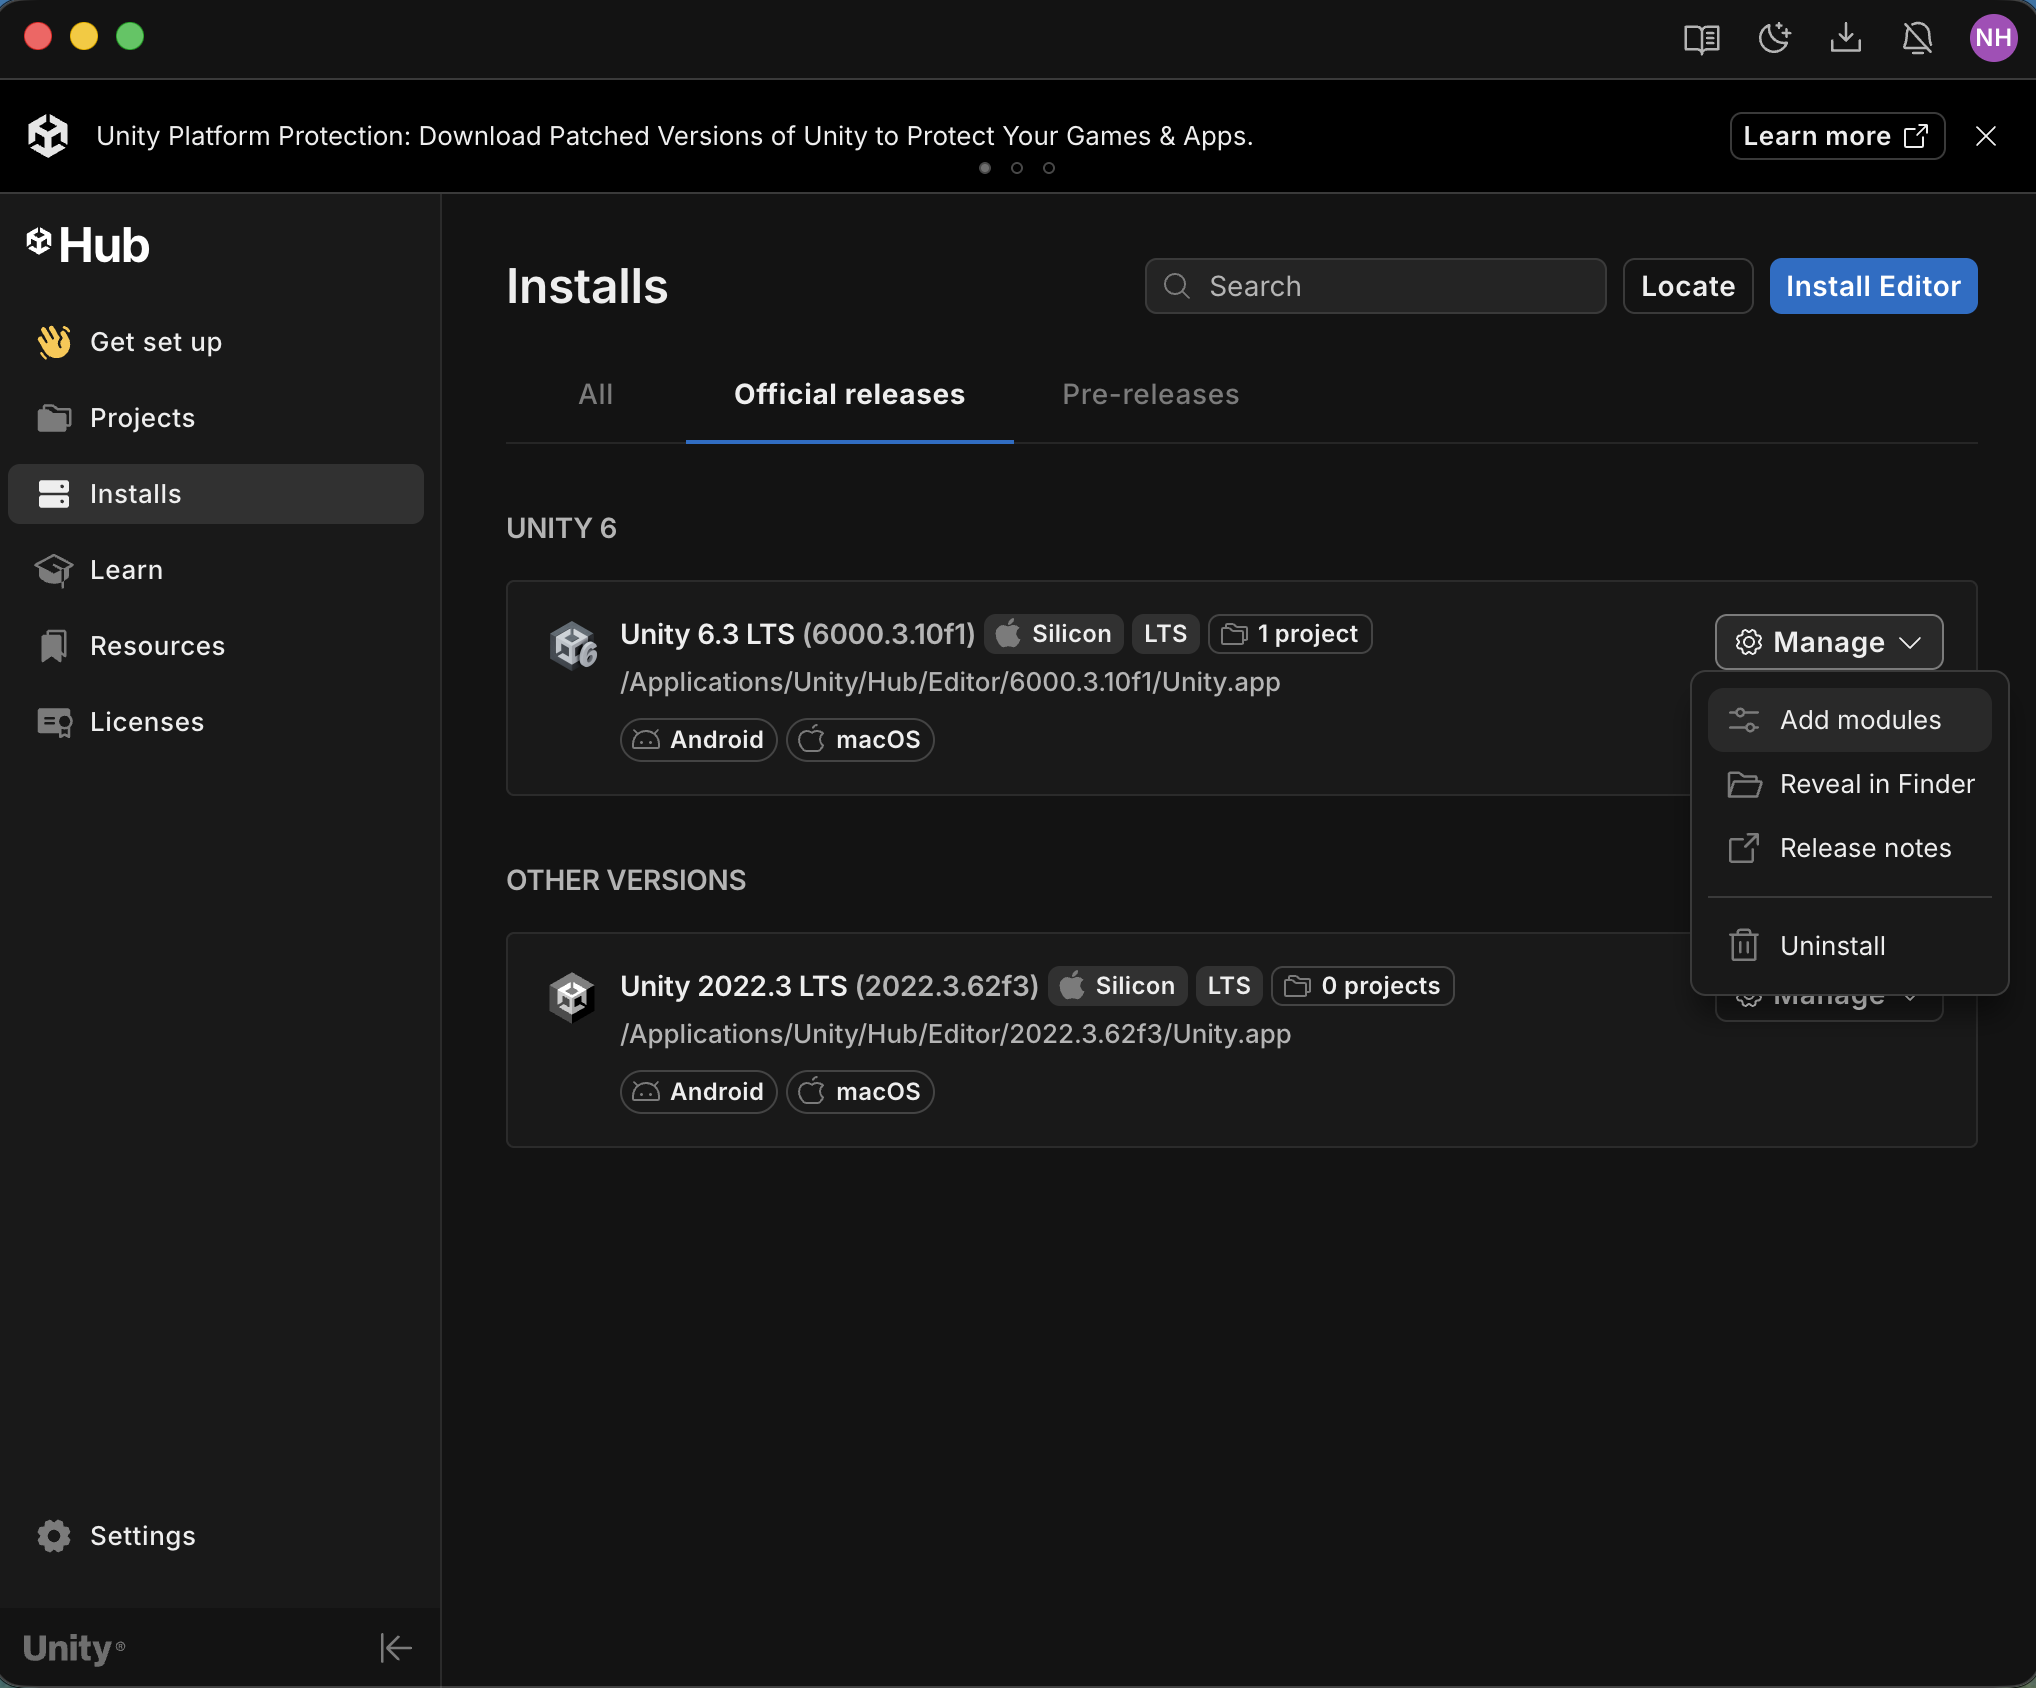
I installed Unity Hub
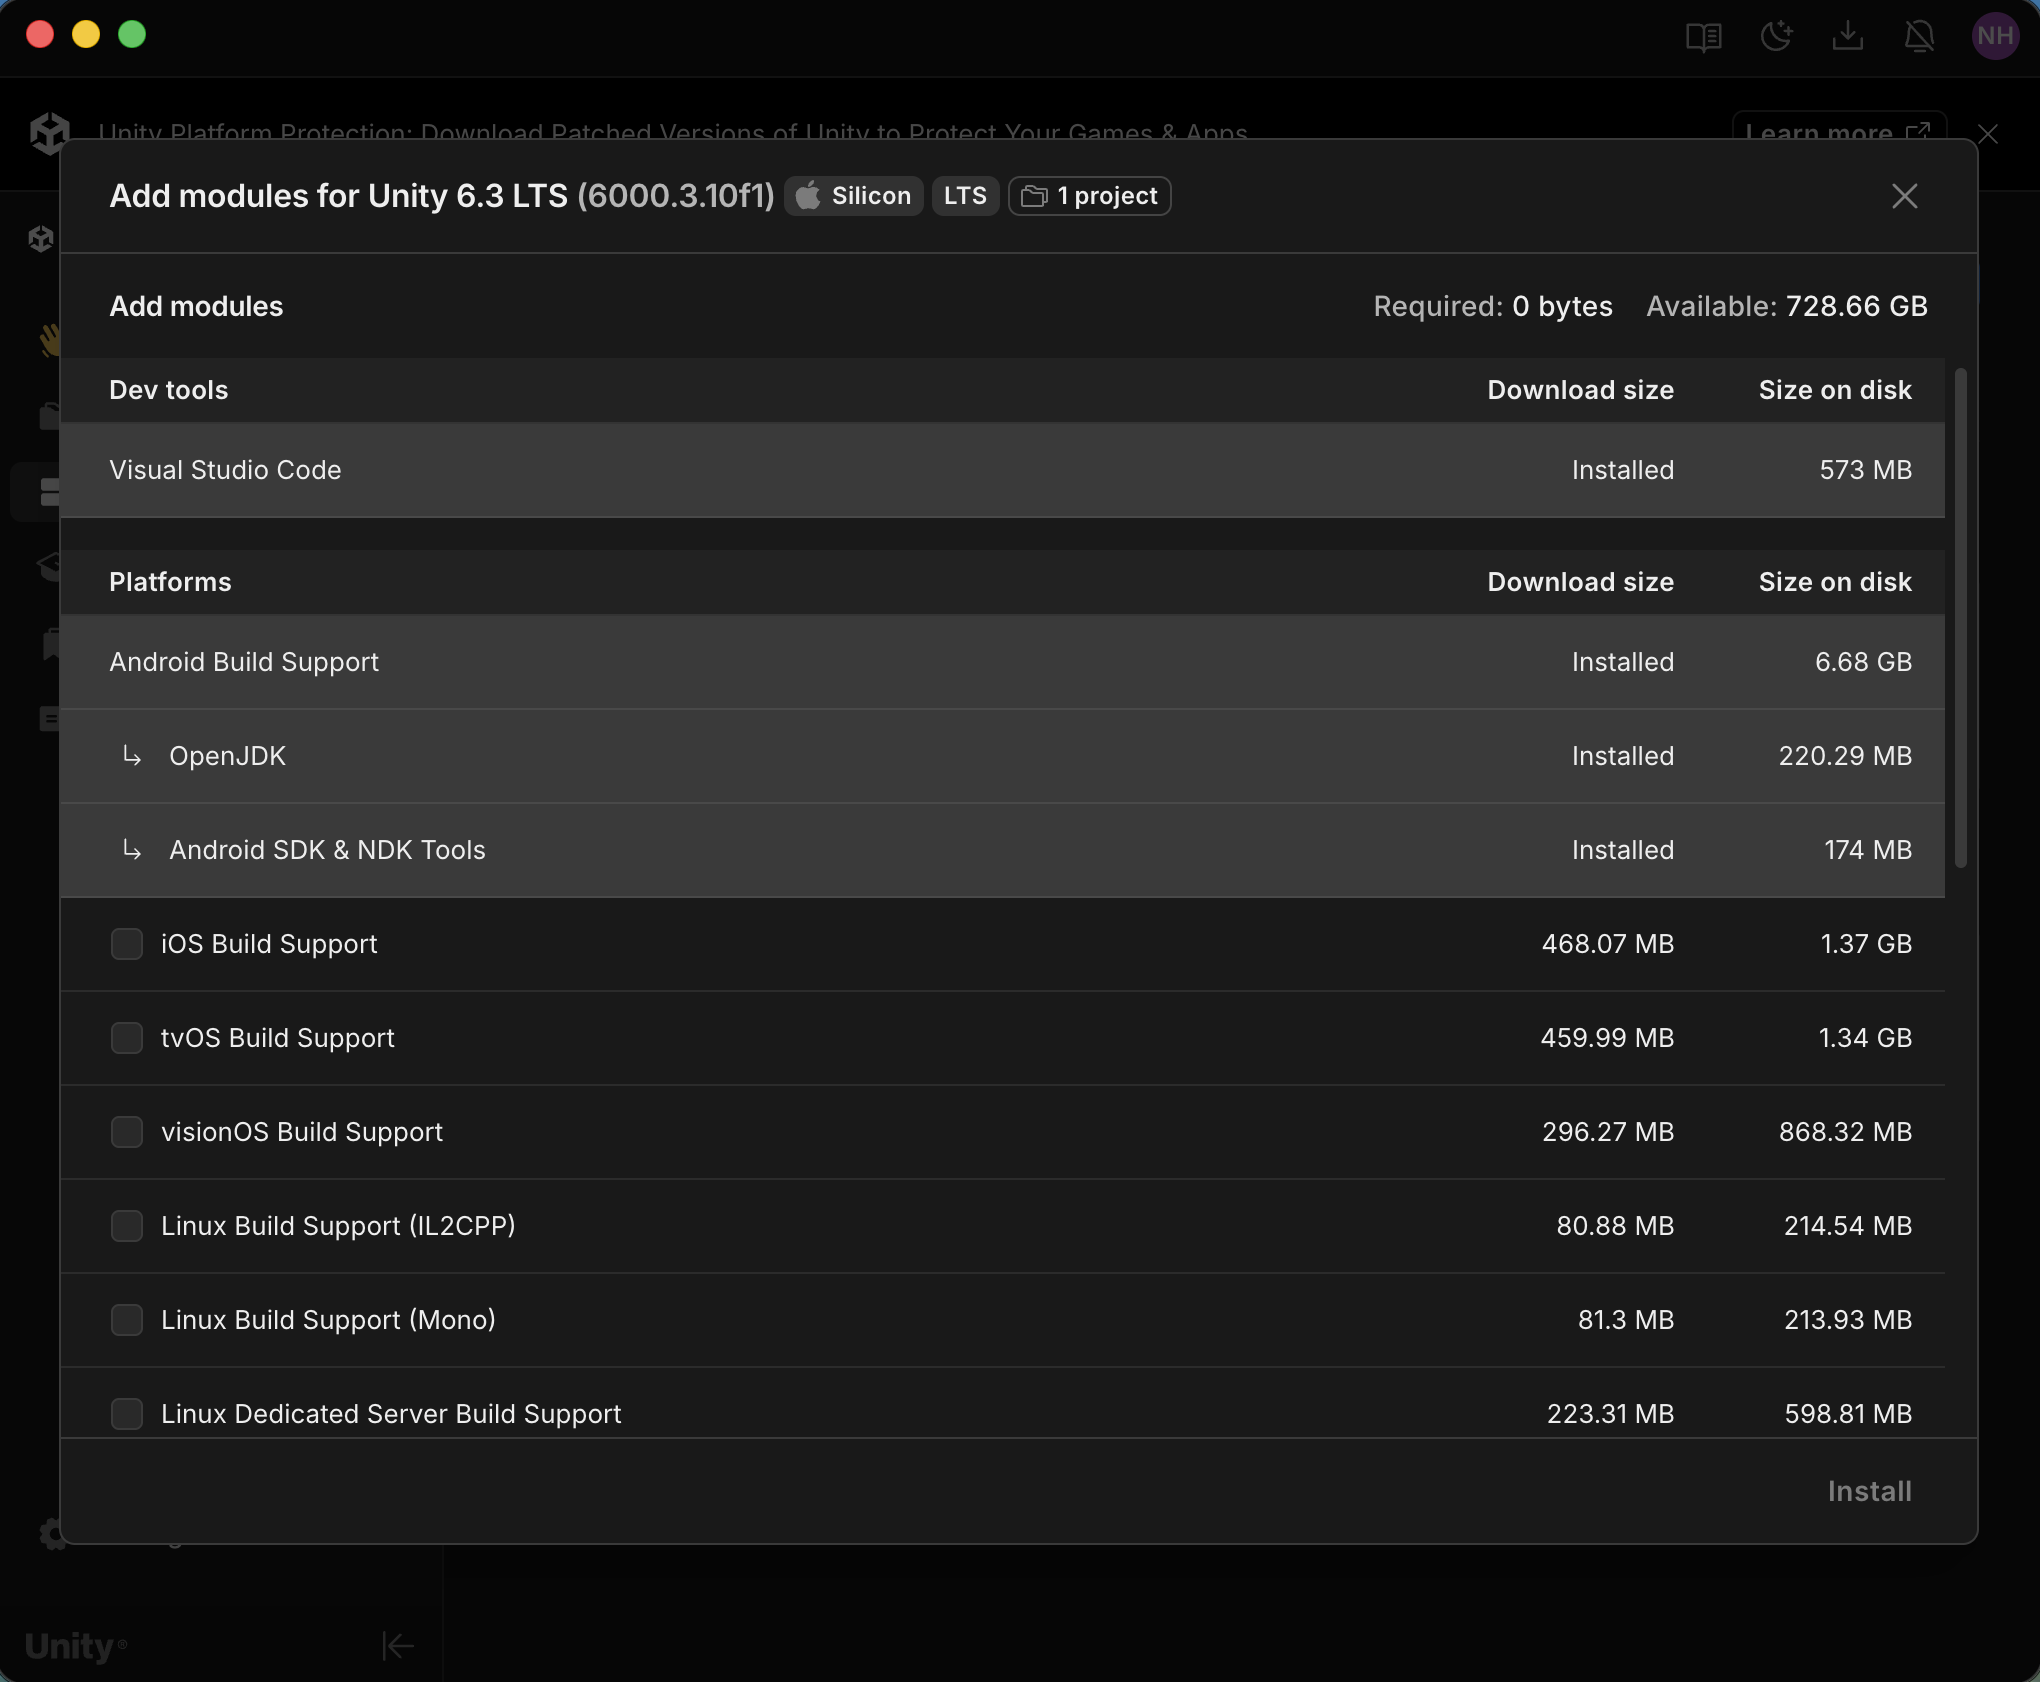
On the Add module screen, I selected the Android Build Support items in the Platforms section.

I opened the Meta XR Core SDK in Unity from the Asset Store
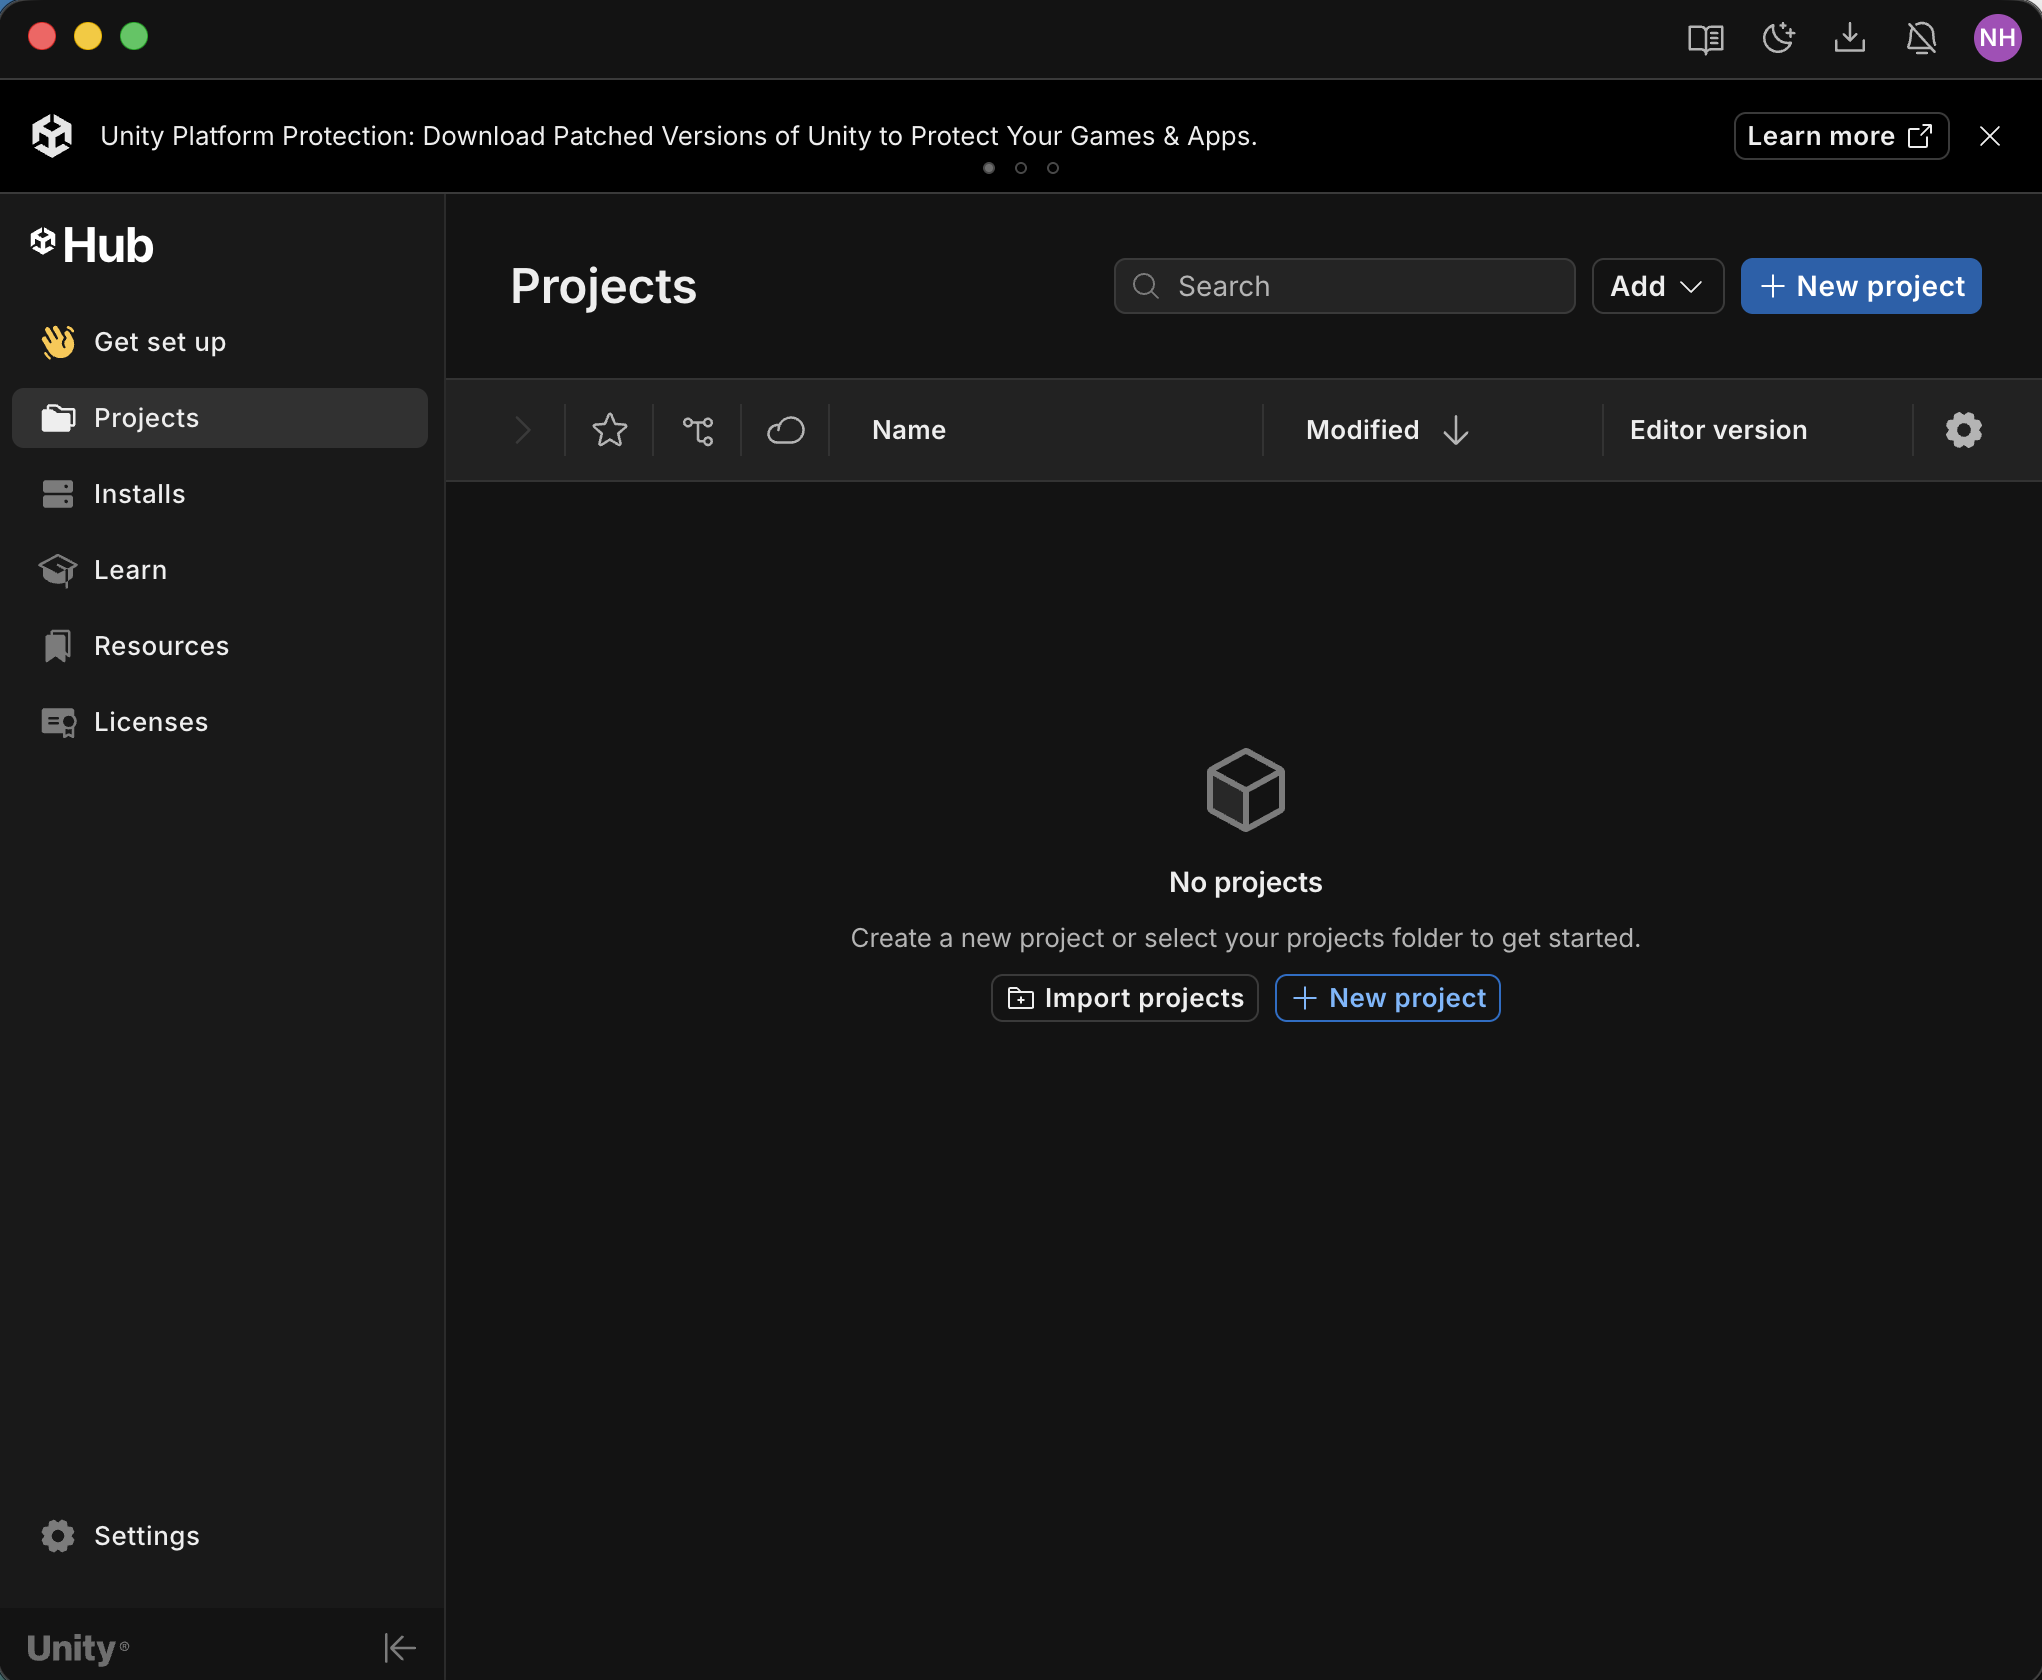
I selected Projects in the left navigation bar, and clicked New project.
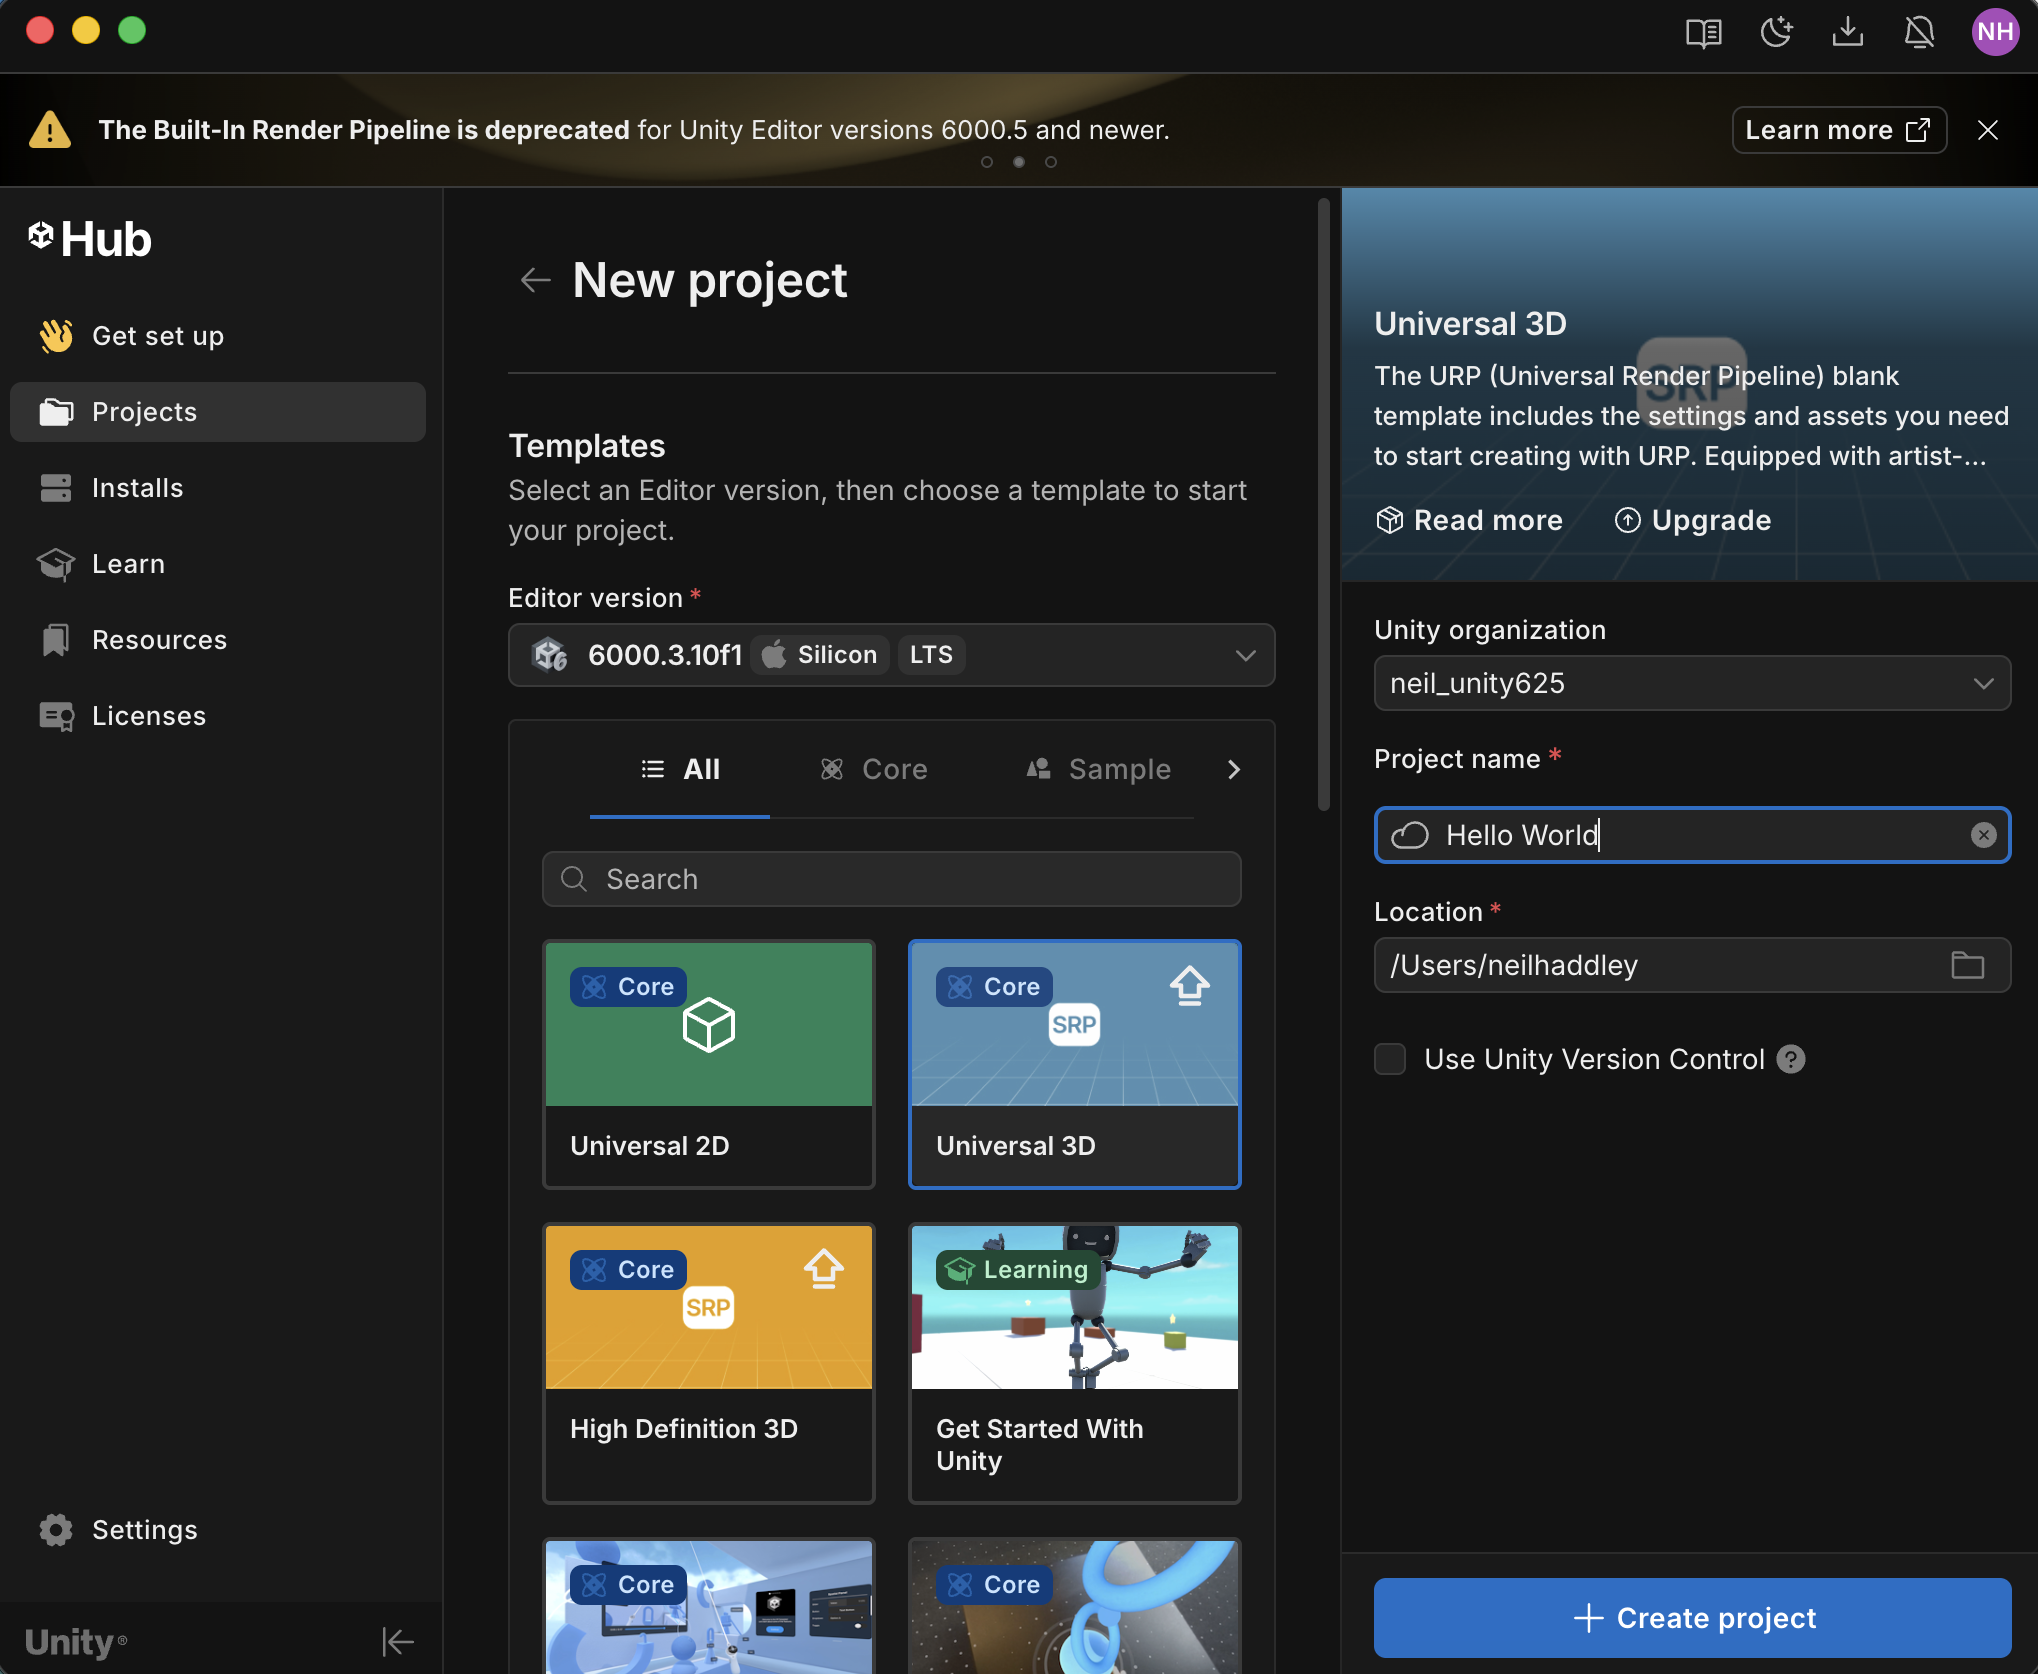
I selected the Universal 3D template
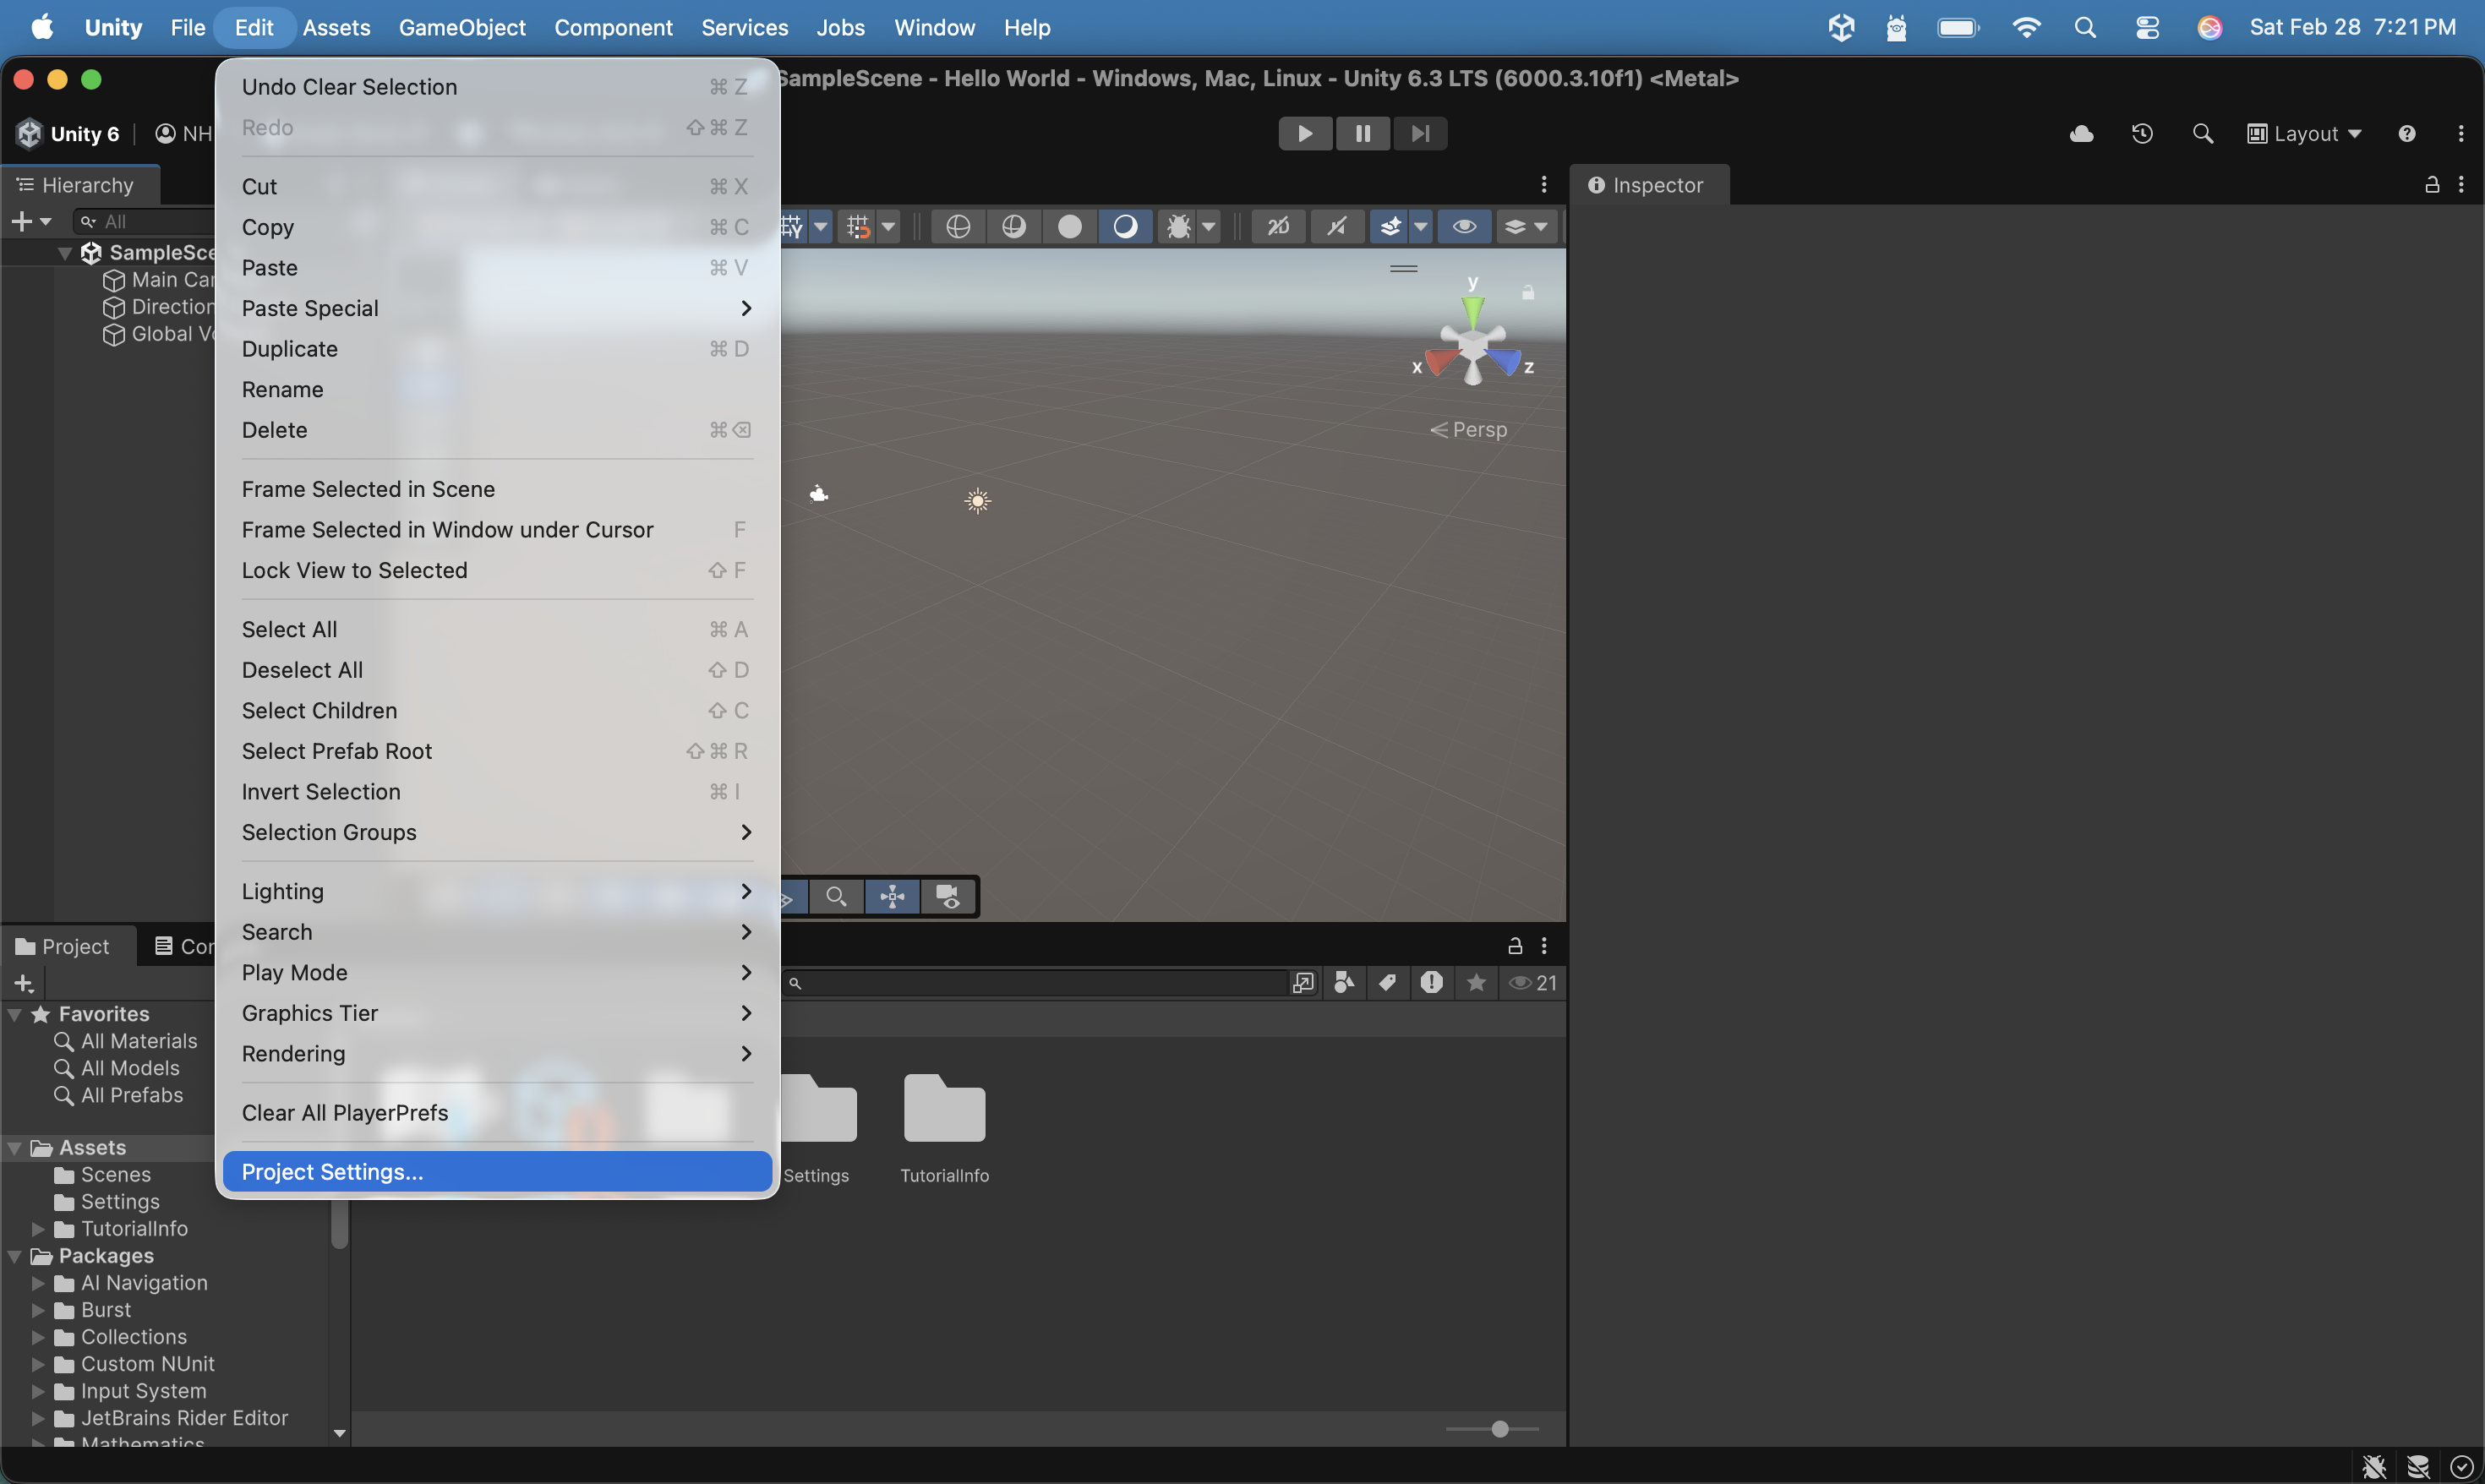
I opened the project and selected Edit > Project Settings
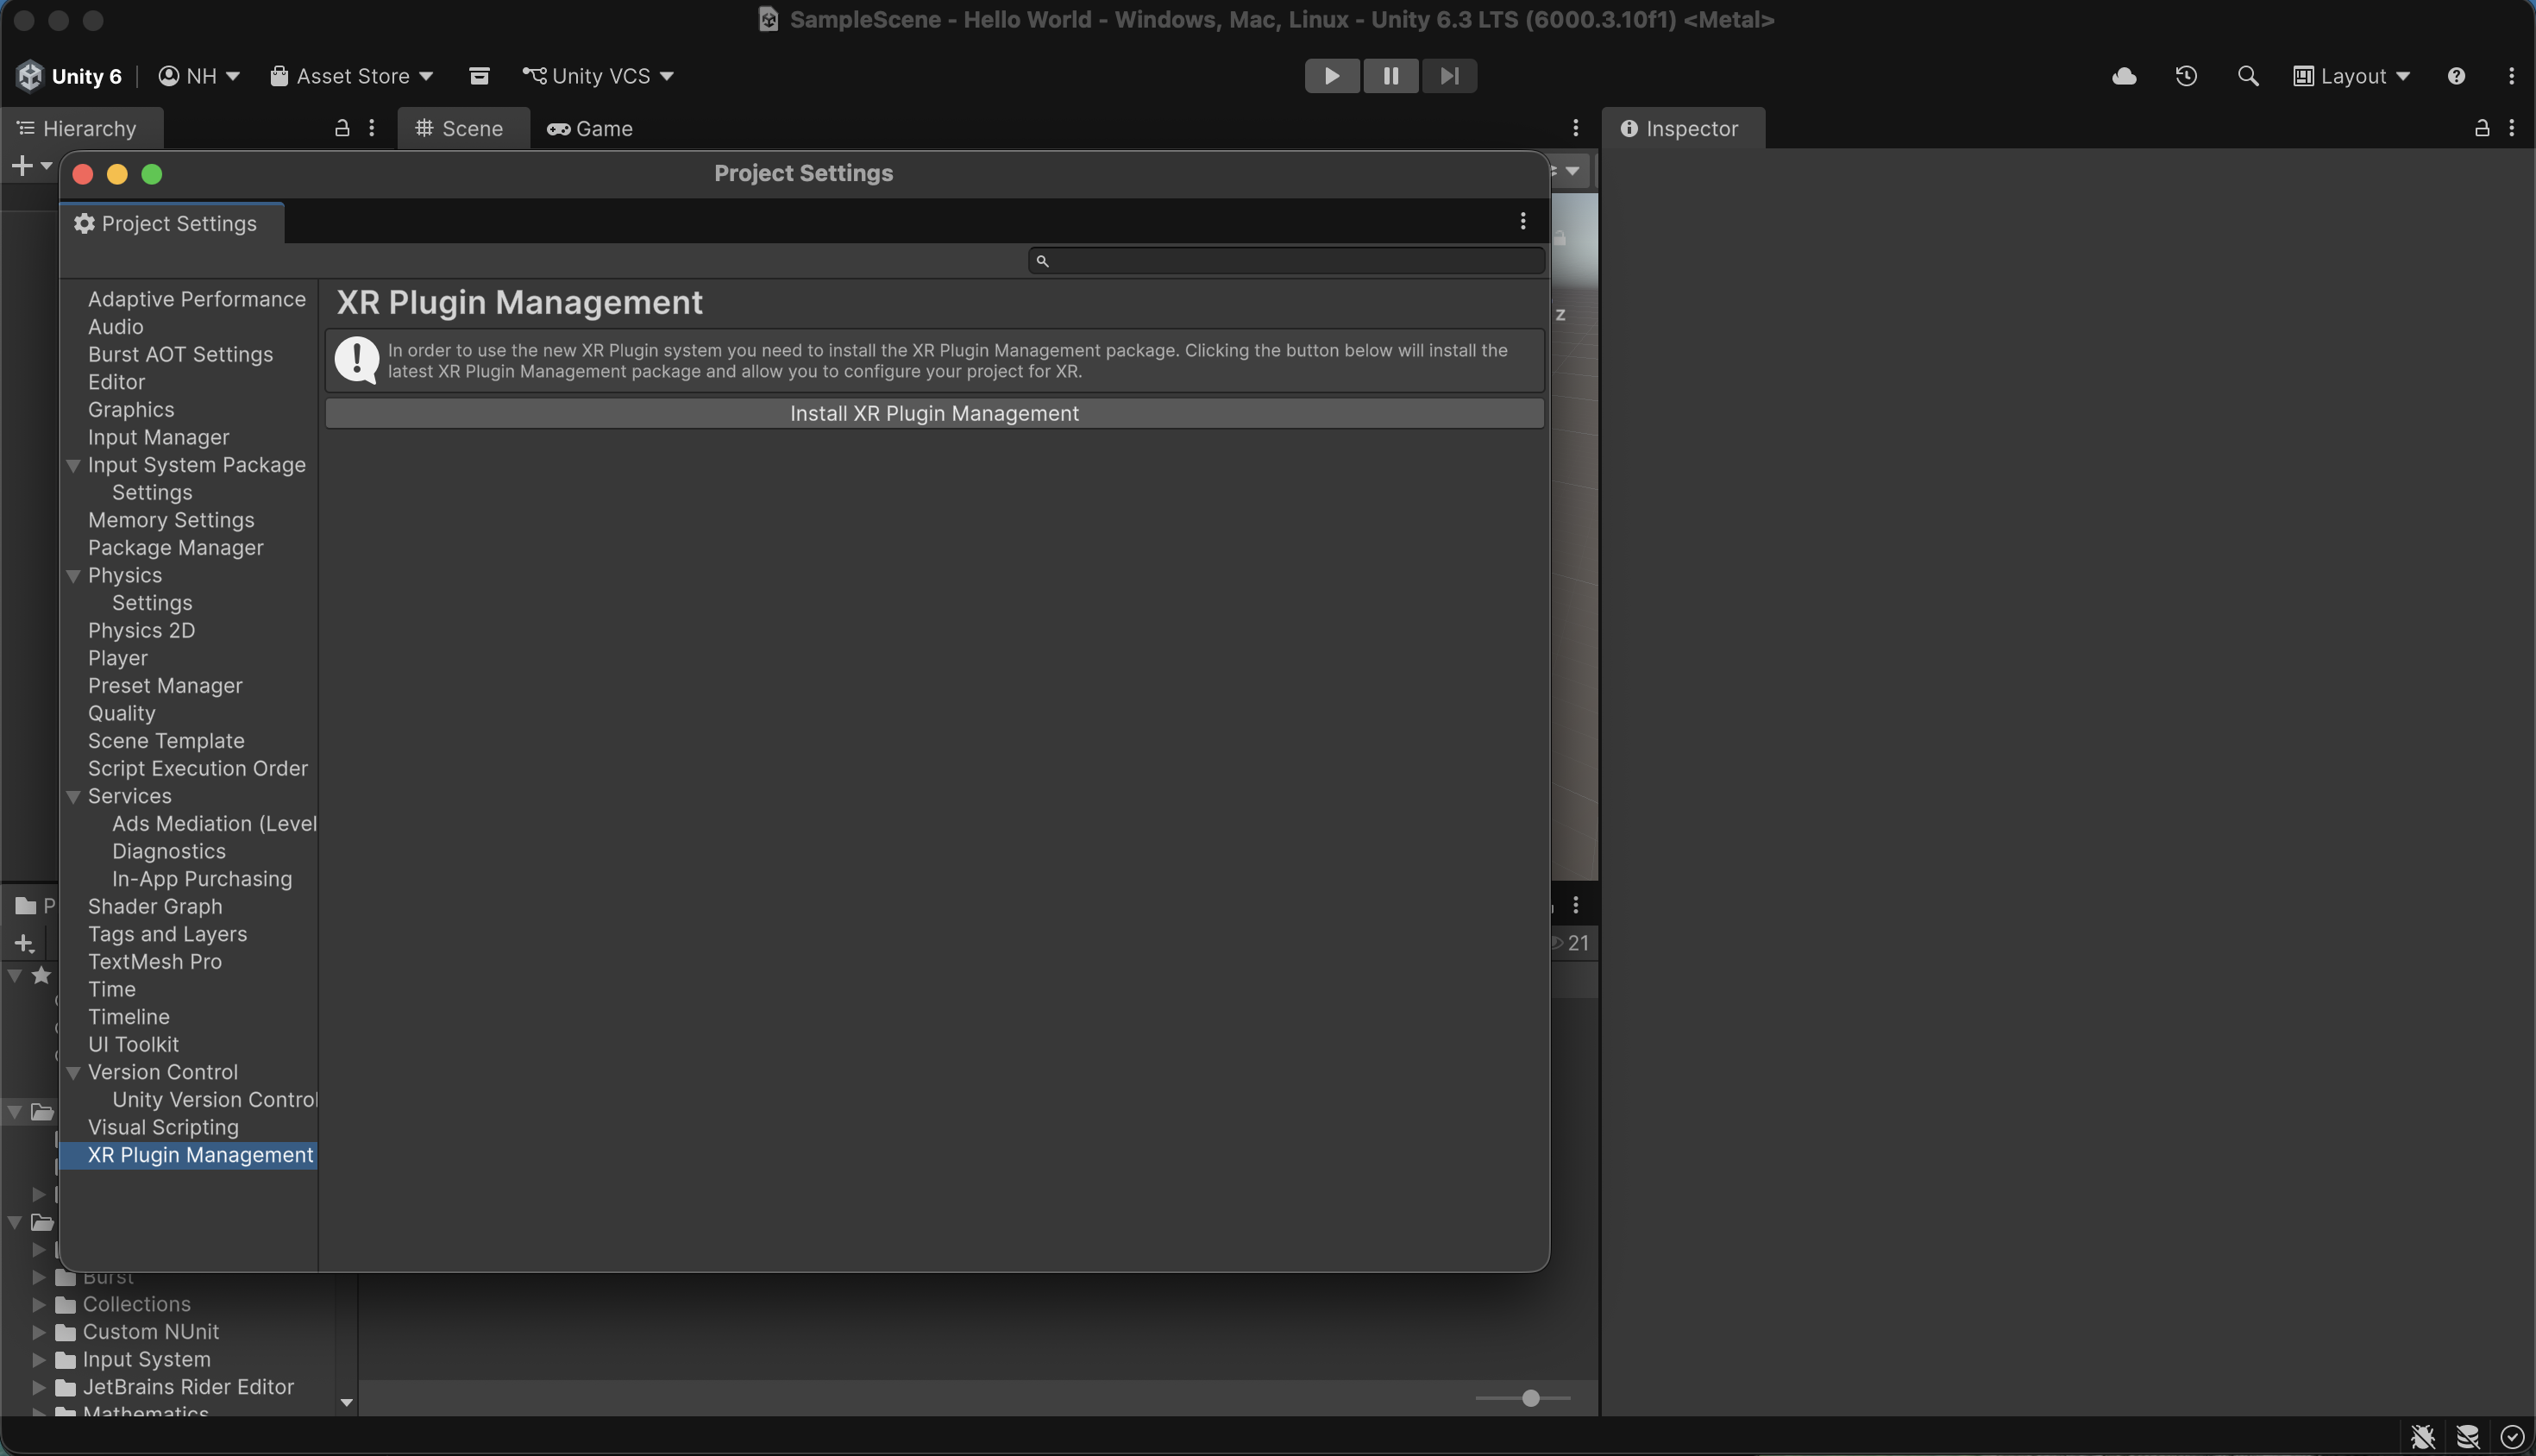
I selected the XR Plug-in Management menu item on the left of the Project Settings window.
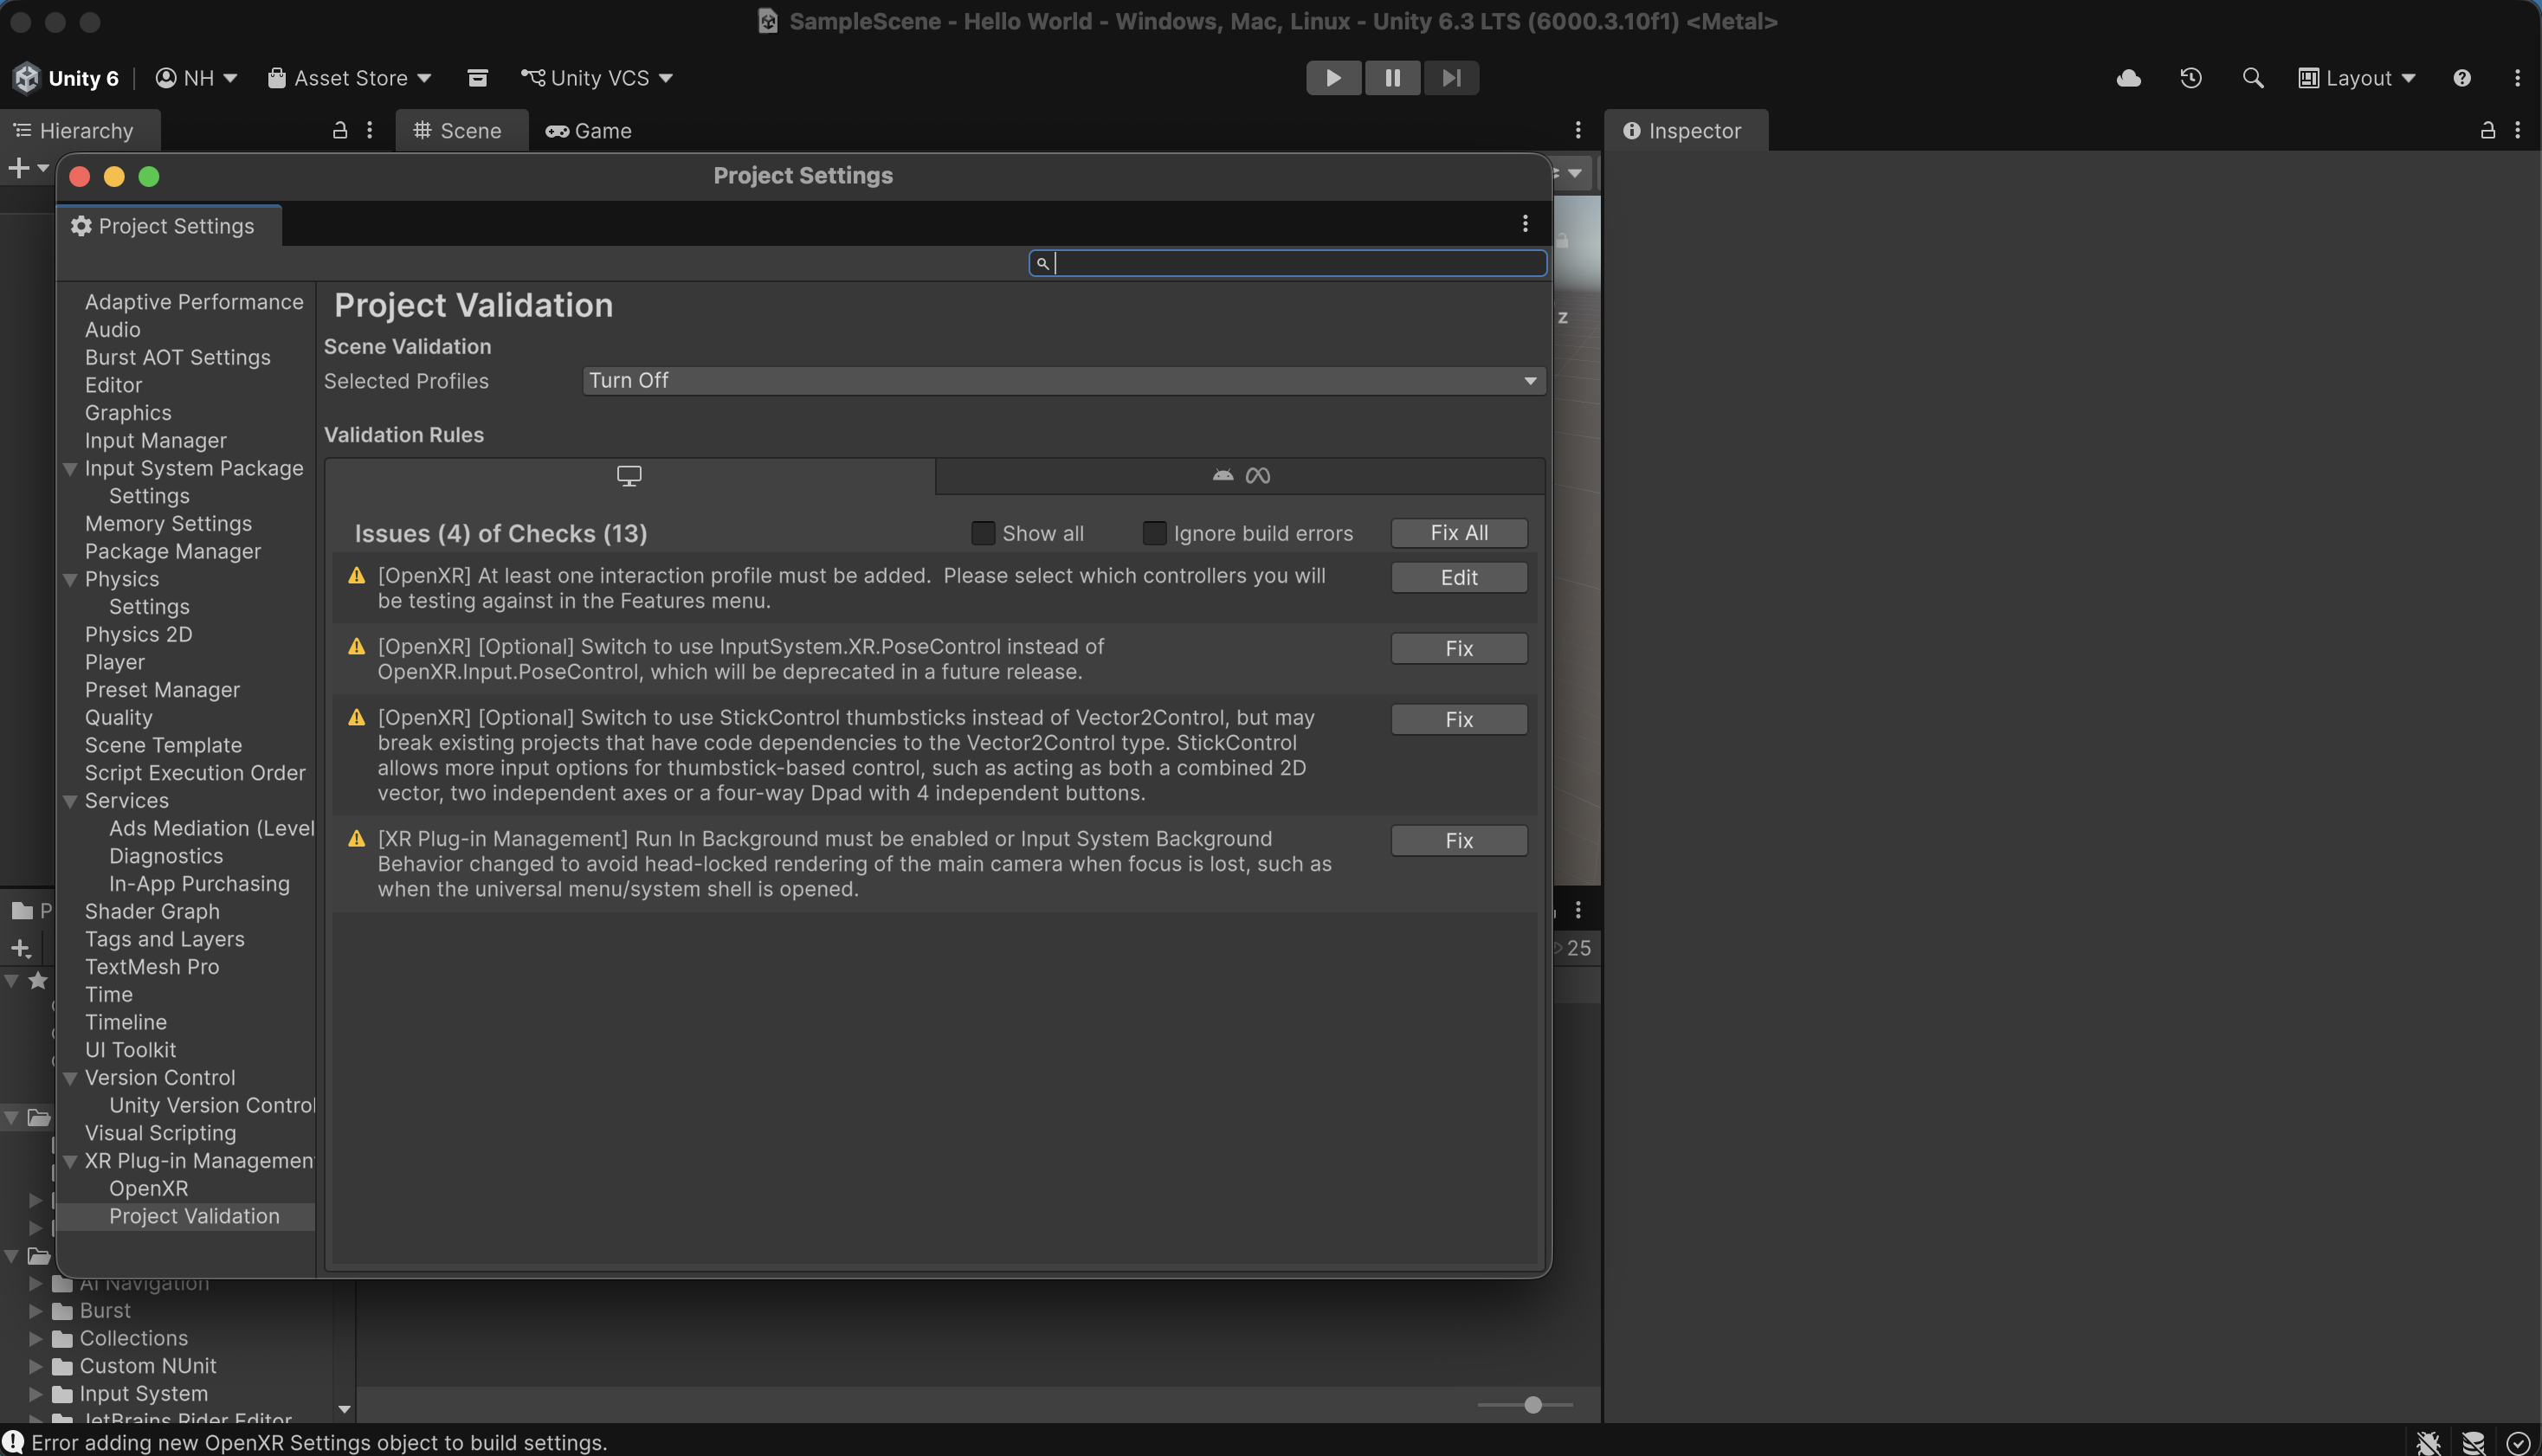
I clicked Fix All
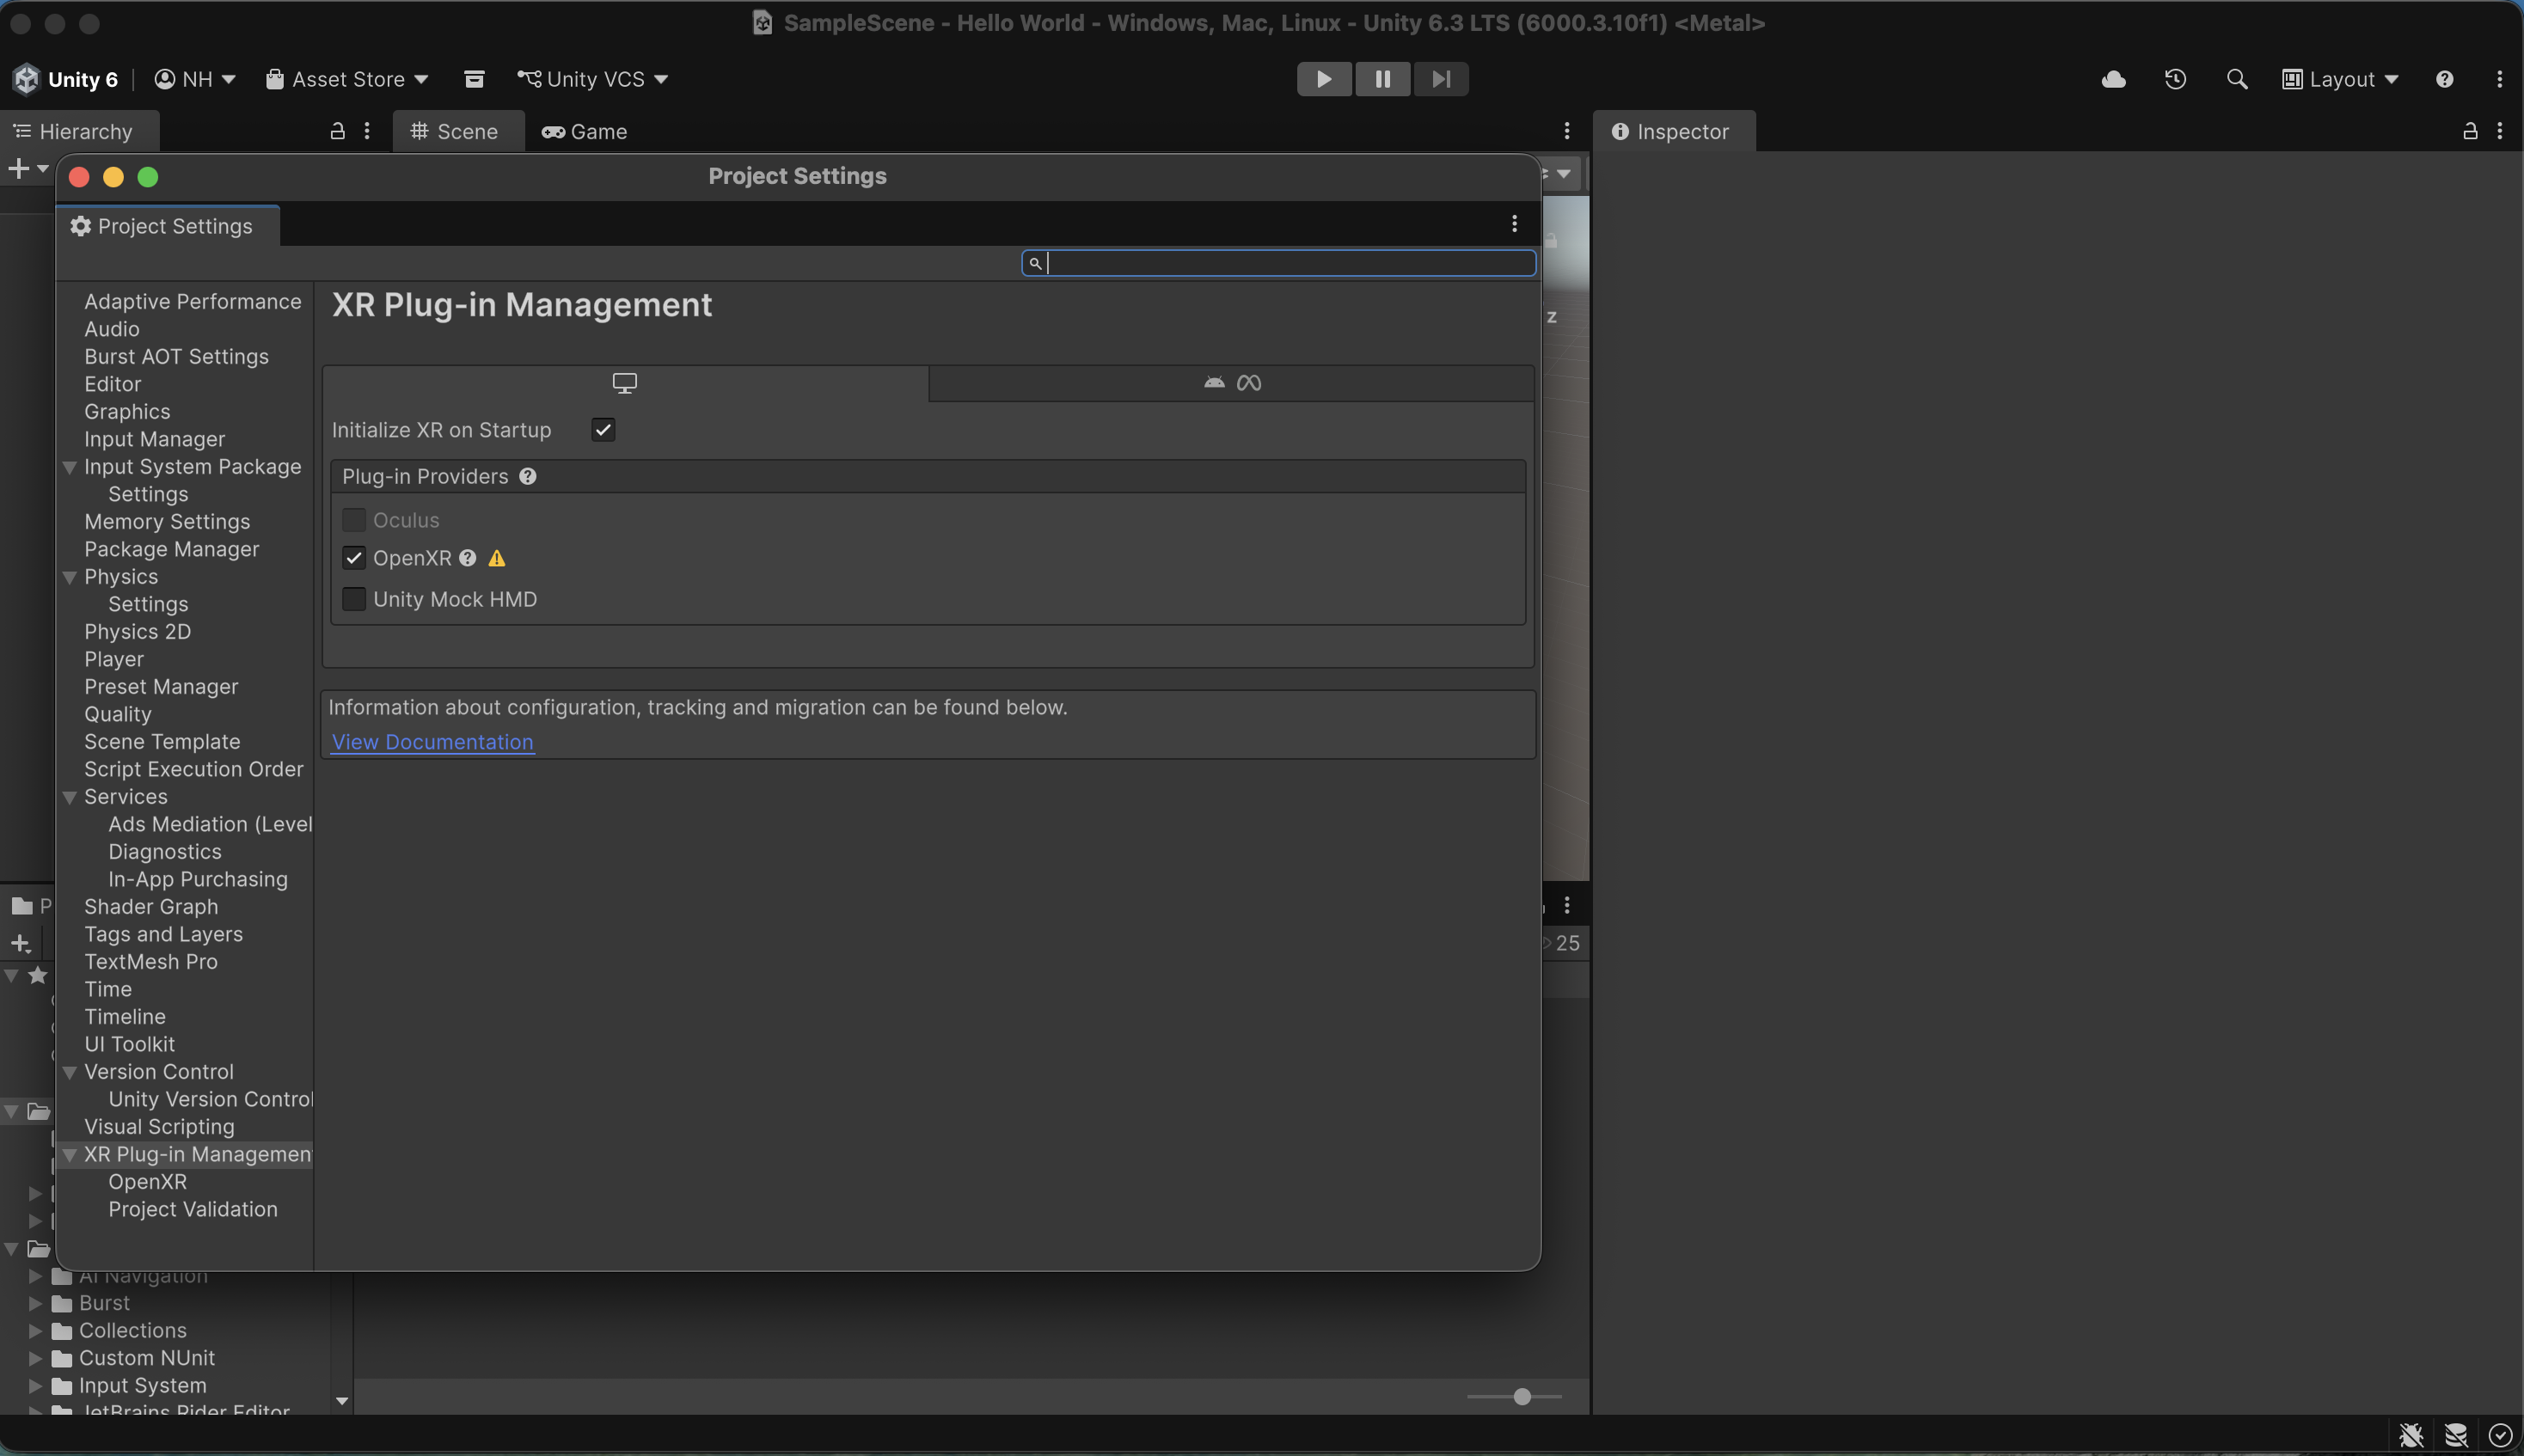
I checked the OpenXR provider in the standalone group tab.
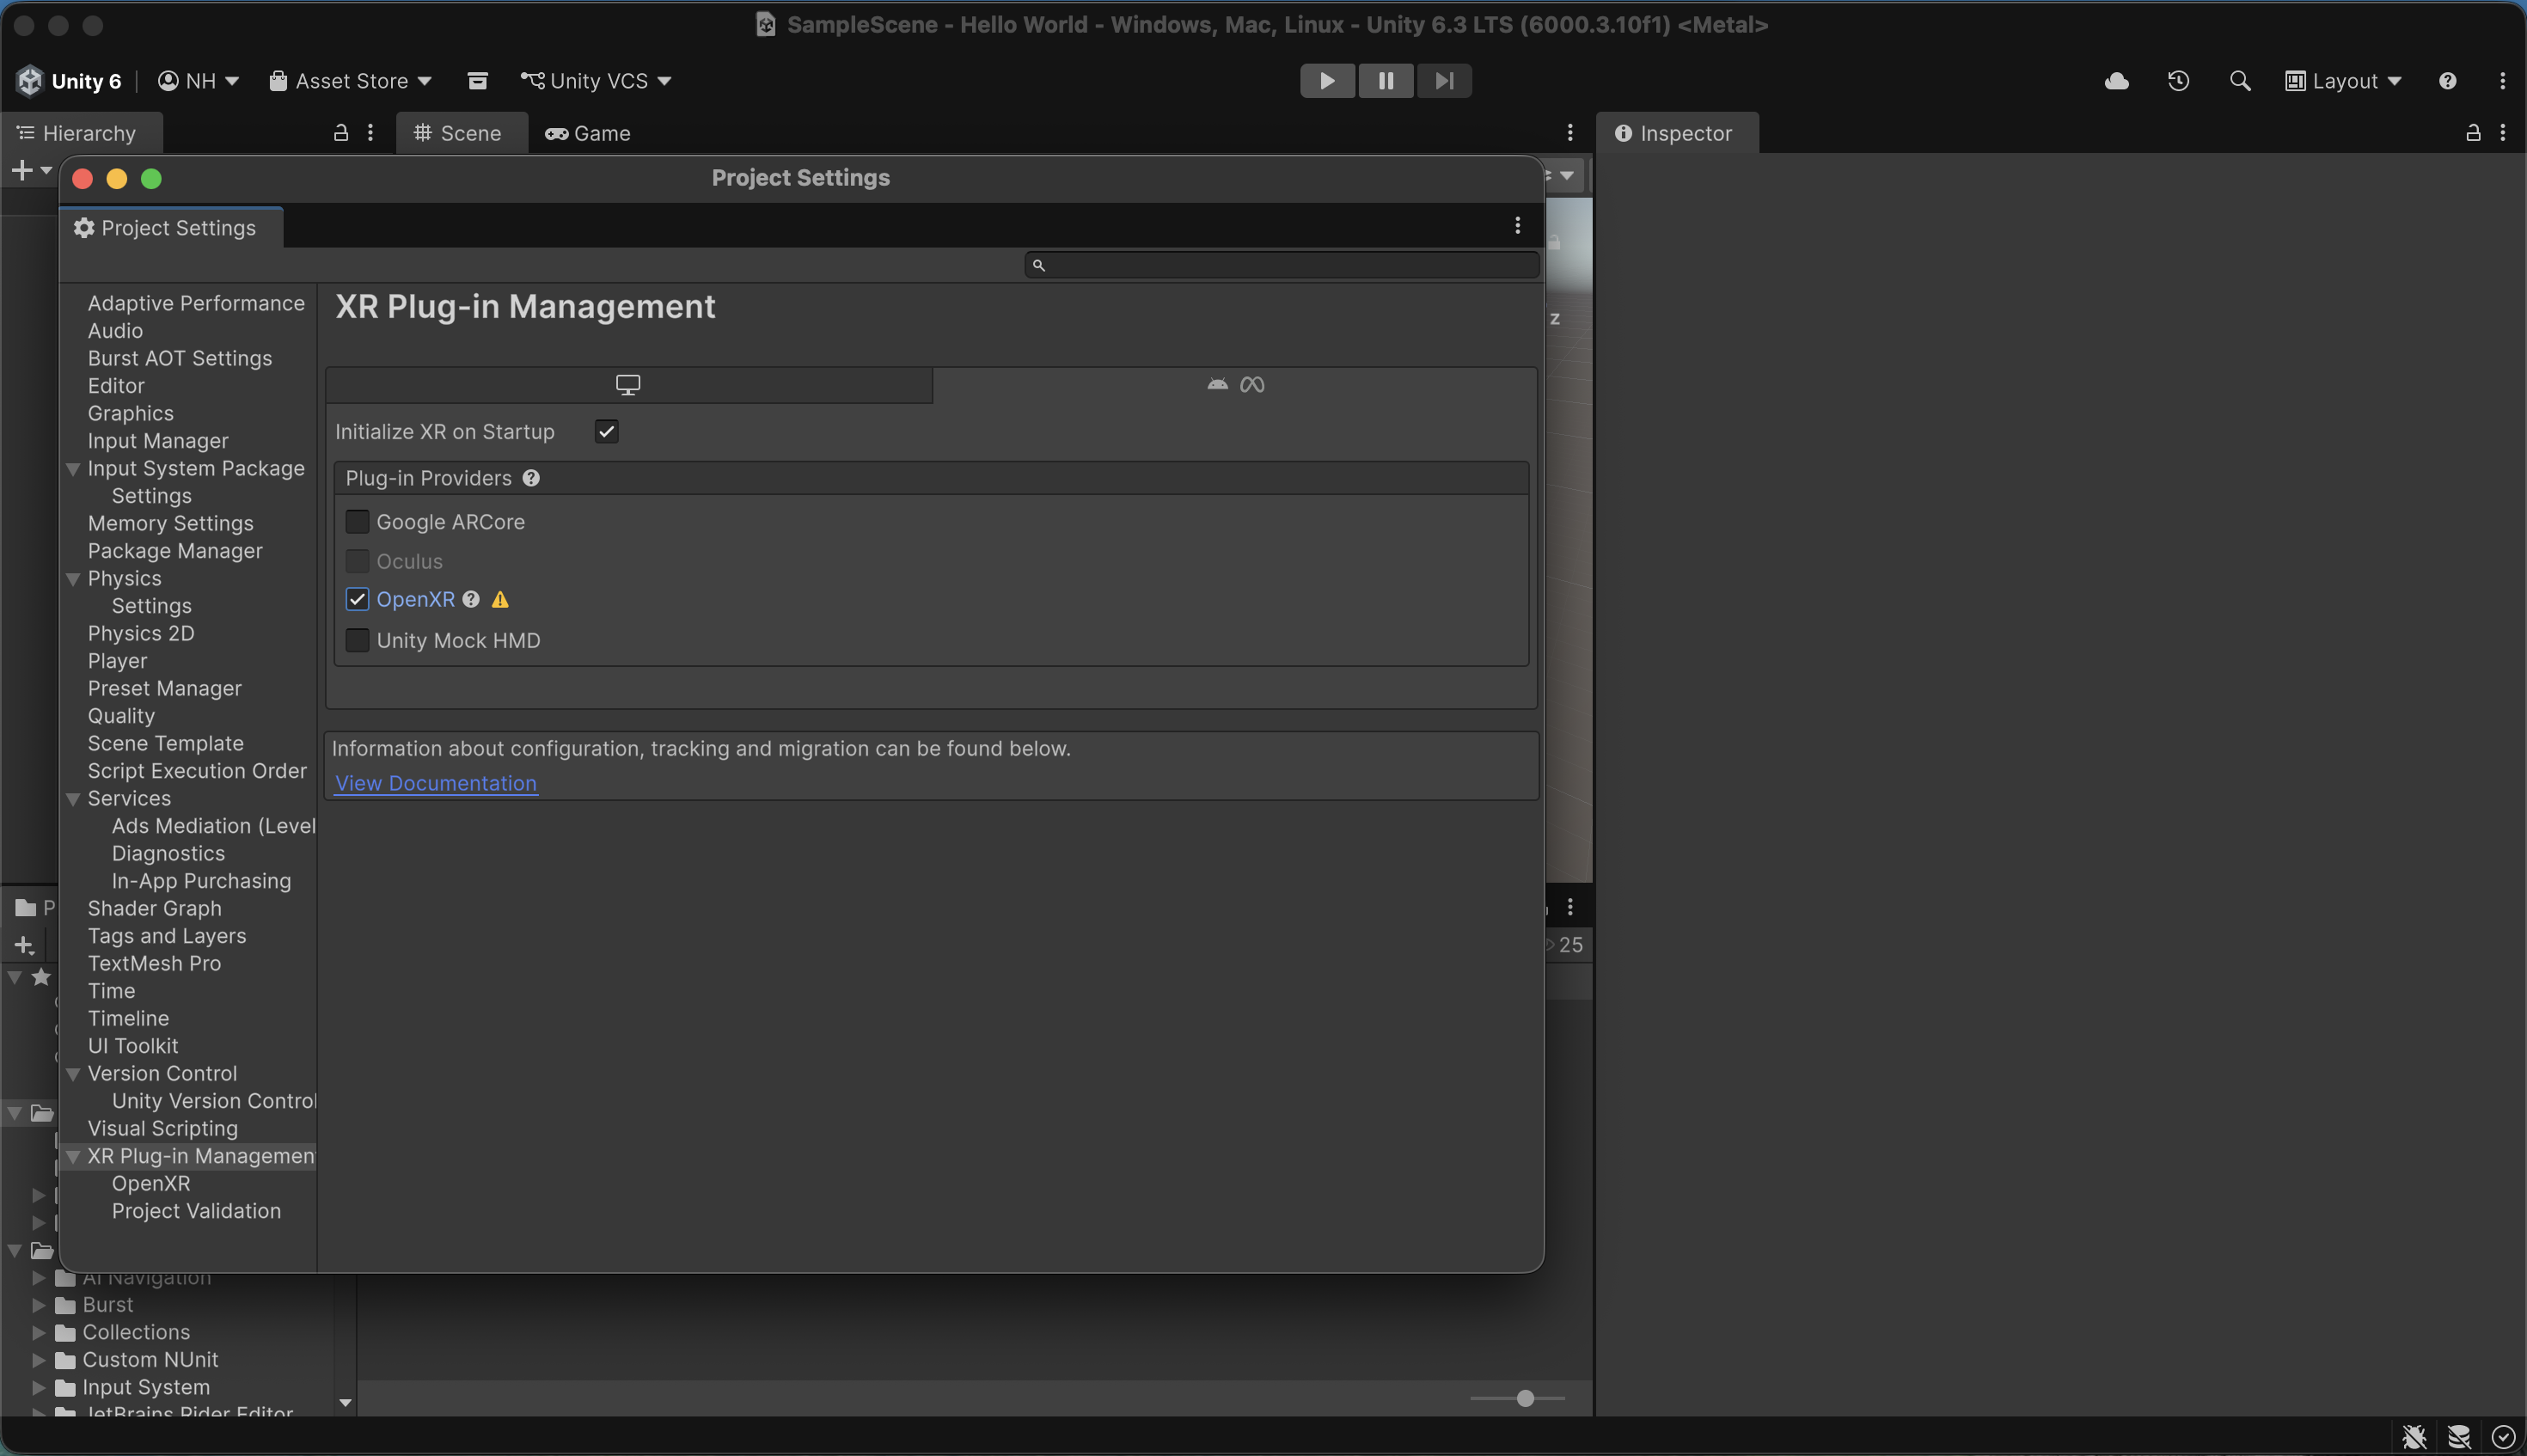
I checked the OpenXR provider in the Meta group tab.
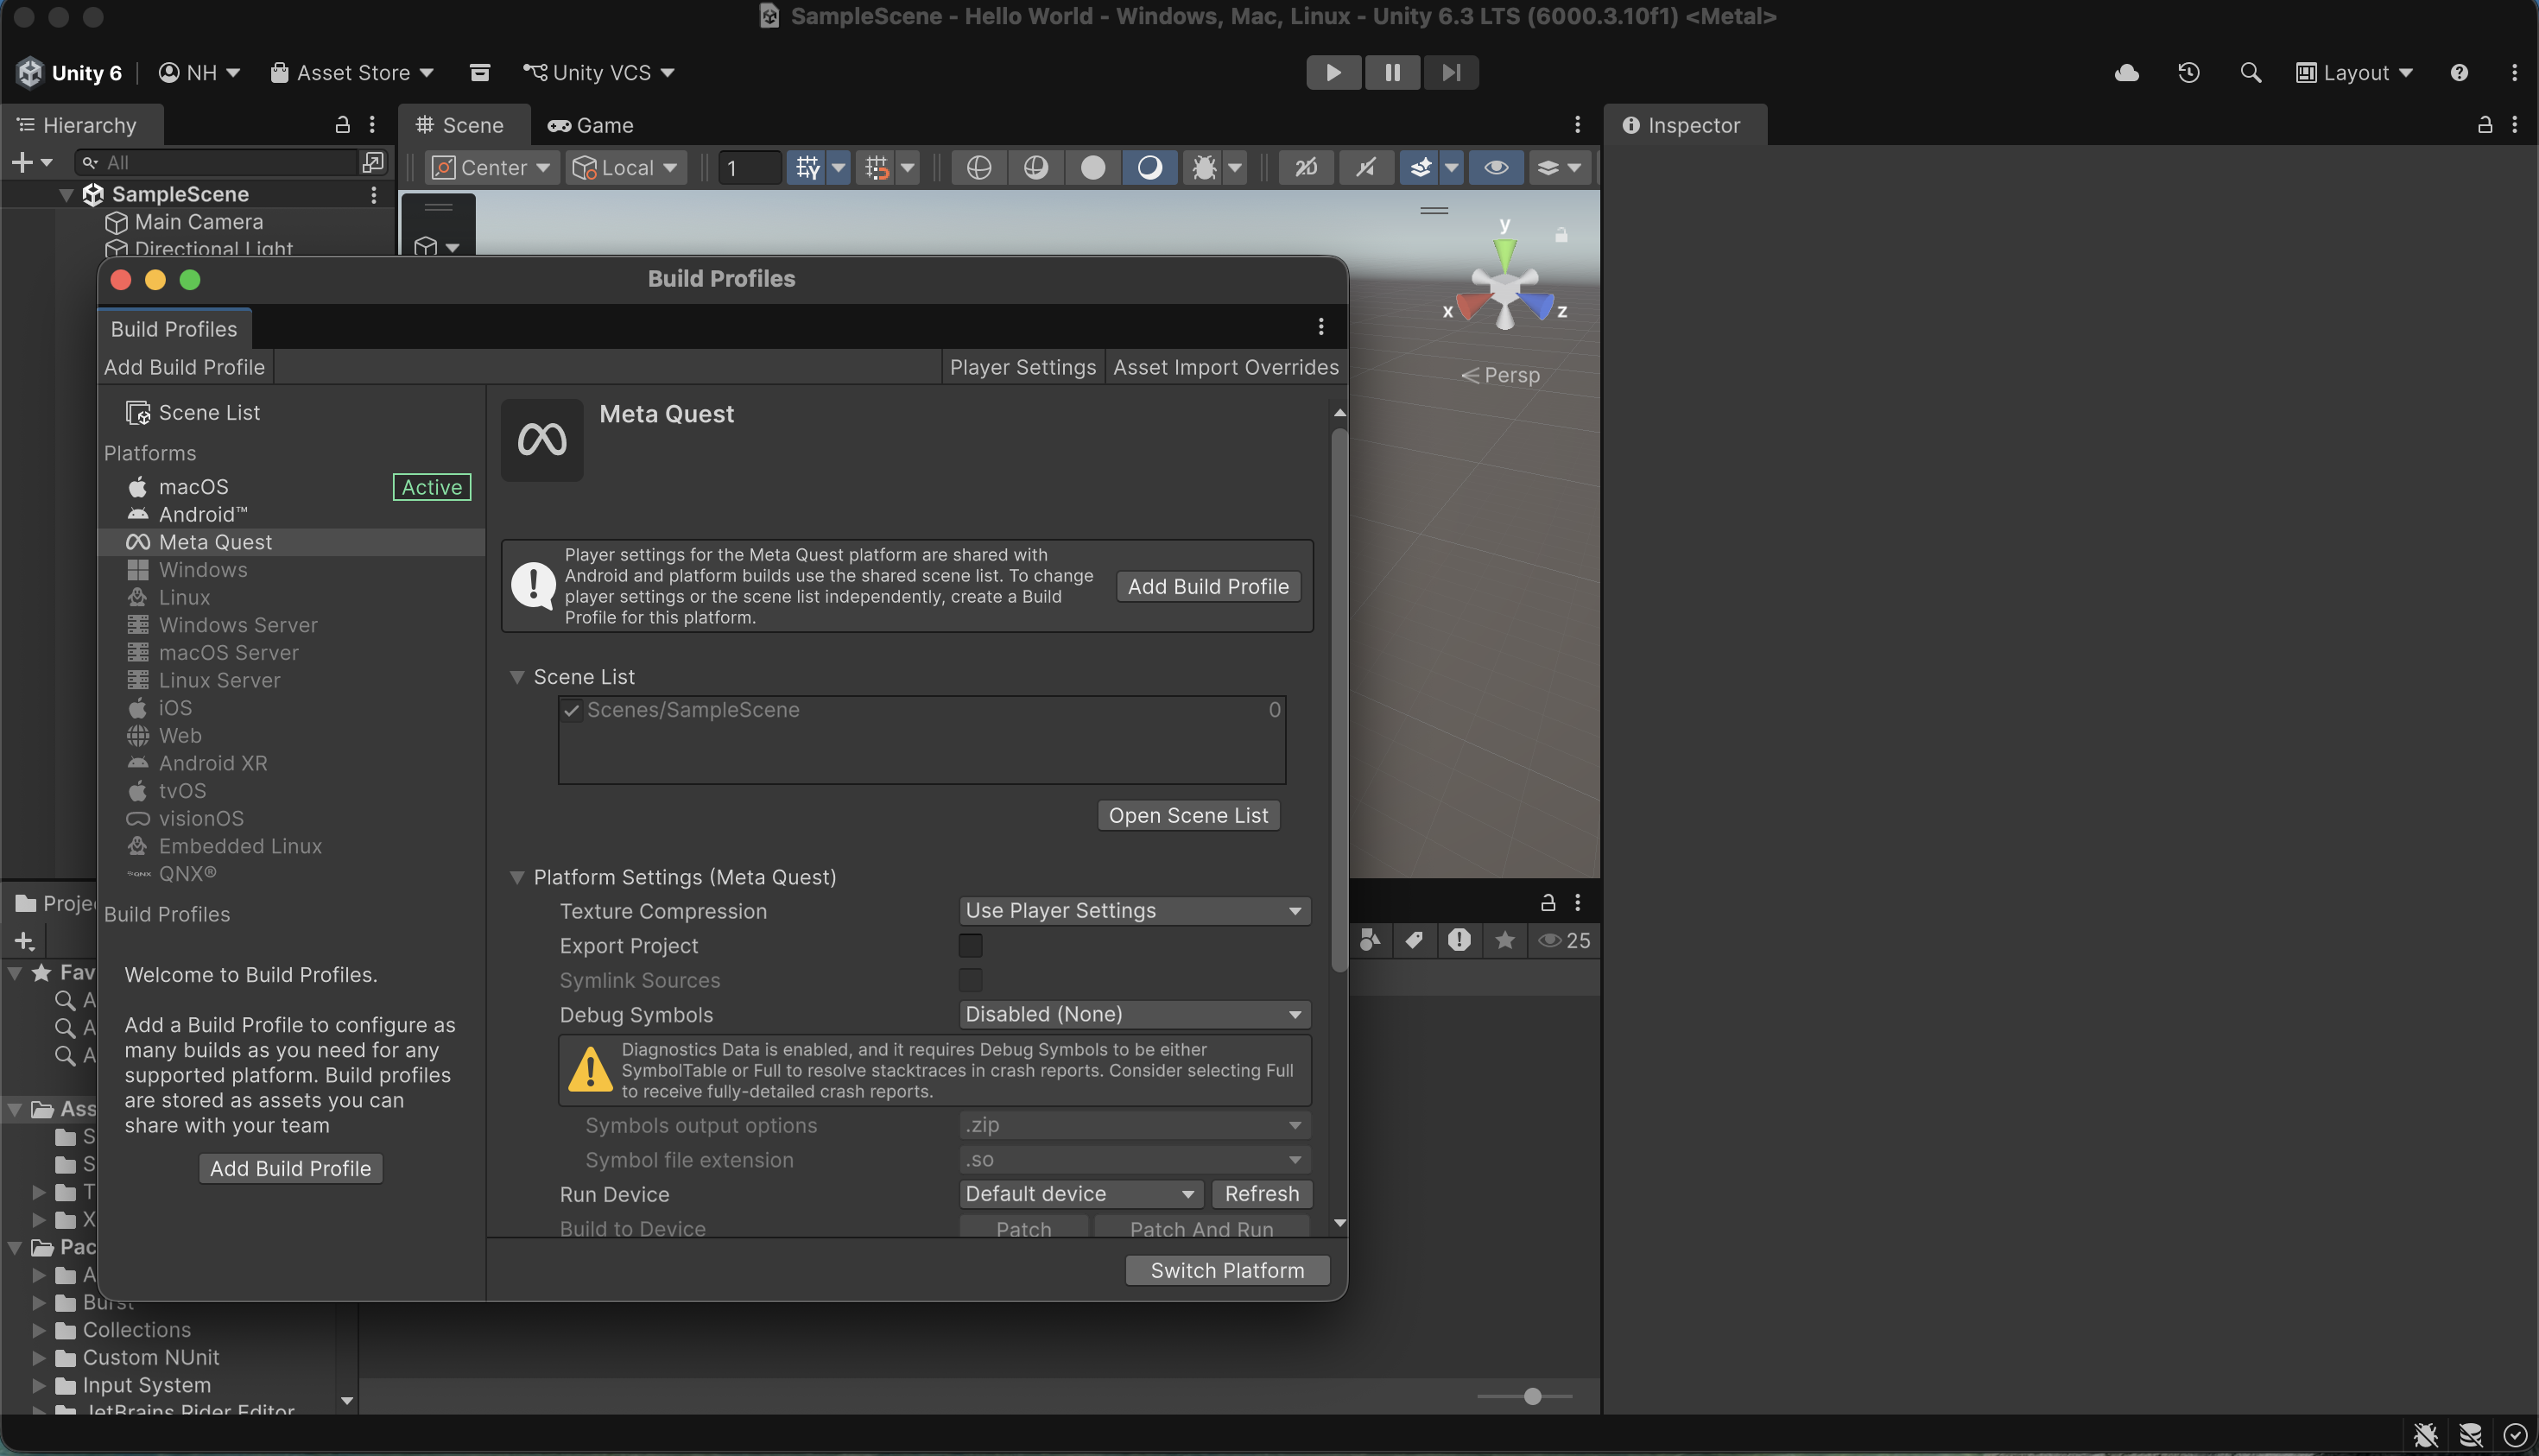
In the Unity editor menu, I selected File > Build Profiles.
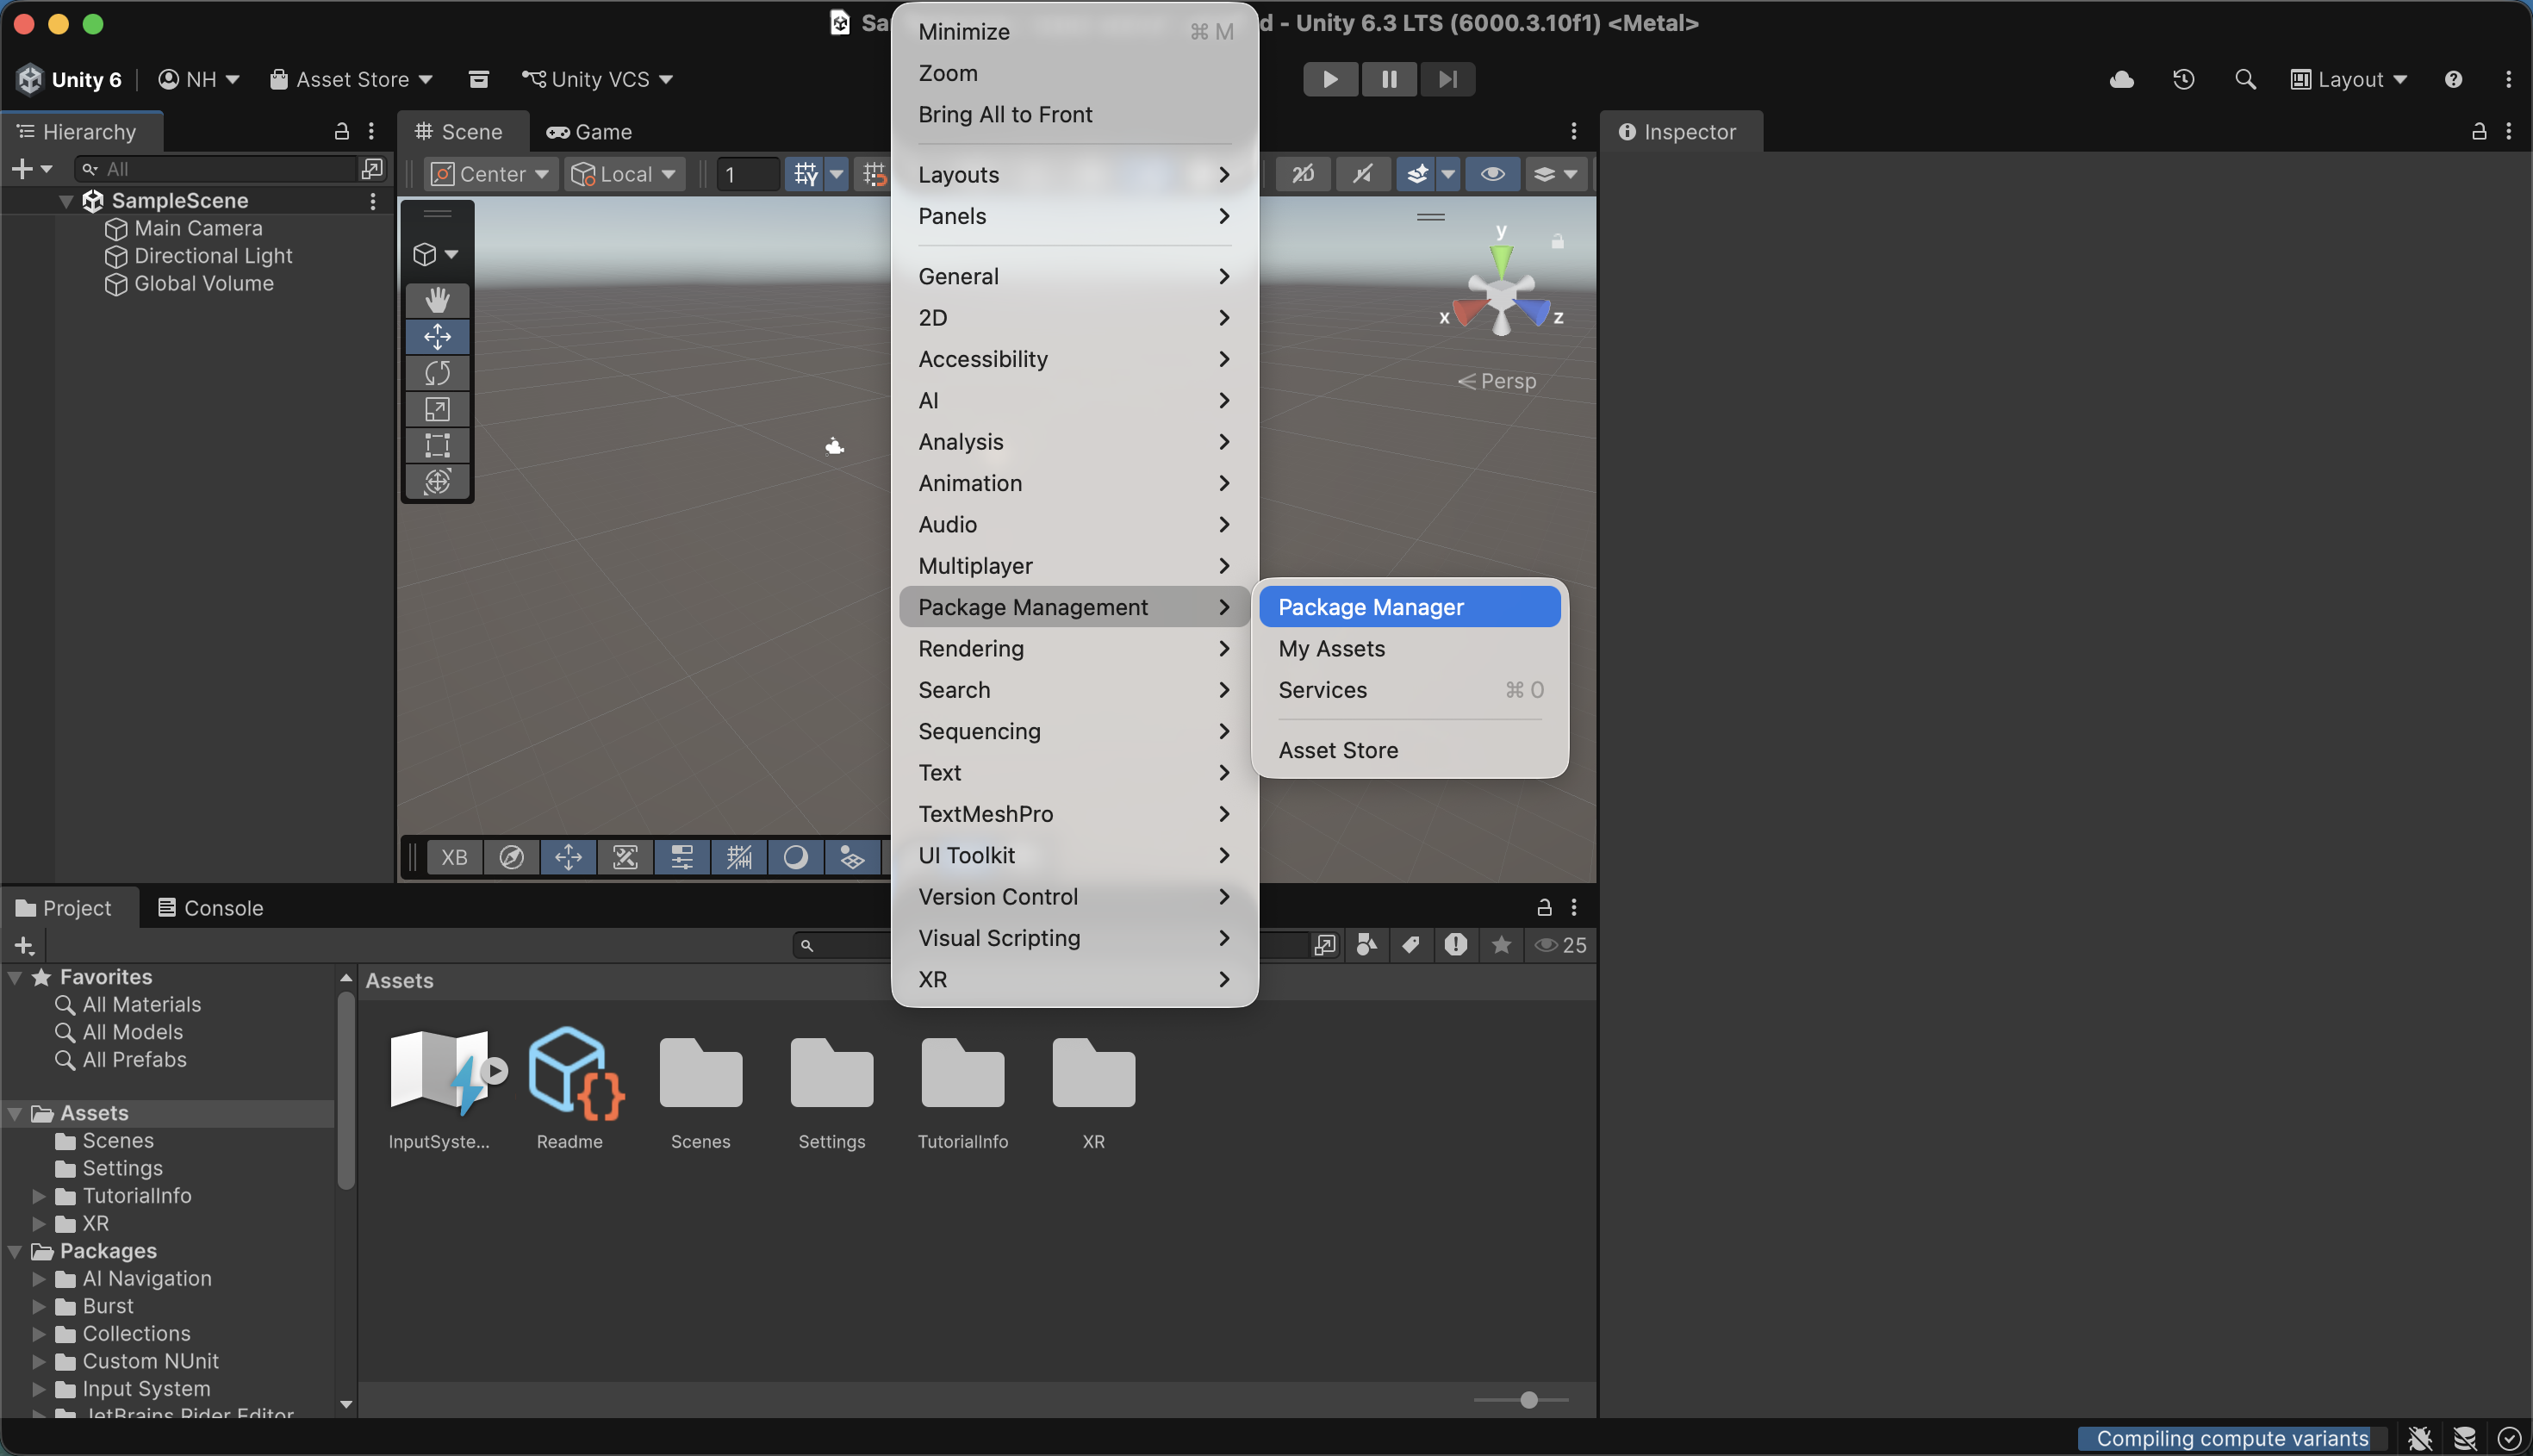
In the Unity Editor menu, I selected Window > Package Manager.
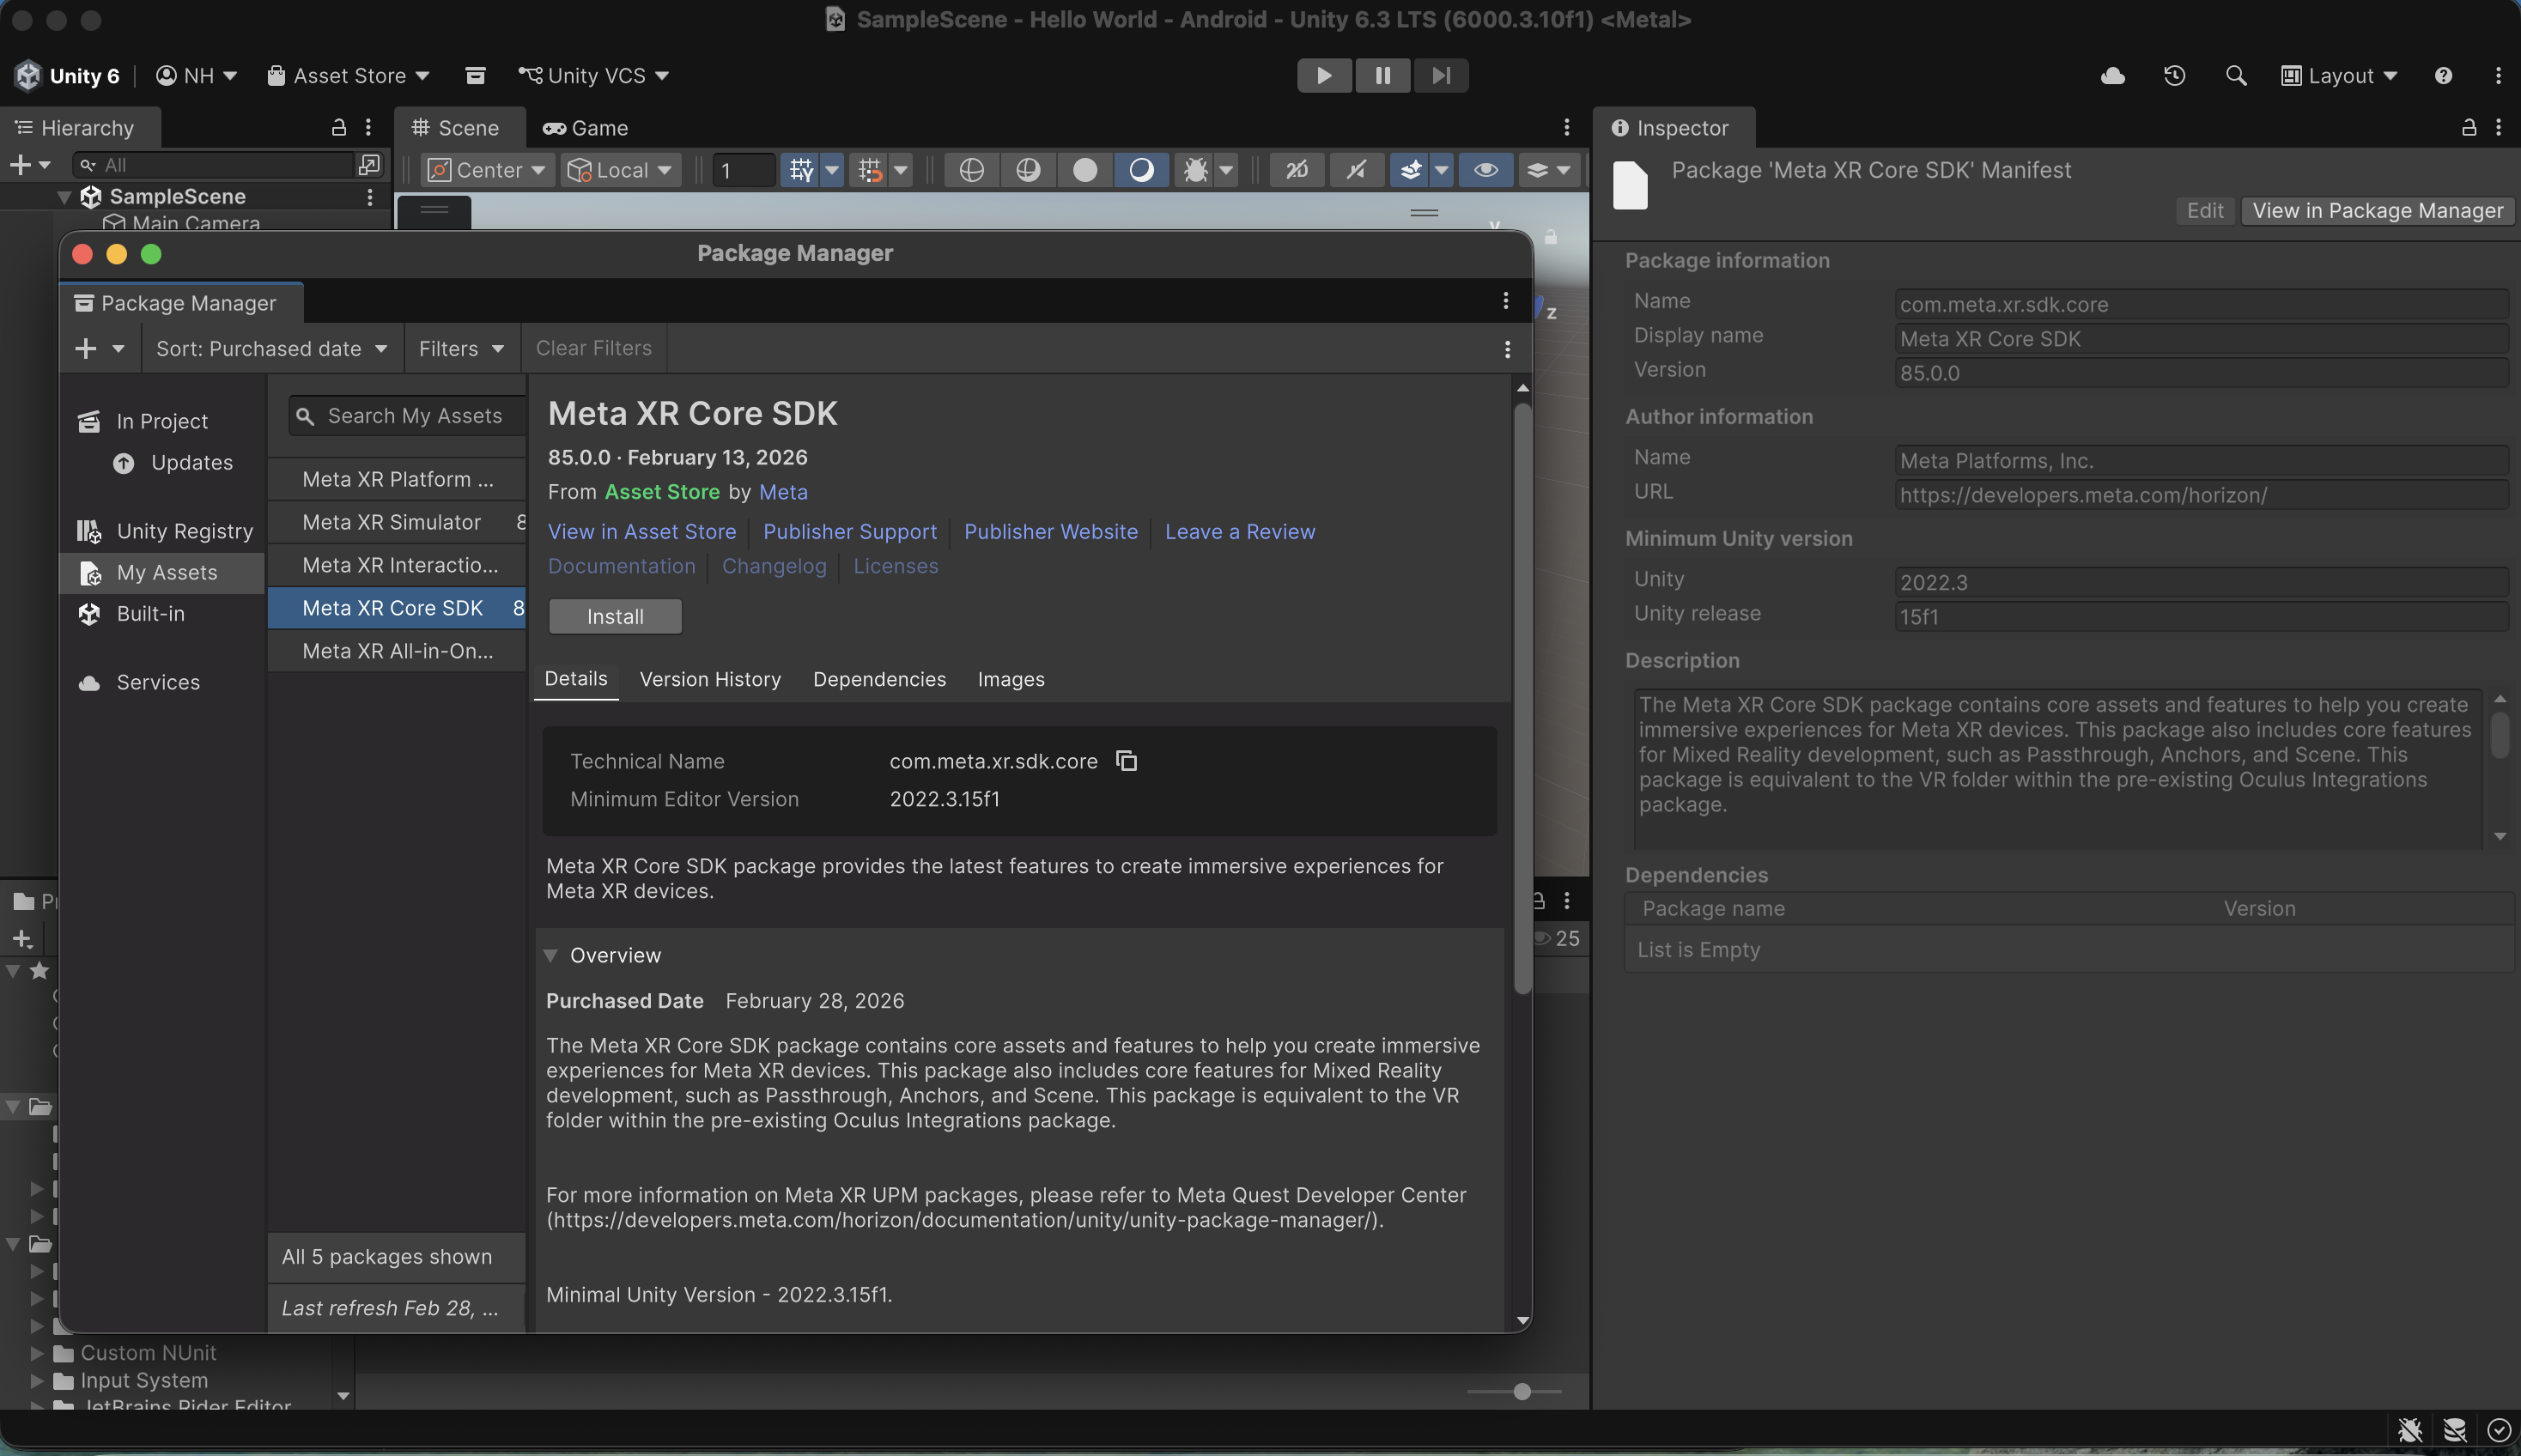
I selected the Meta XR Core SDK and clicked Install.
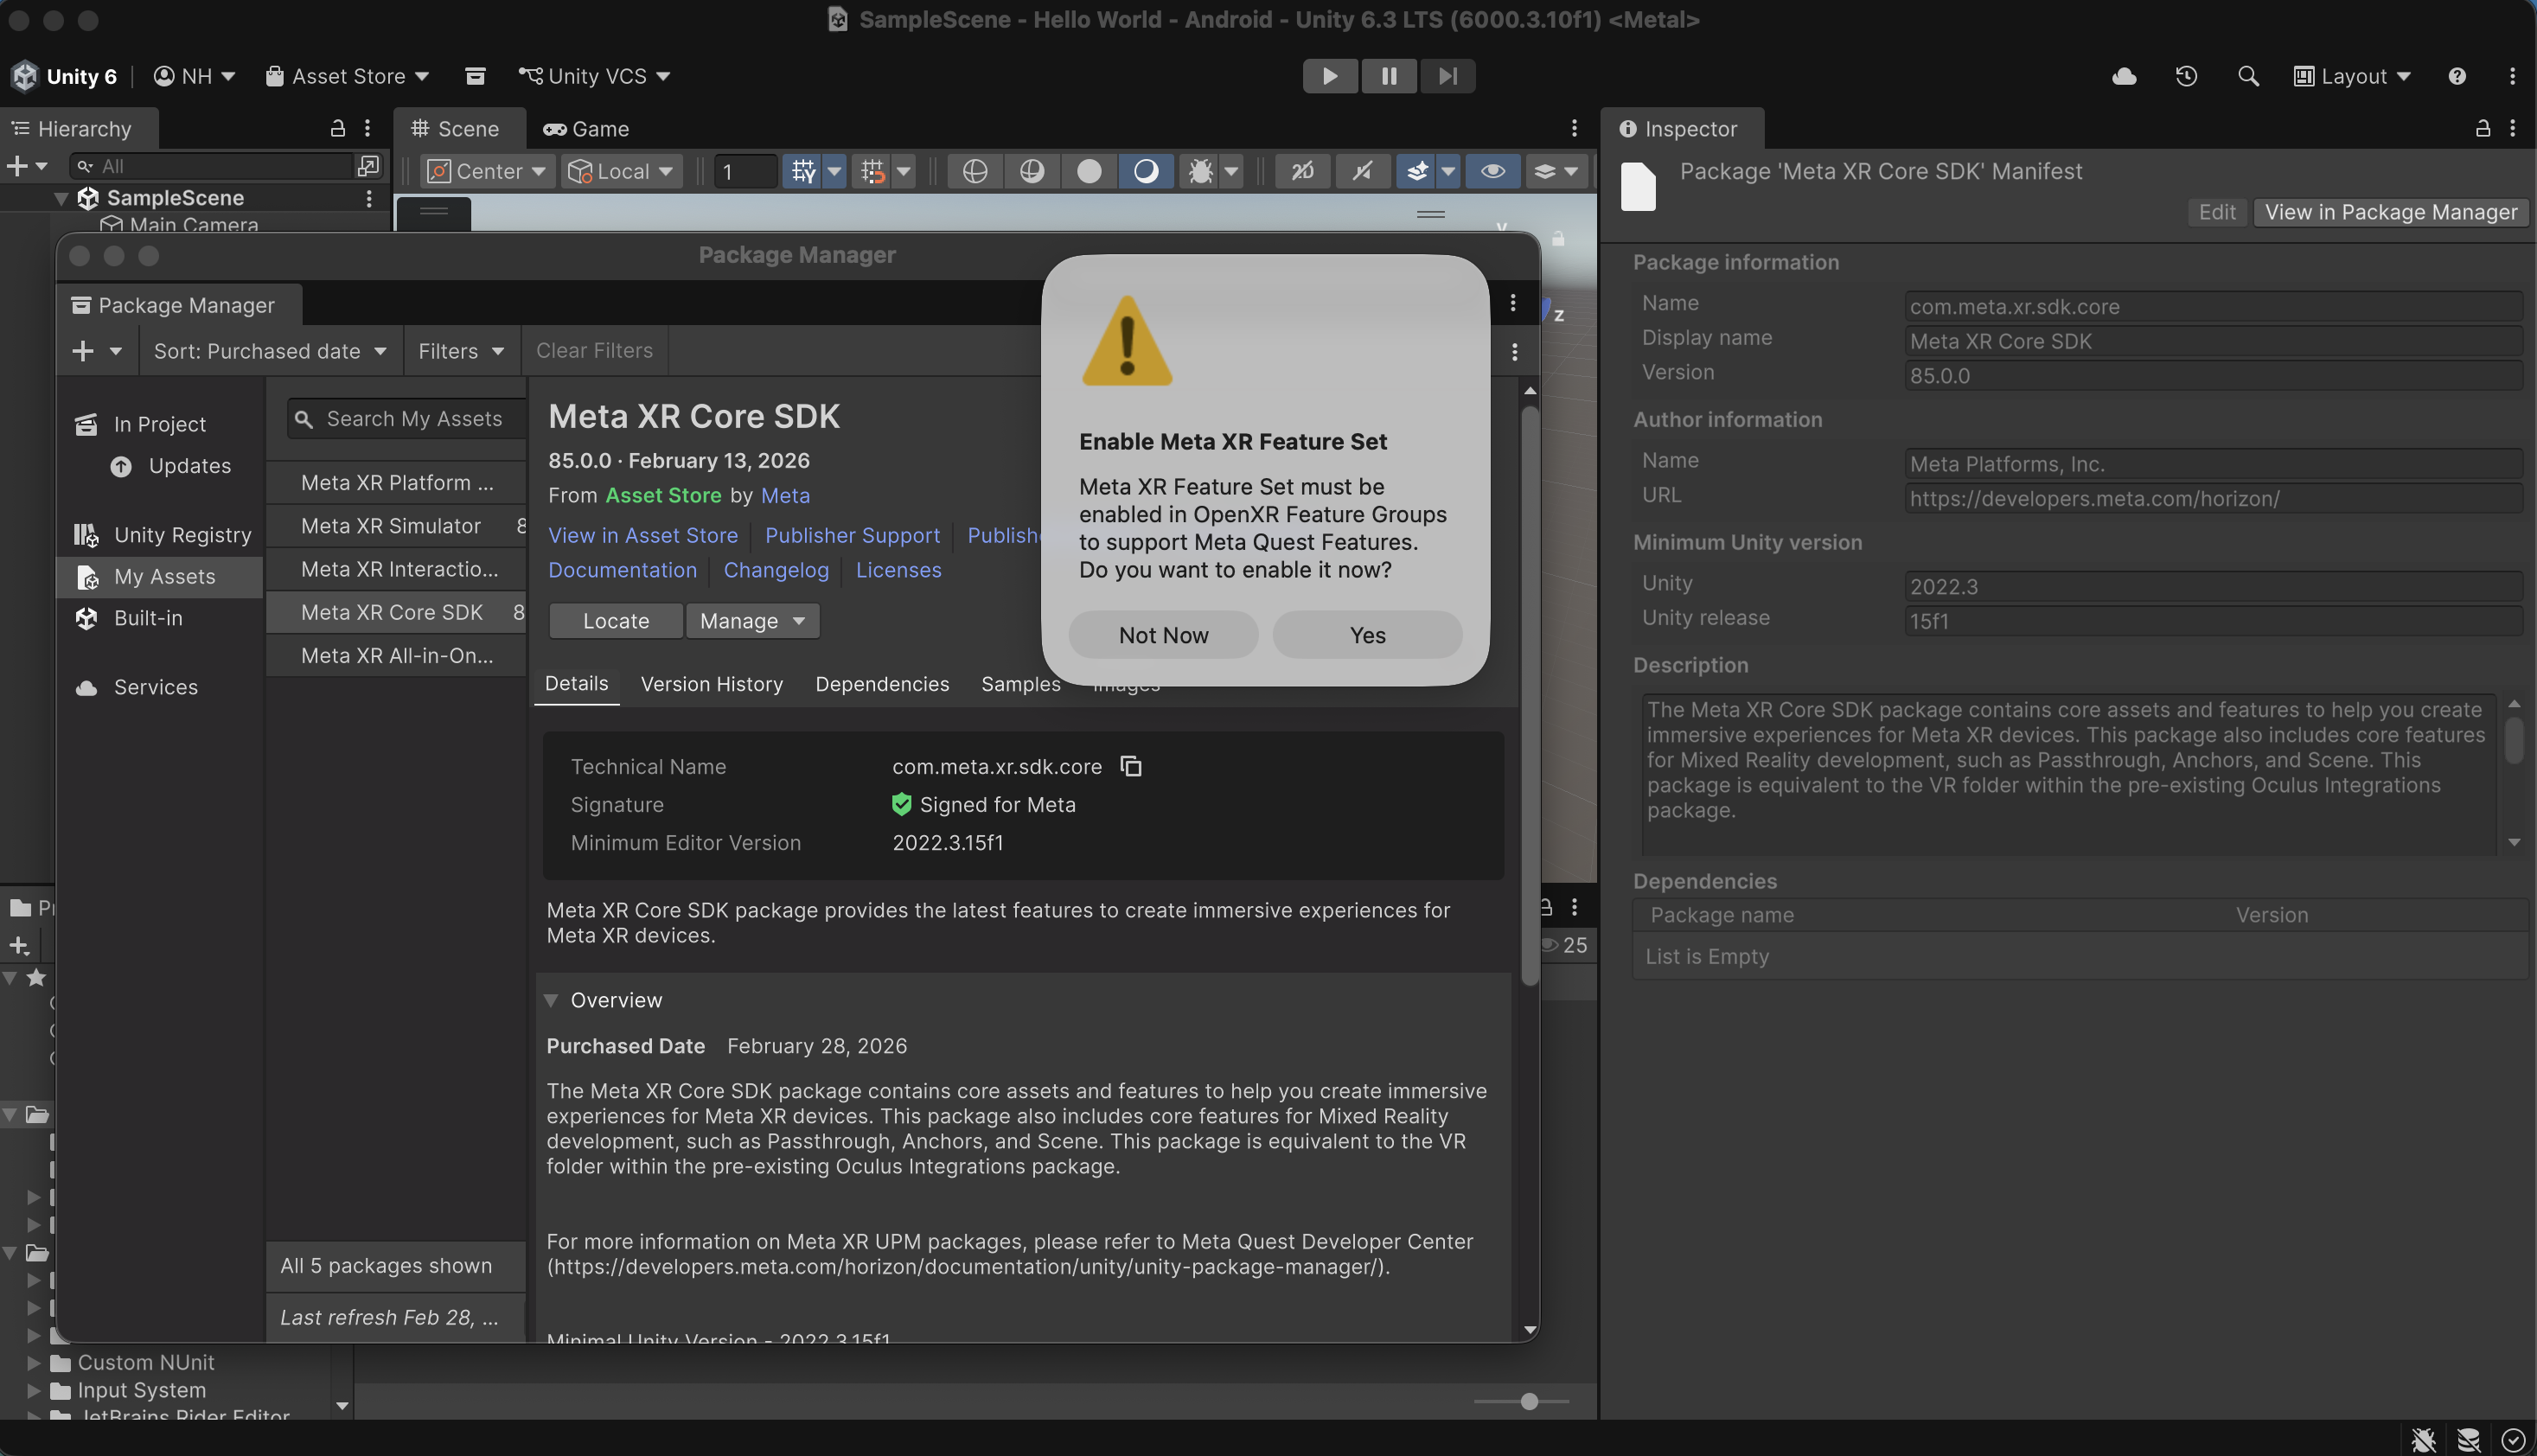
When prompted to enable the Meta XR feature set, I selected Enable.
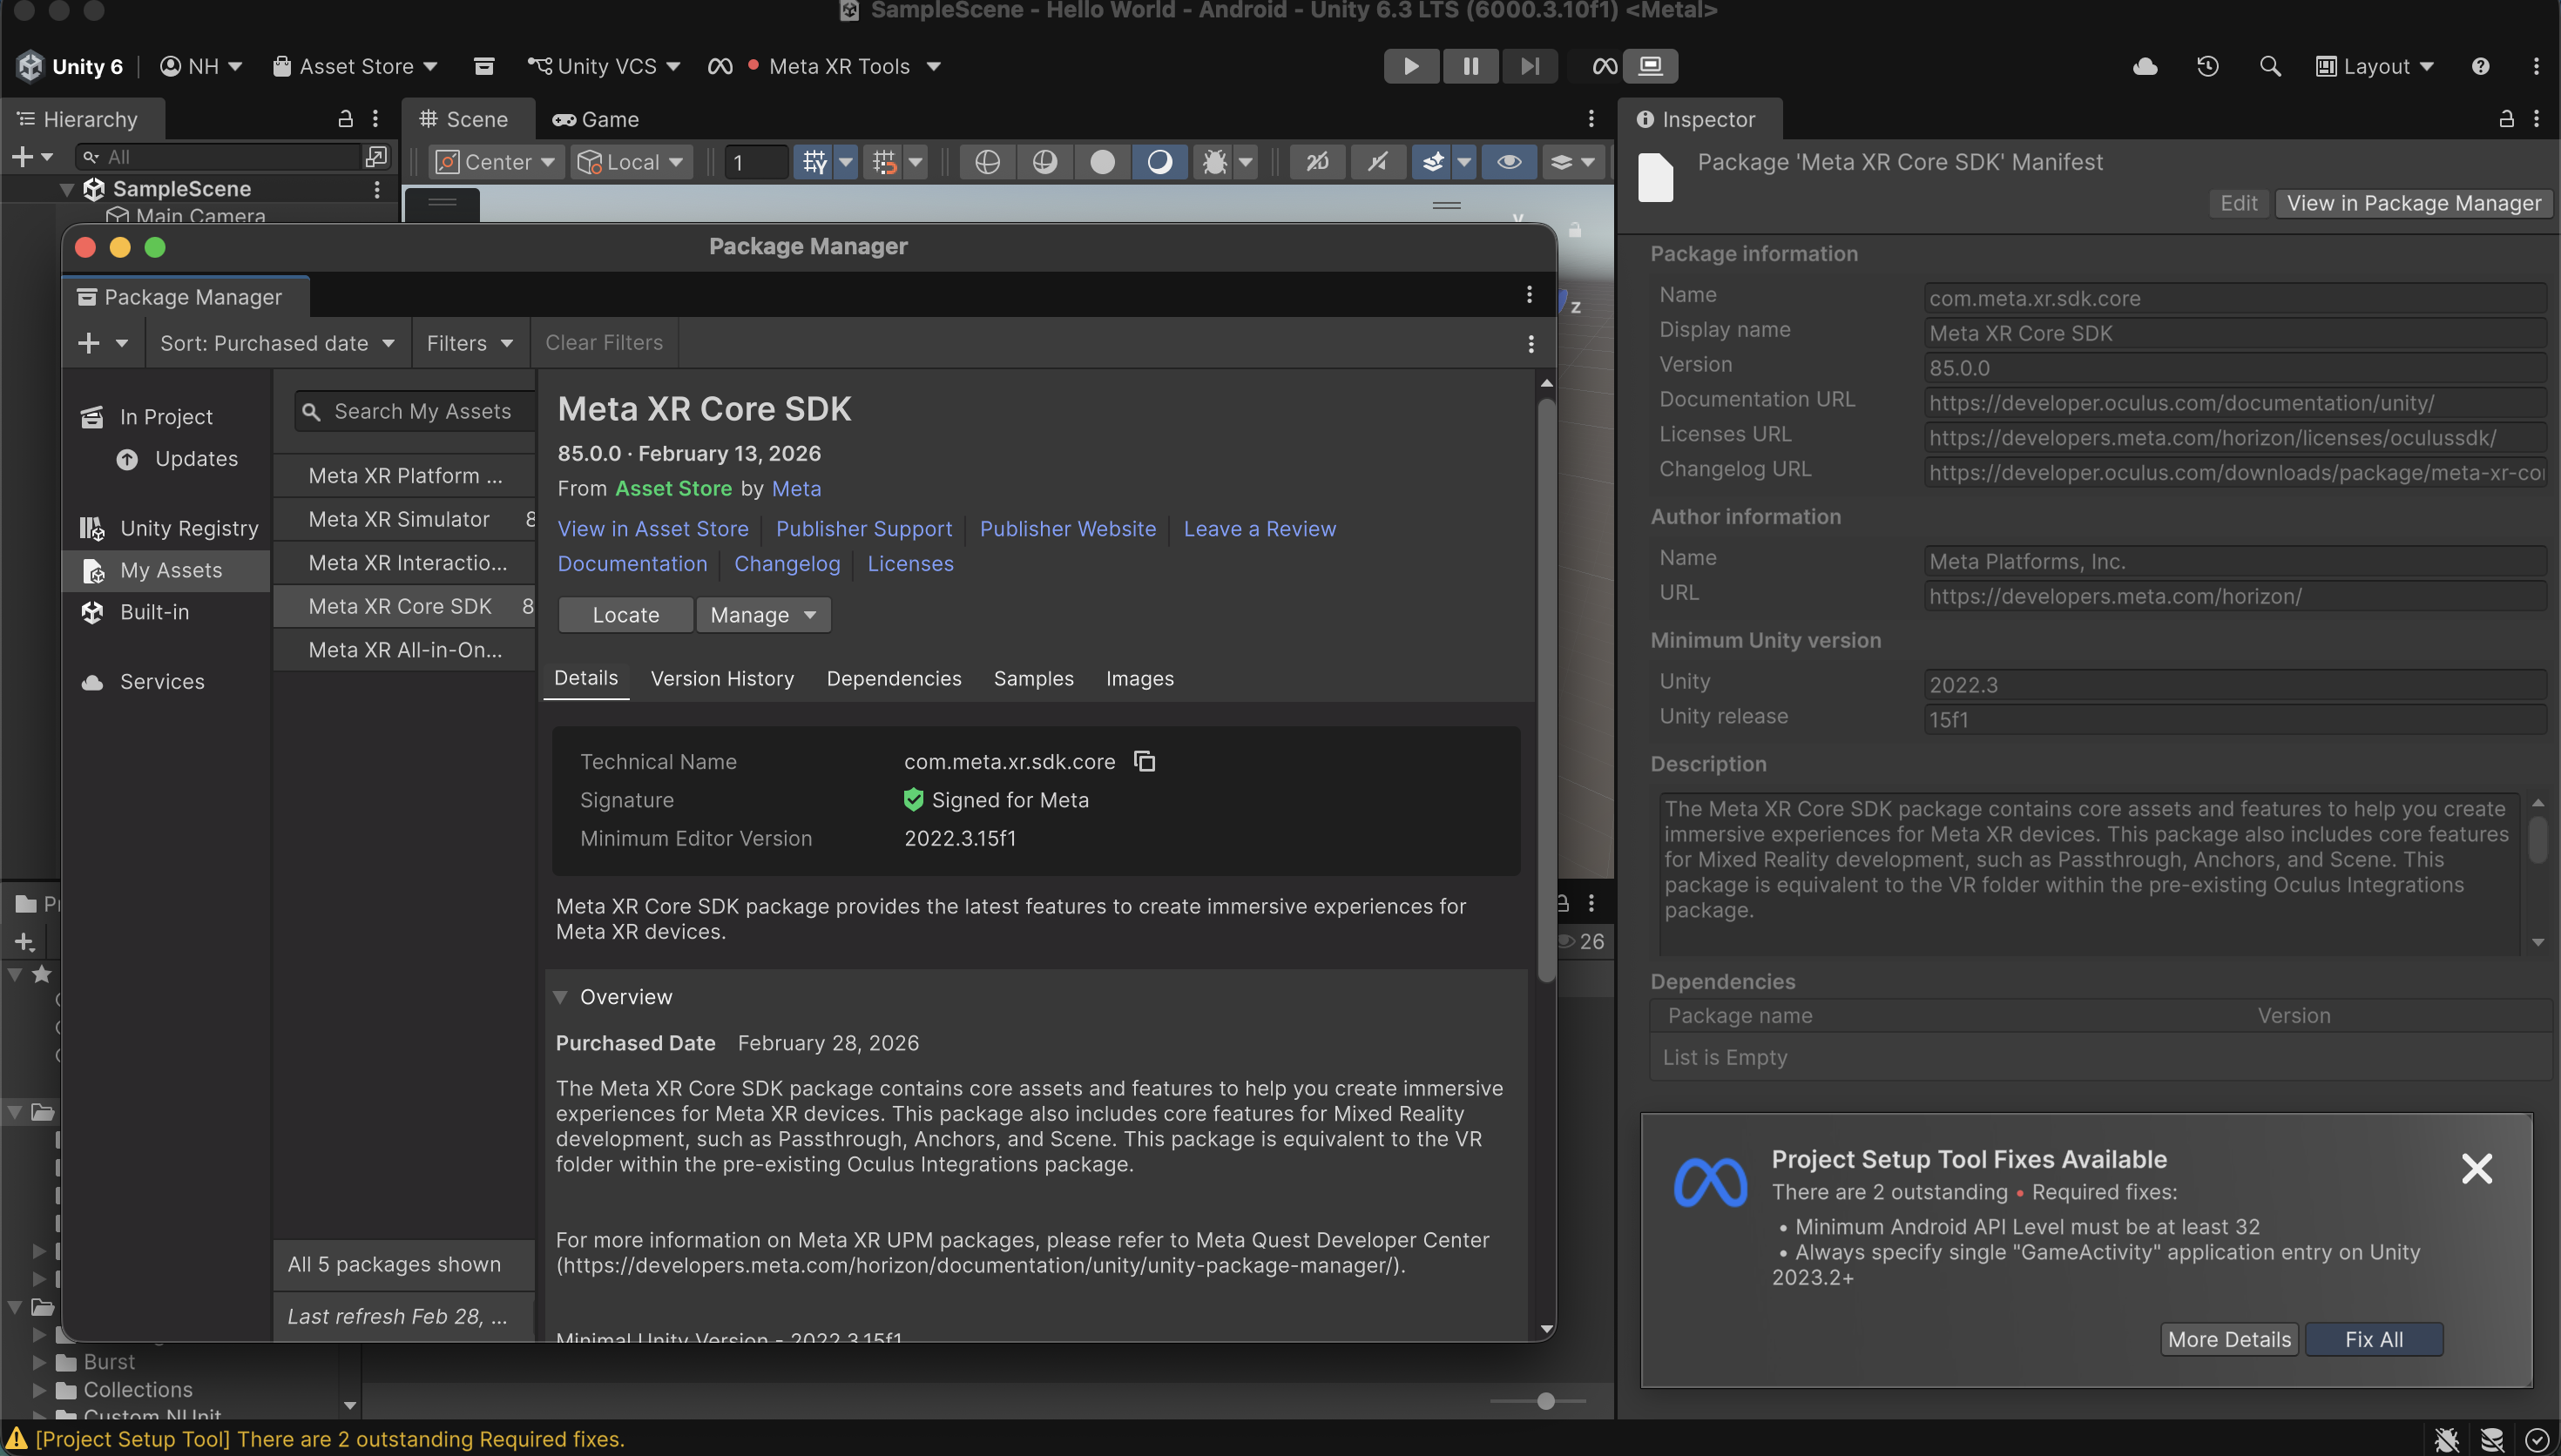
I confirmed that the Meta XR Core SDK was installed
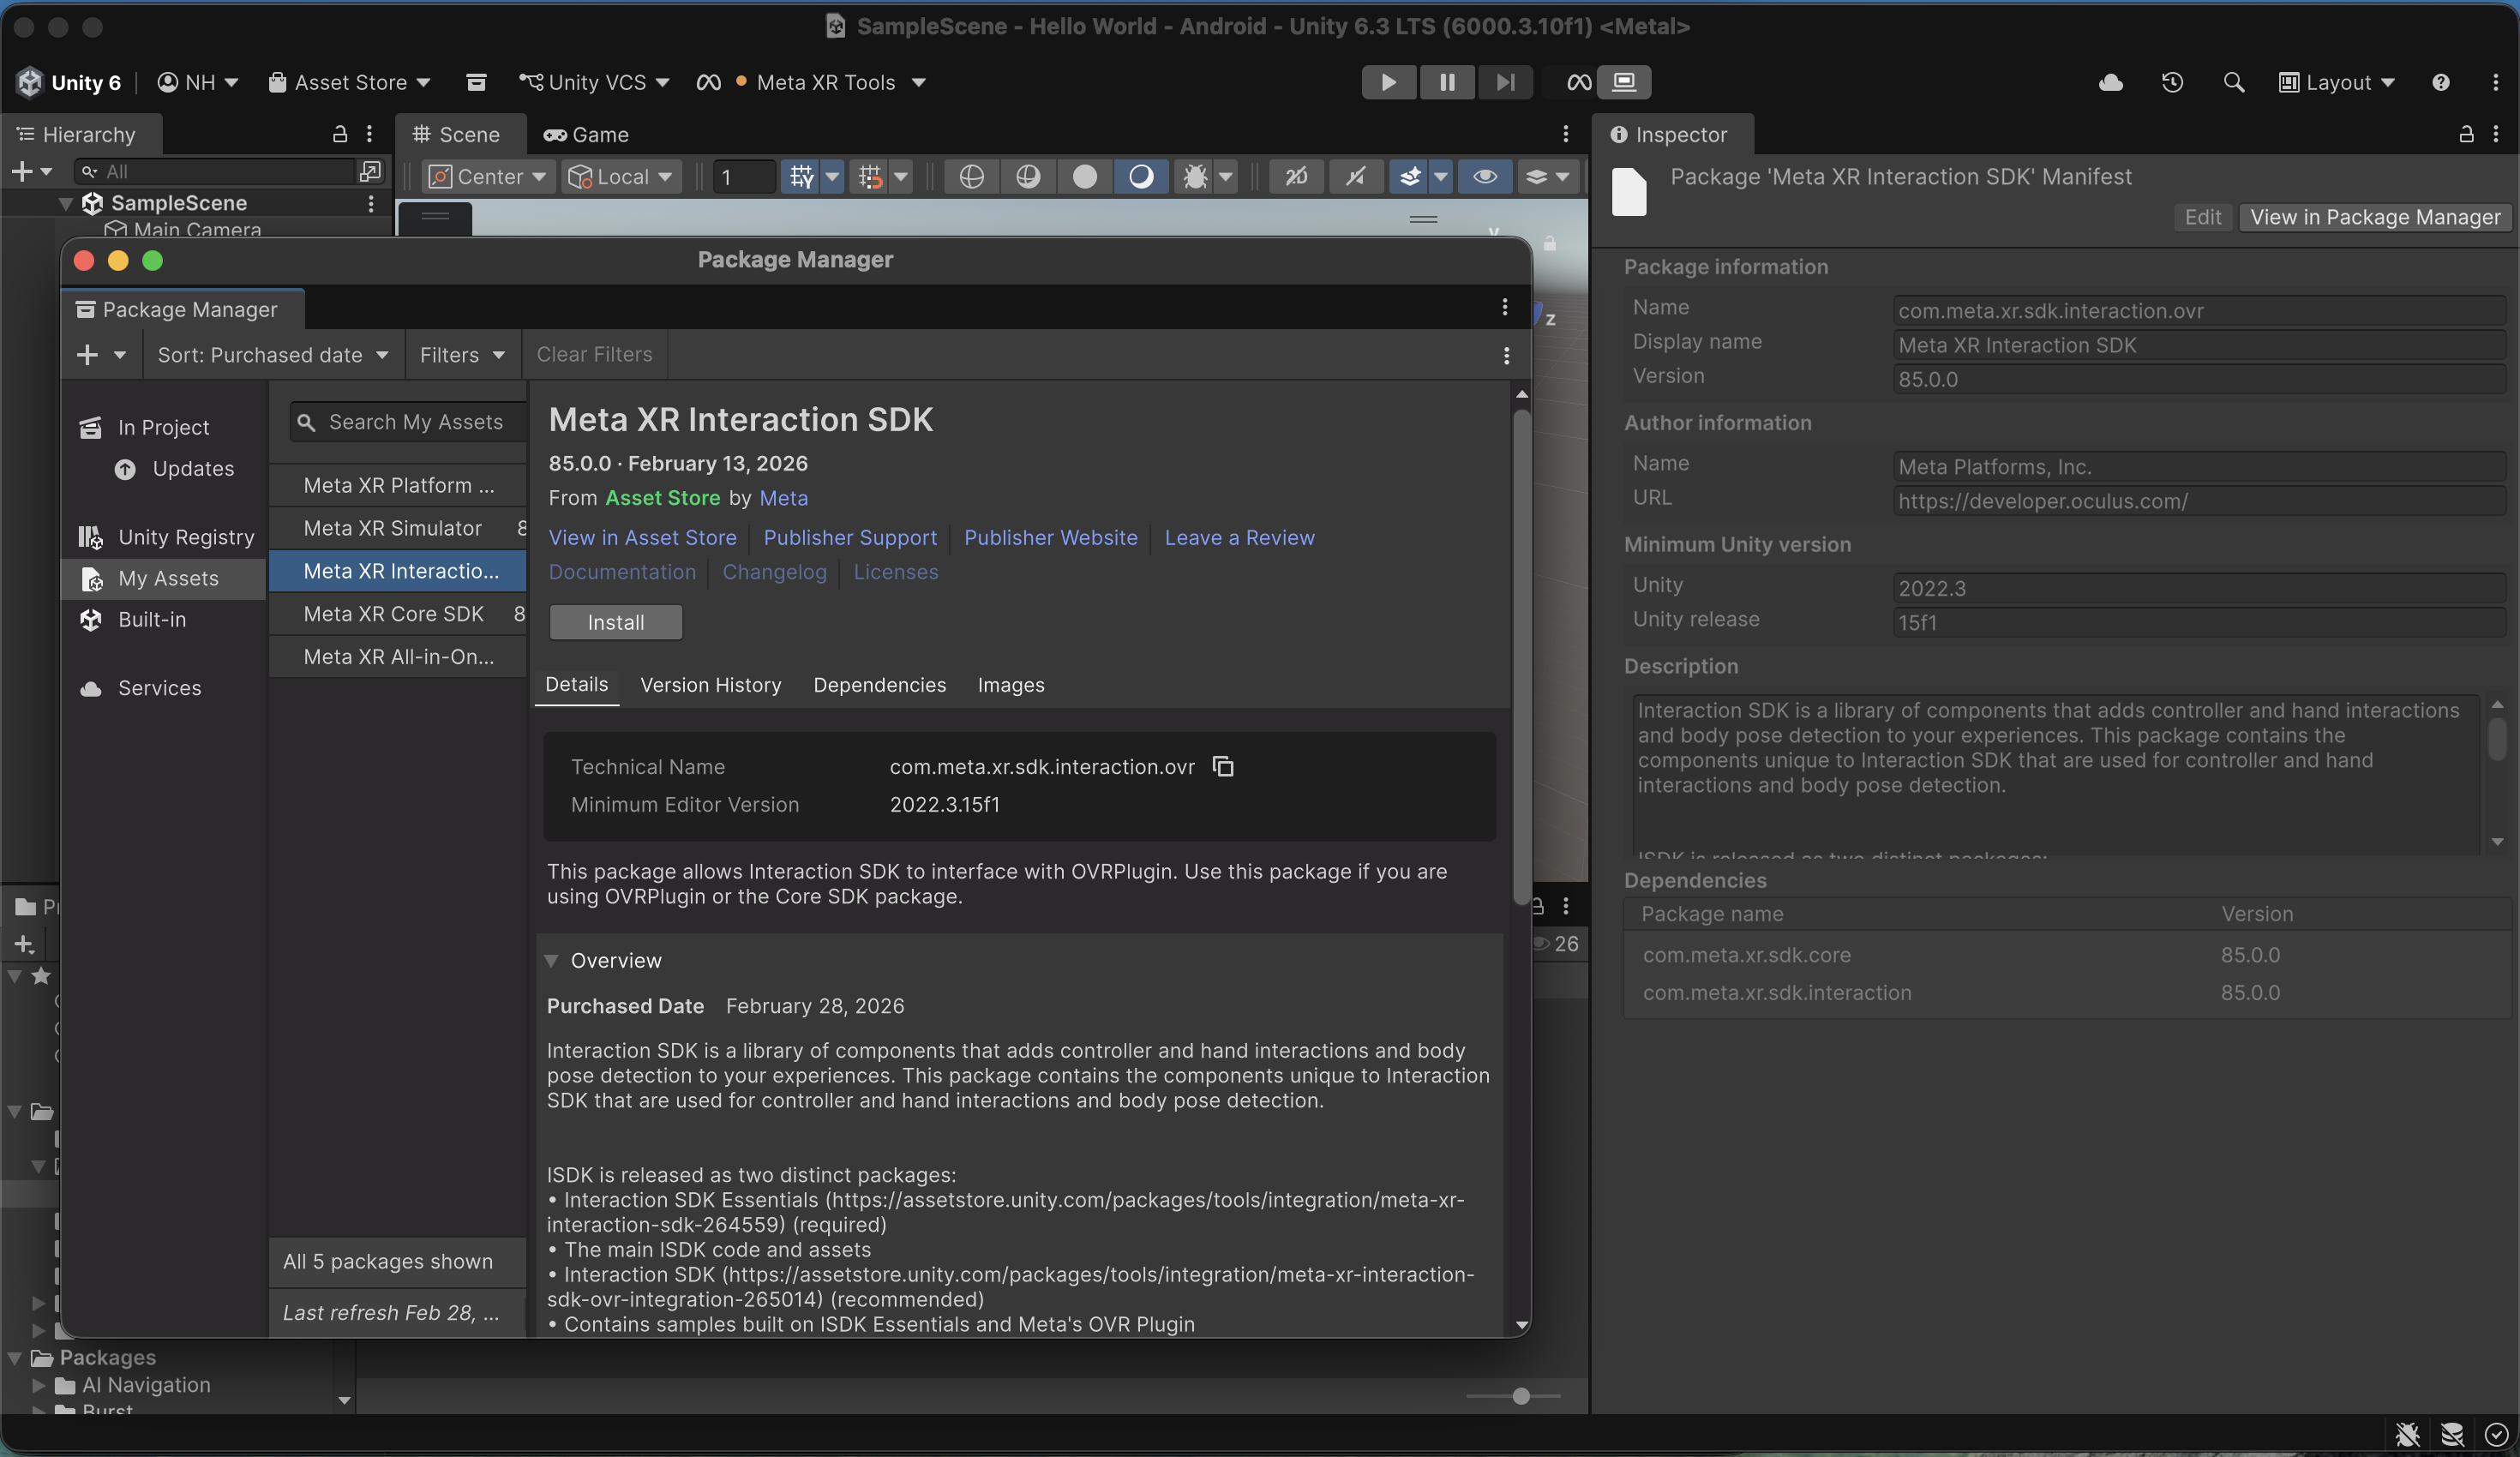
I selected the Meta XR Interaction SDK and clicked Install
I installed the Meta XR Interaction SDK

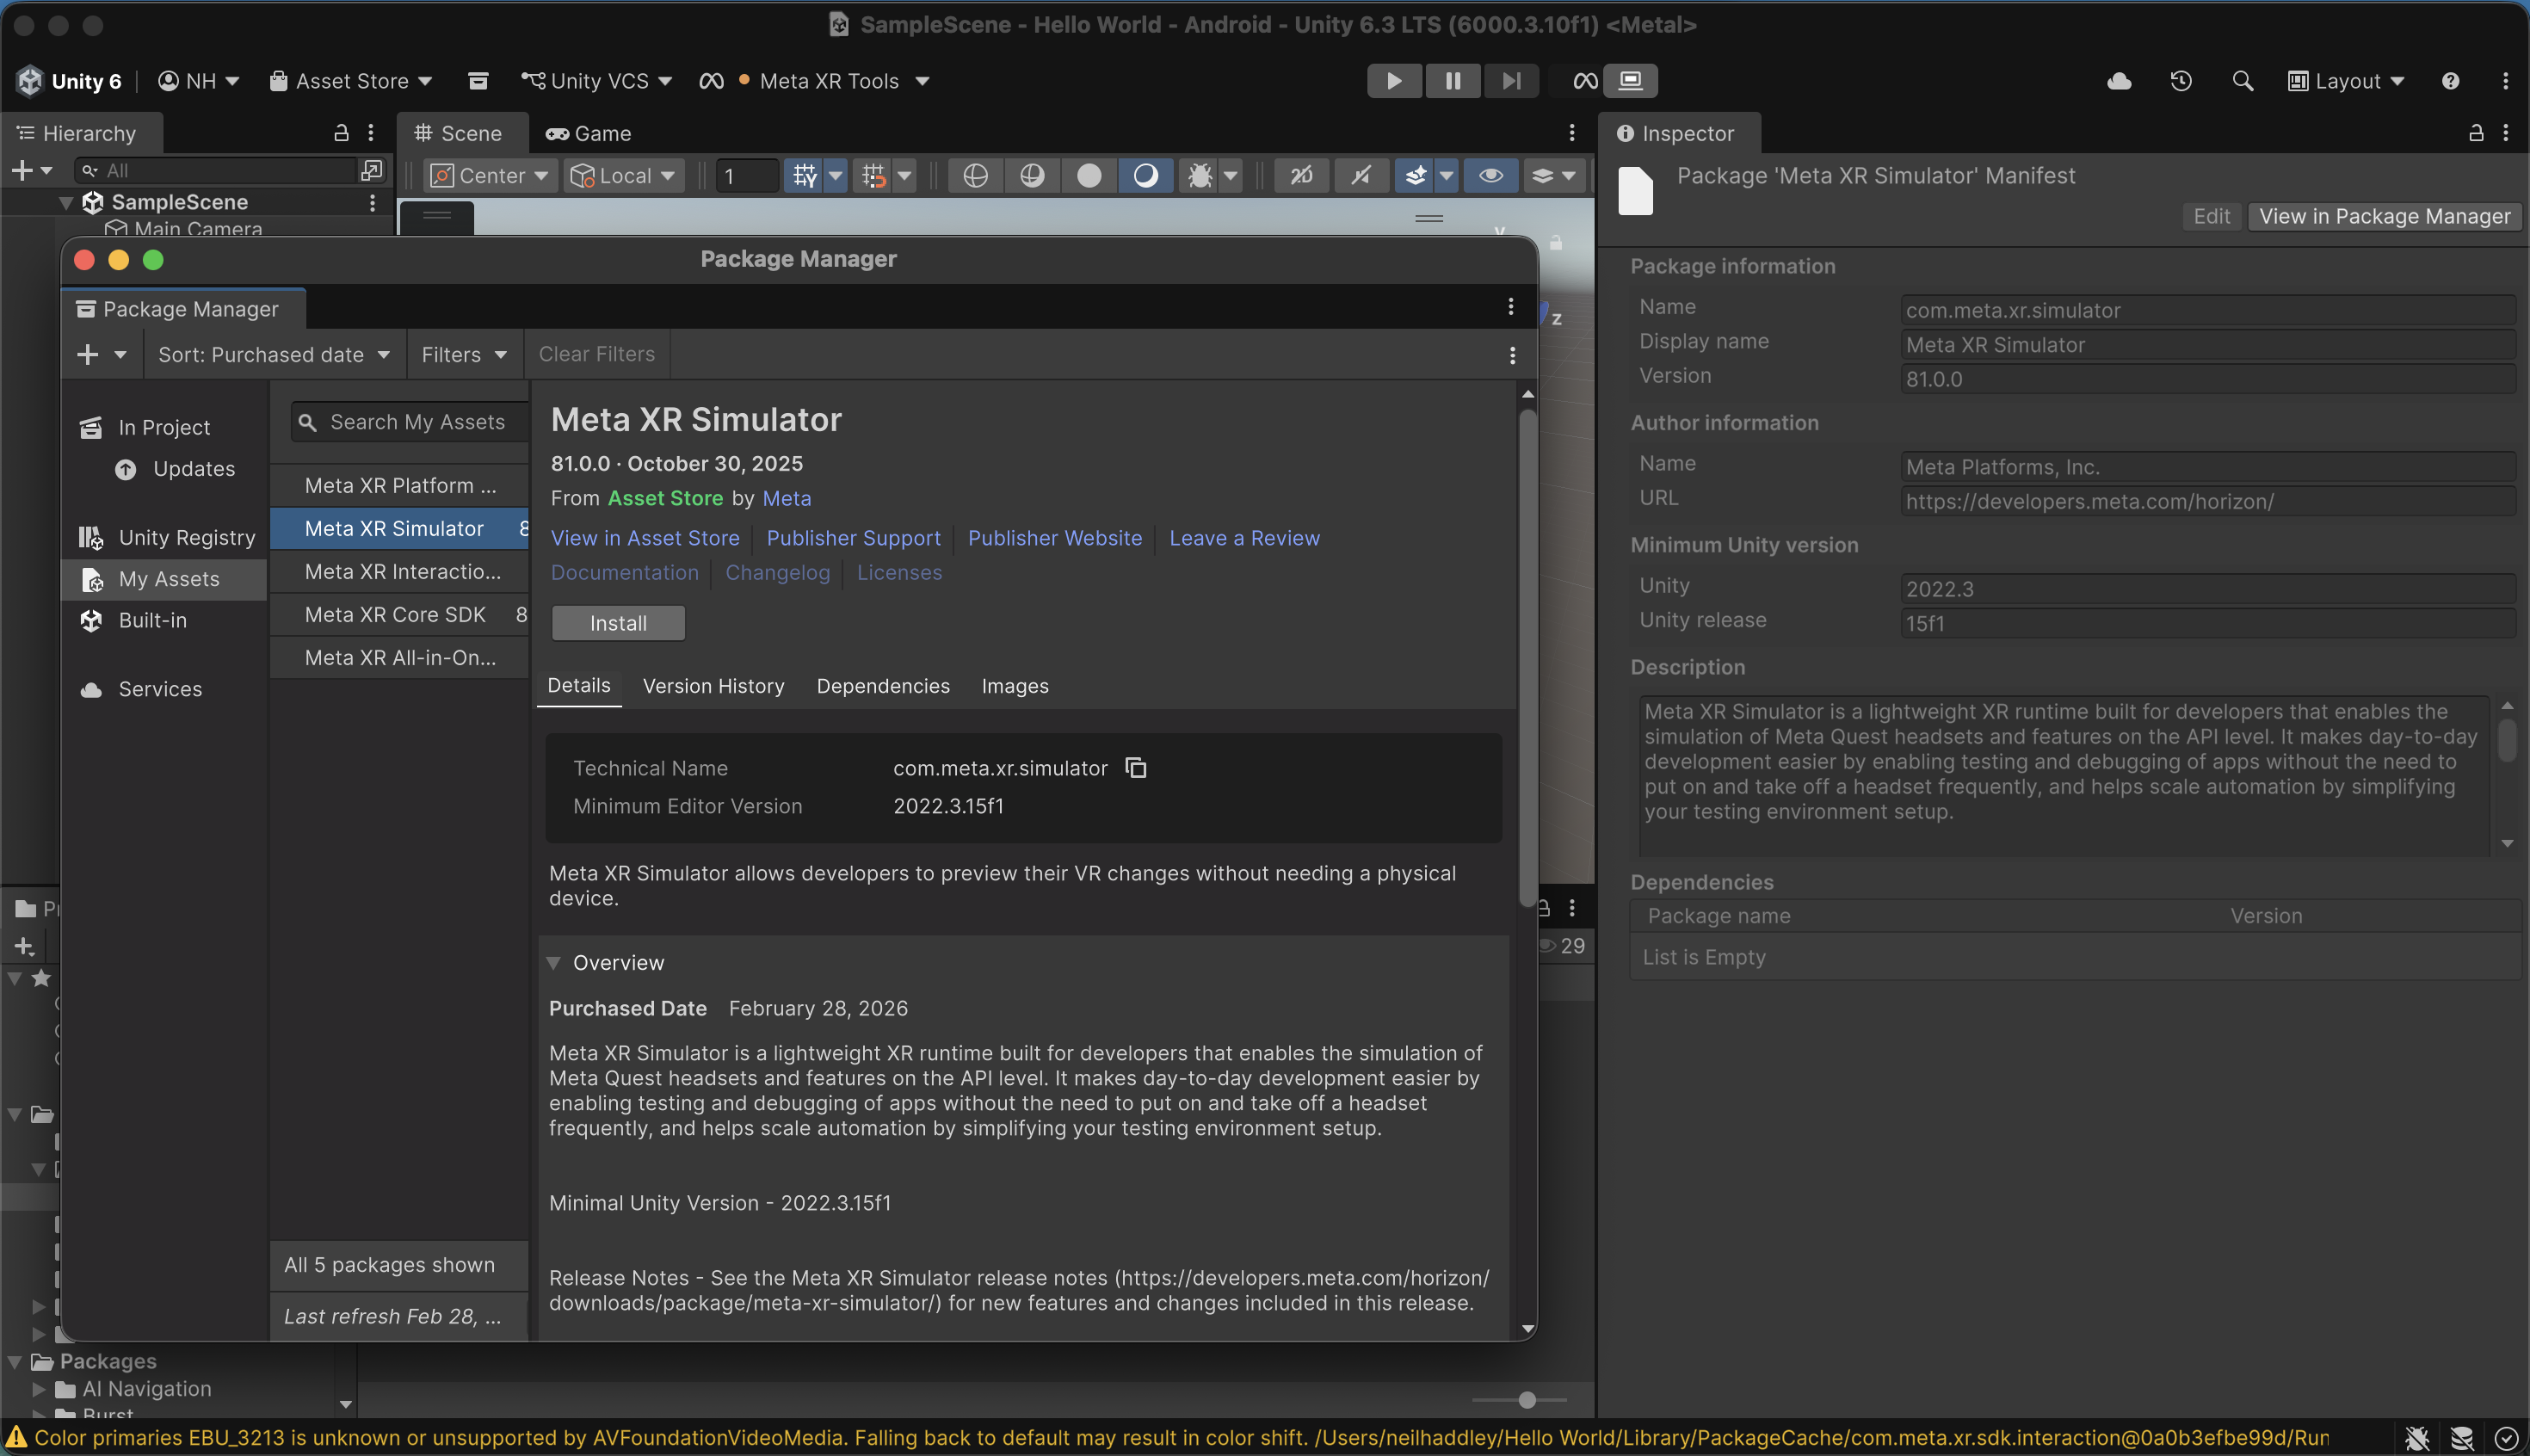
I installed the Meta XR Simulator
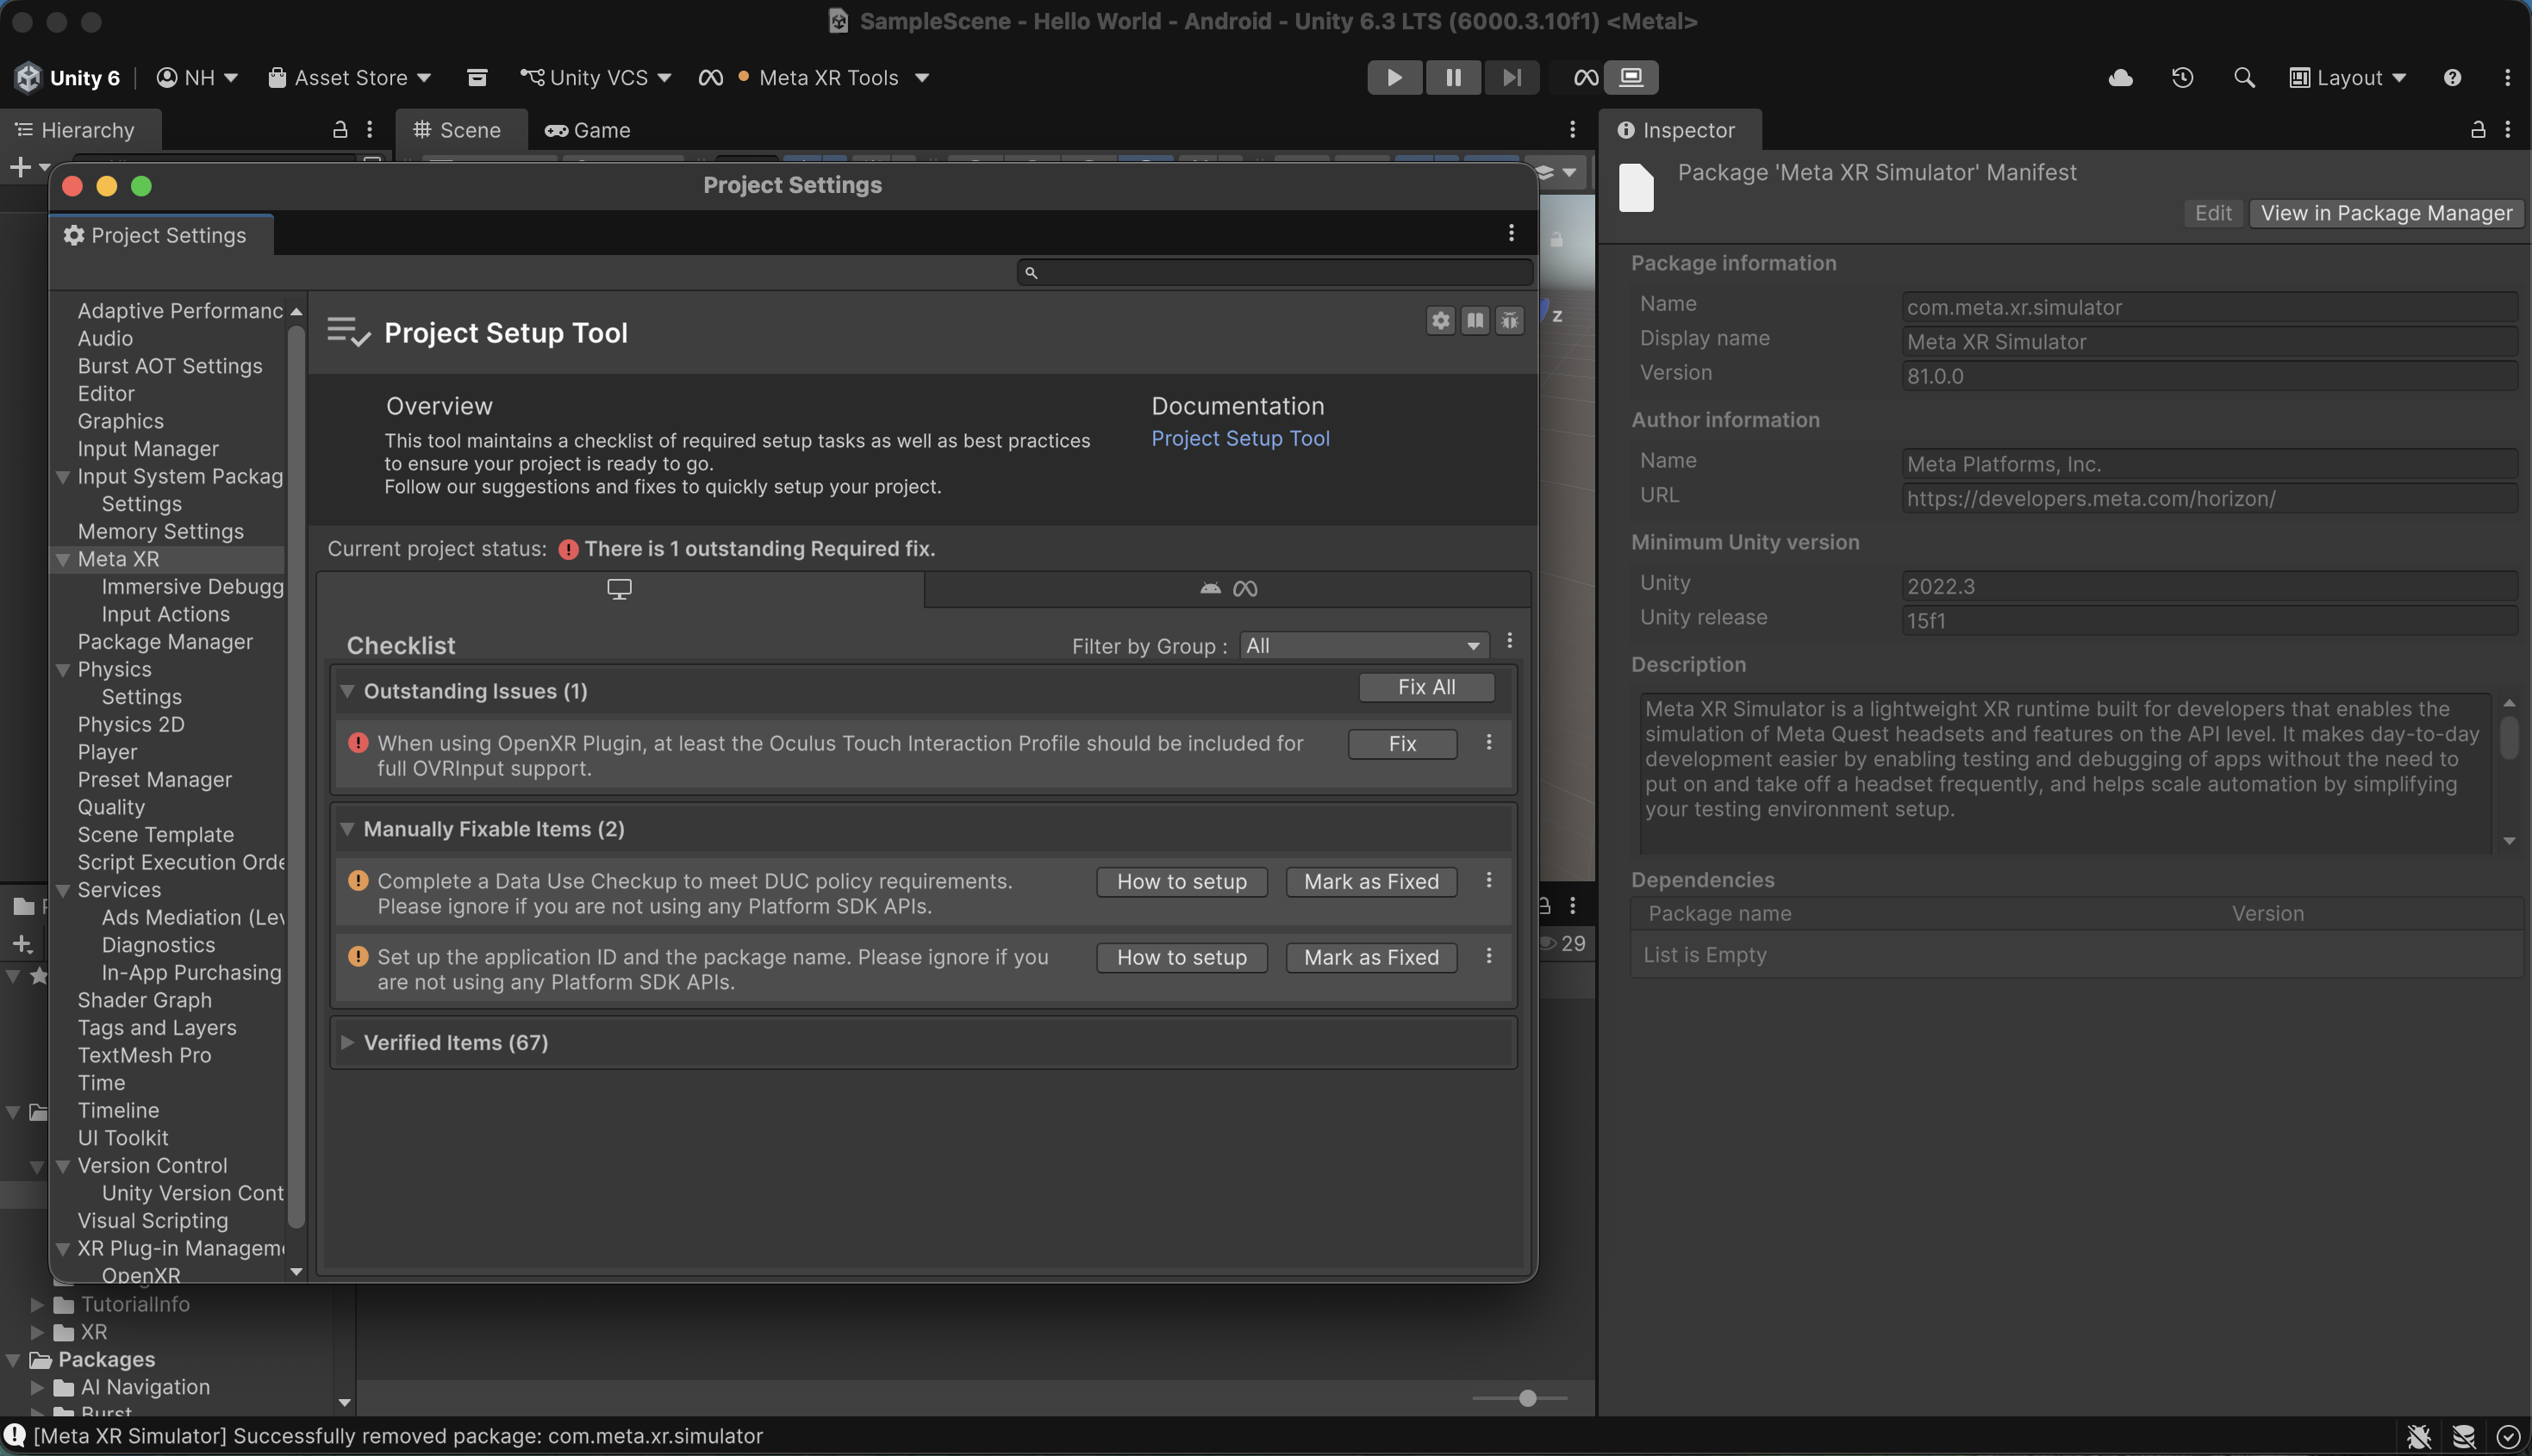
From the top of the Unity Editor, I expanded the Meta XR Tools drop-down list, and then I selected Project Setup Tool.
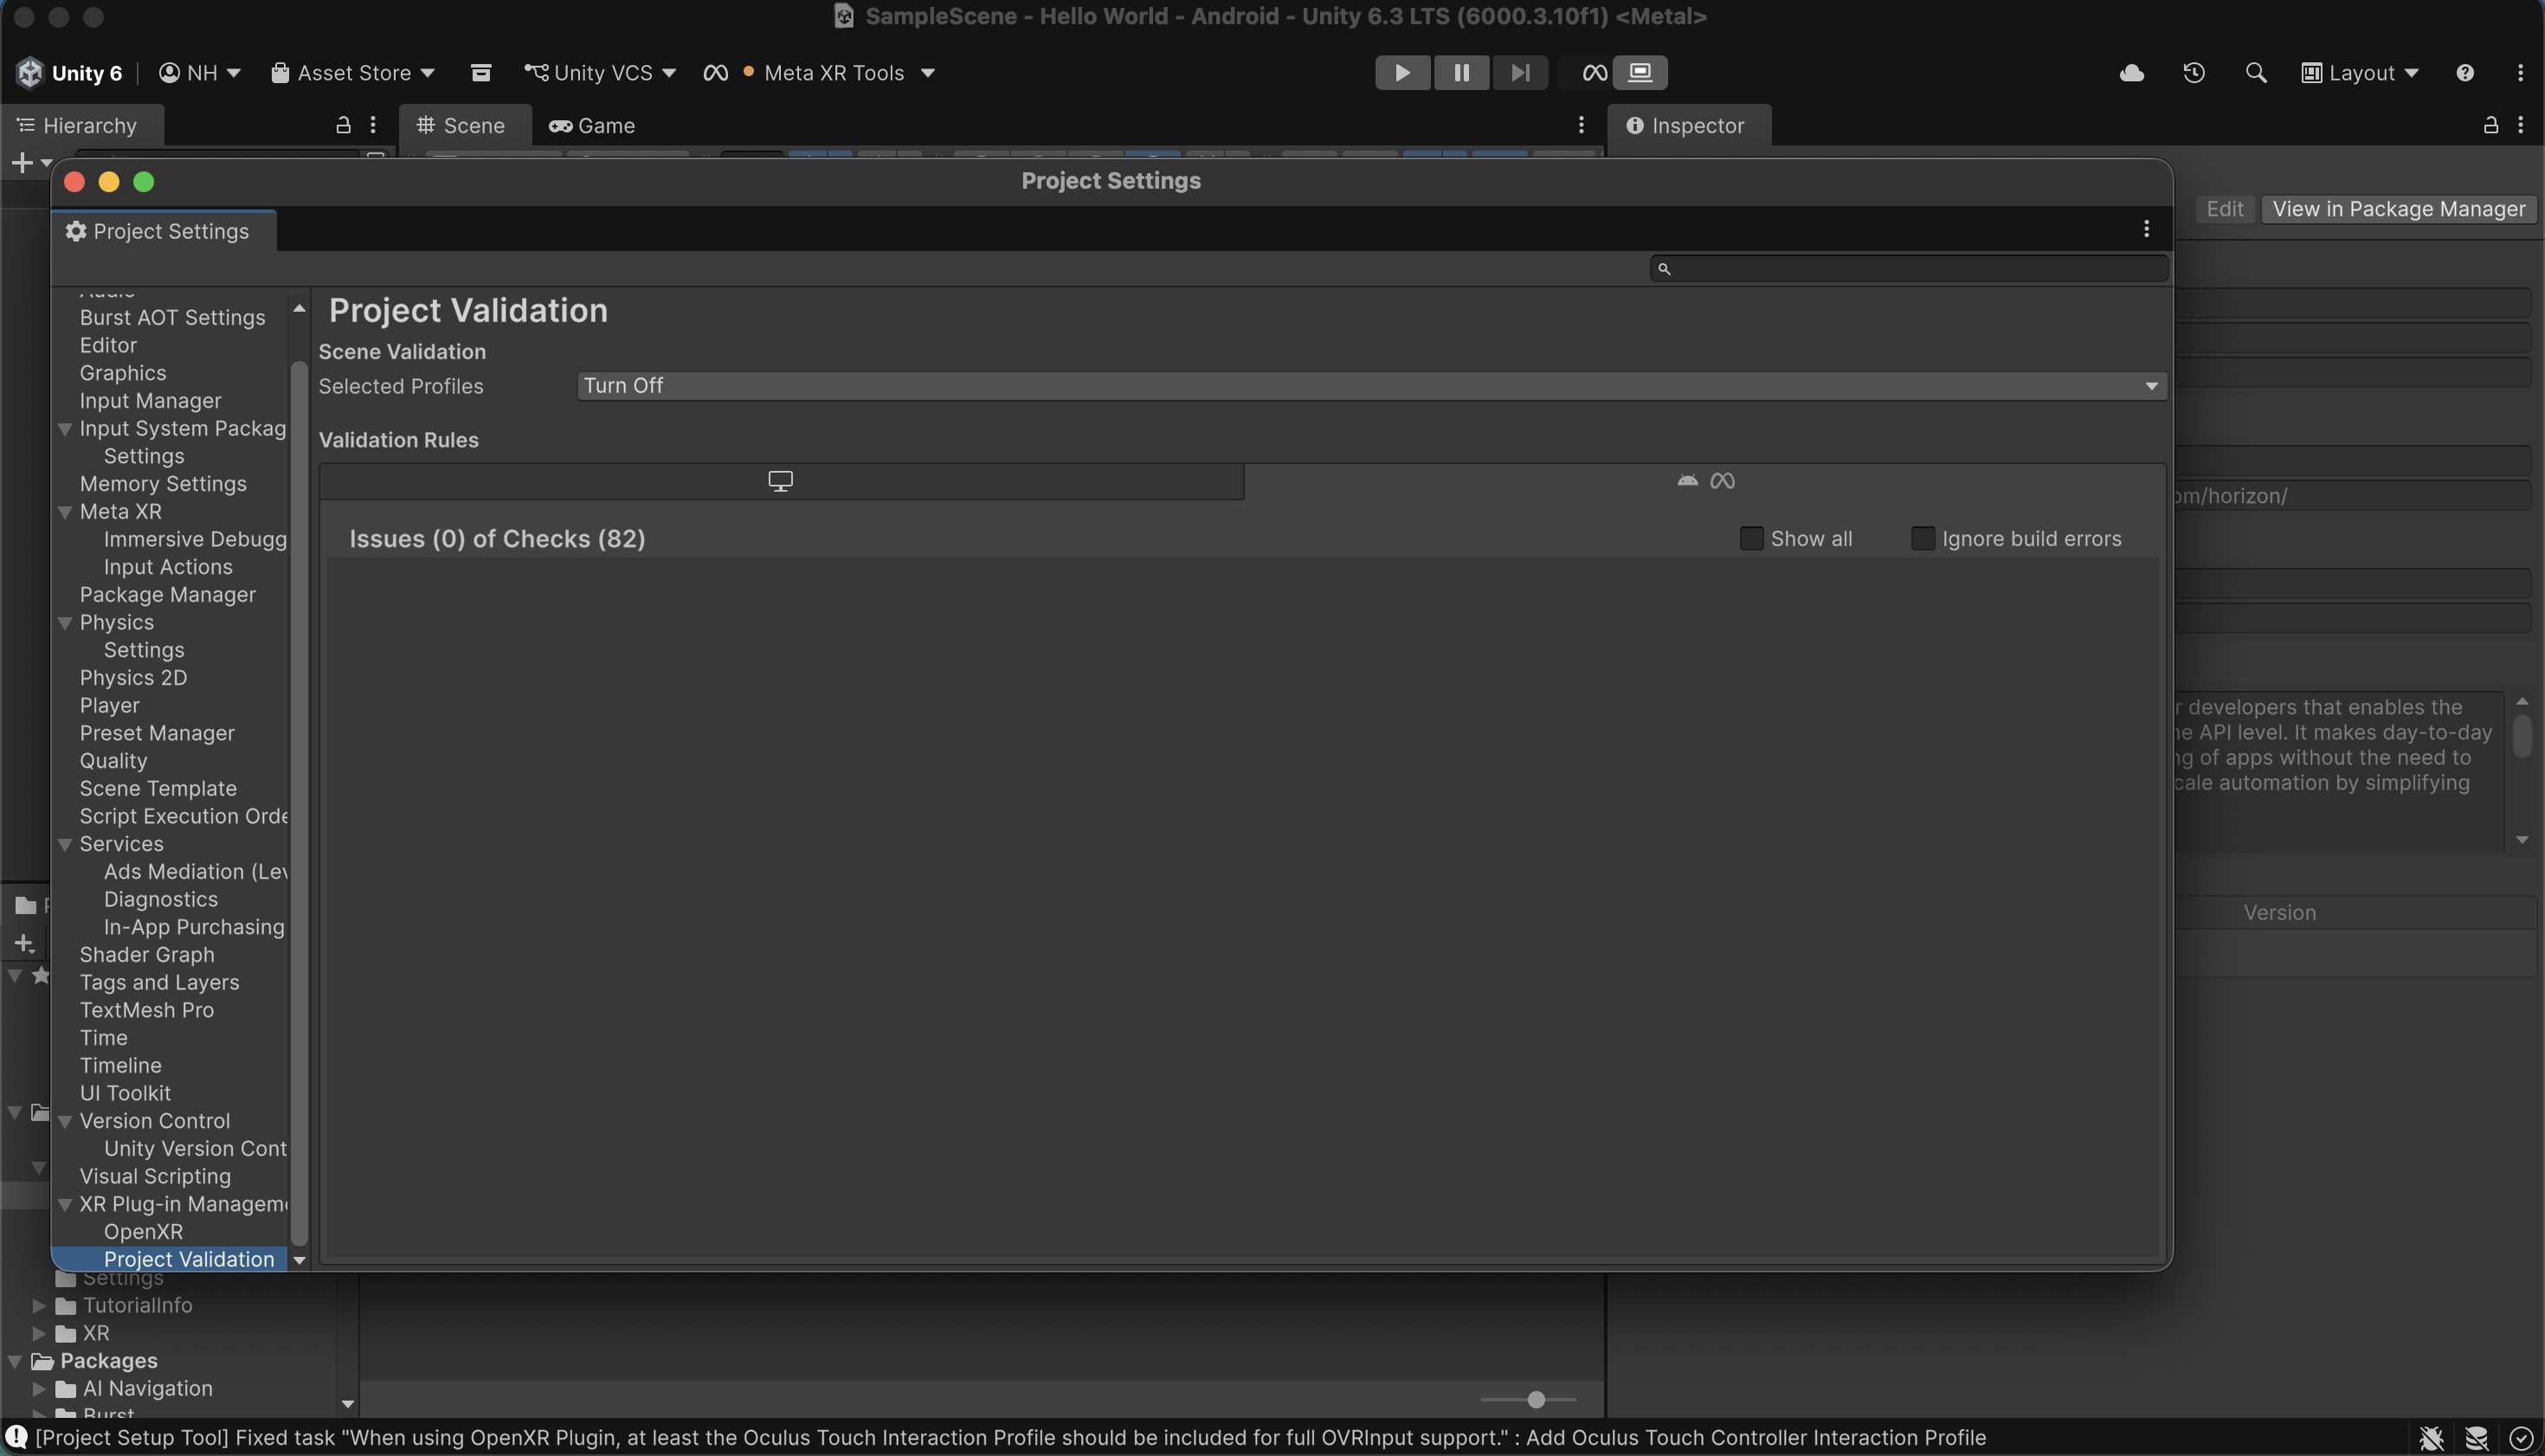
I navigated to Project Settings > XR Plug-in Management > Project Validation.
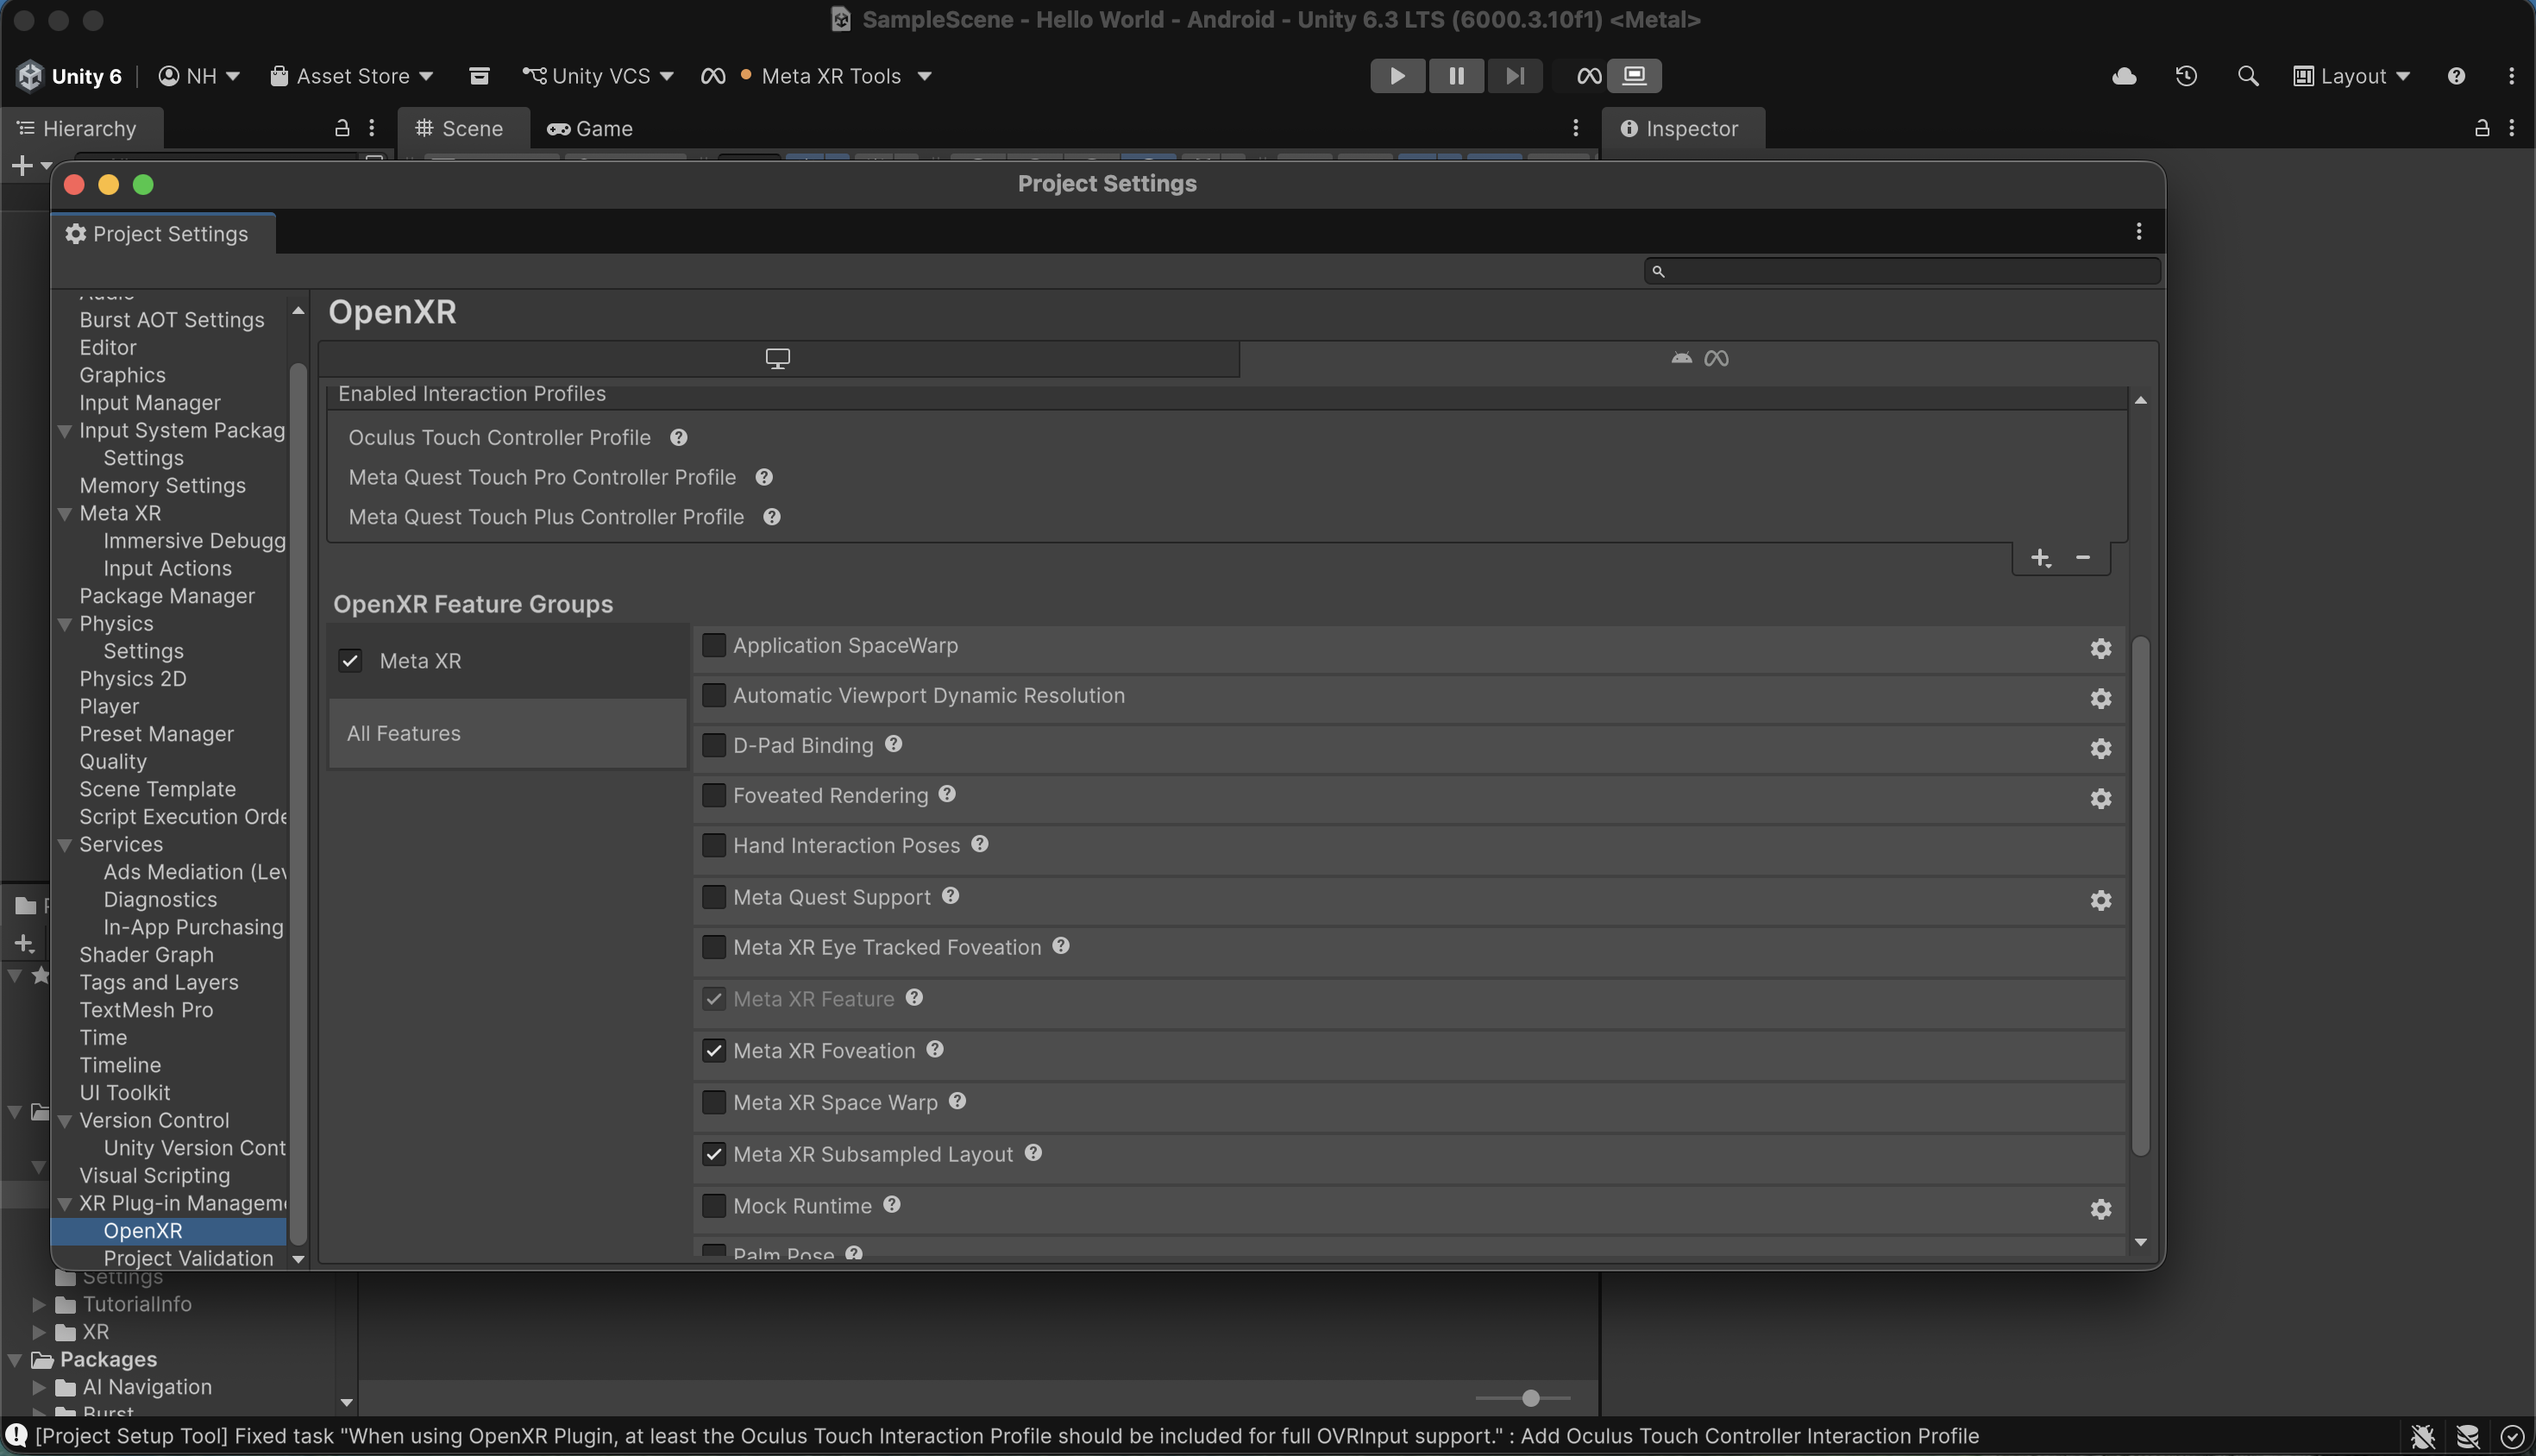
I navigated to Project Settings > XR Plug-in Management > OpenXR and selected the Android tab.
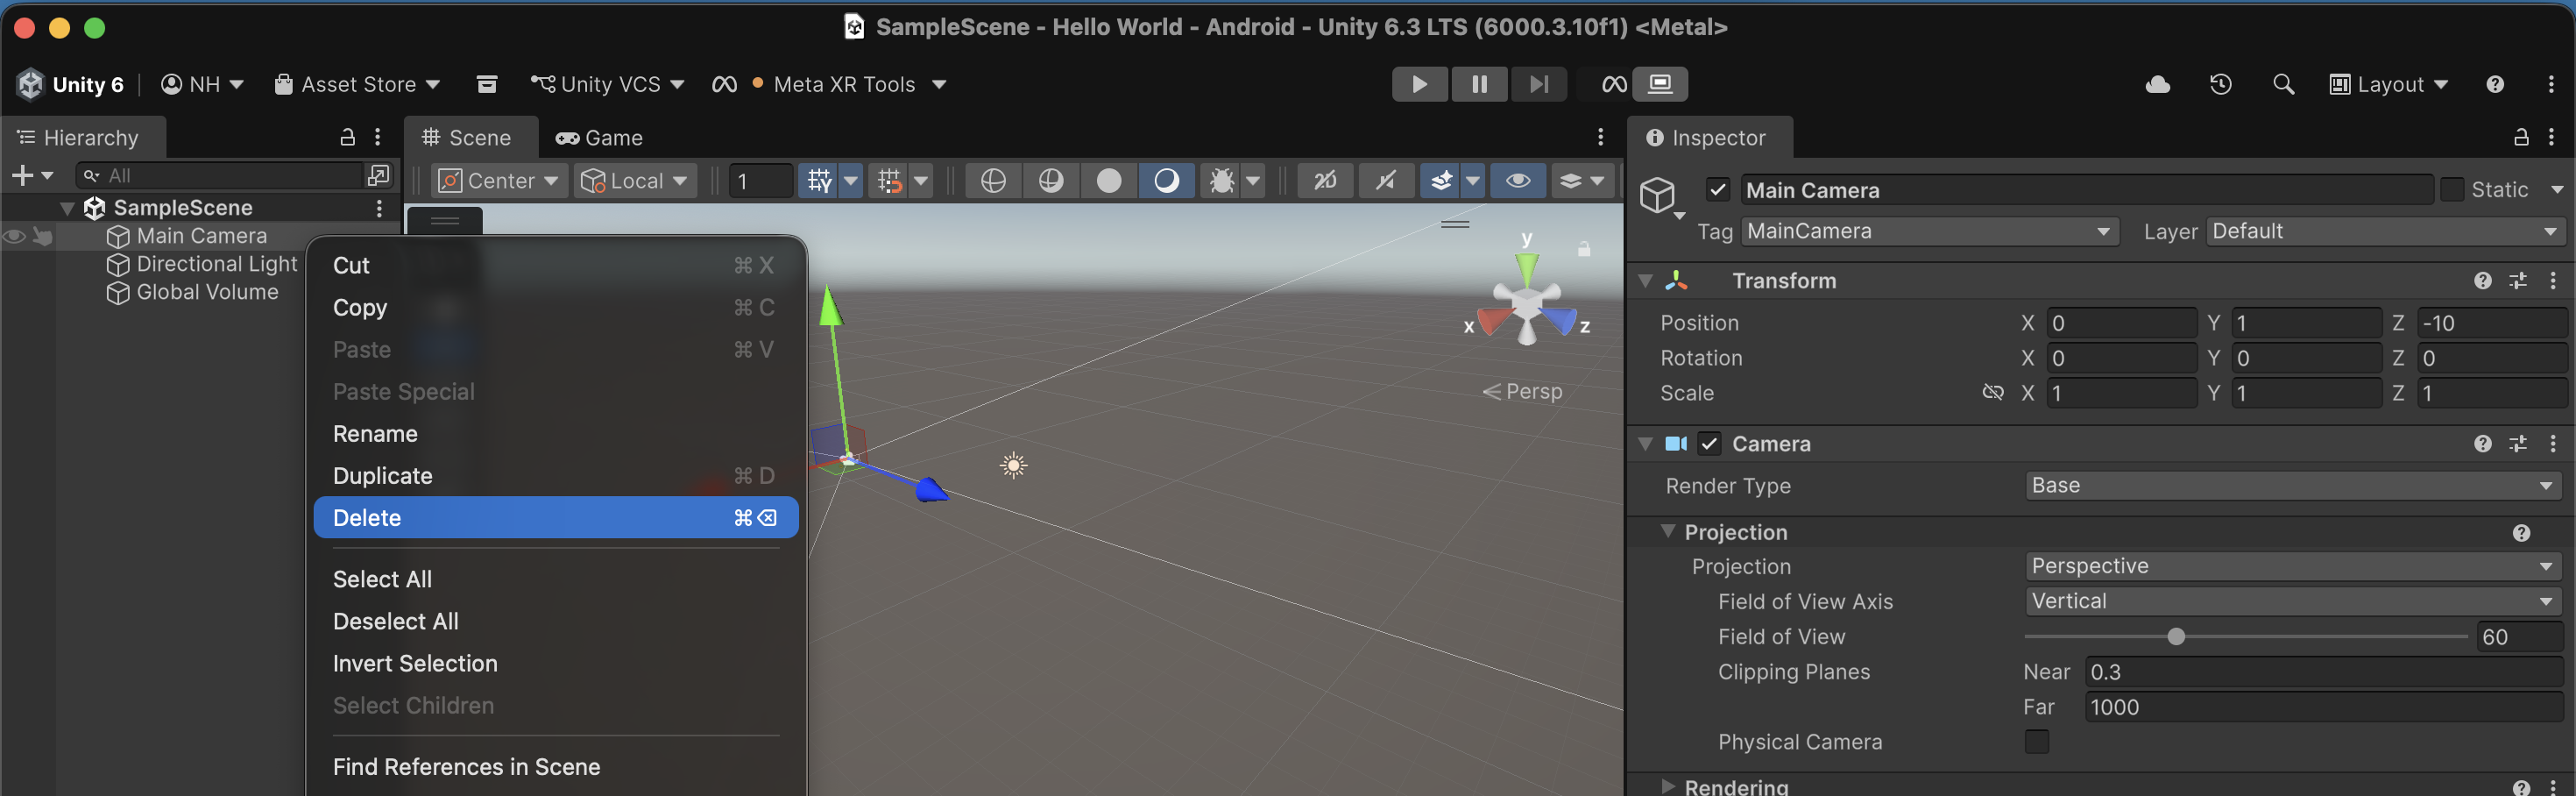
In the Hierarchy pane, I deleted the Main Camera from my project’s SampleScene.
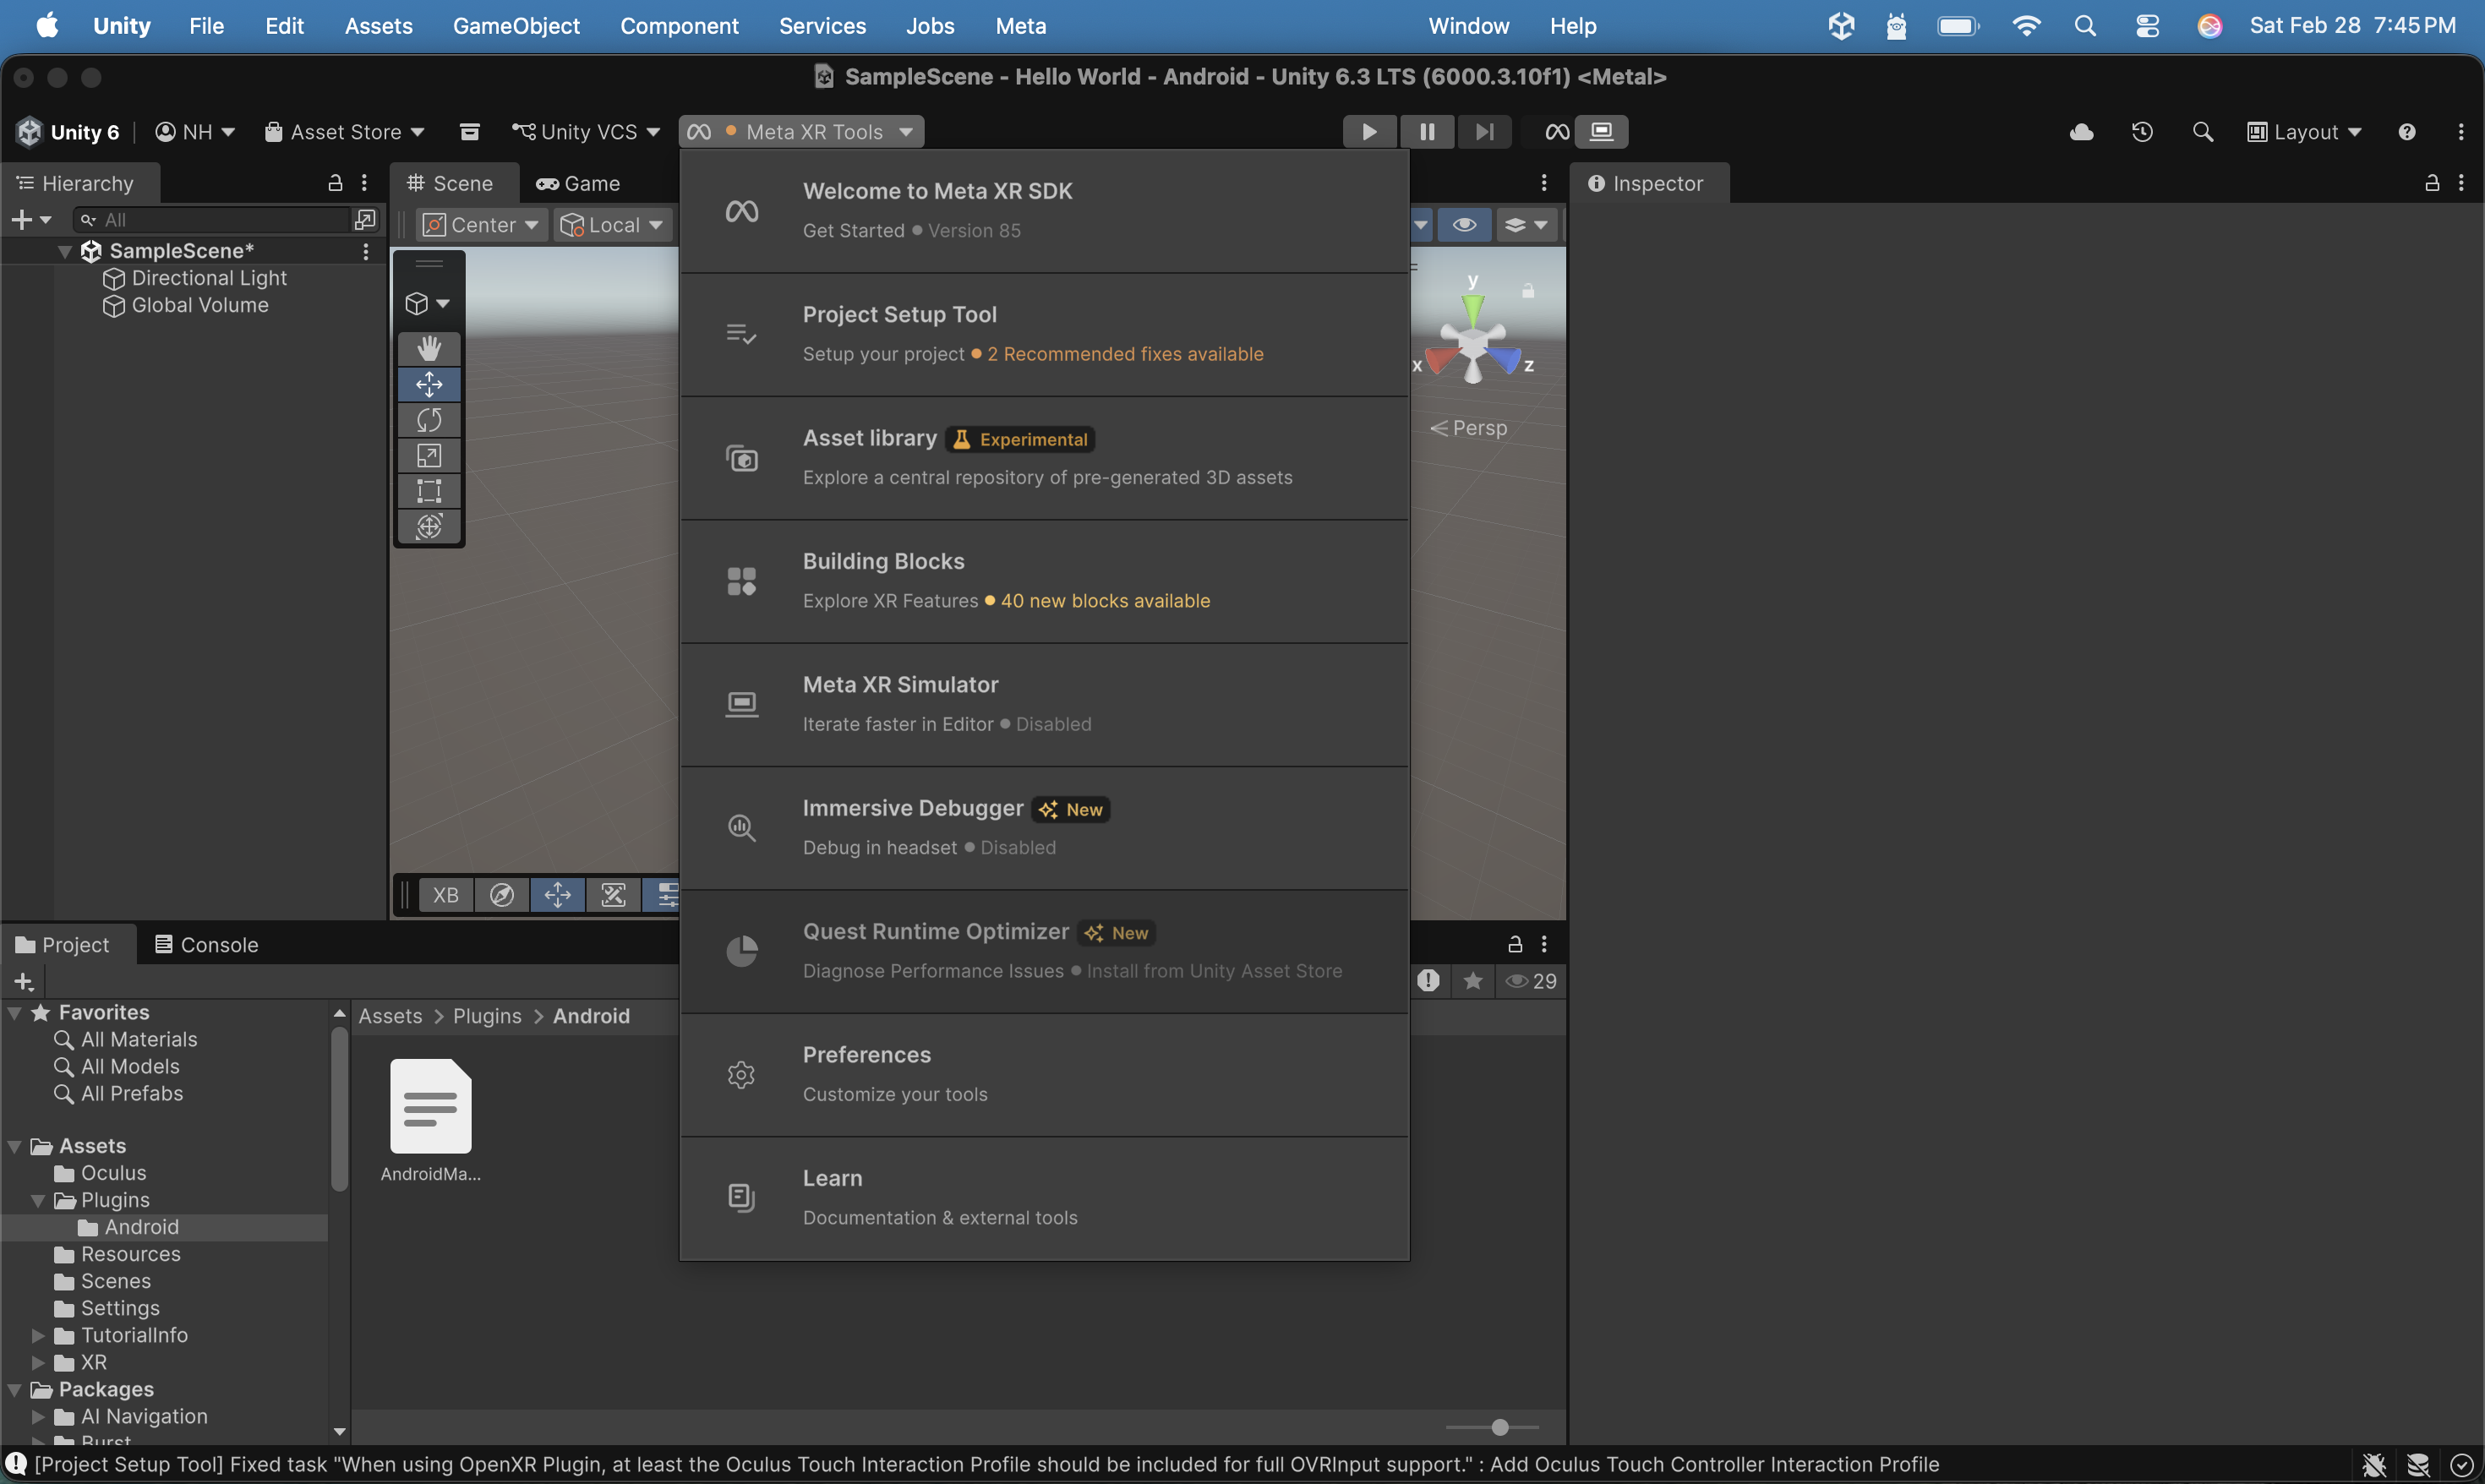
I selected Meta XR Tools > Building Blocks from the drop-down toolbar menu in the editor.
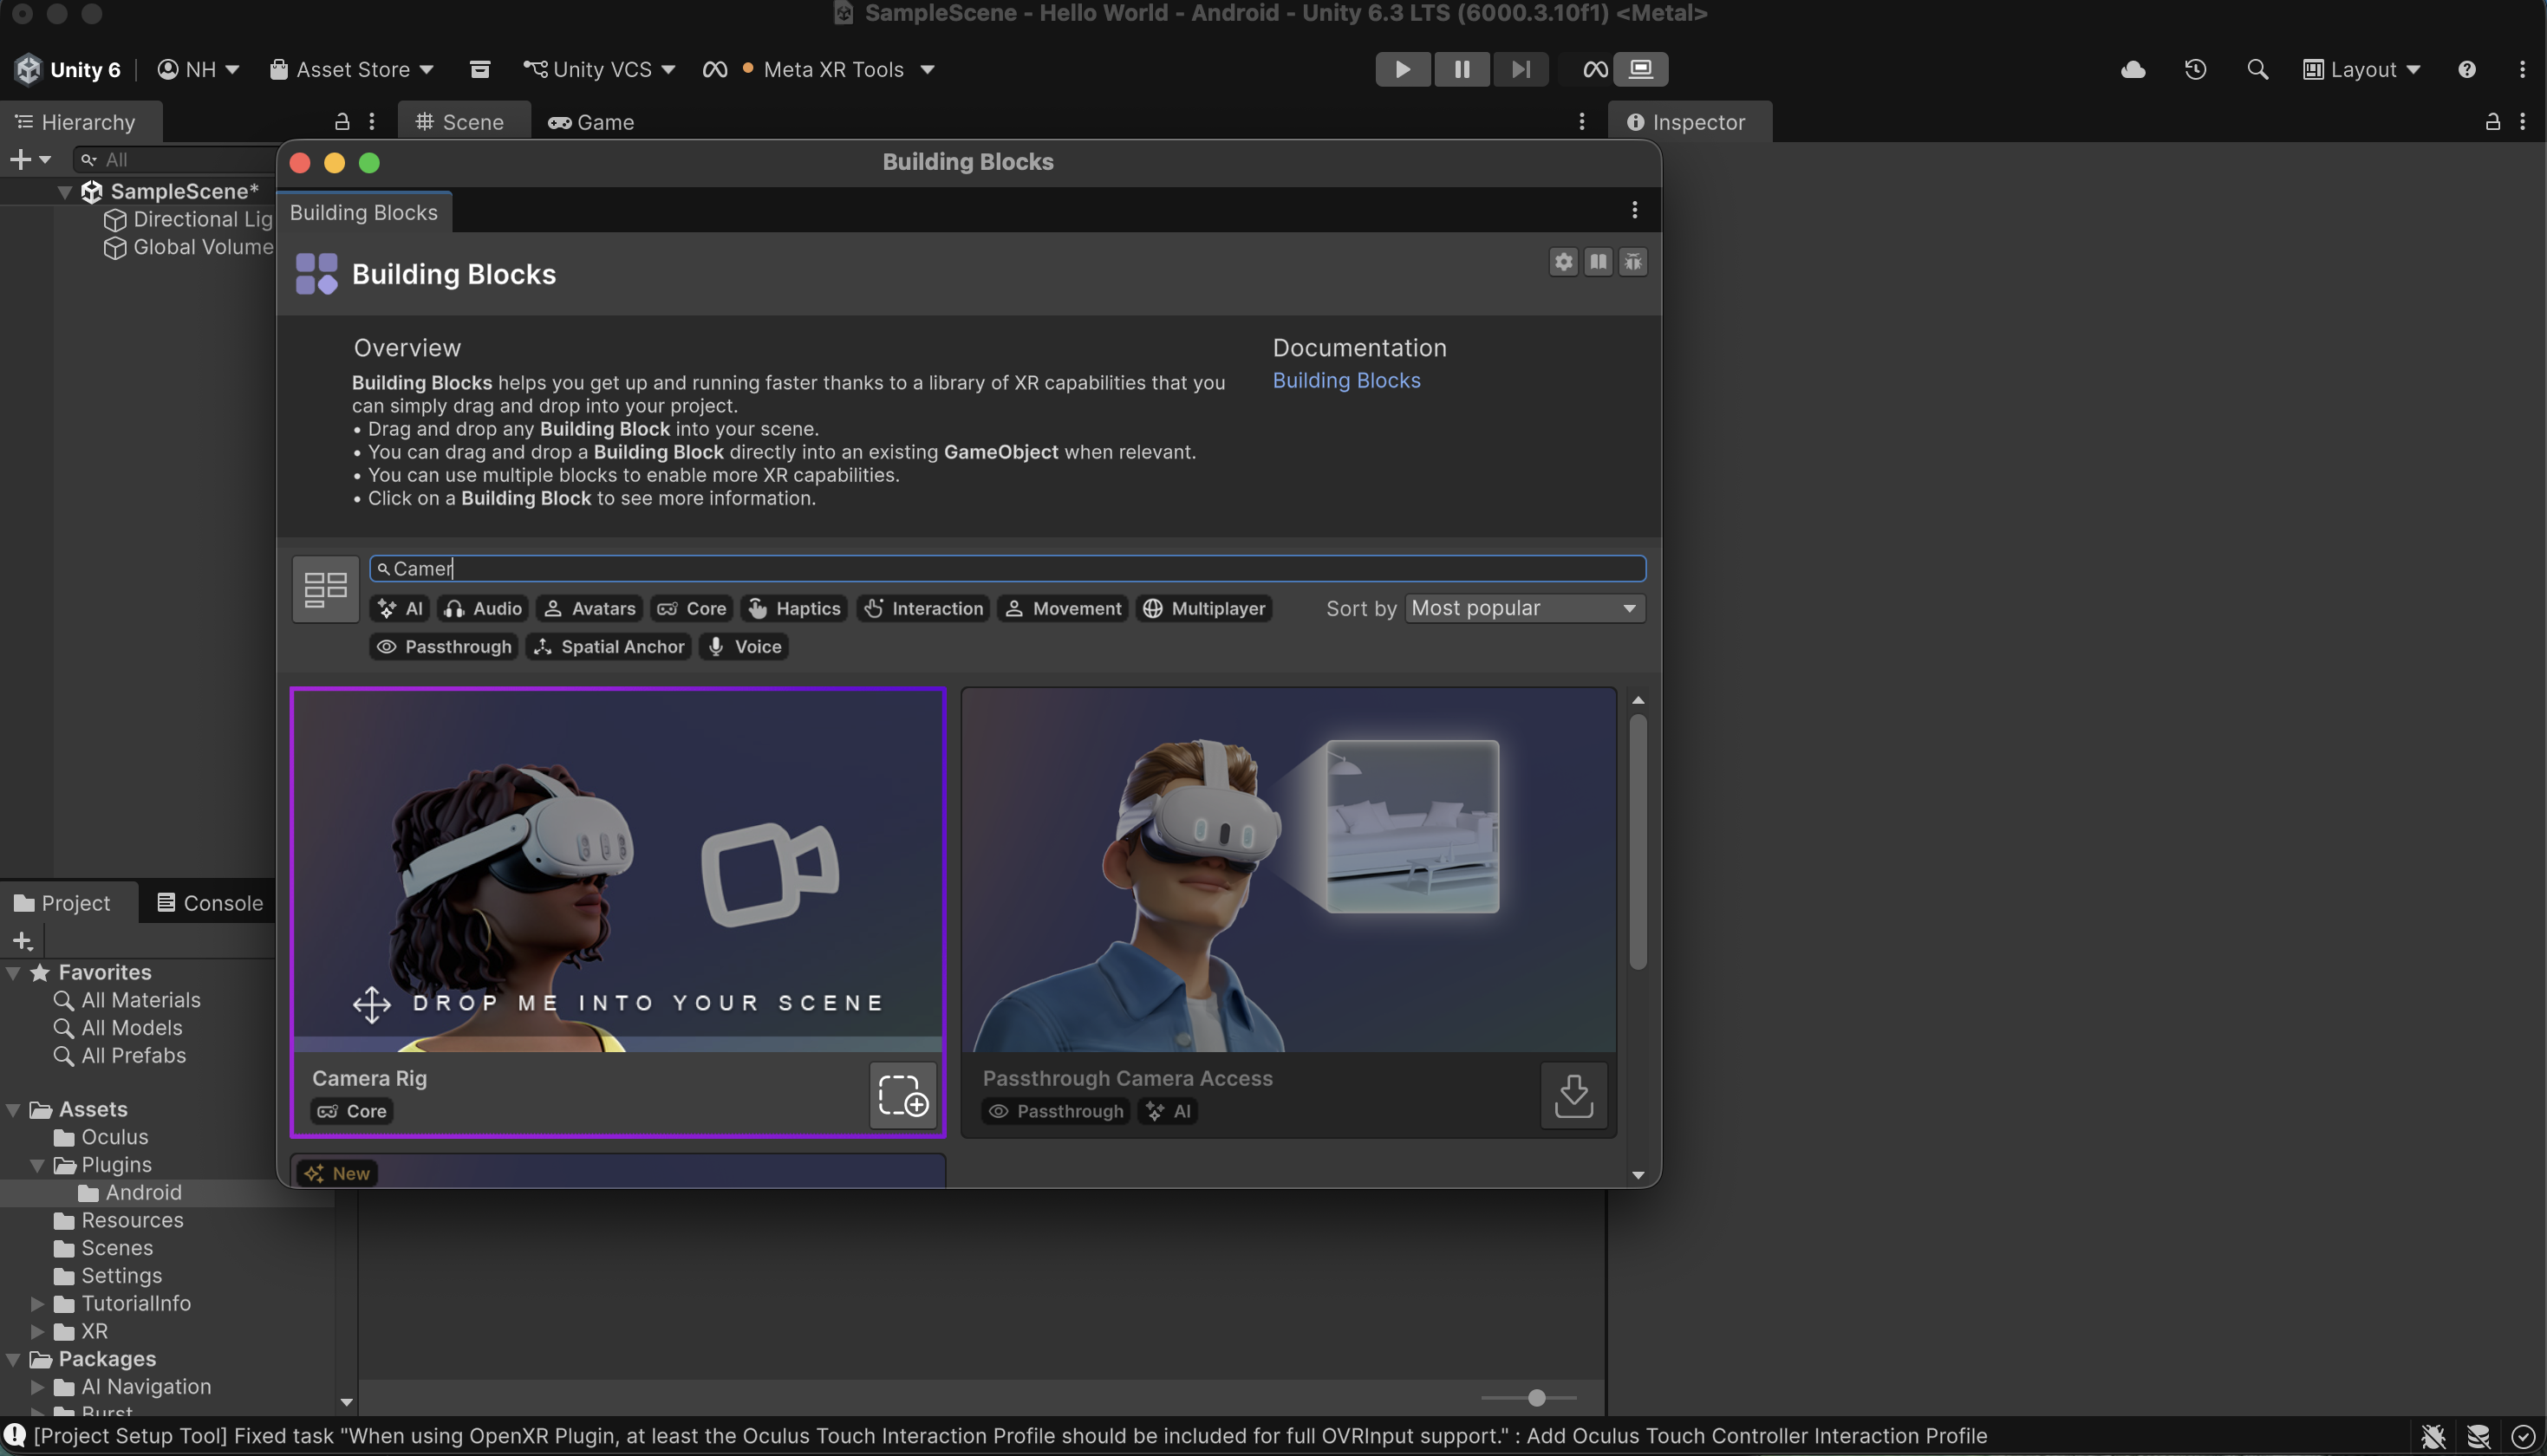
In the Building Blocks window, I found the Camera Rig Building Block, and selected the icon on the bottom right of the block to add it to the project.
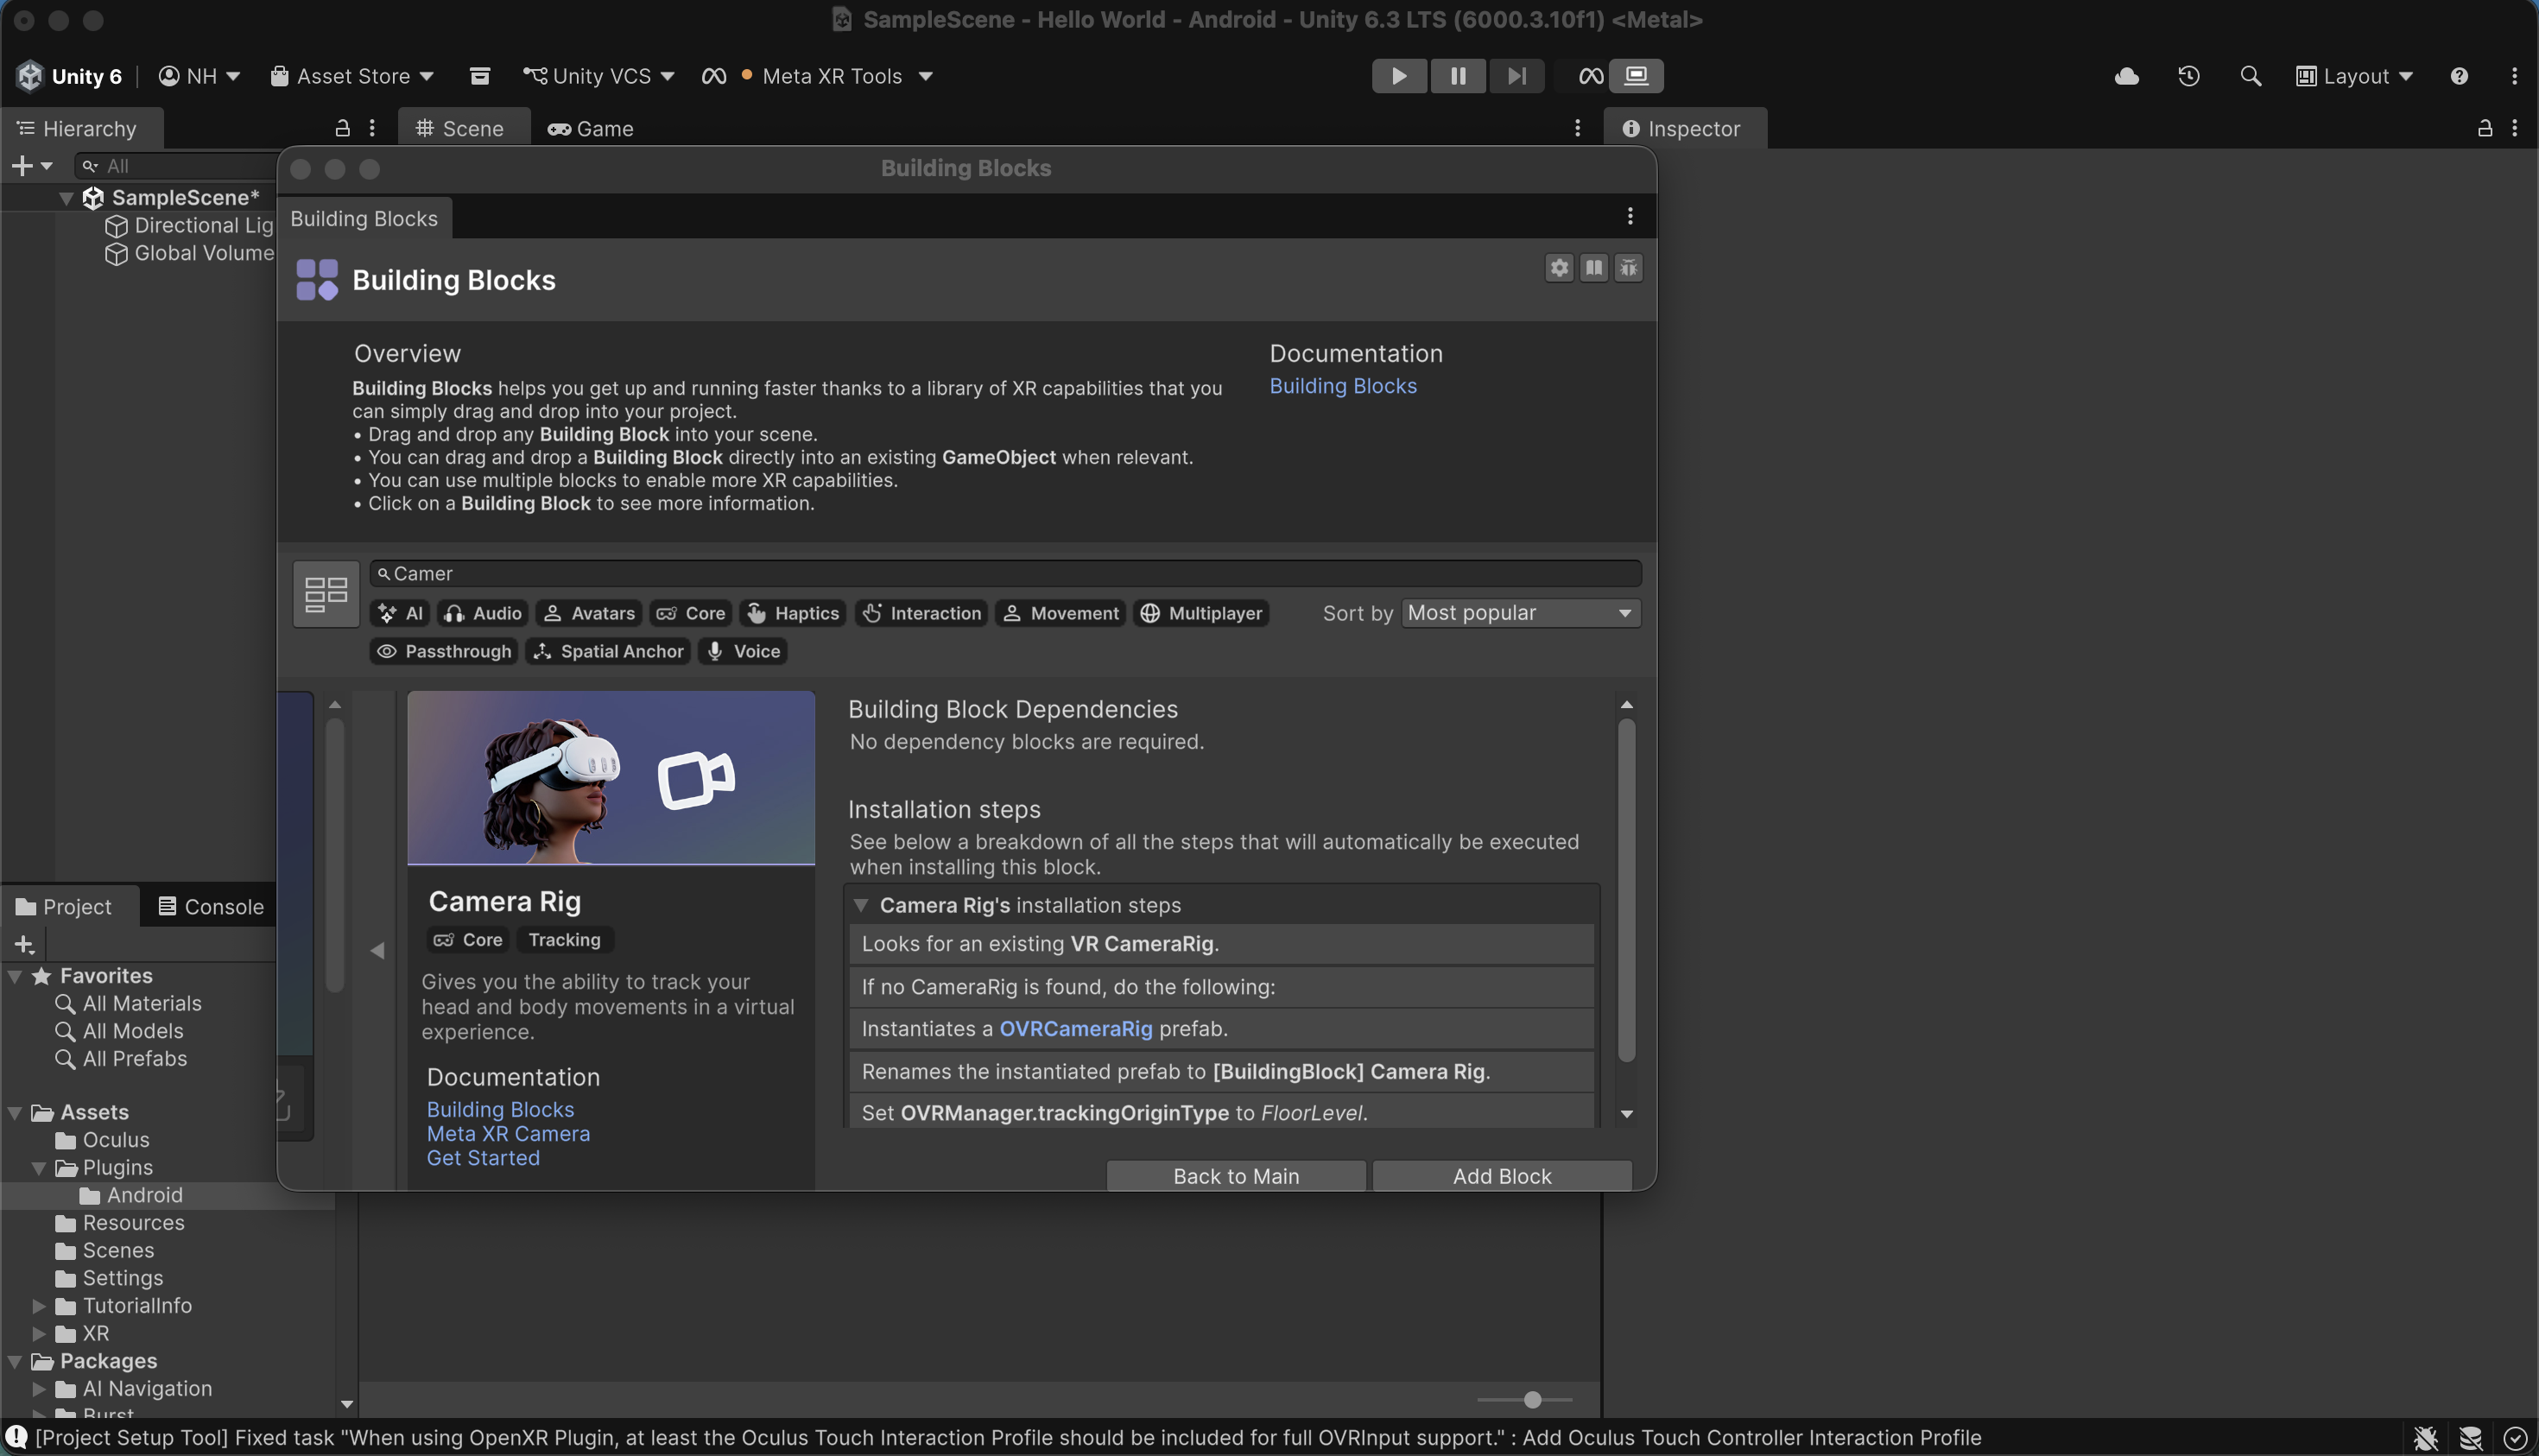
I added the Camera Rig object
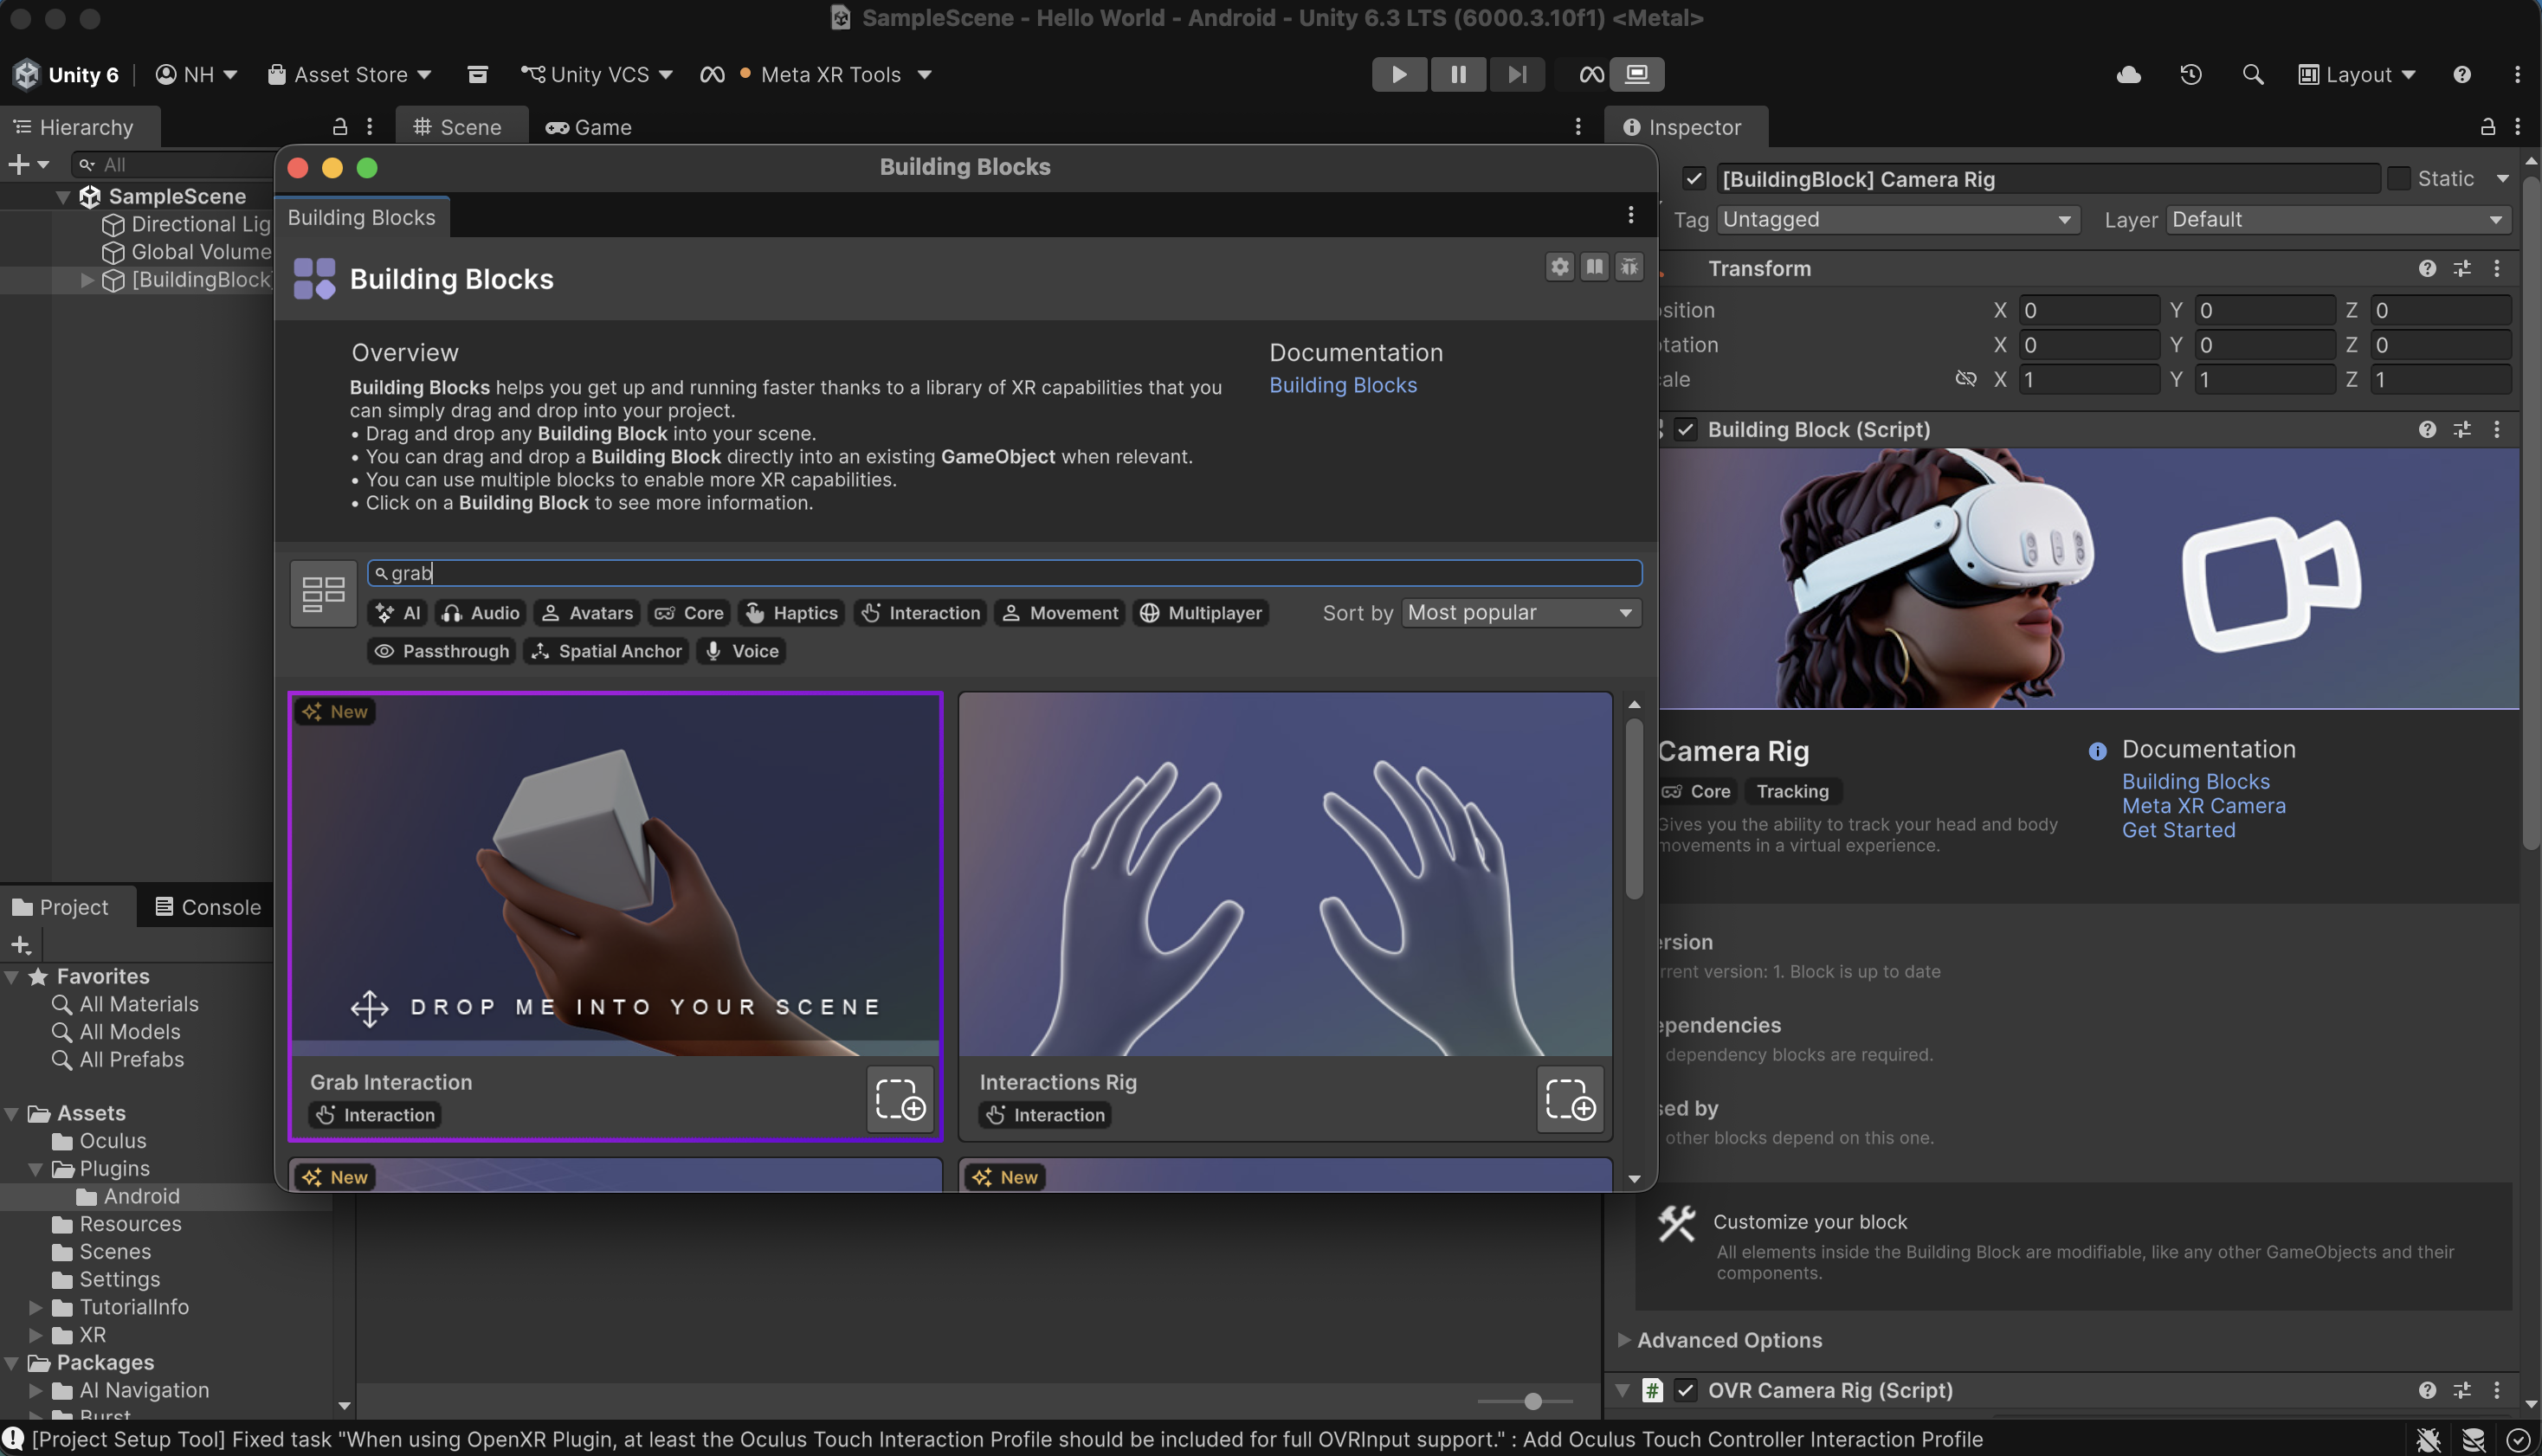
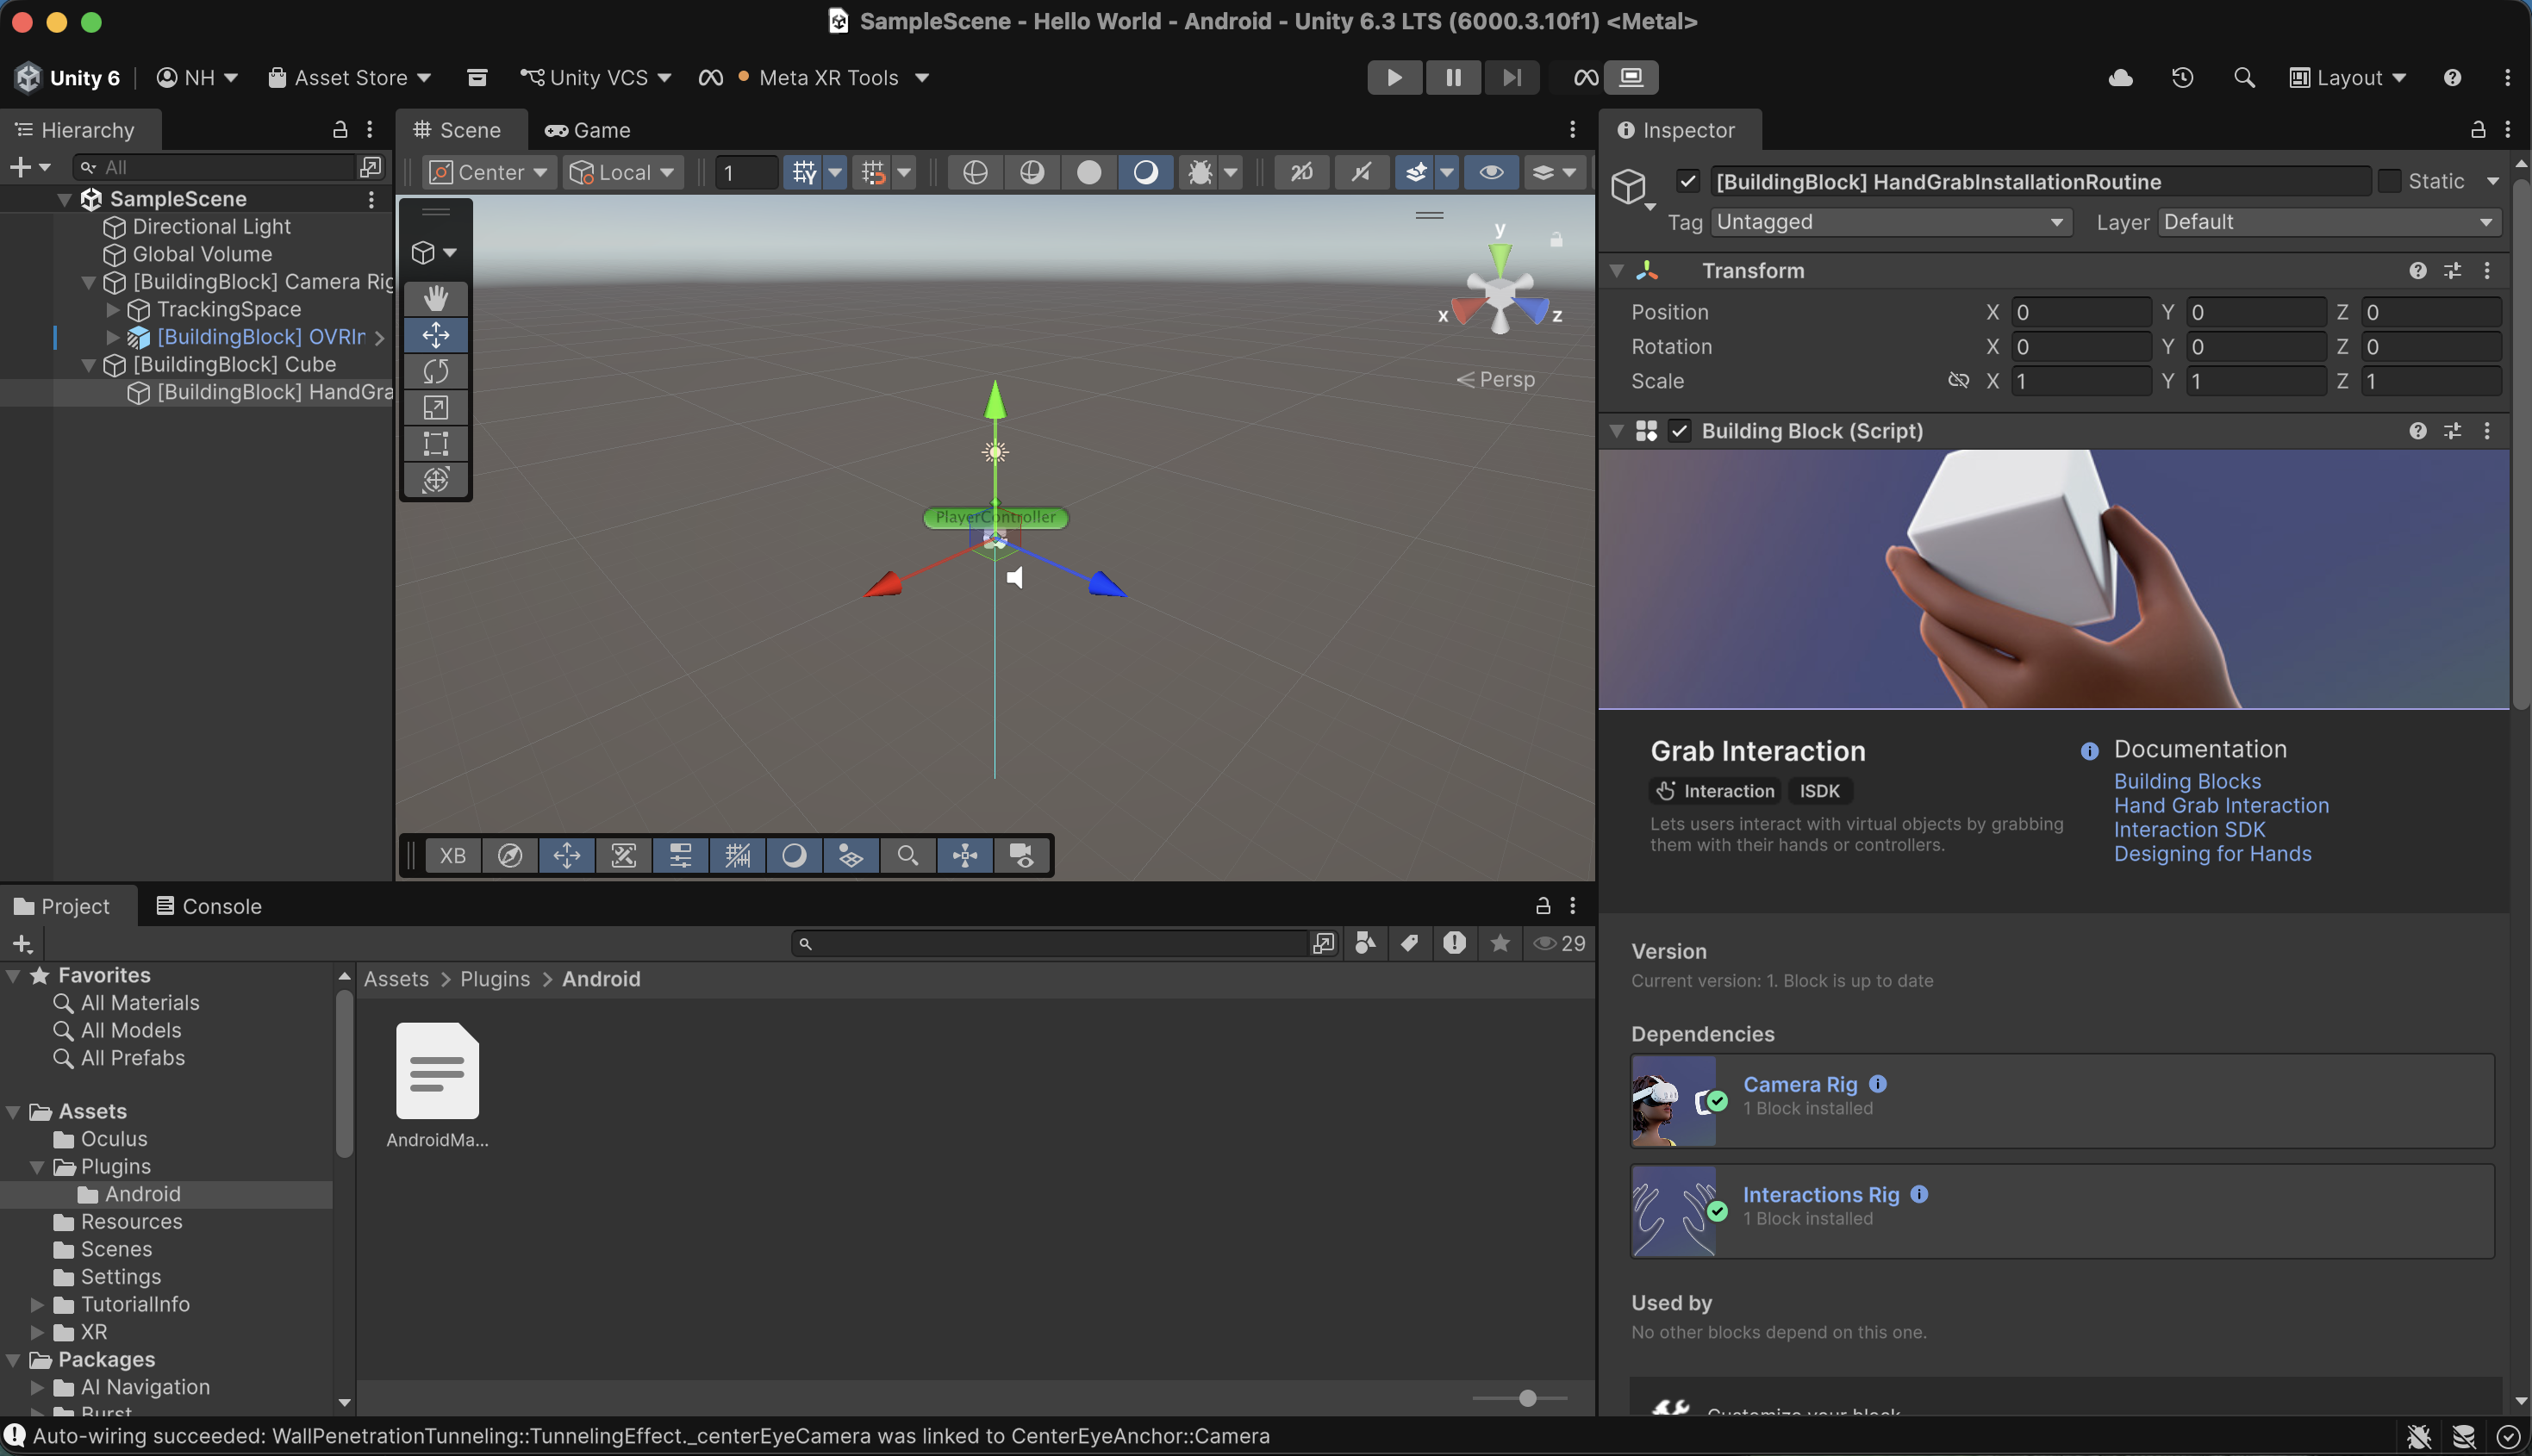
In the Building Blocks window, I found the Grab Interaction Building Block, and I selected the icon on the bottom right of the block to add it to the project.
I selected the Cube
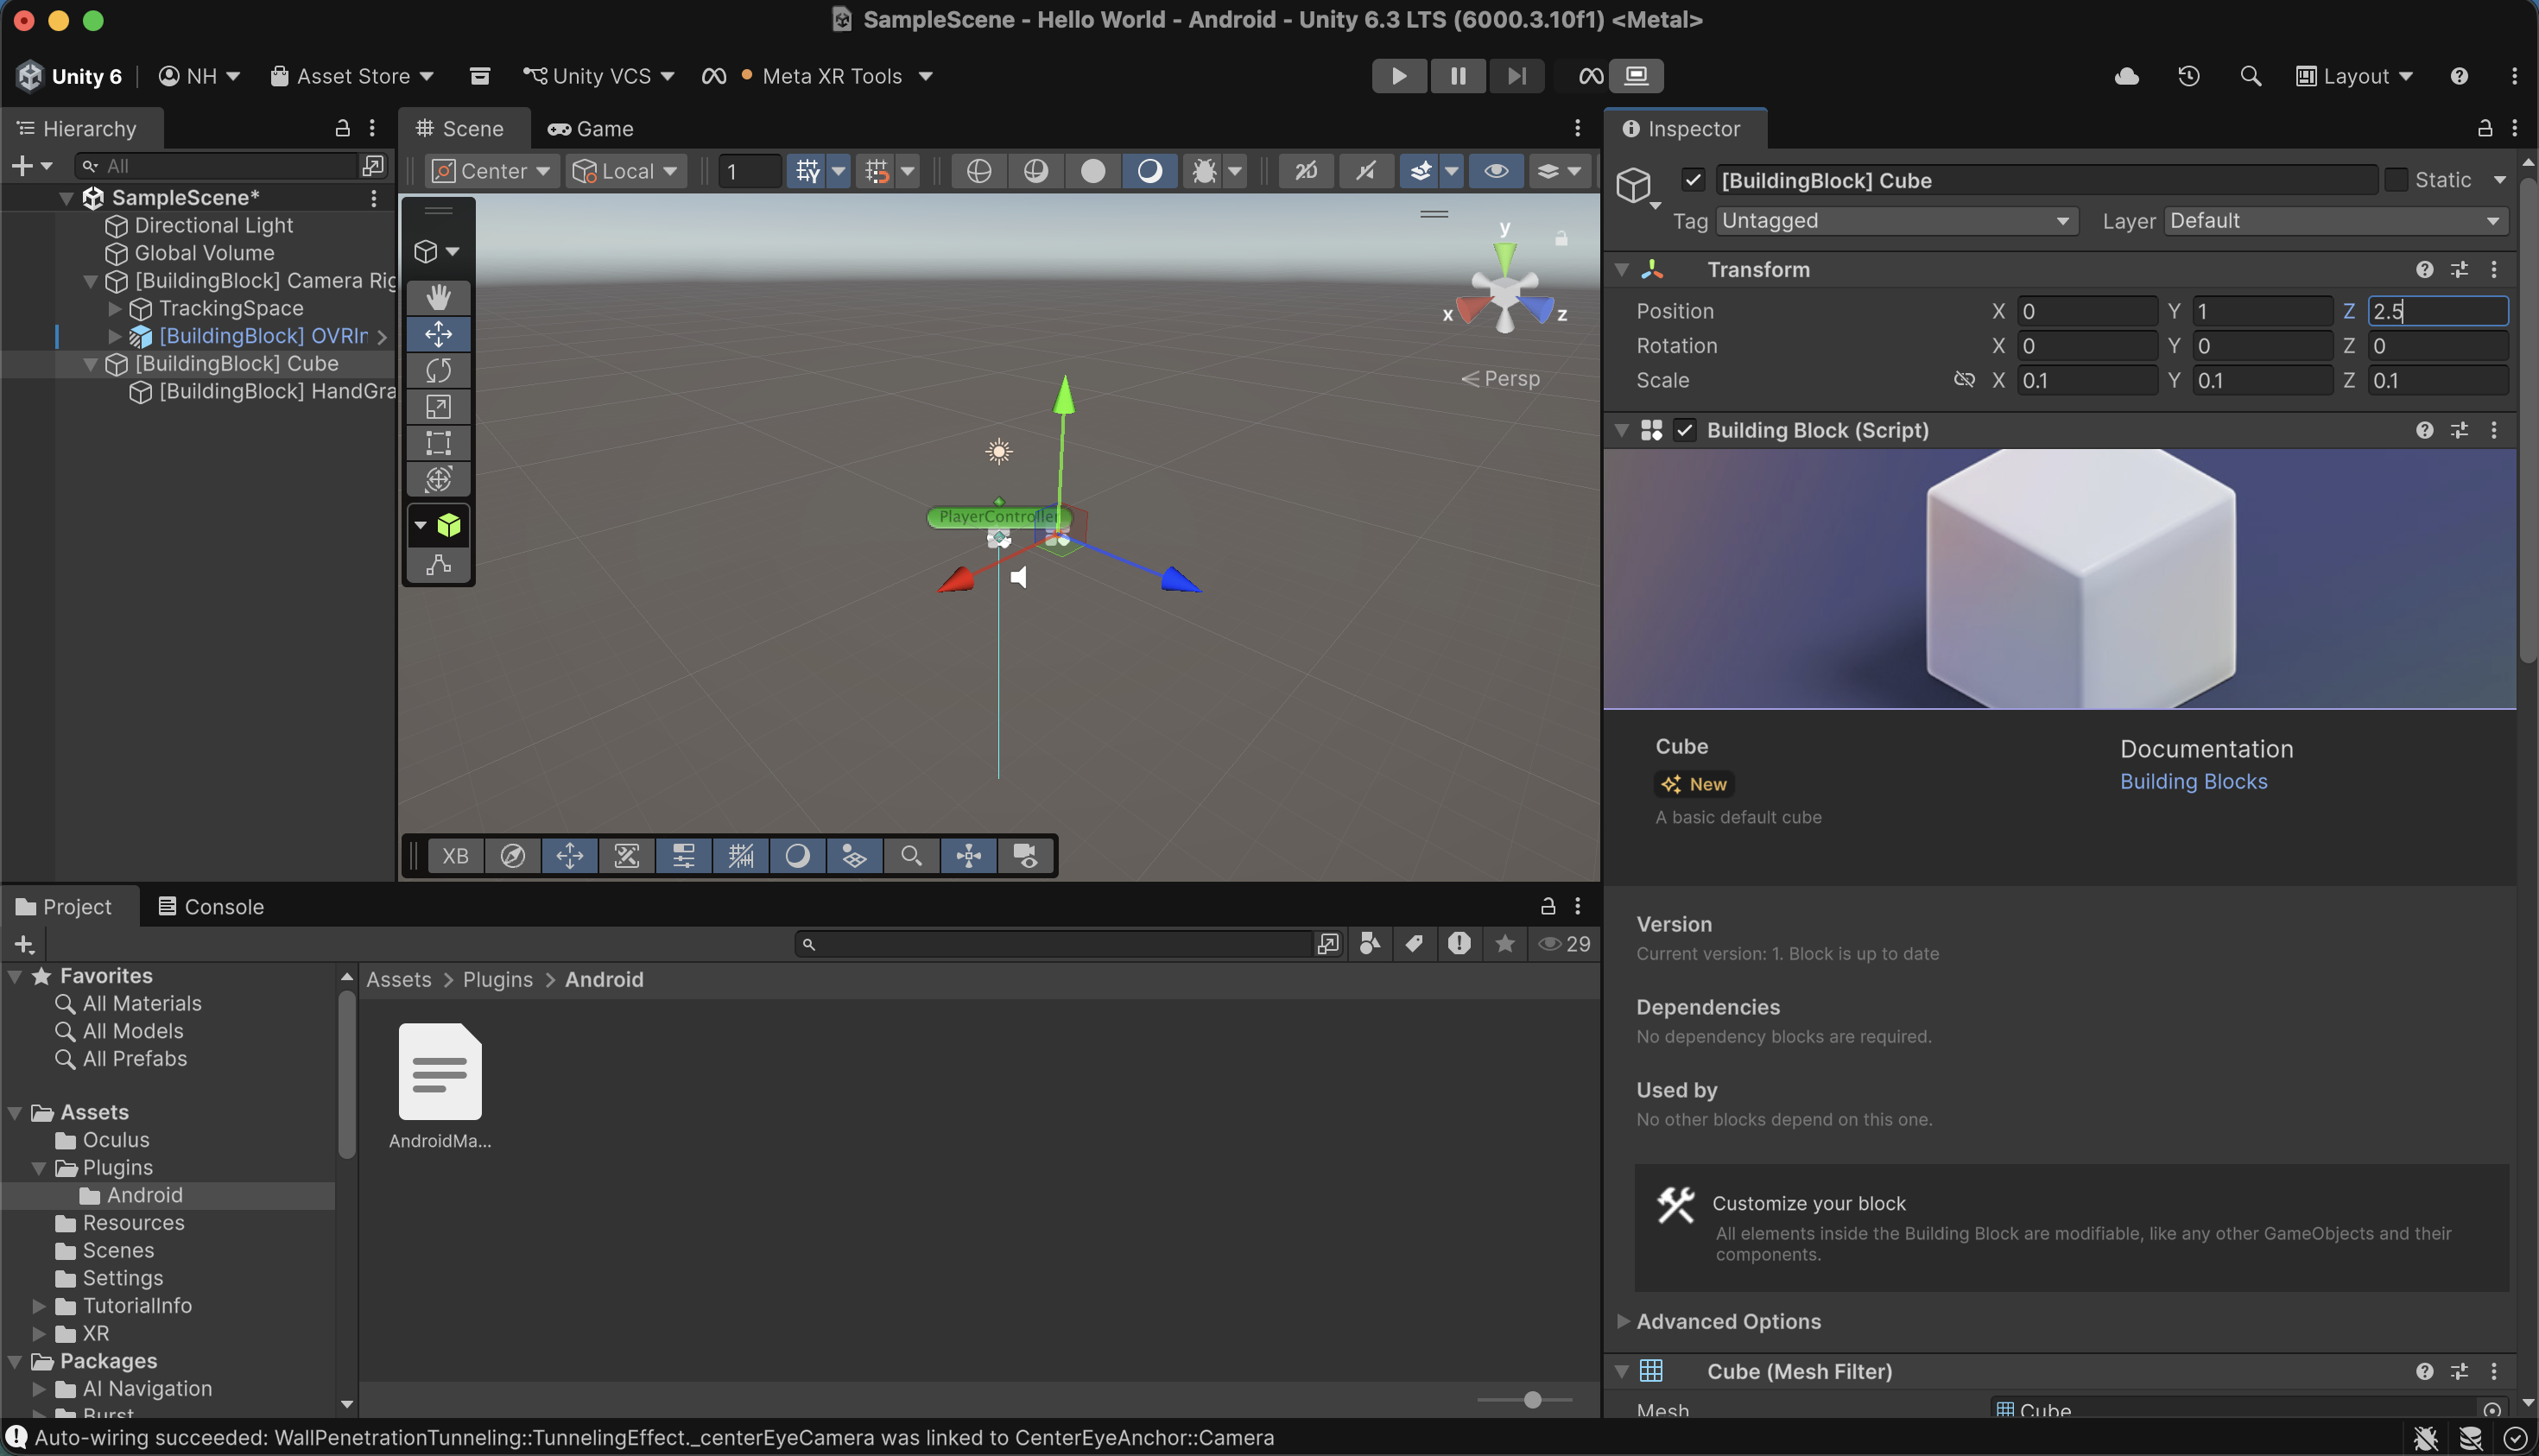
I updated the position of the cube
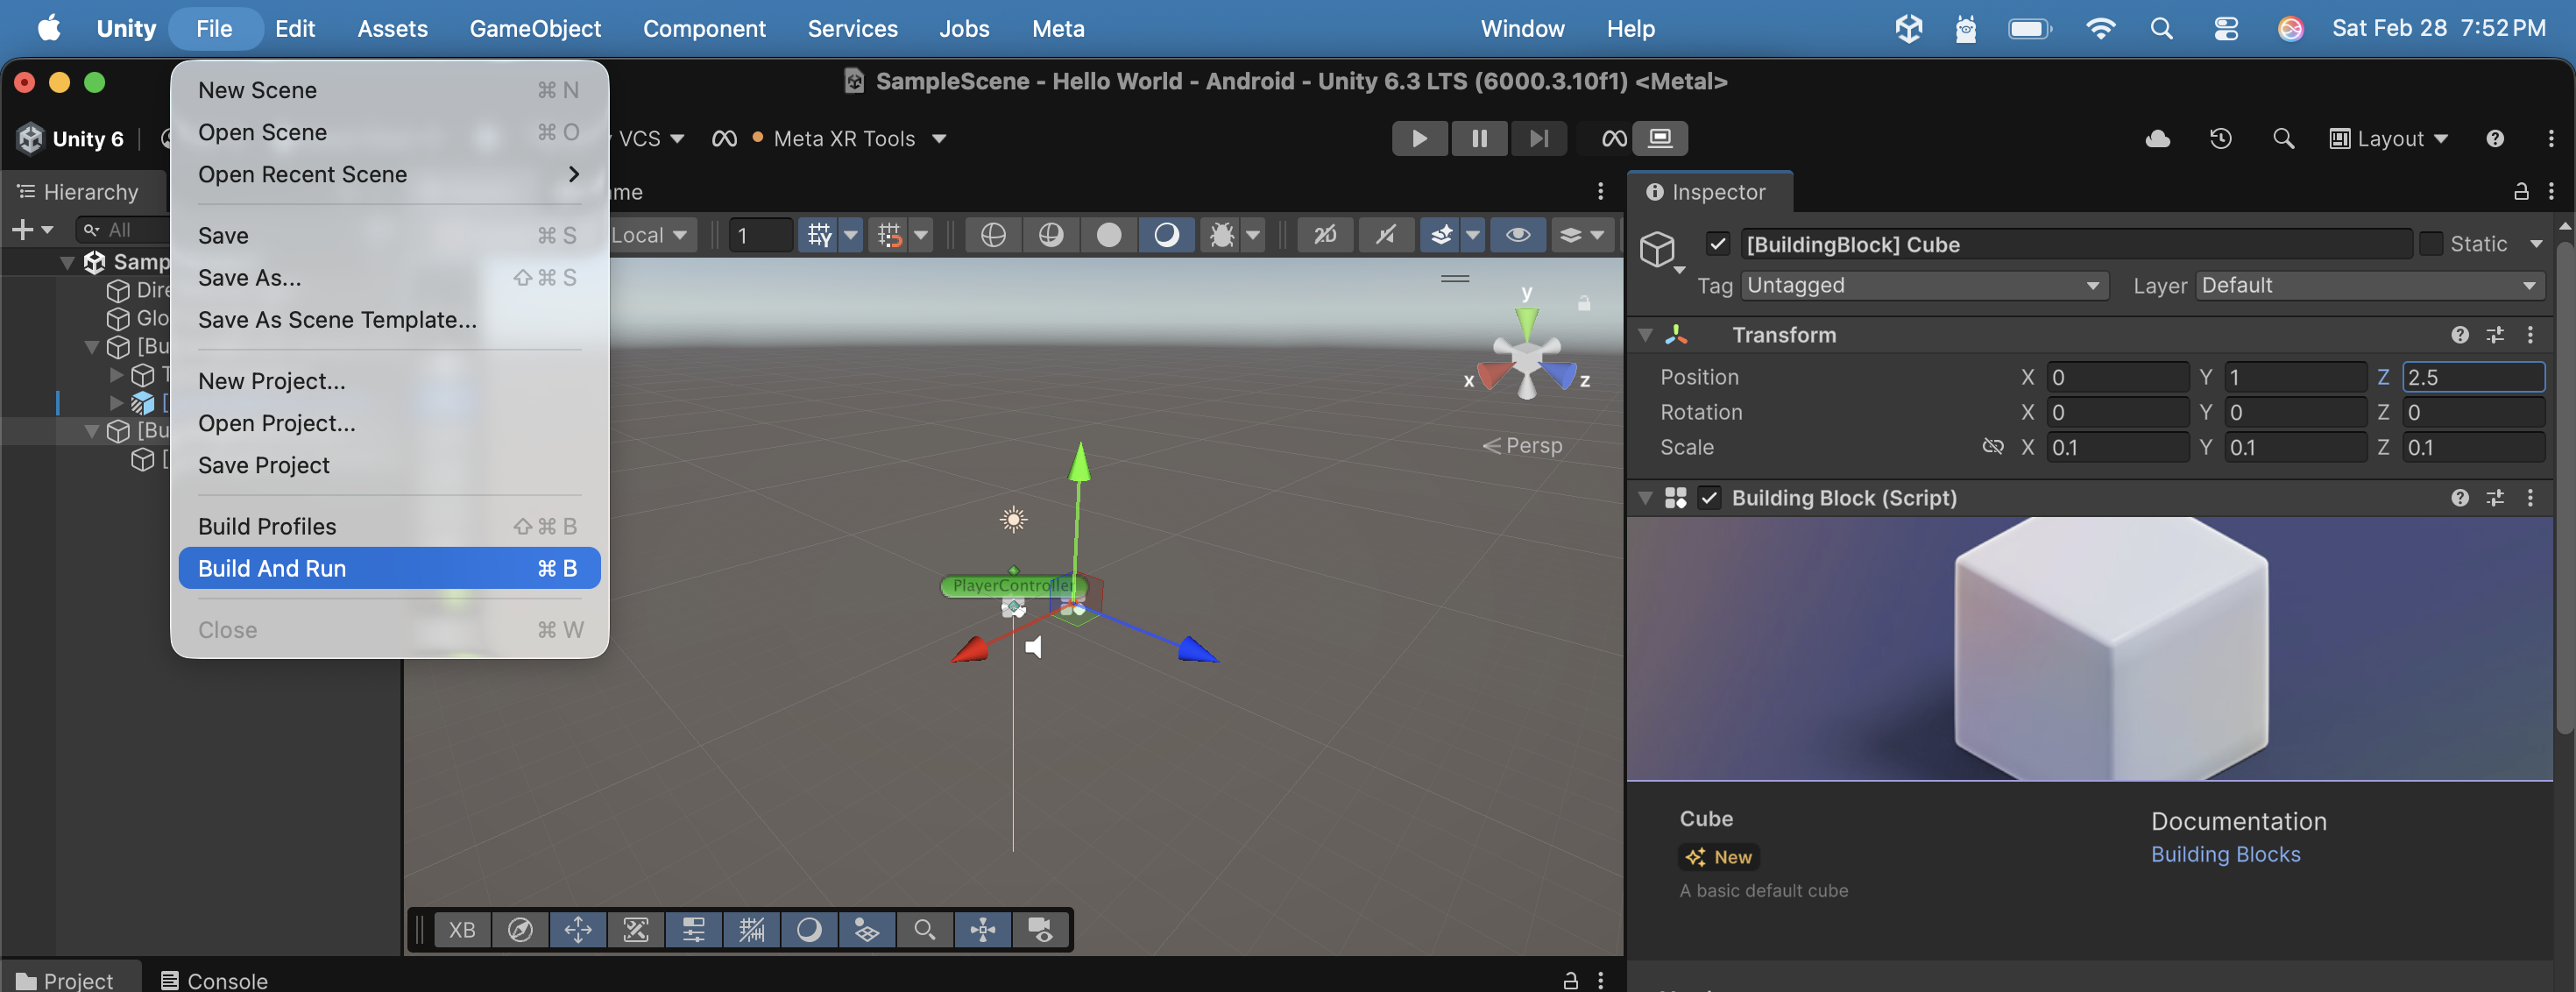
I clicked the 'Build And Run' menu item
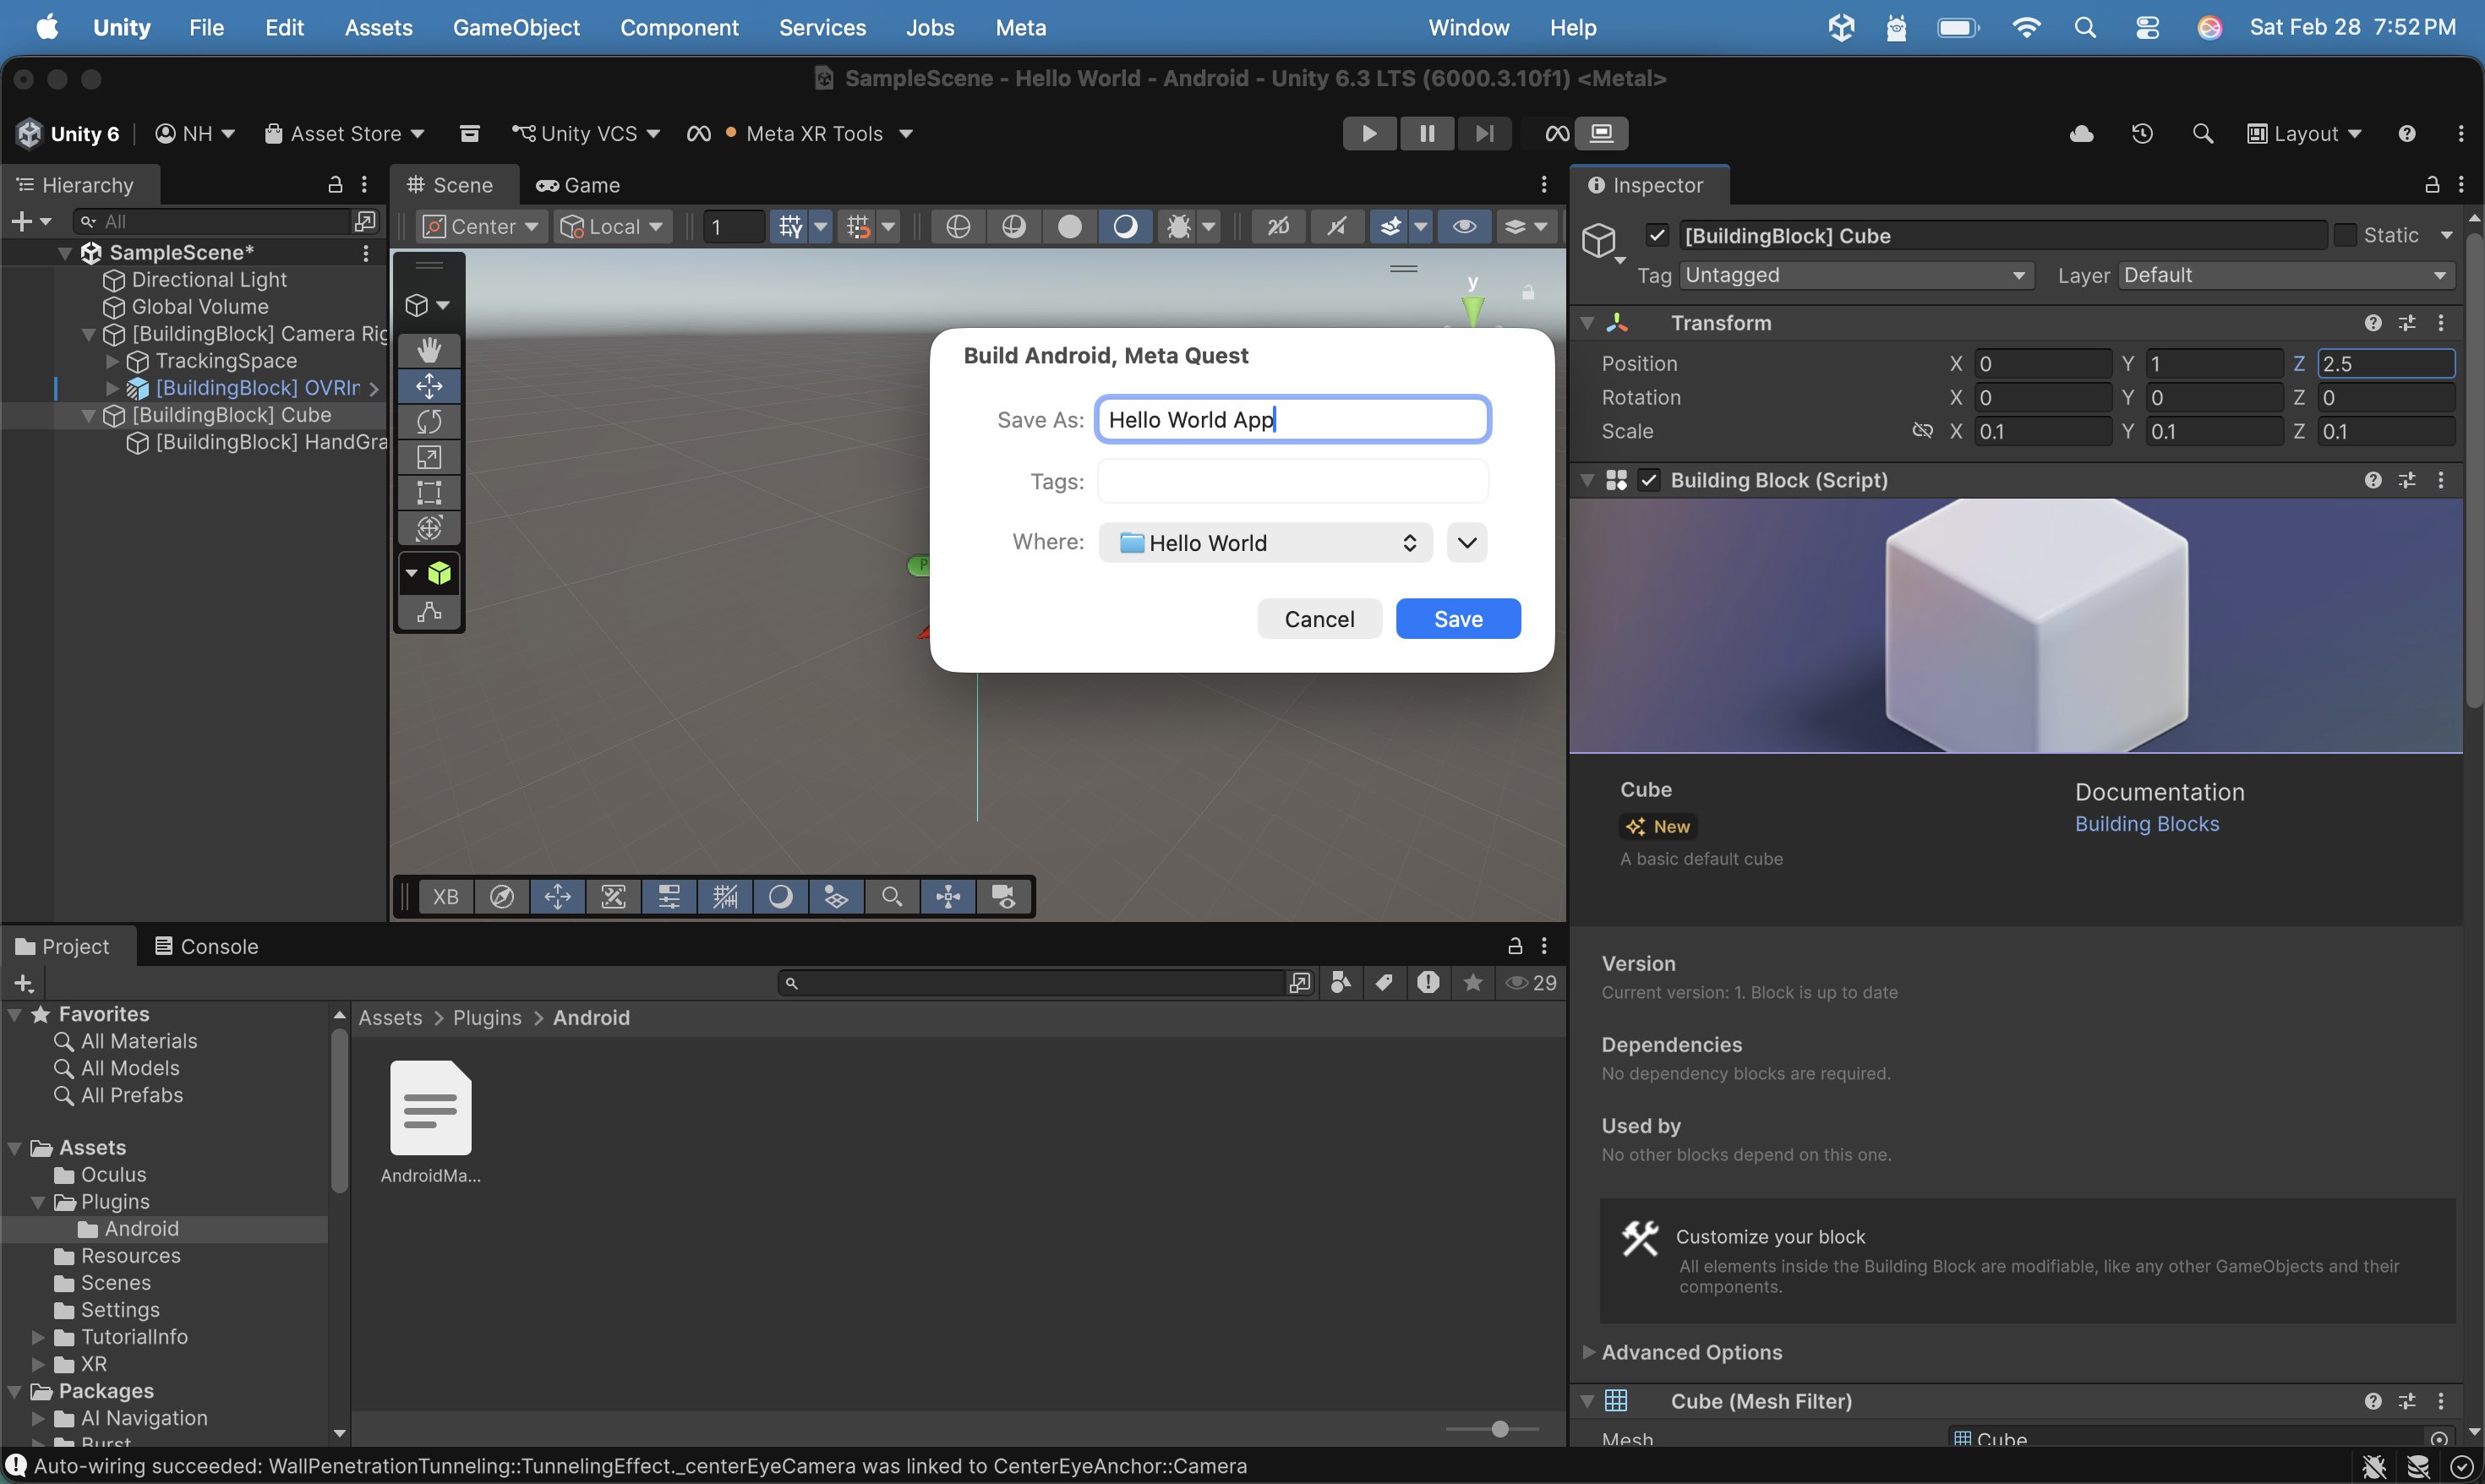
I saved the file as `Hello World App.apk`
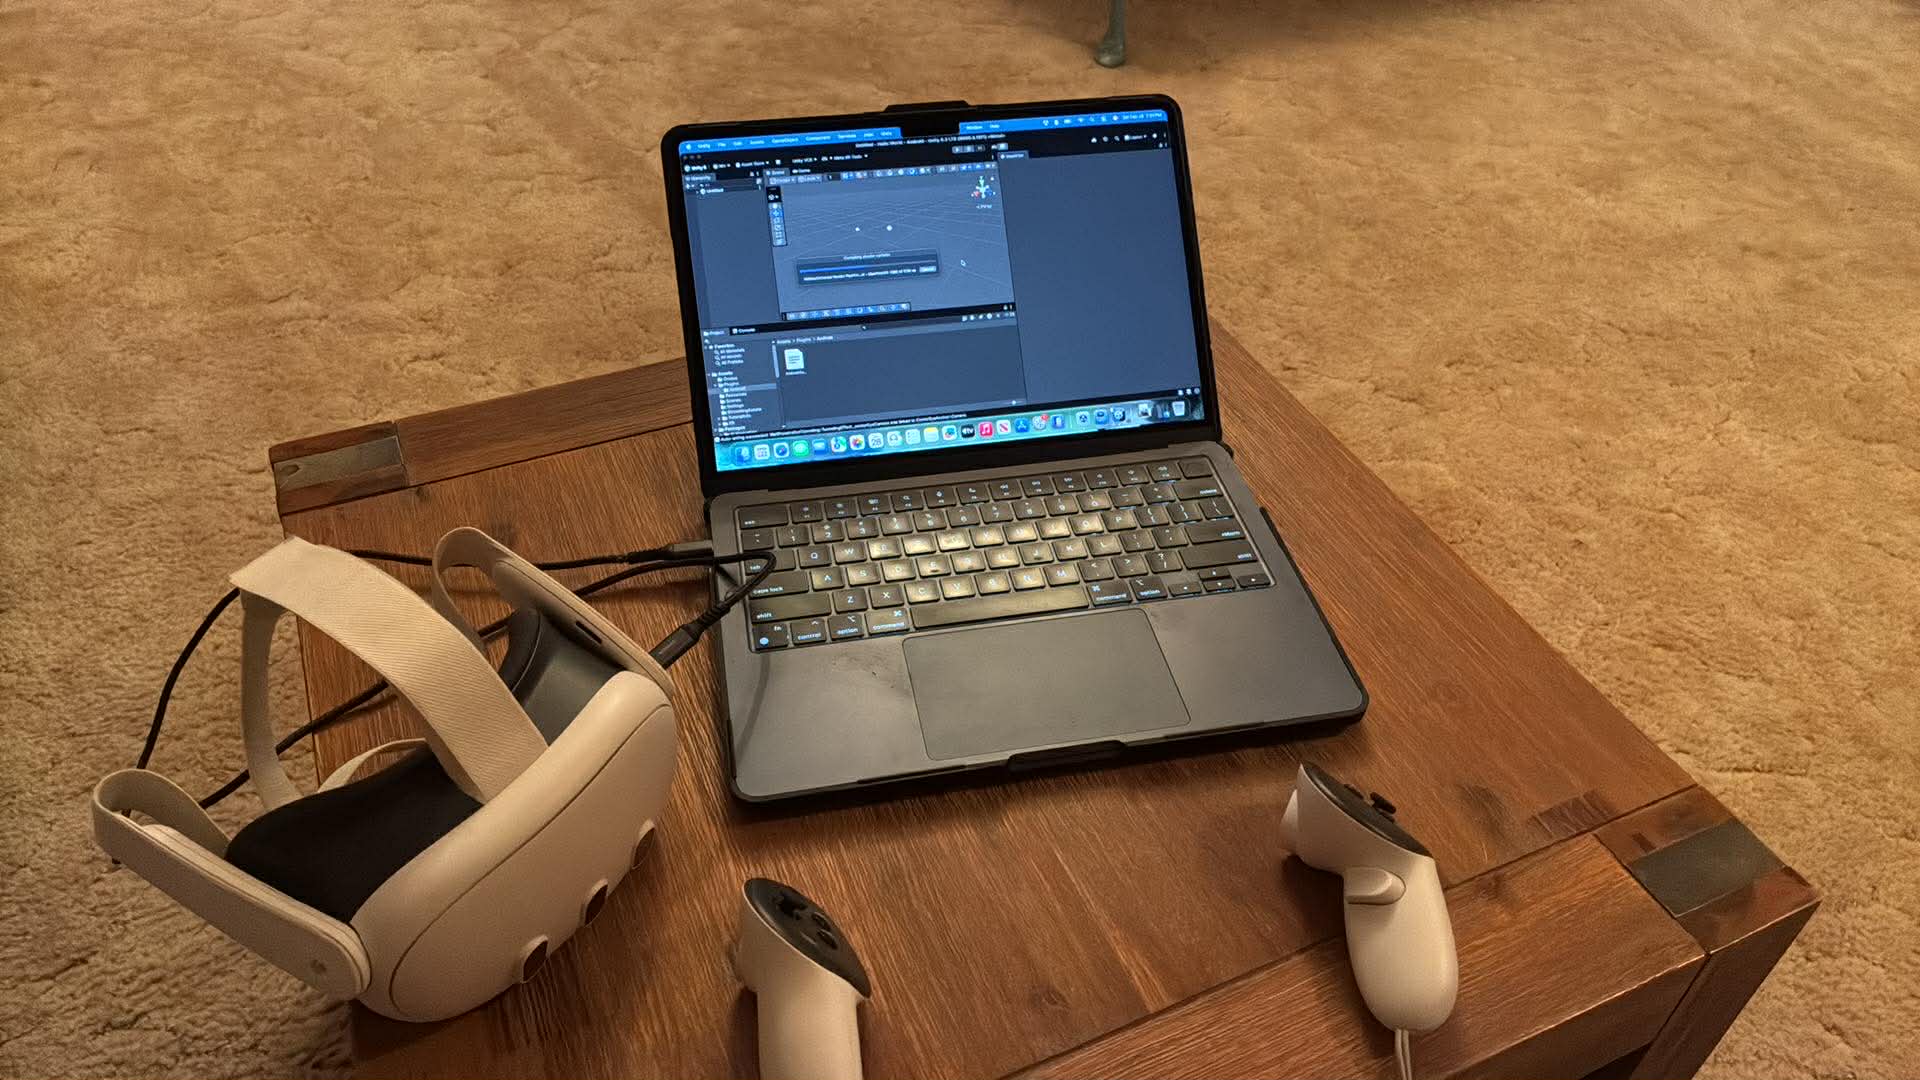
I connected my Quest 3 headset to my laptop
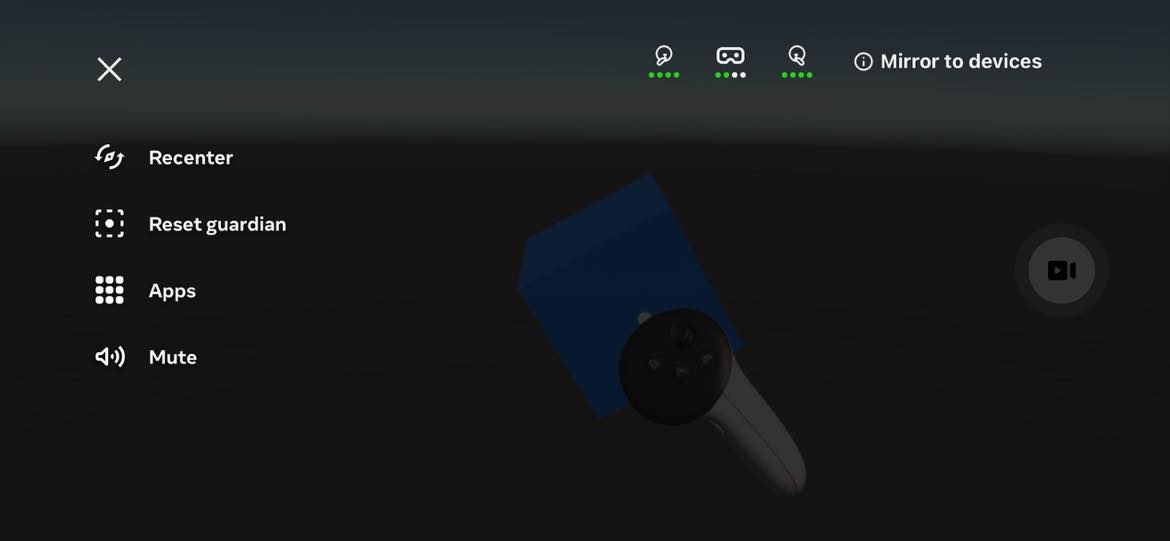
I used the Cast feature of the Meta Horizon mobile app to capture an image of myself grasping and moving the cube
Add more Cubes using Claude Code
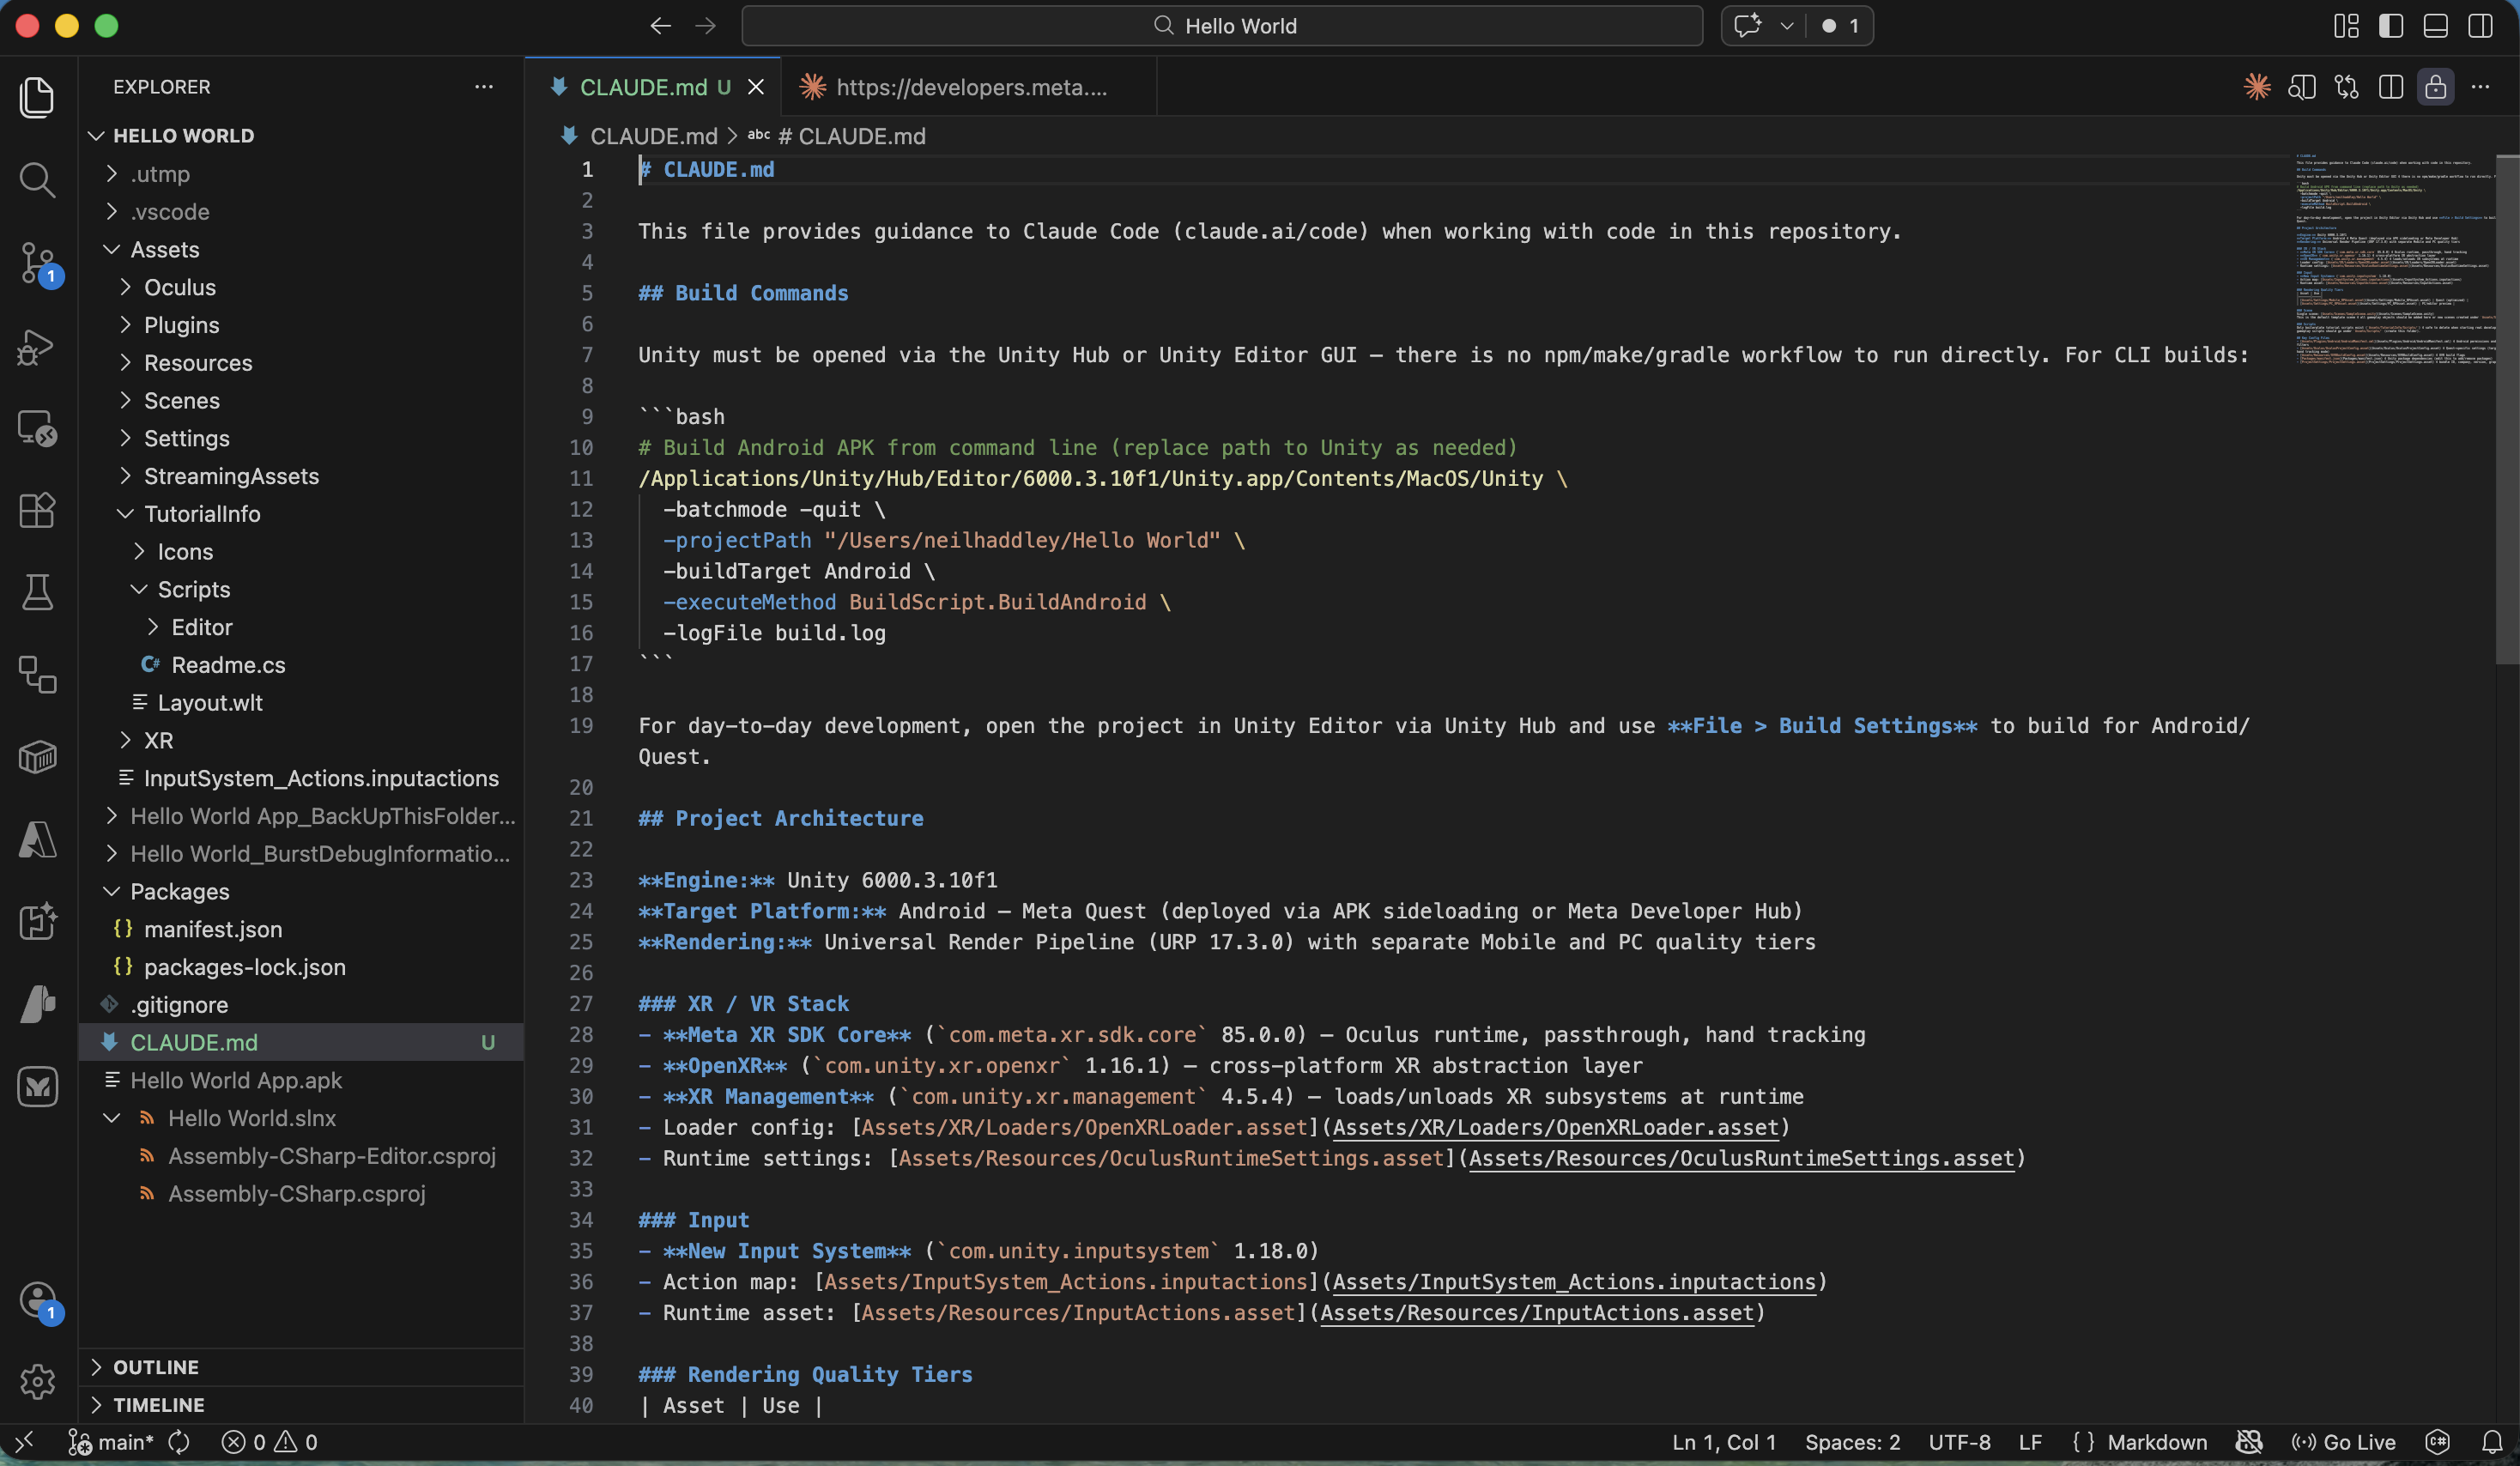
I opened the project using Visual Studio Code and used /init to create a CLAUDE.md file
PROMPT
1Describe the scene
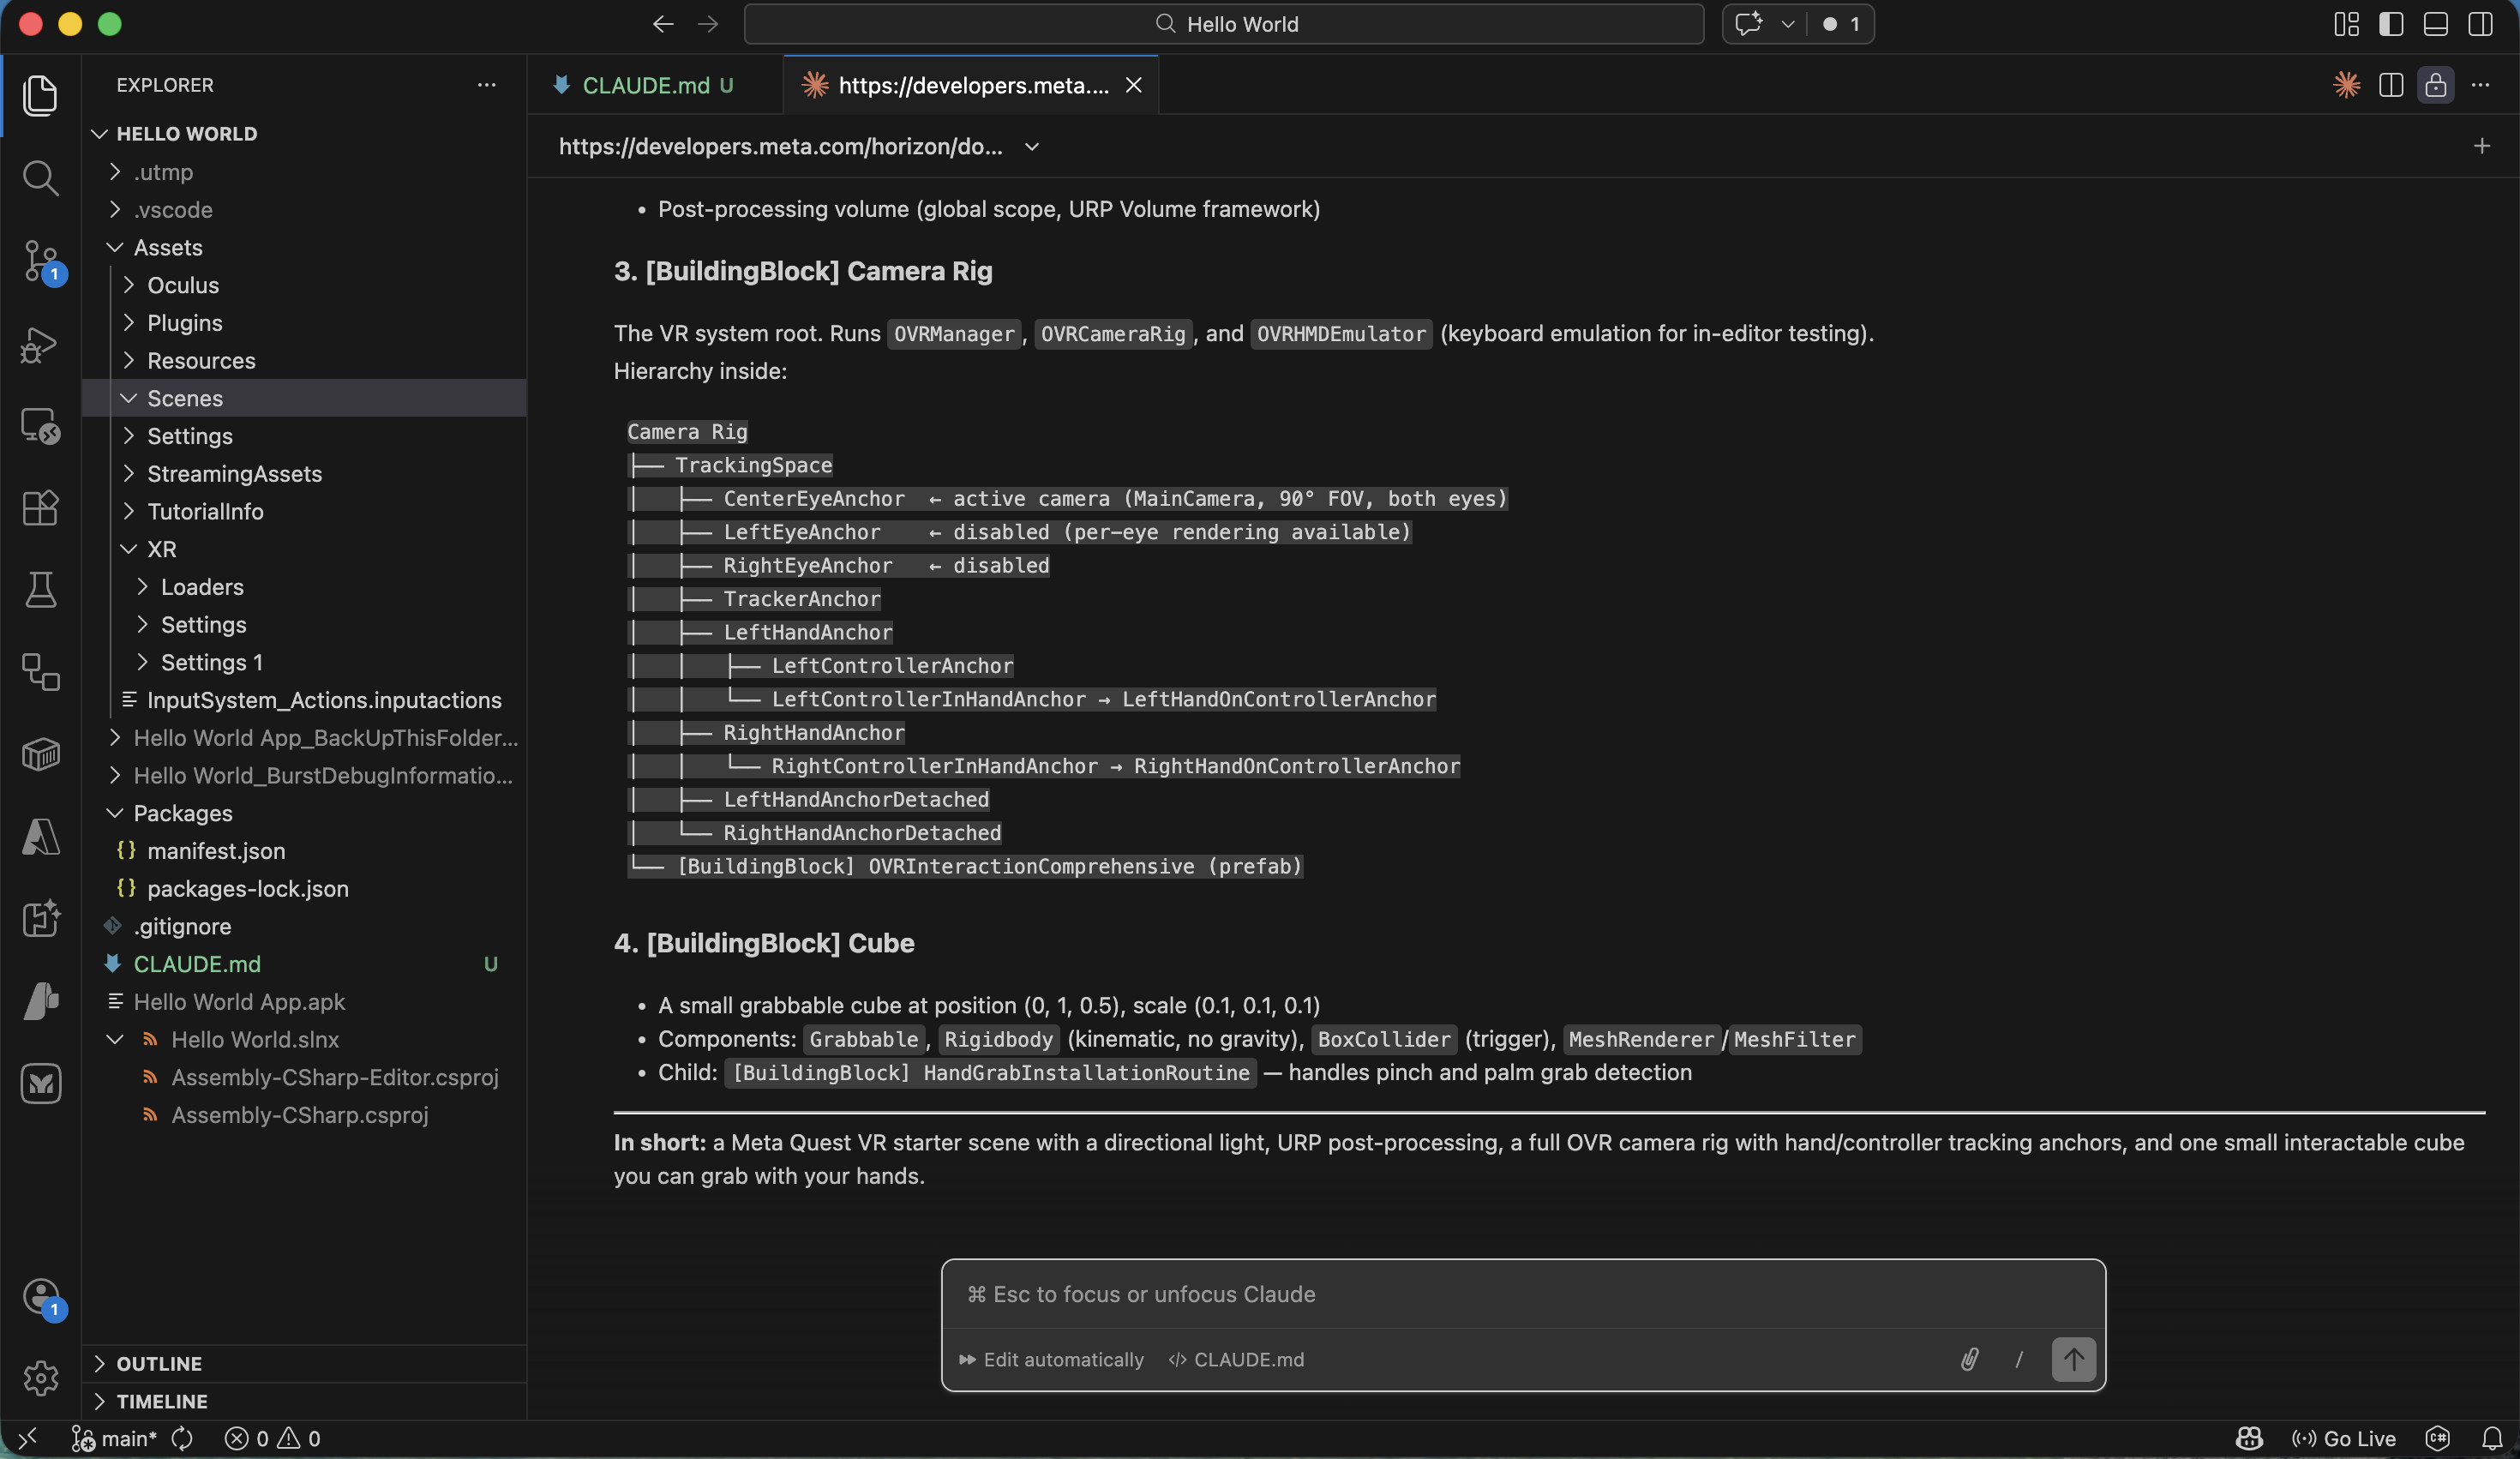
I reviewed Claude Code's description of the scene
PROMPT
1How can we add an extra 5 cubes to the scene?
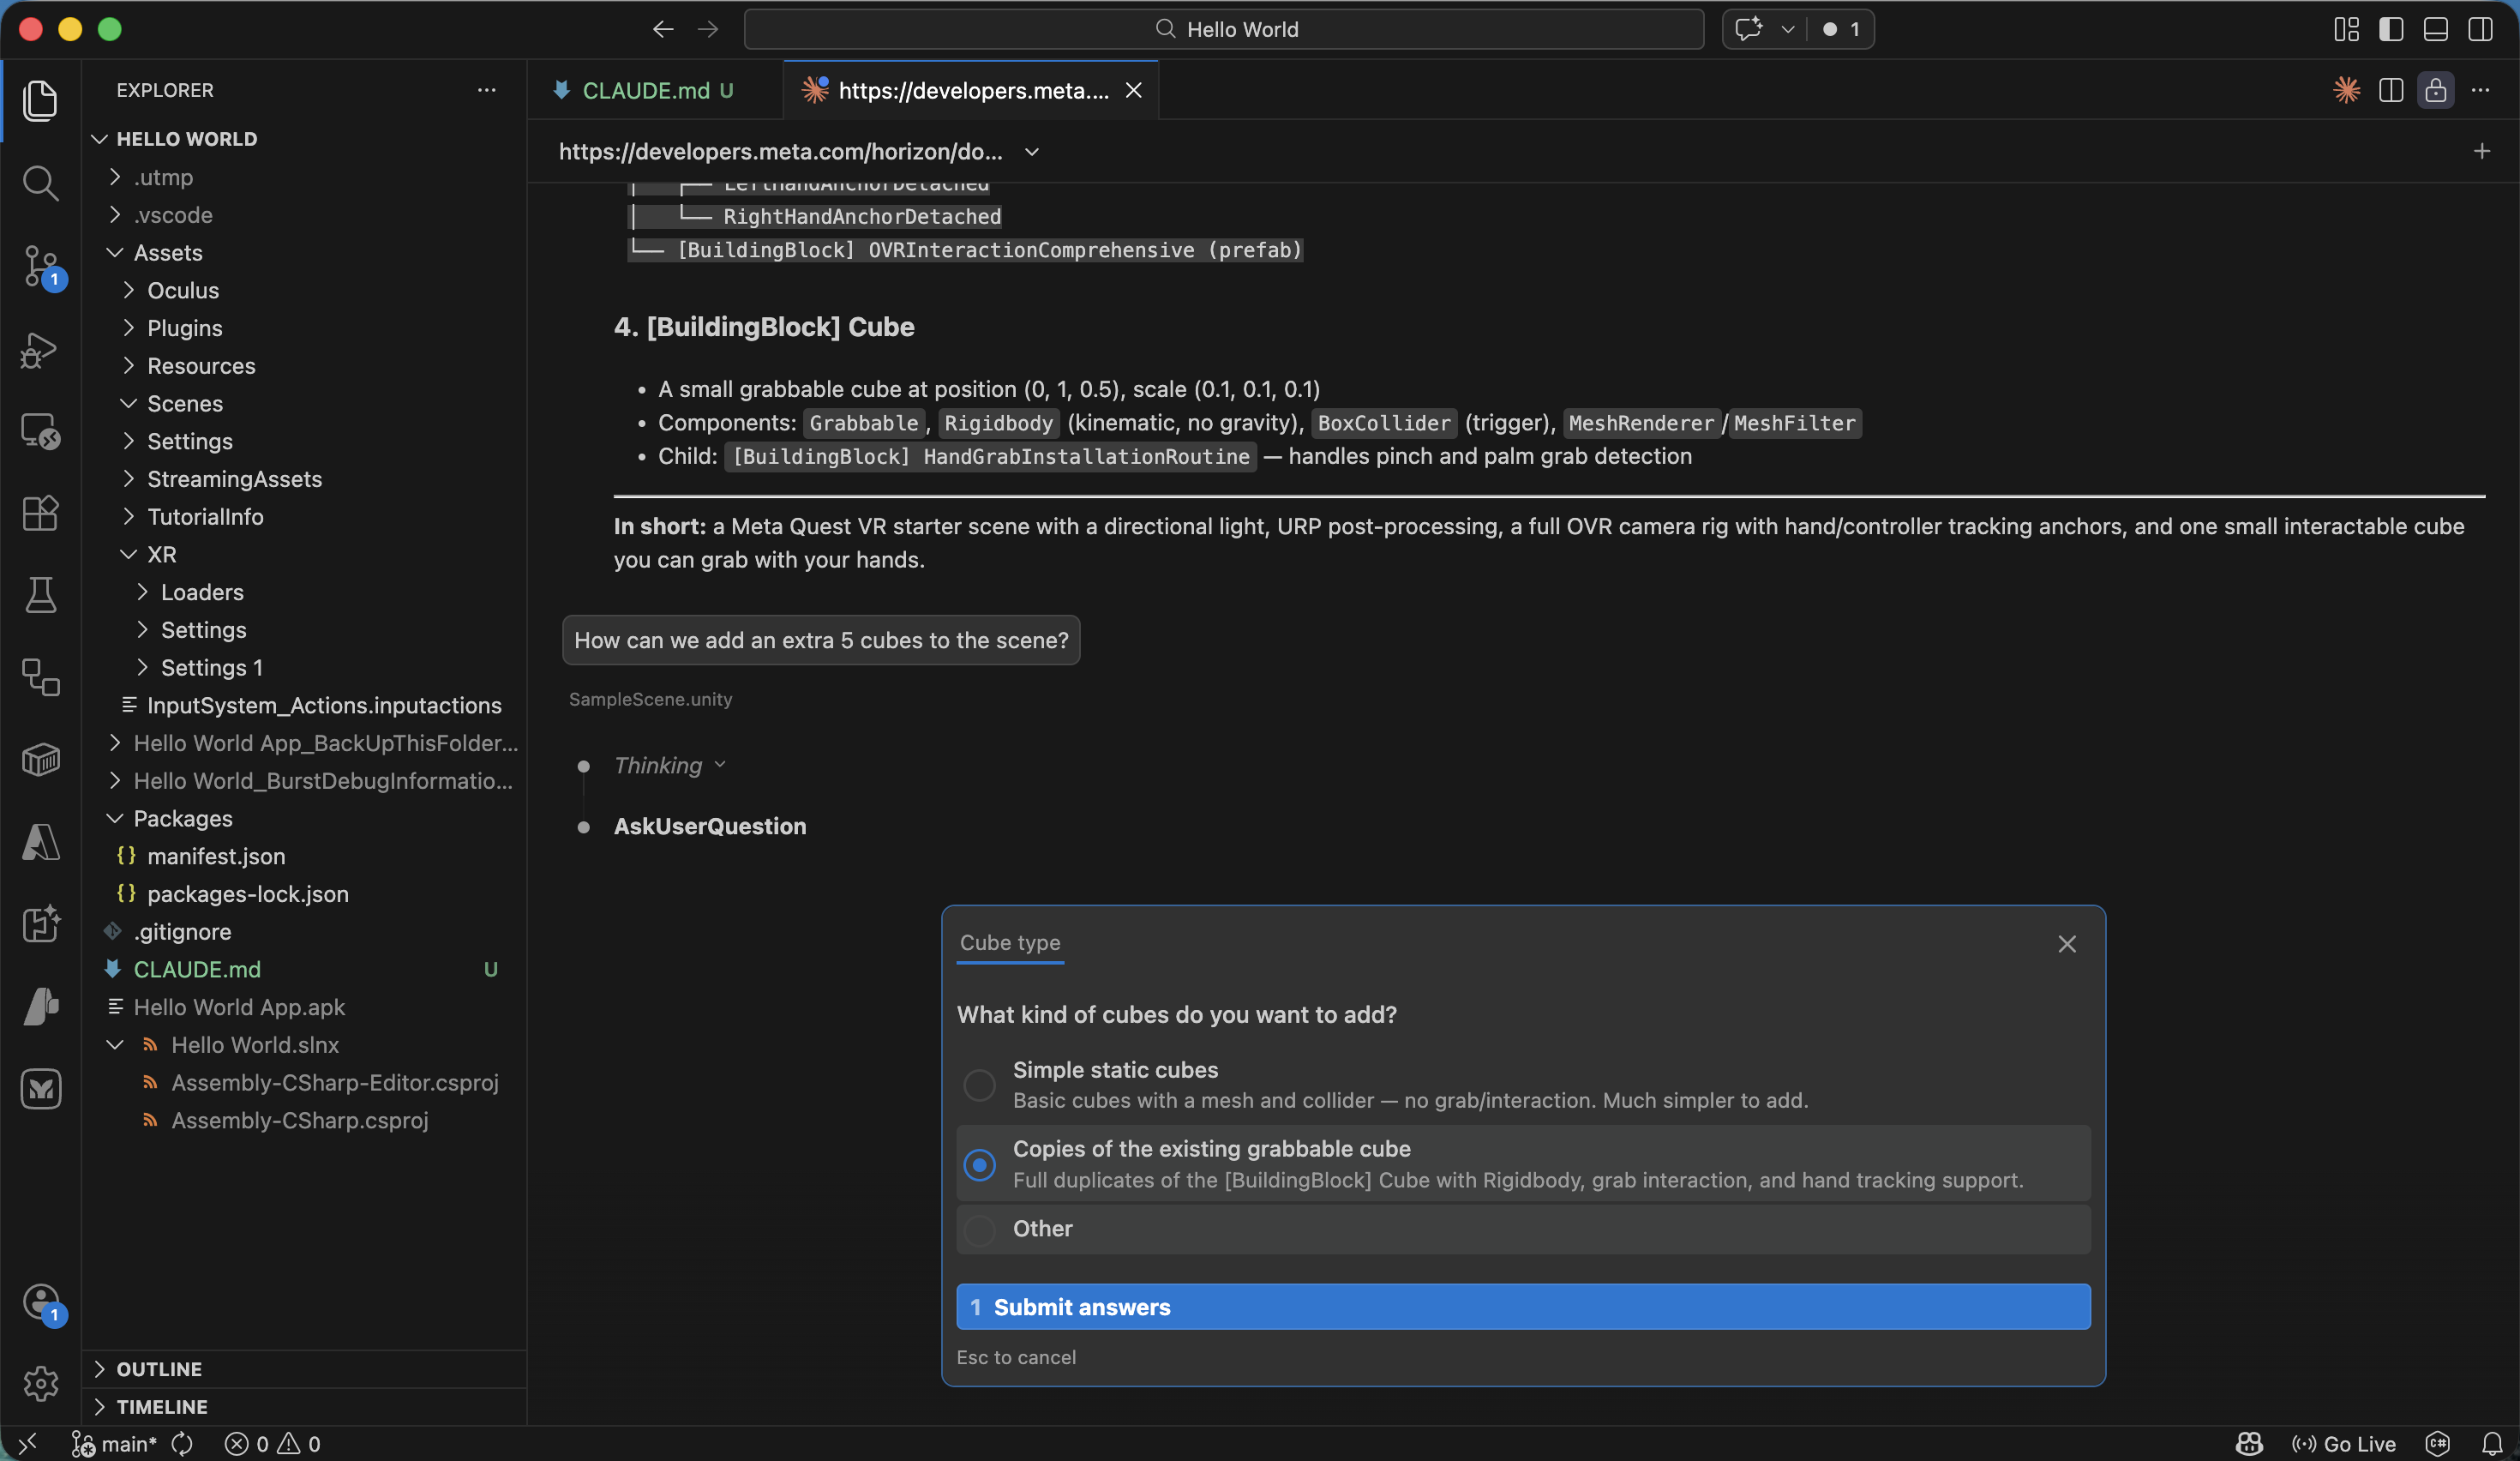
I selected the 'Copies of the existing grabbable cube' option
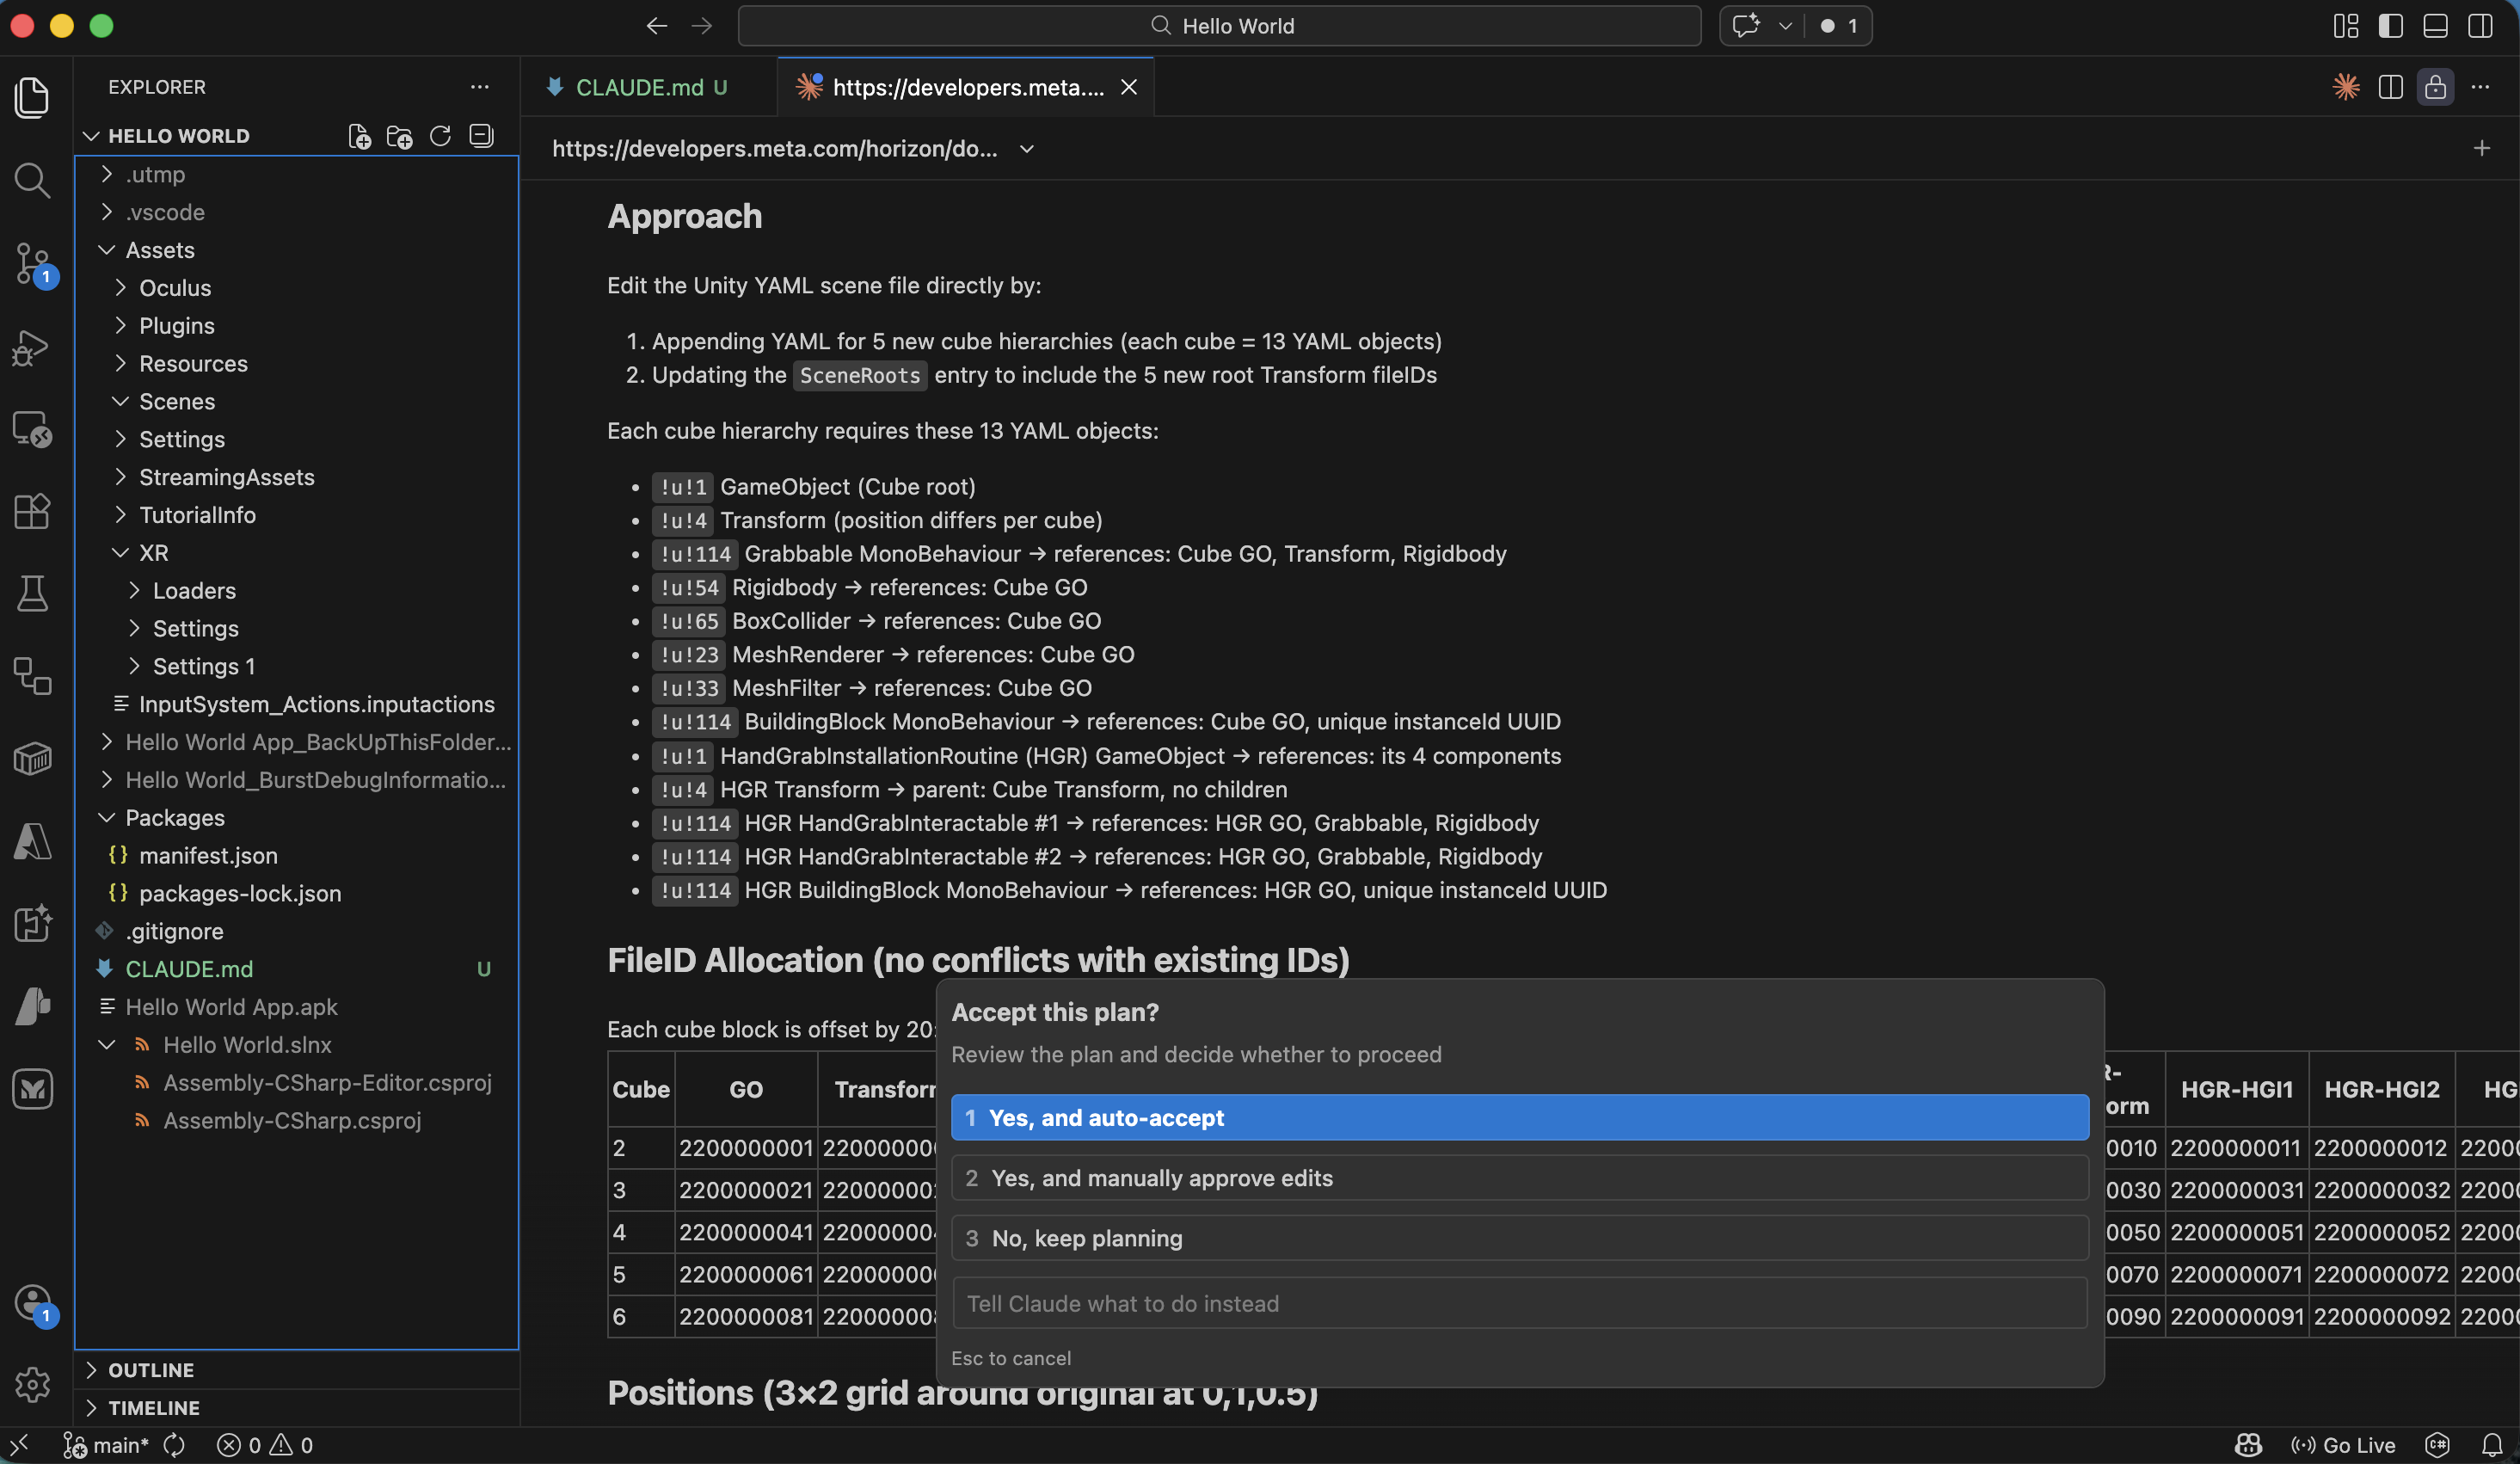
I clicked Yes to apply the planned update
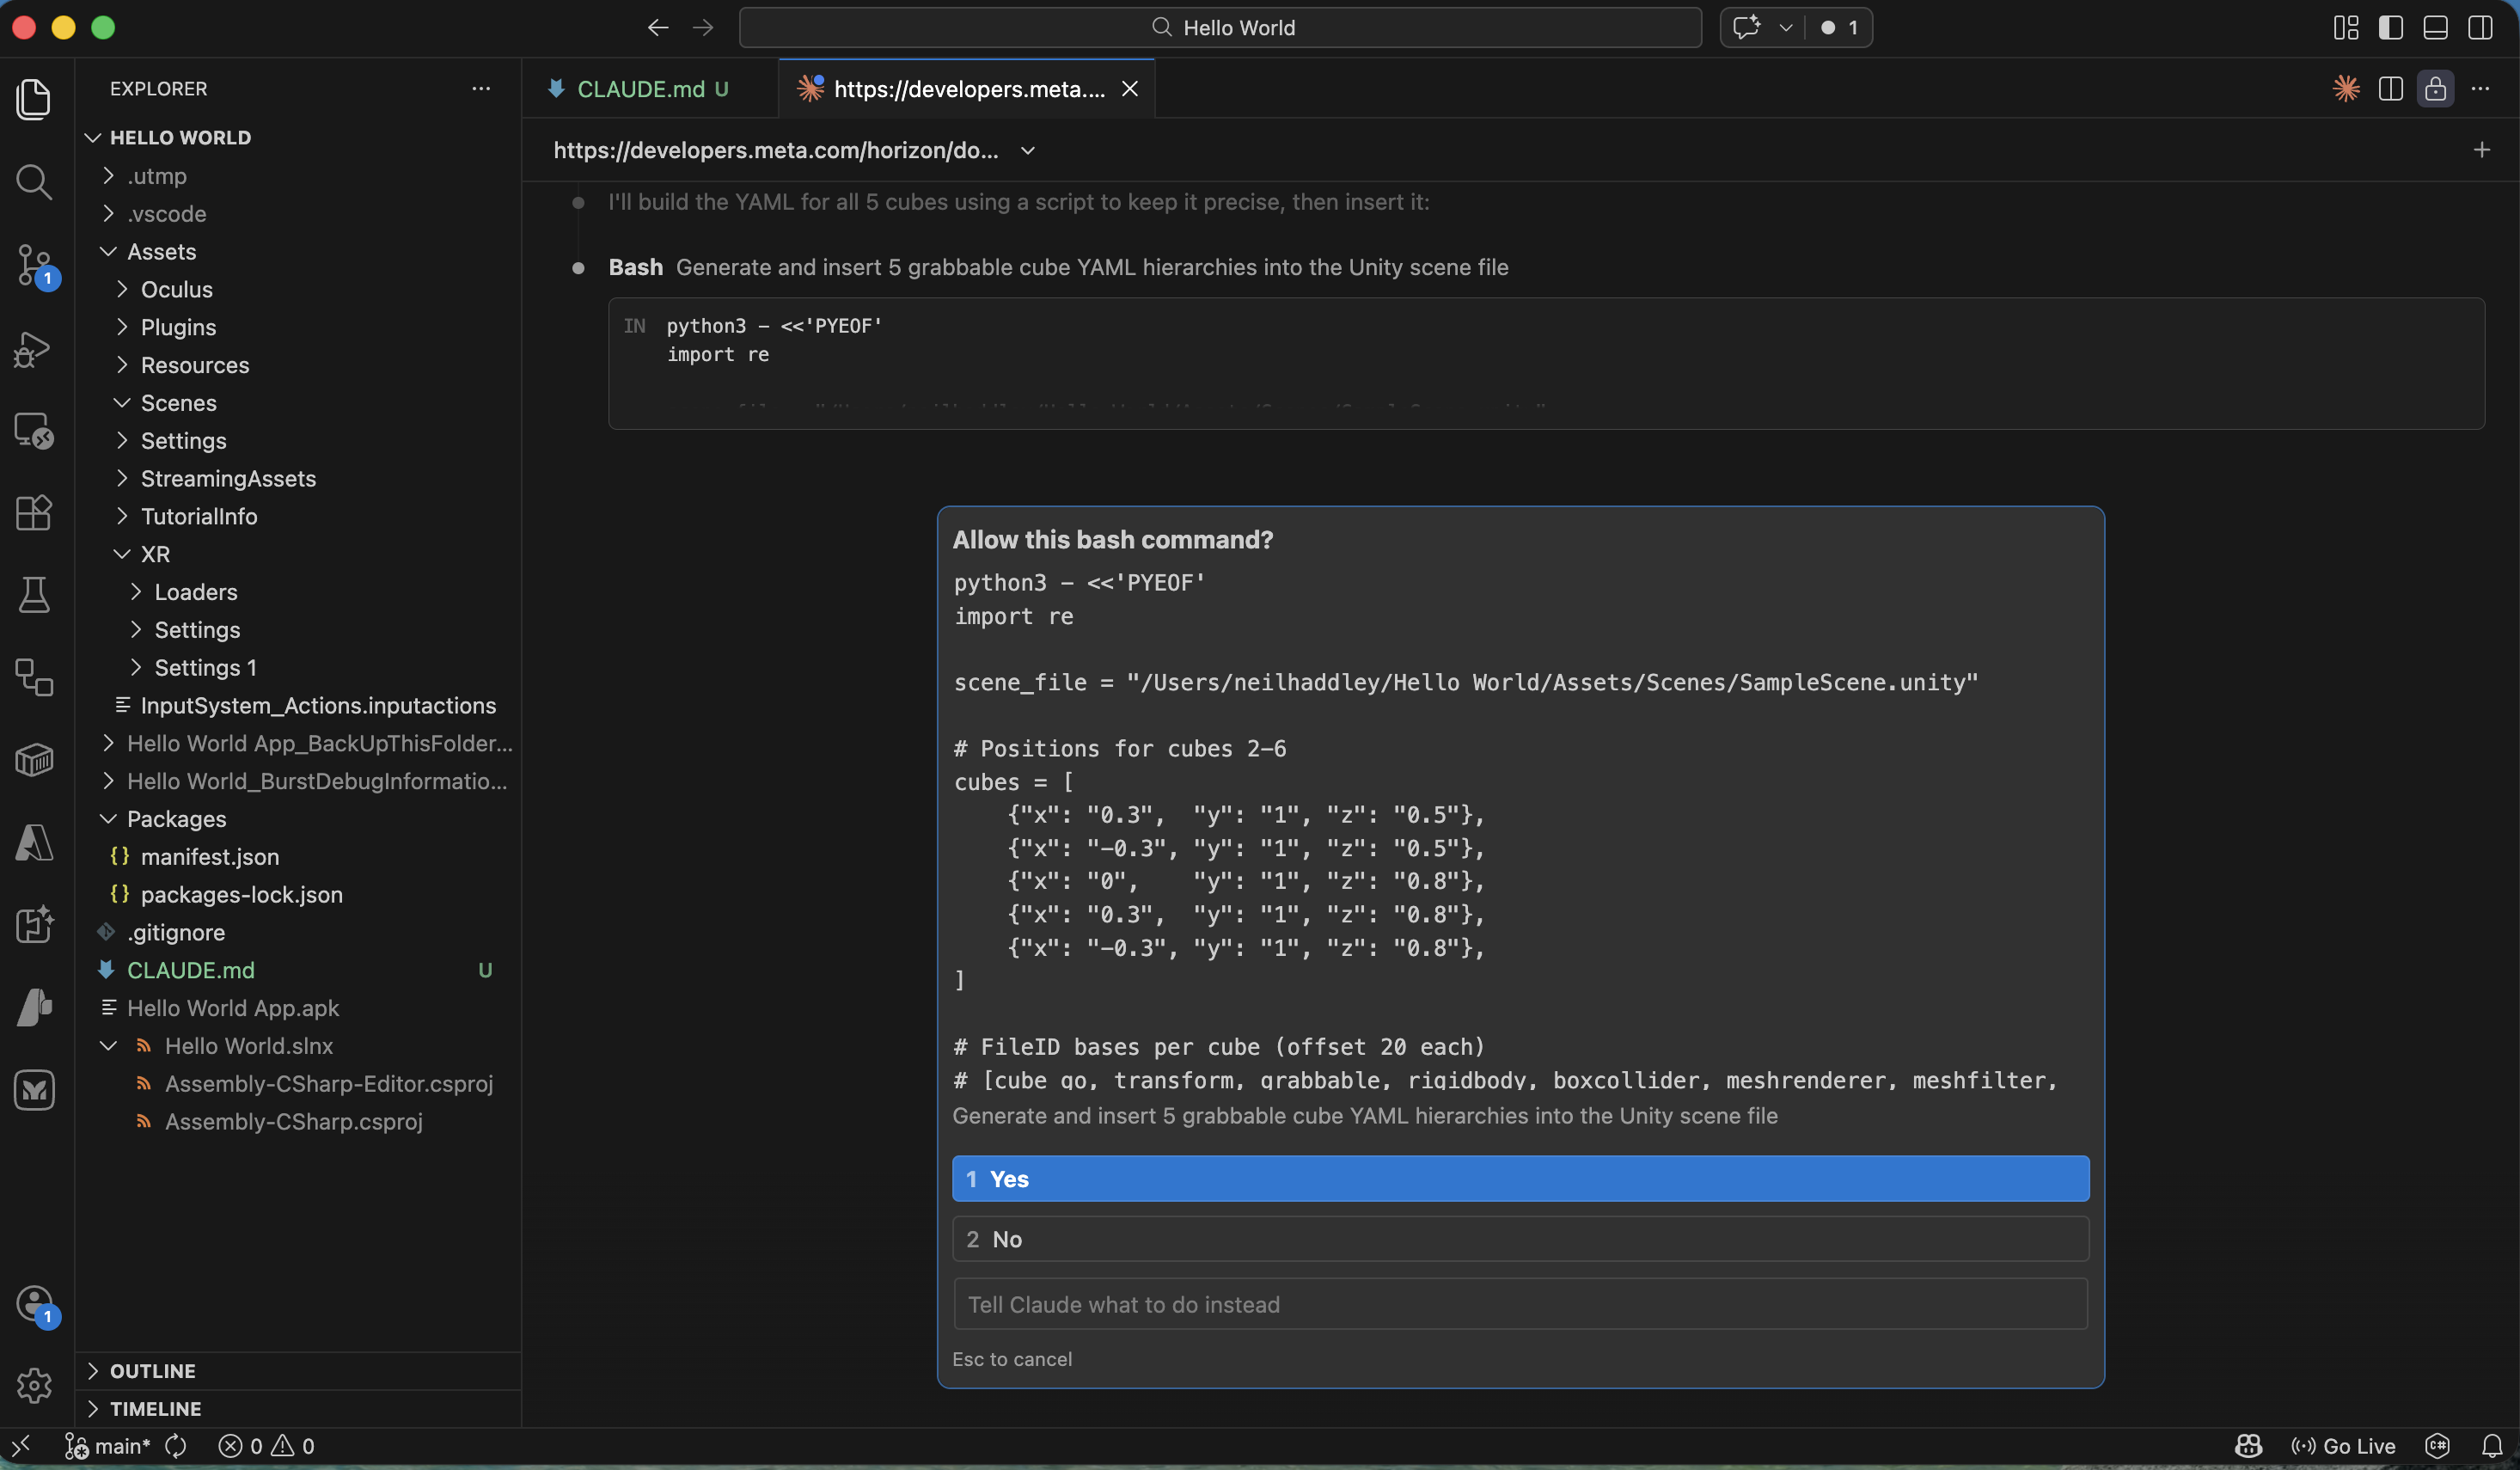
I clicked Yes to allow the bash command to run

I confirmed the update was applied
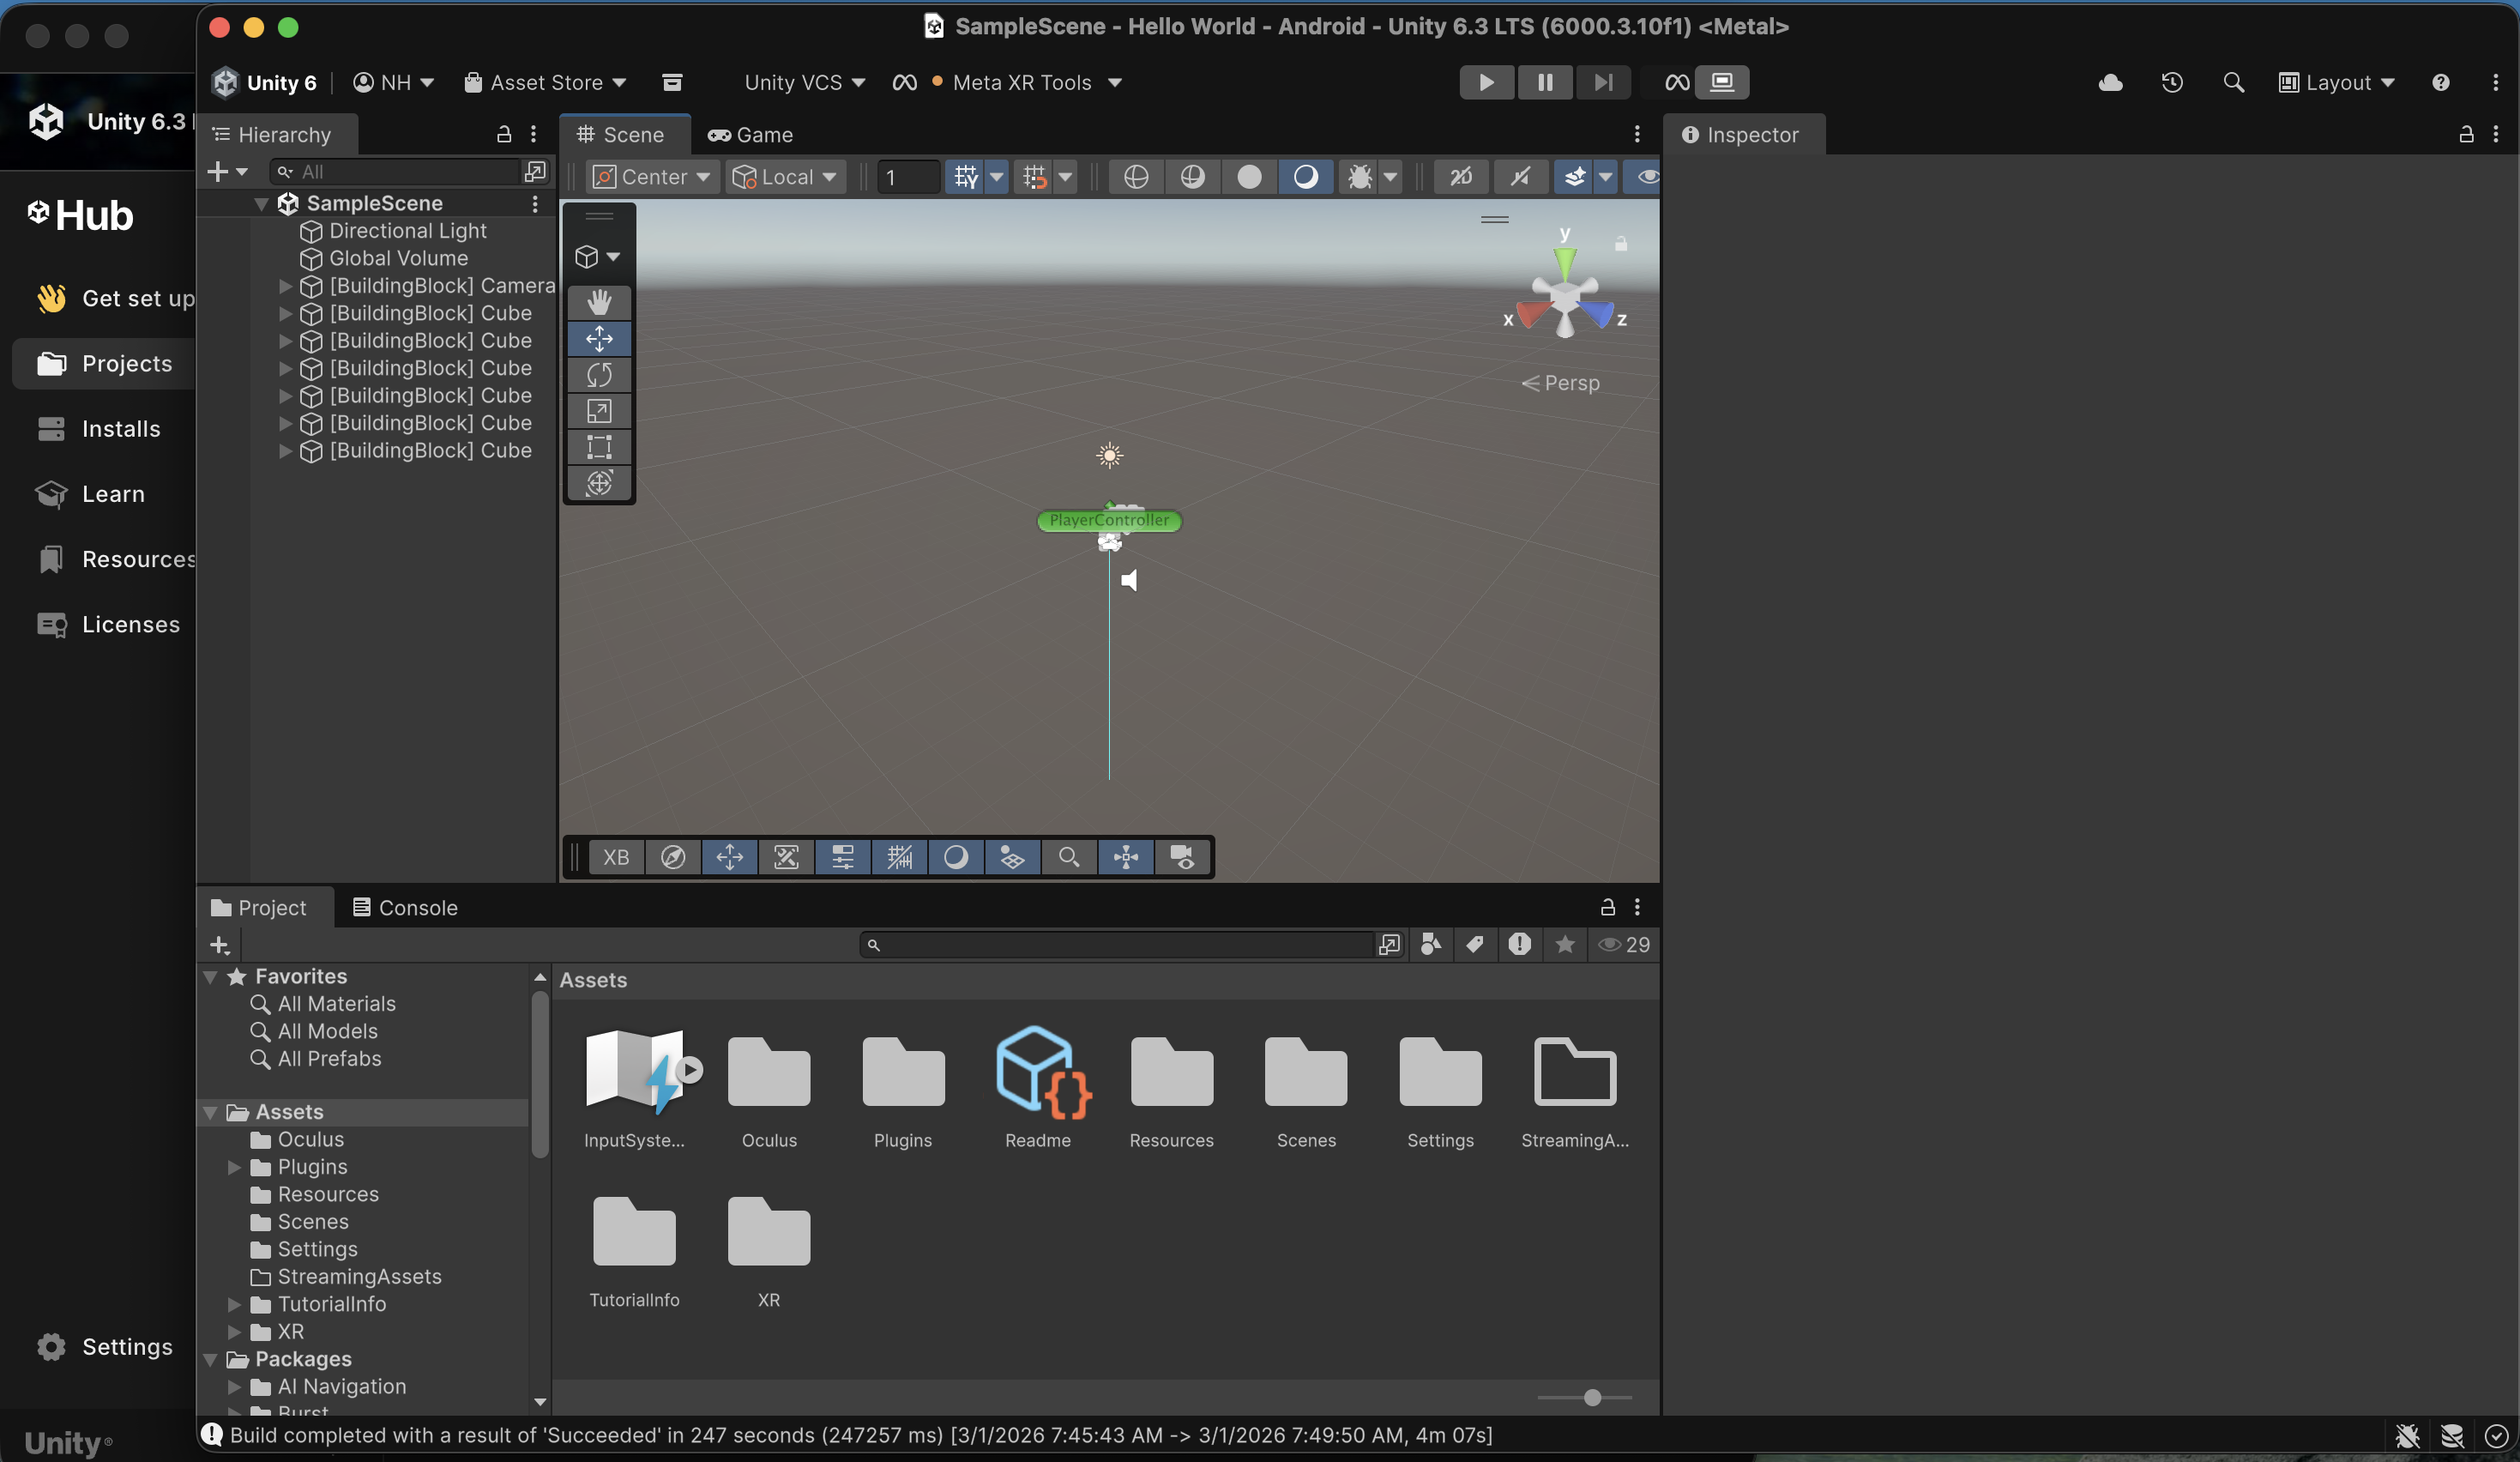
I selected the Build and Run command in Unity
I used the Quest 3 headset to grab and move the 6 cubes
Switch to Passthrough with Claude Code
PROMPT
1review this page https://developers.meta.com/horizon/documentation/unity/unity-passthrough-tutorial/ then update the scene to use "passthrough"
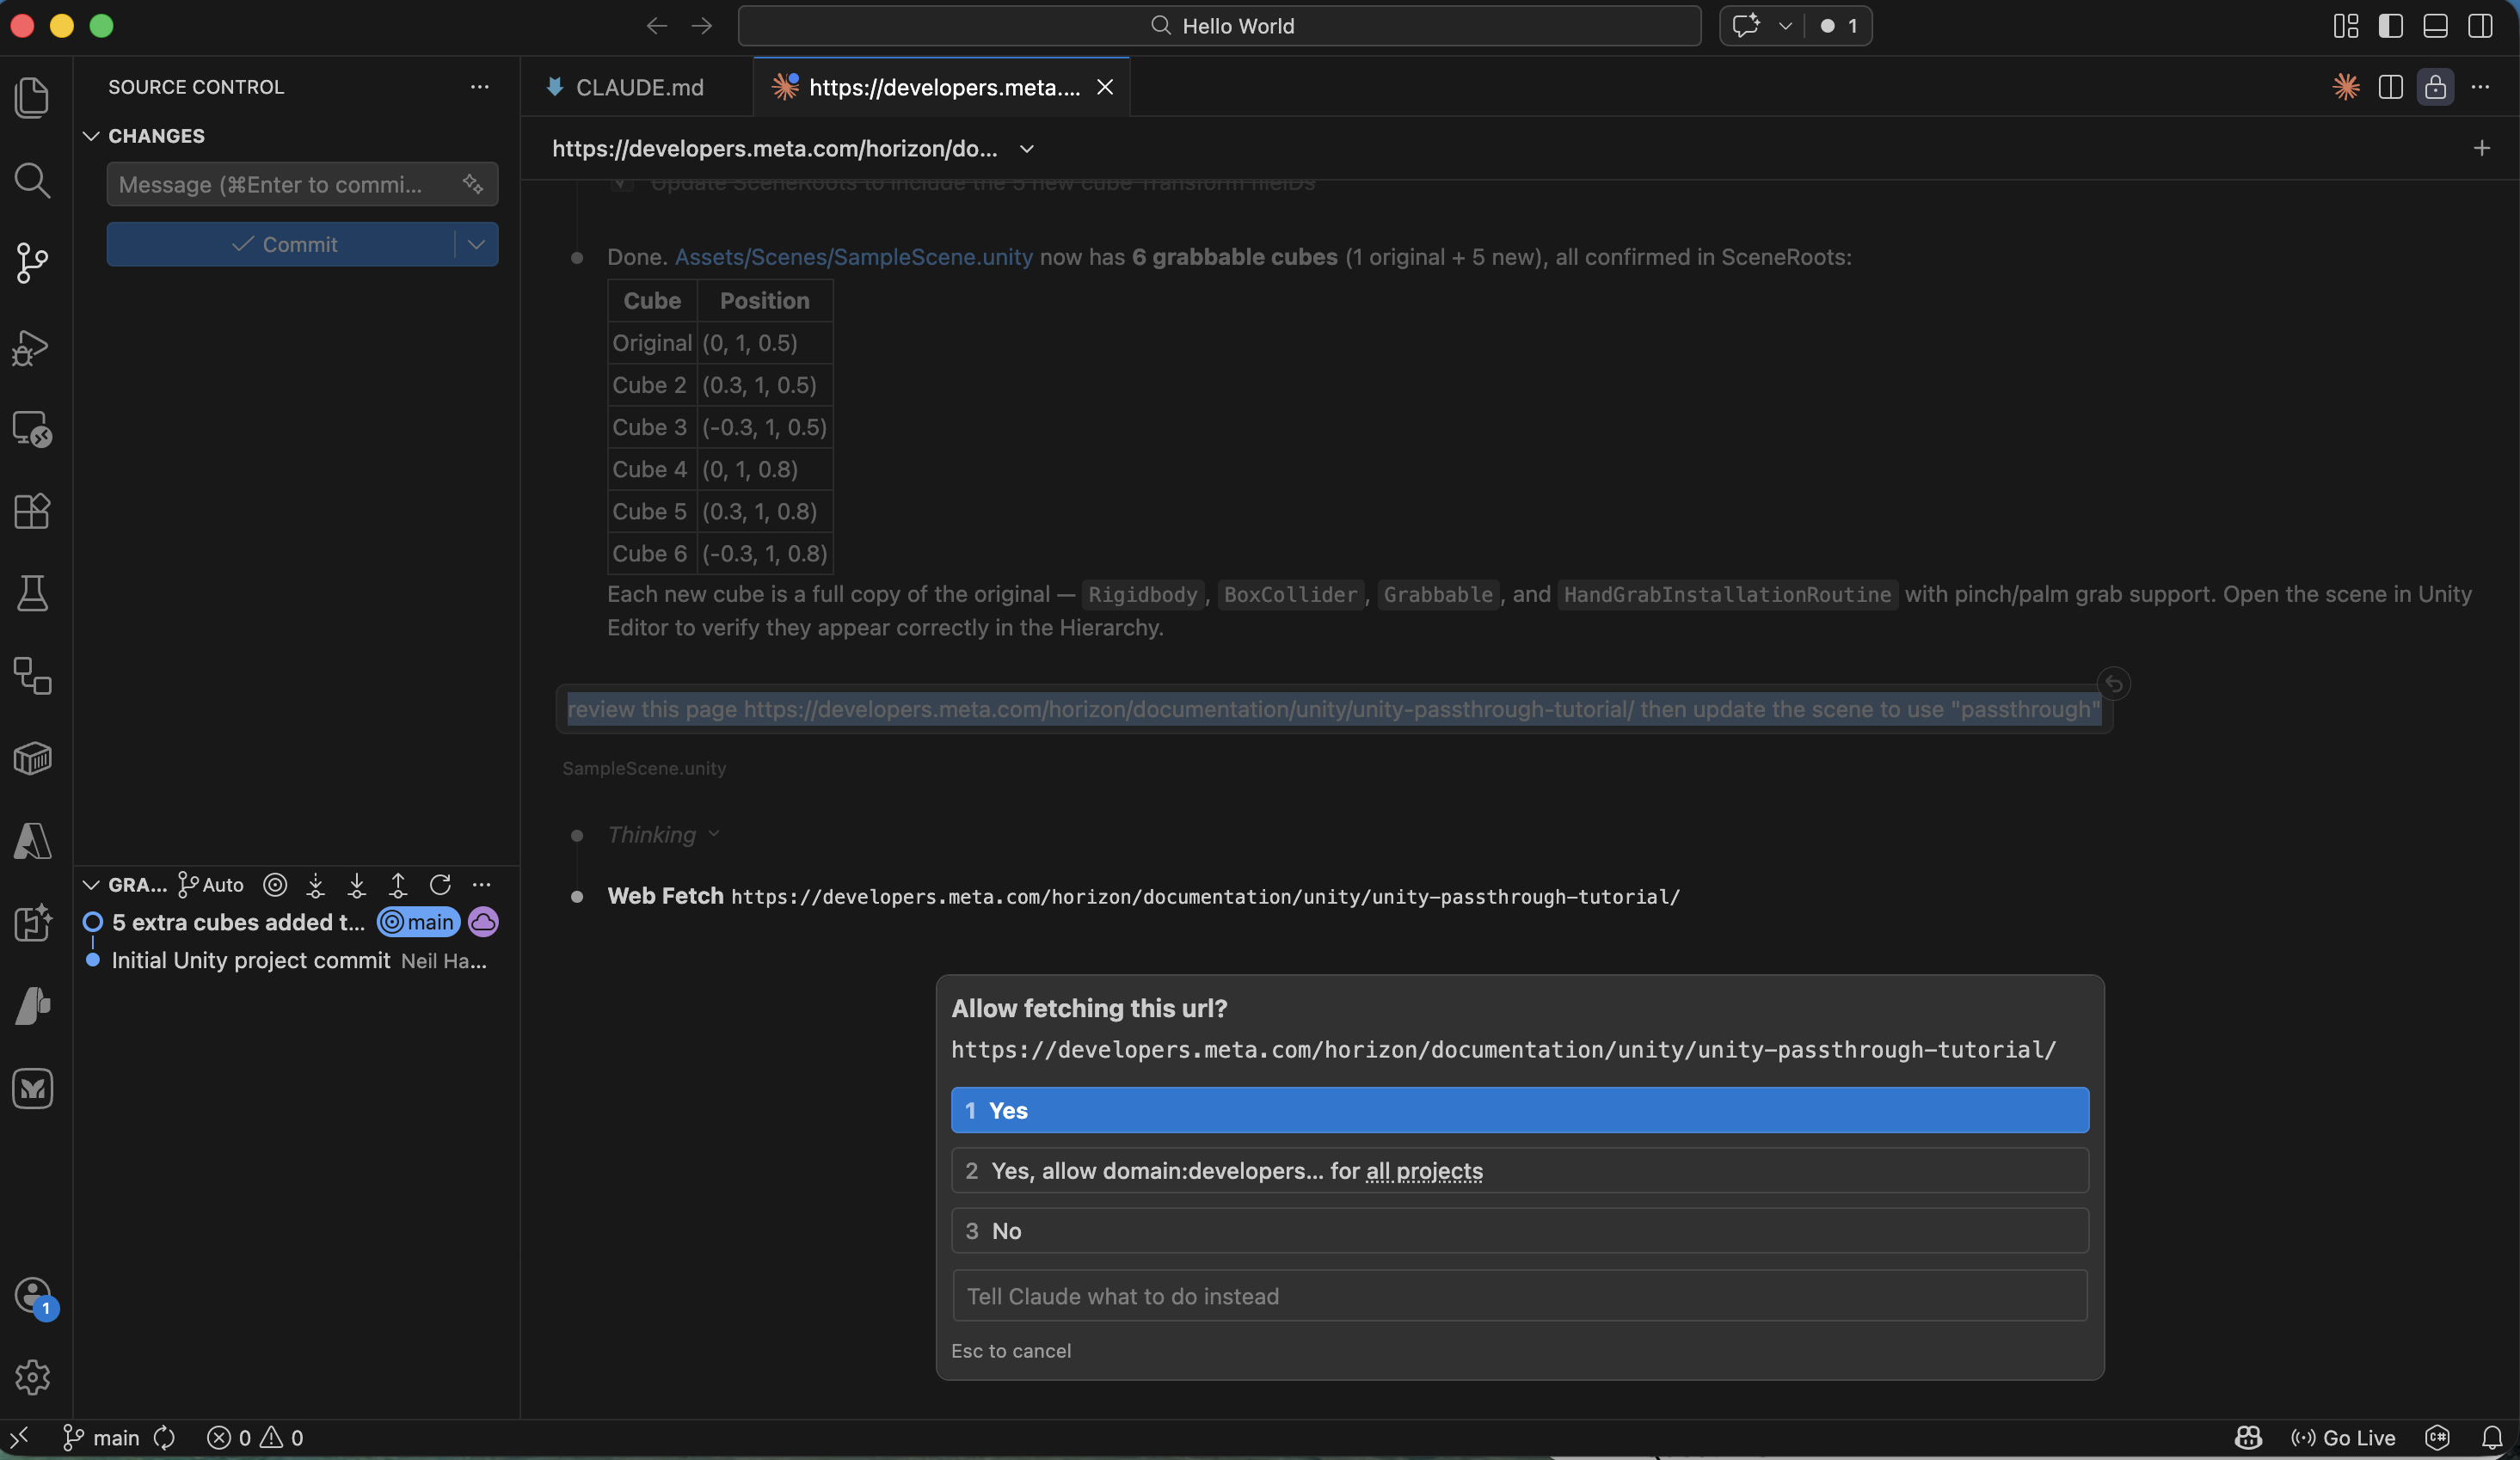
I clicked Yes to allow Claude Code to fetch the Meta passthrough tutorial
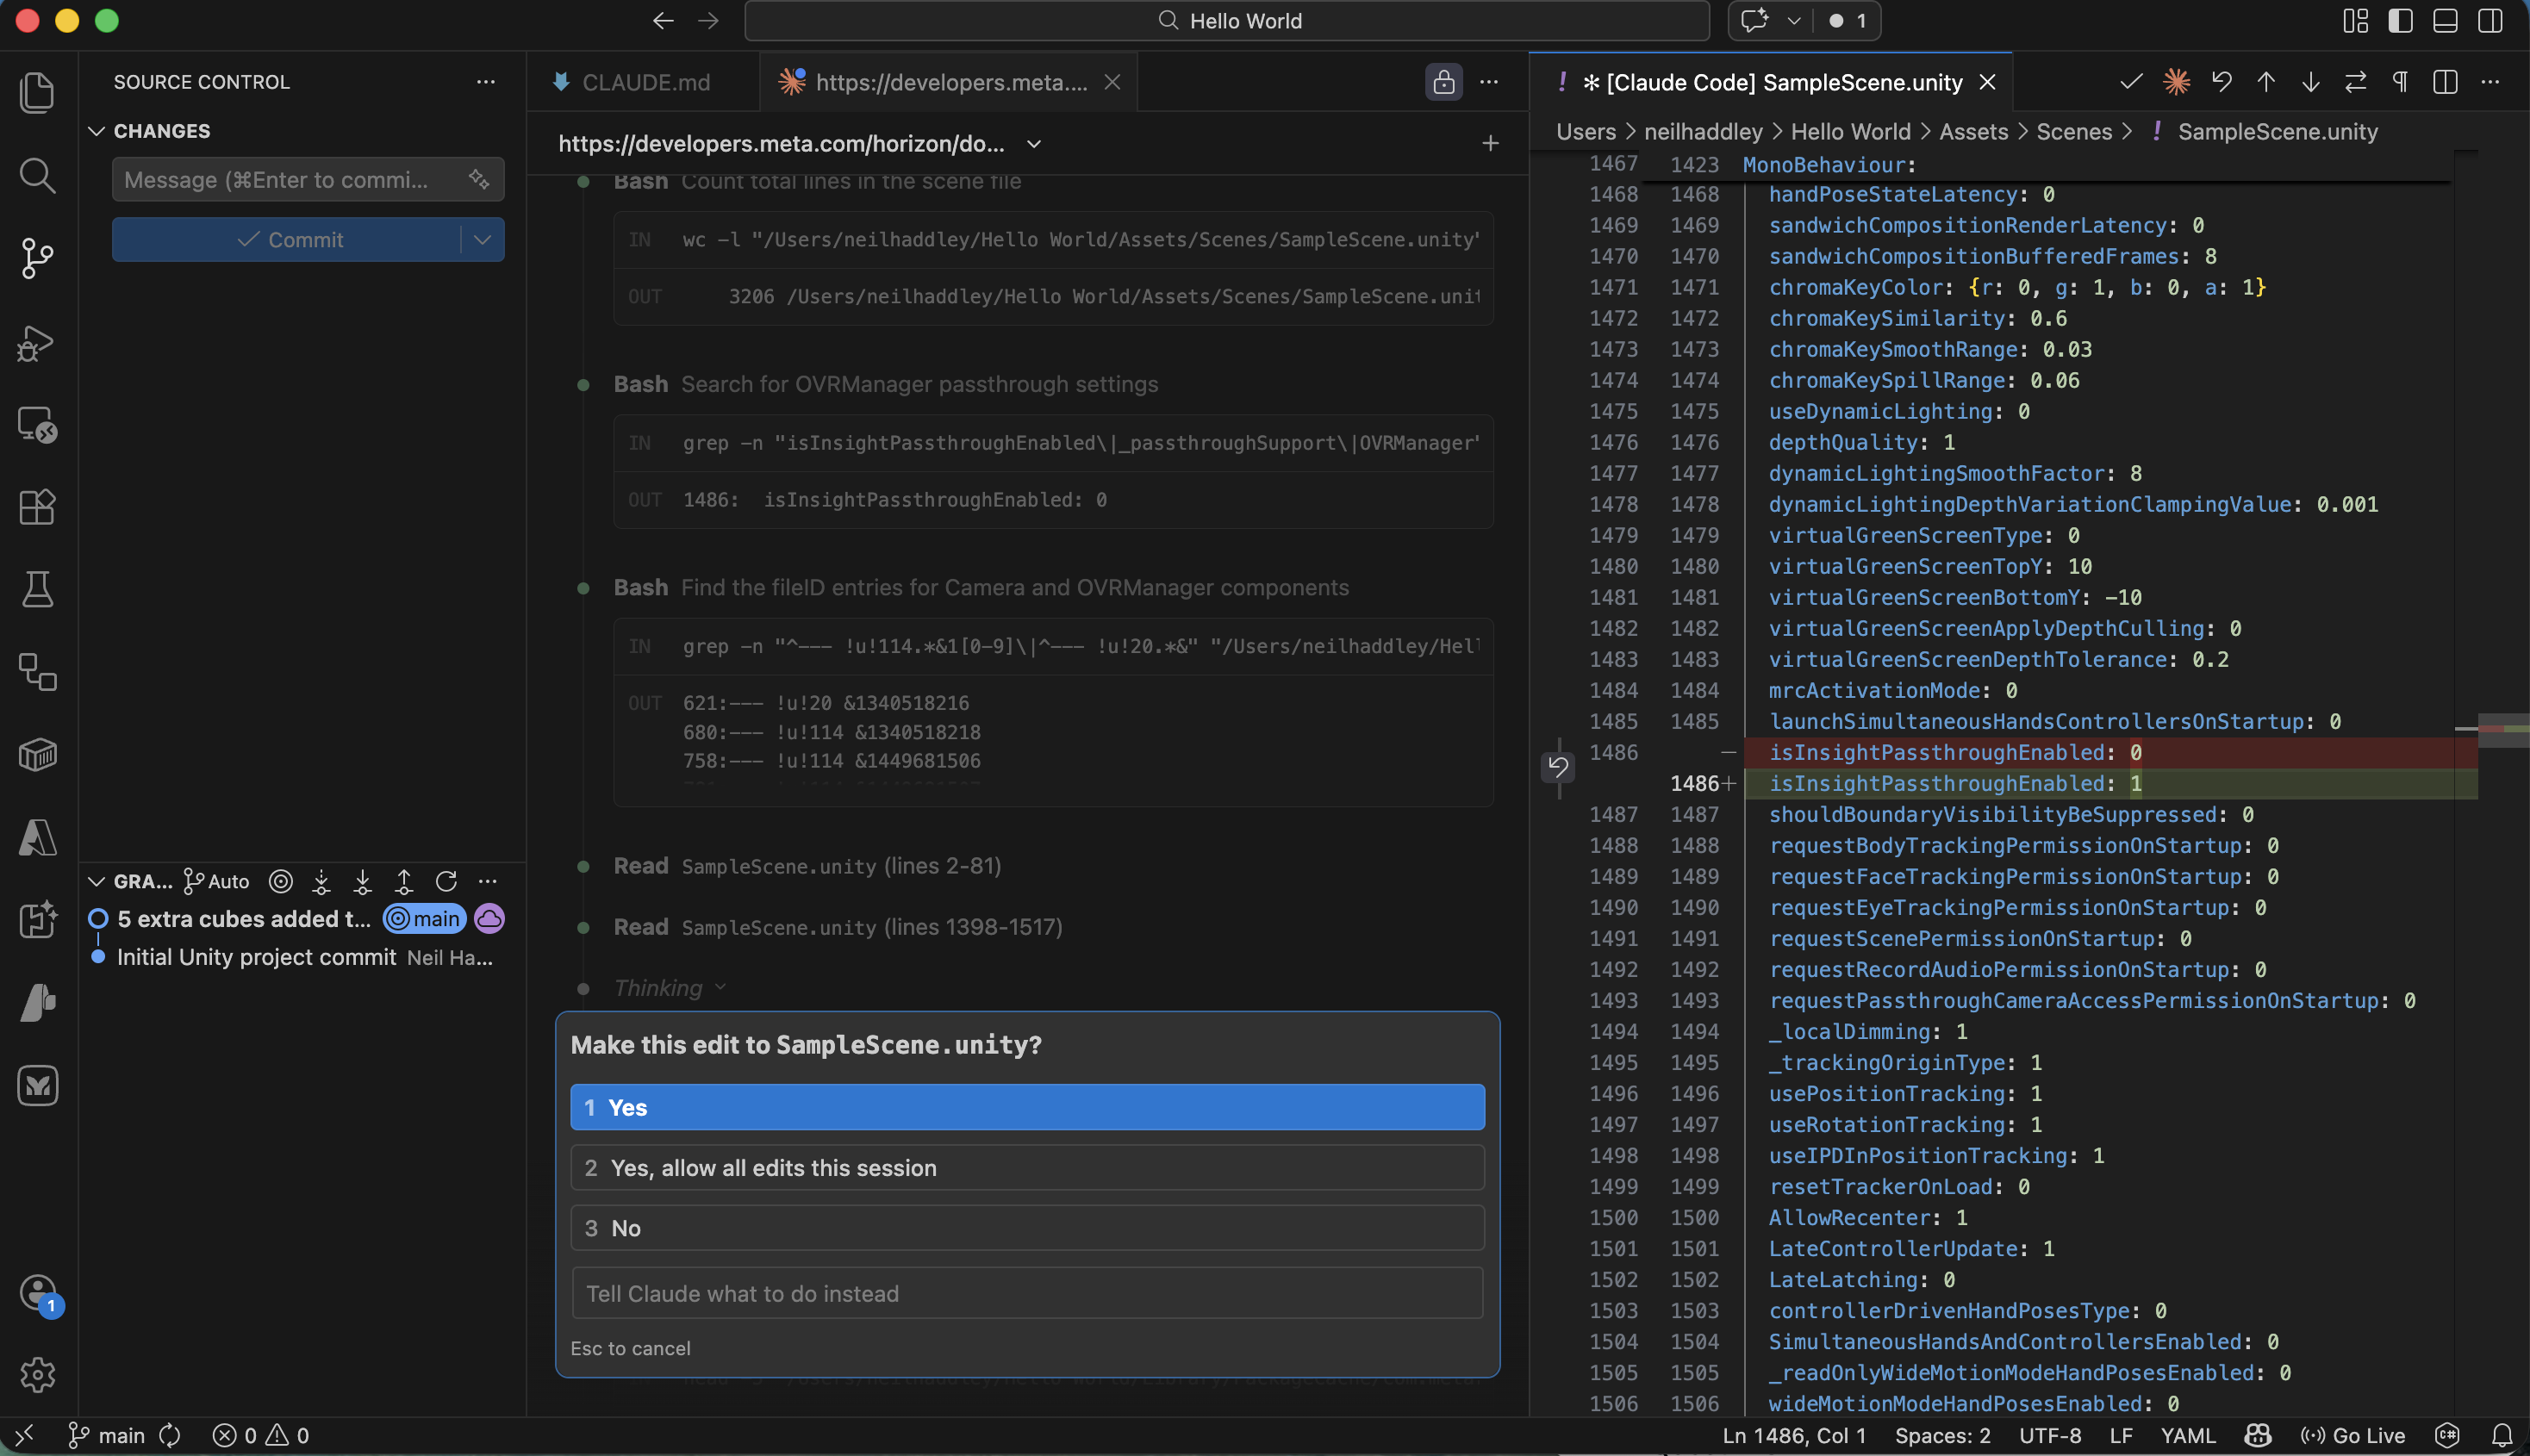
I clicked Yes to apply the first SampleScene.unity edit
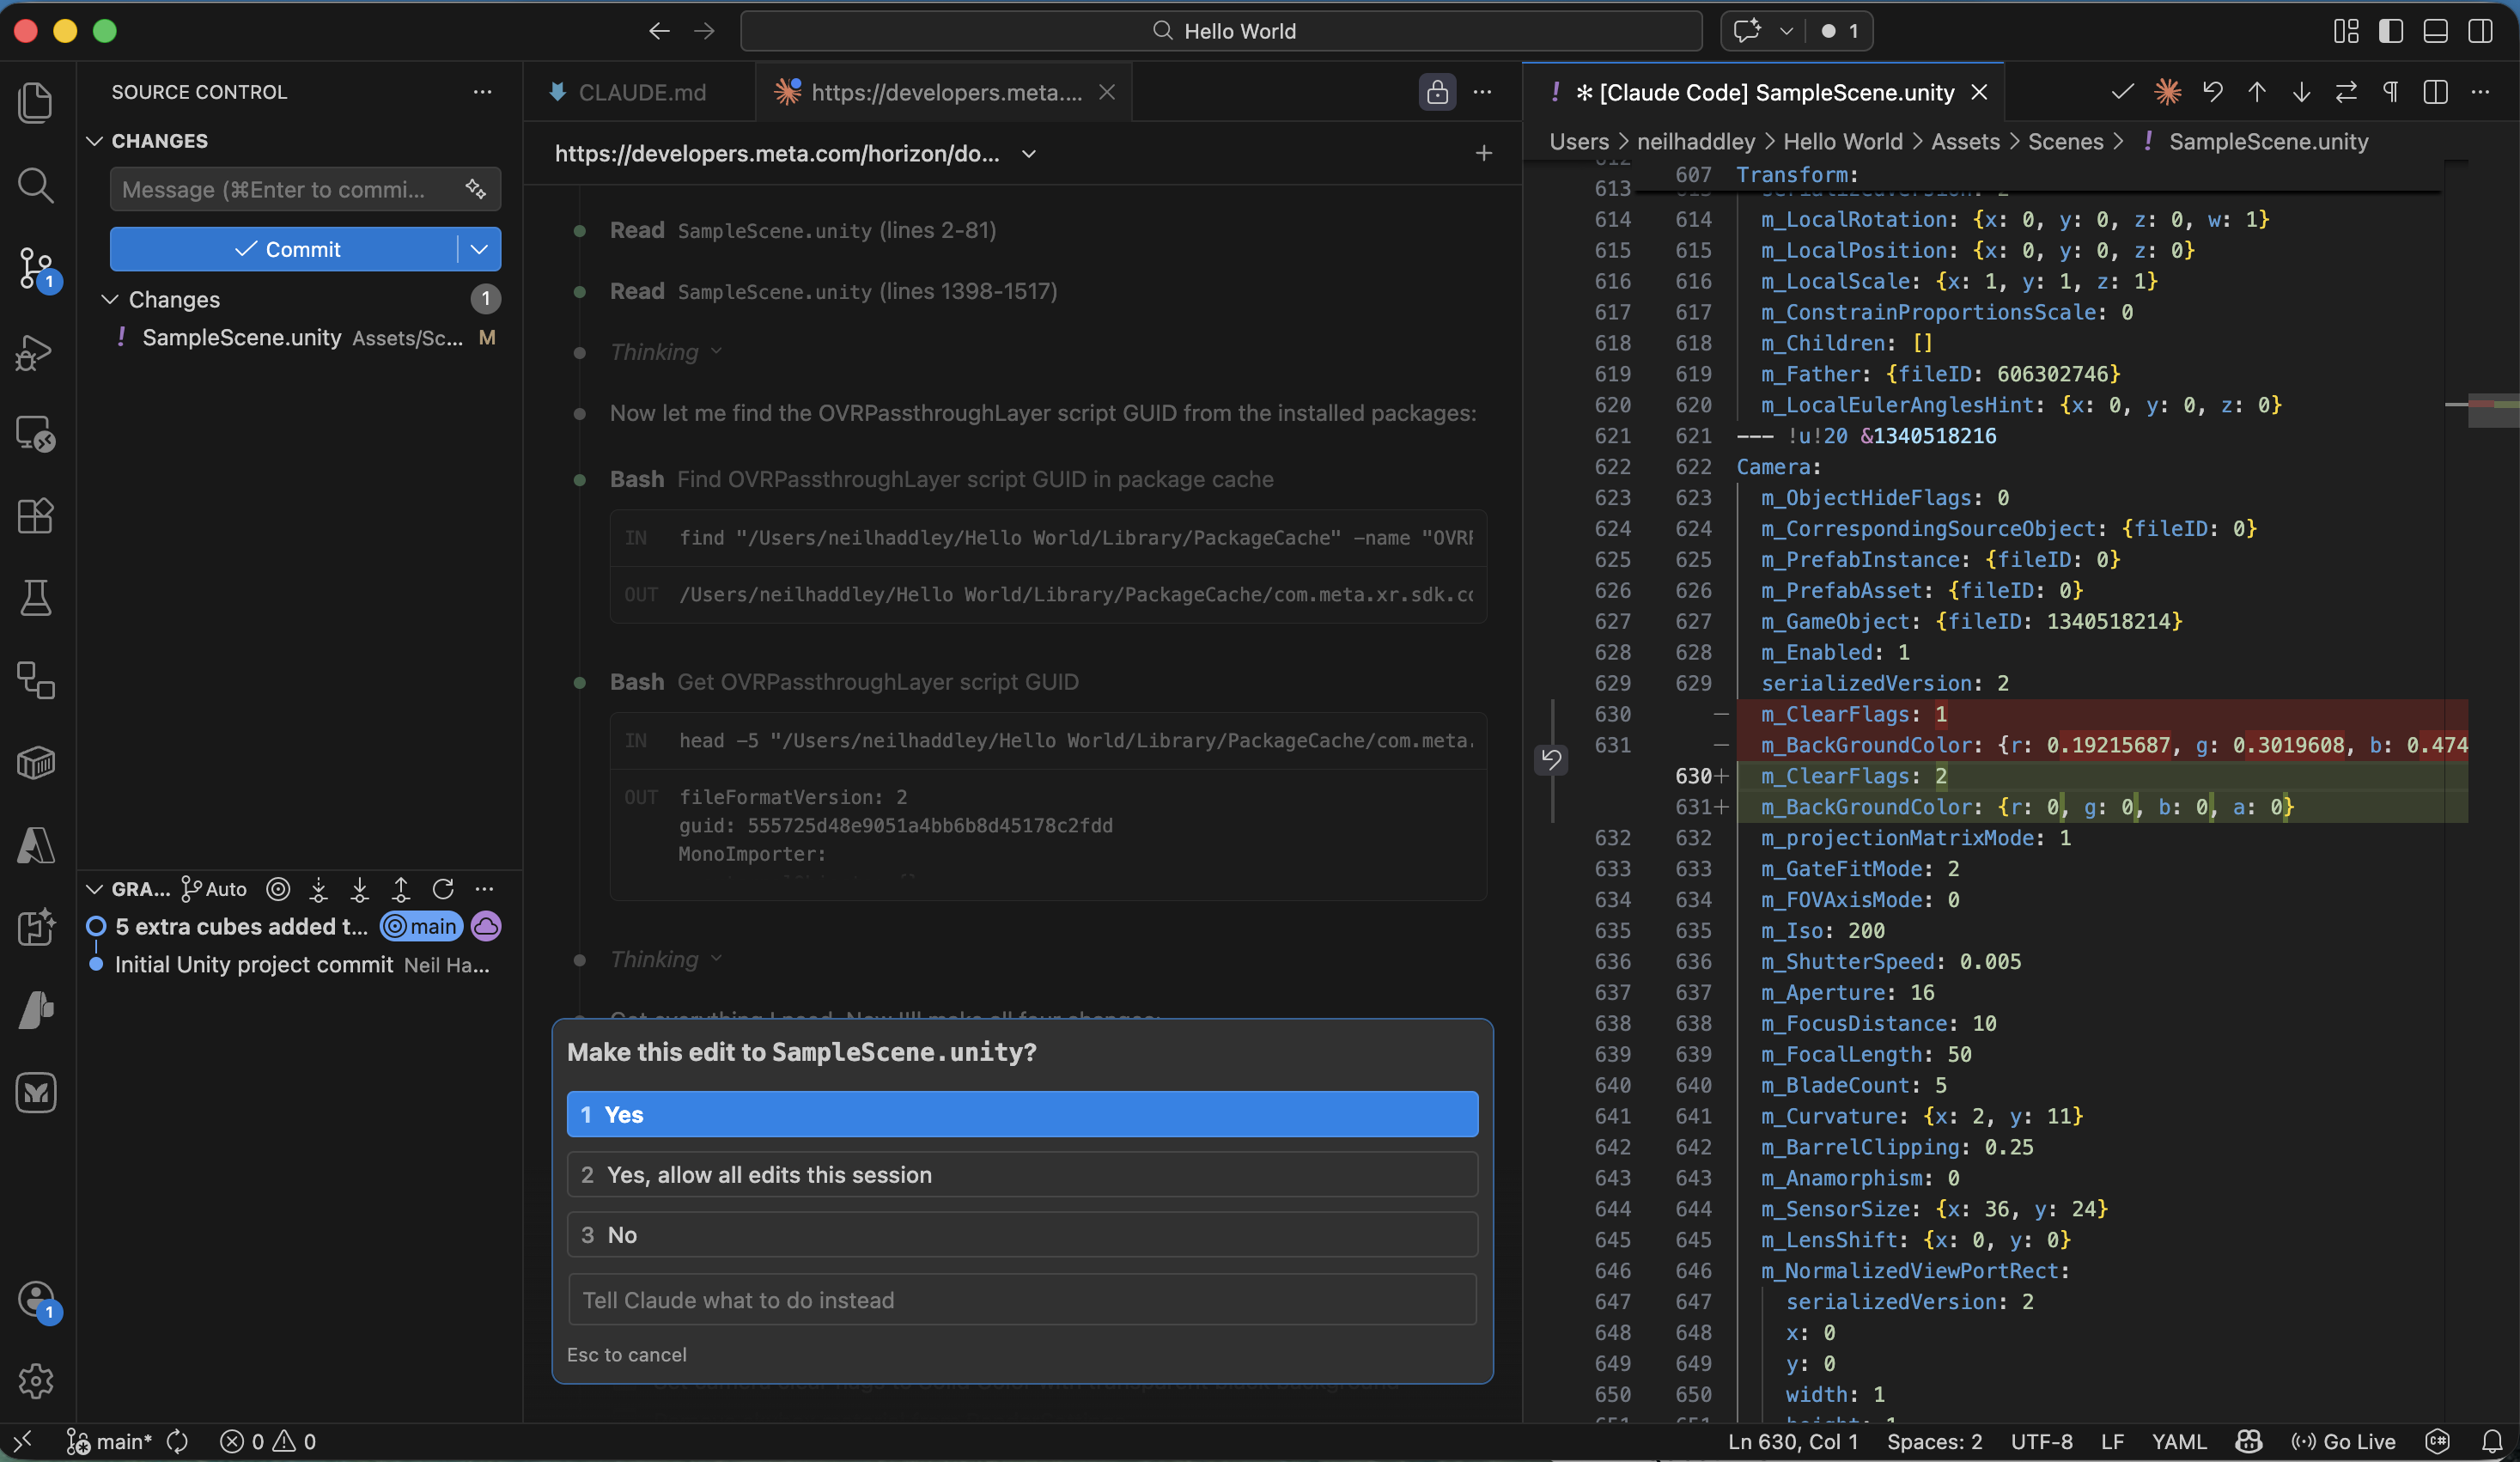
I clicked Yes to apply a second SampleScene.unity edit
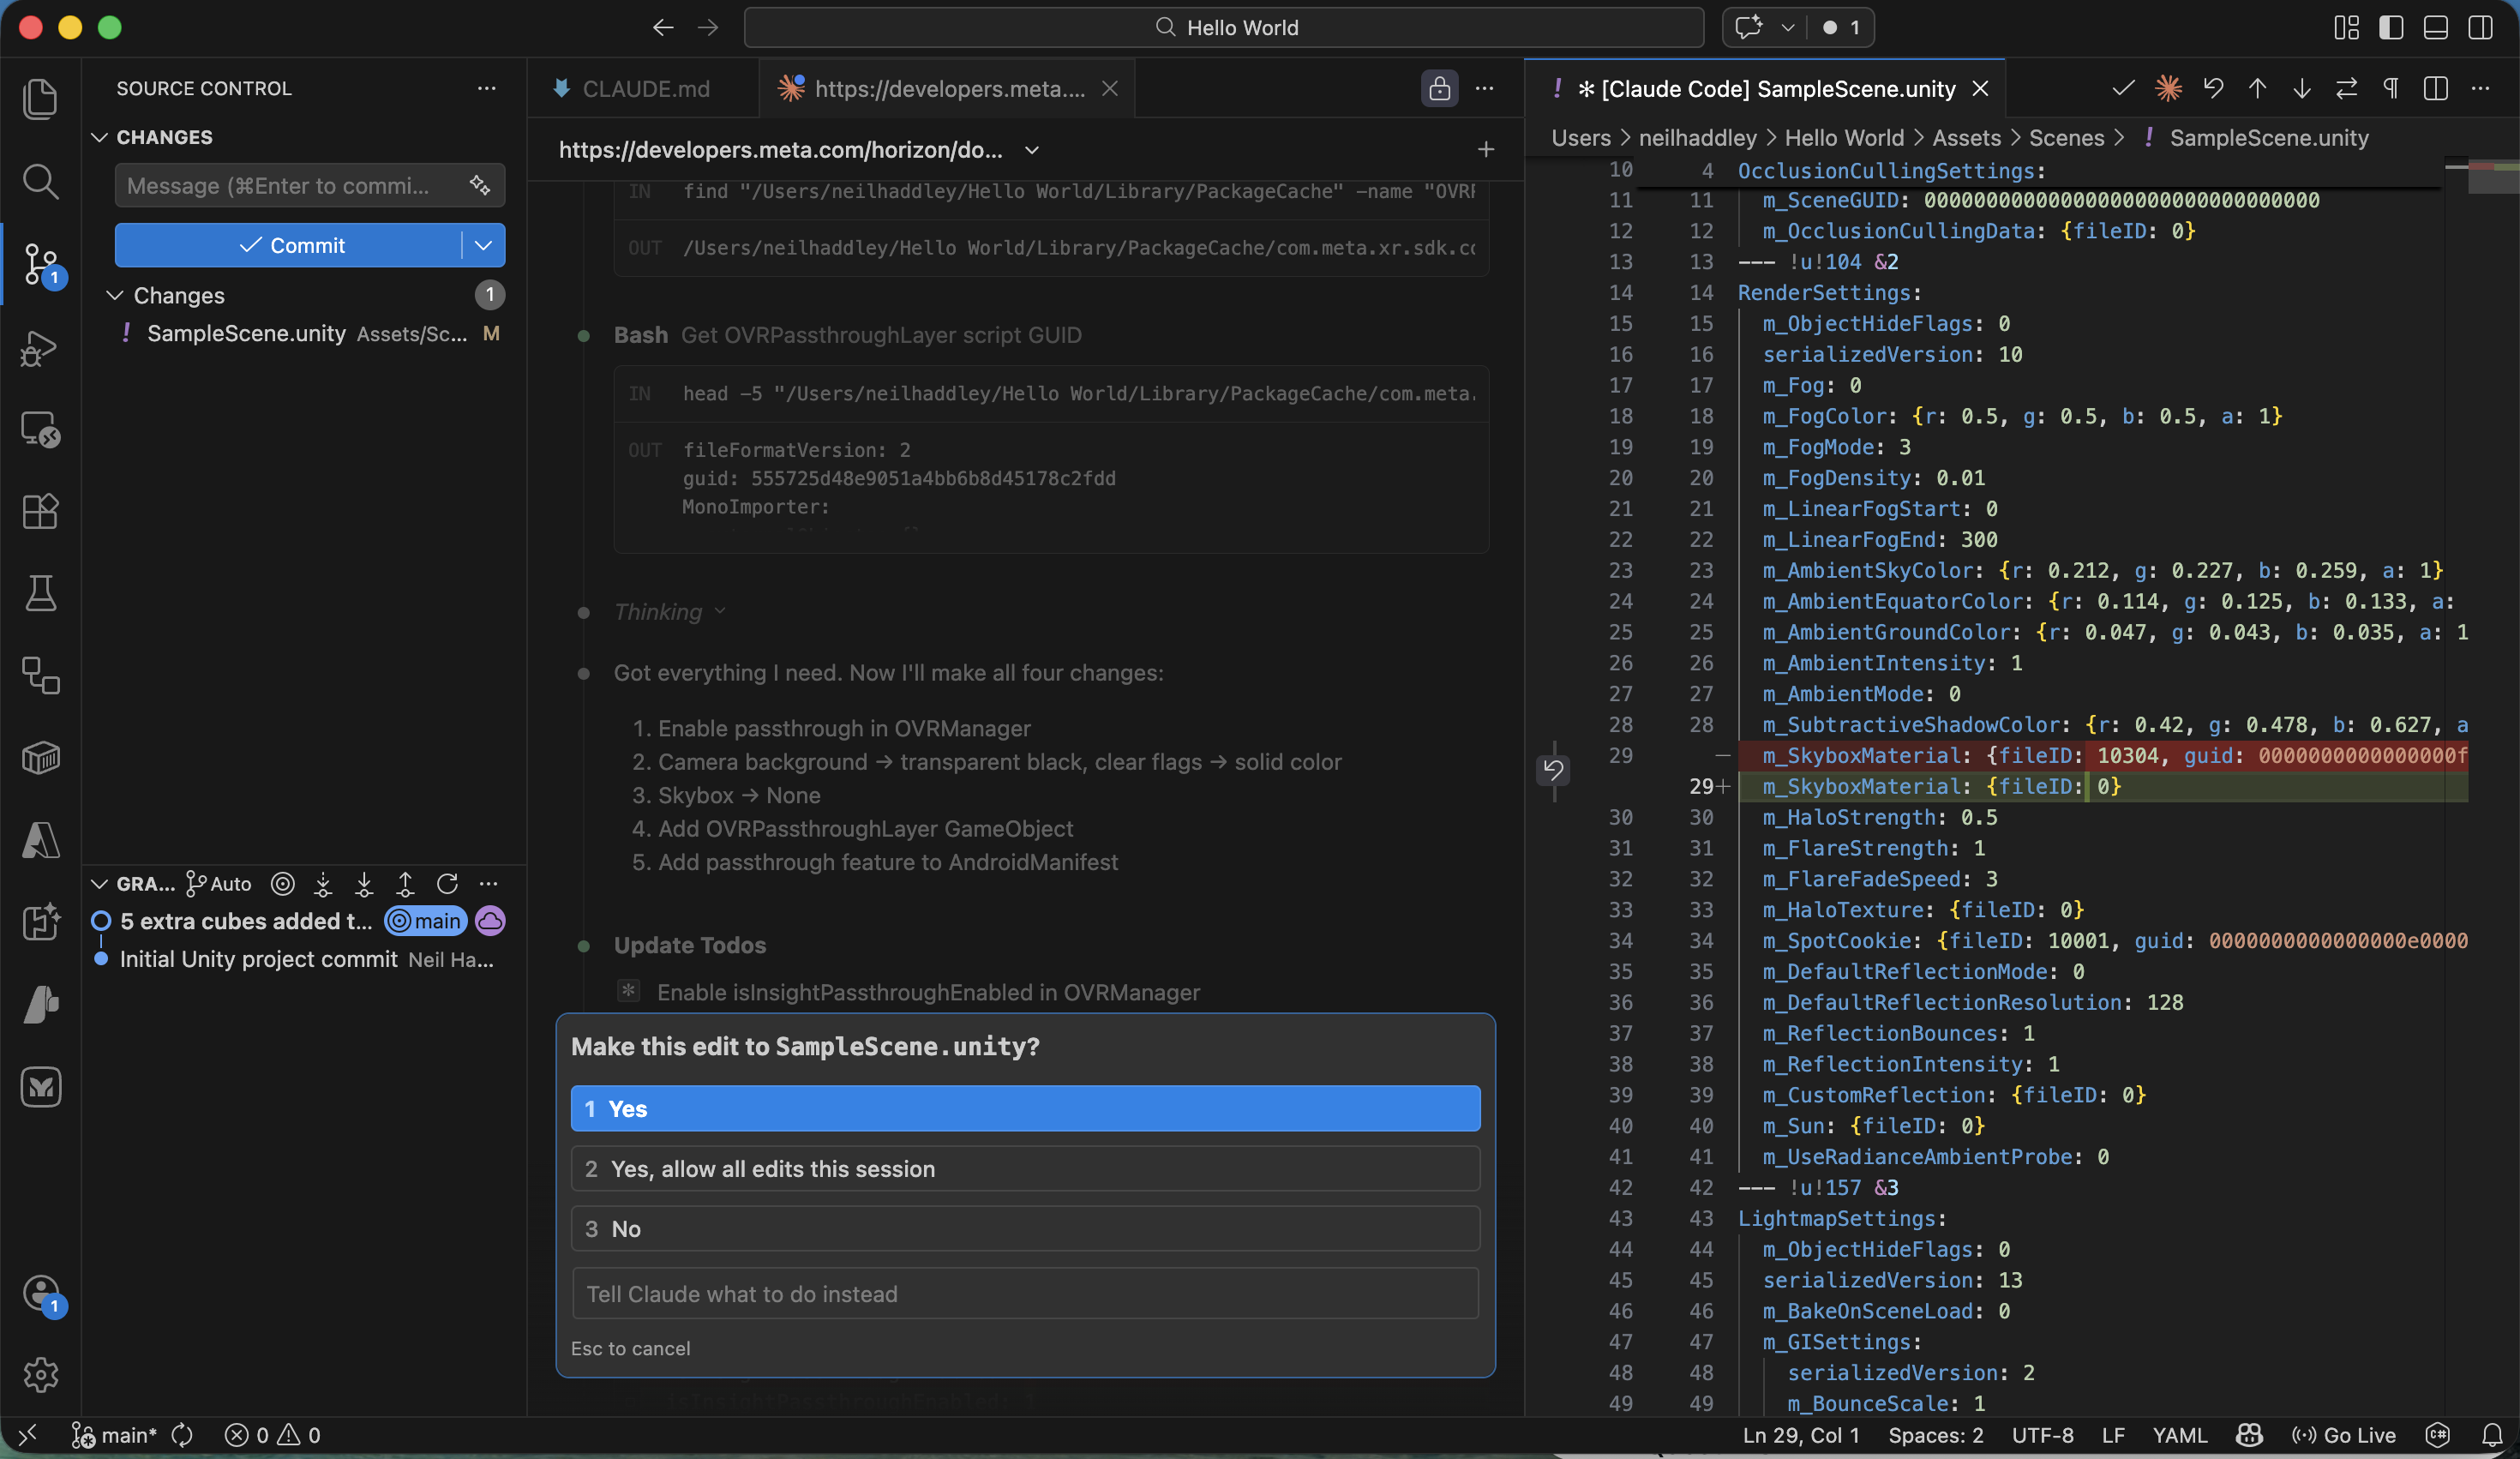
Claude Code planned the 4 changes needed to enable passthrough
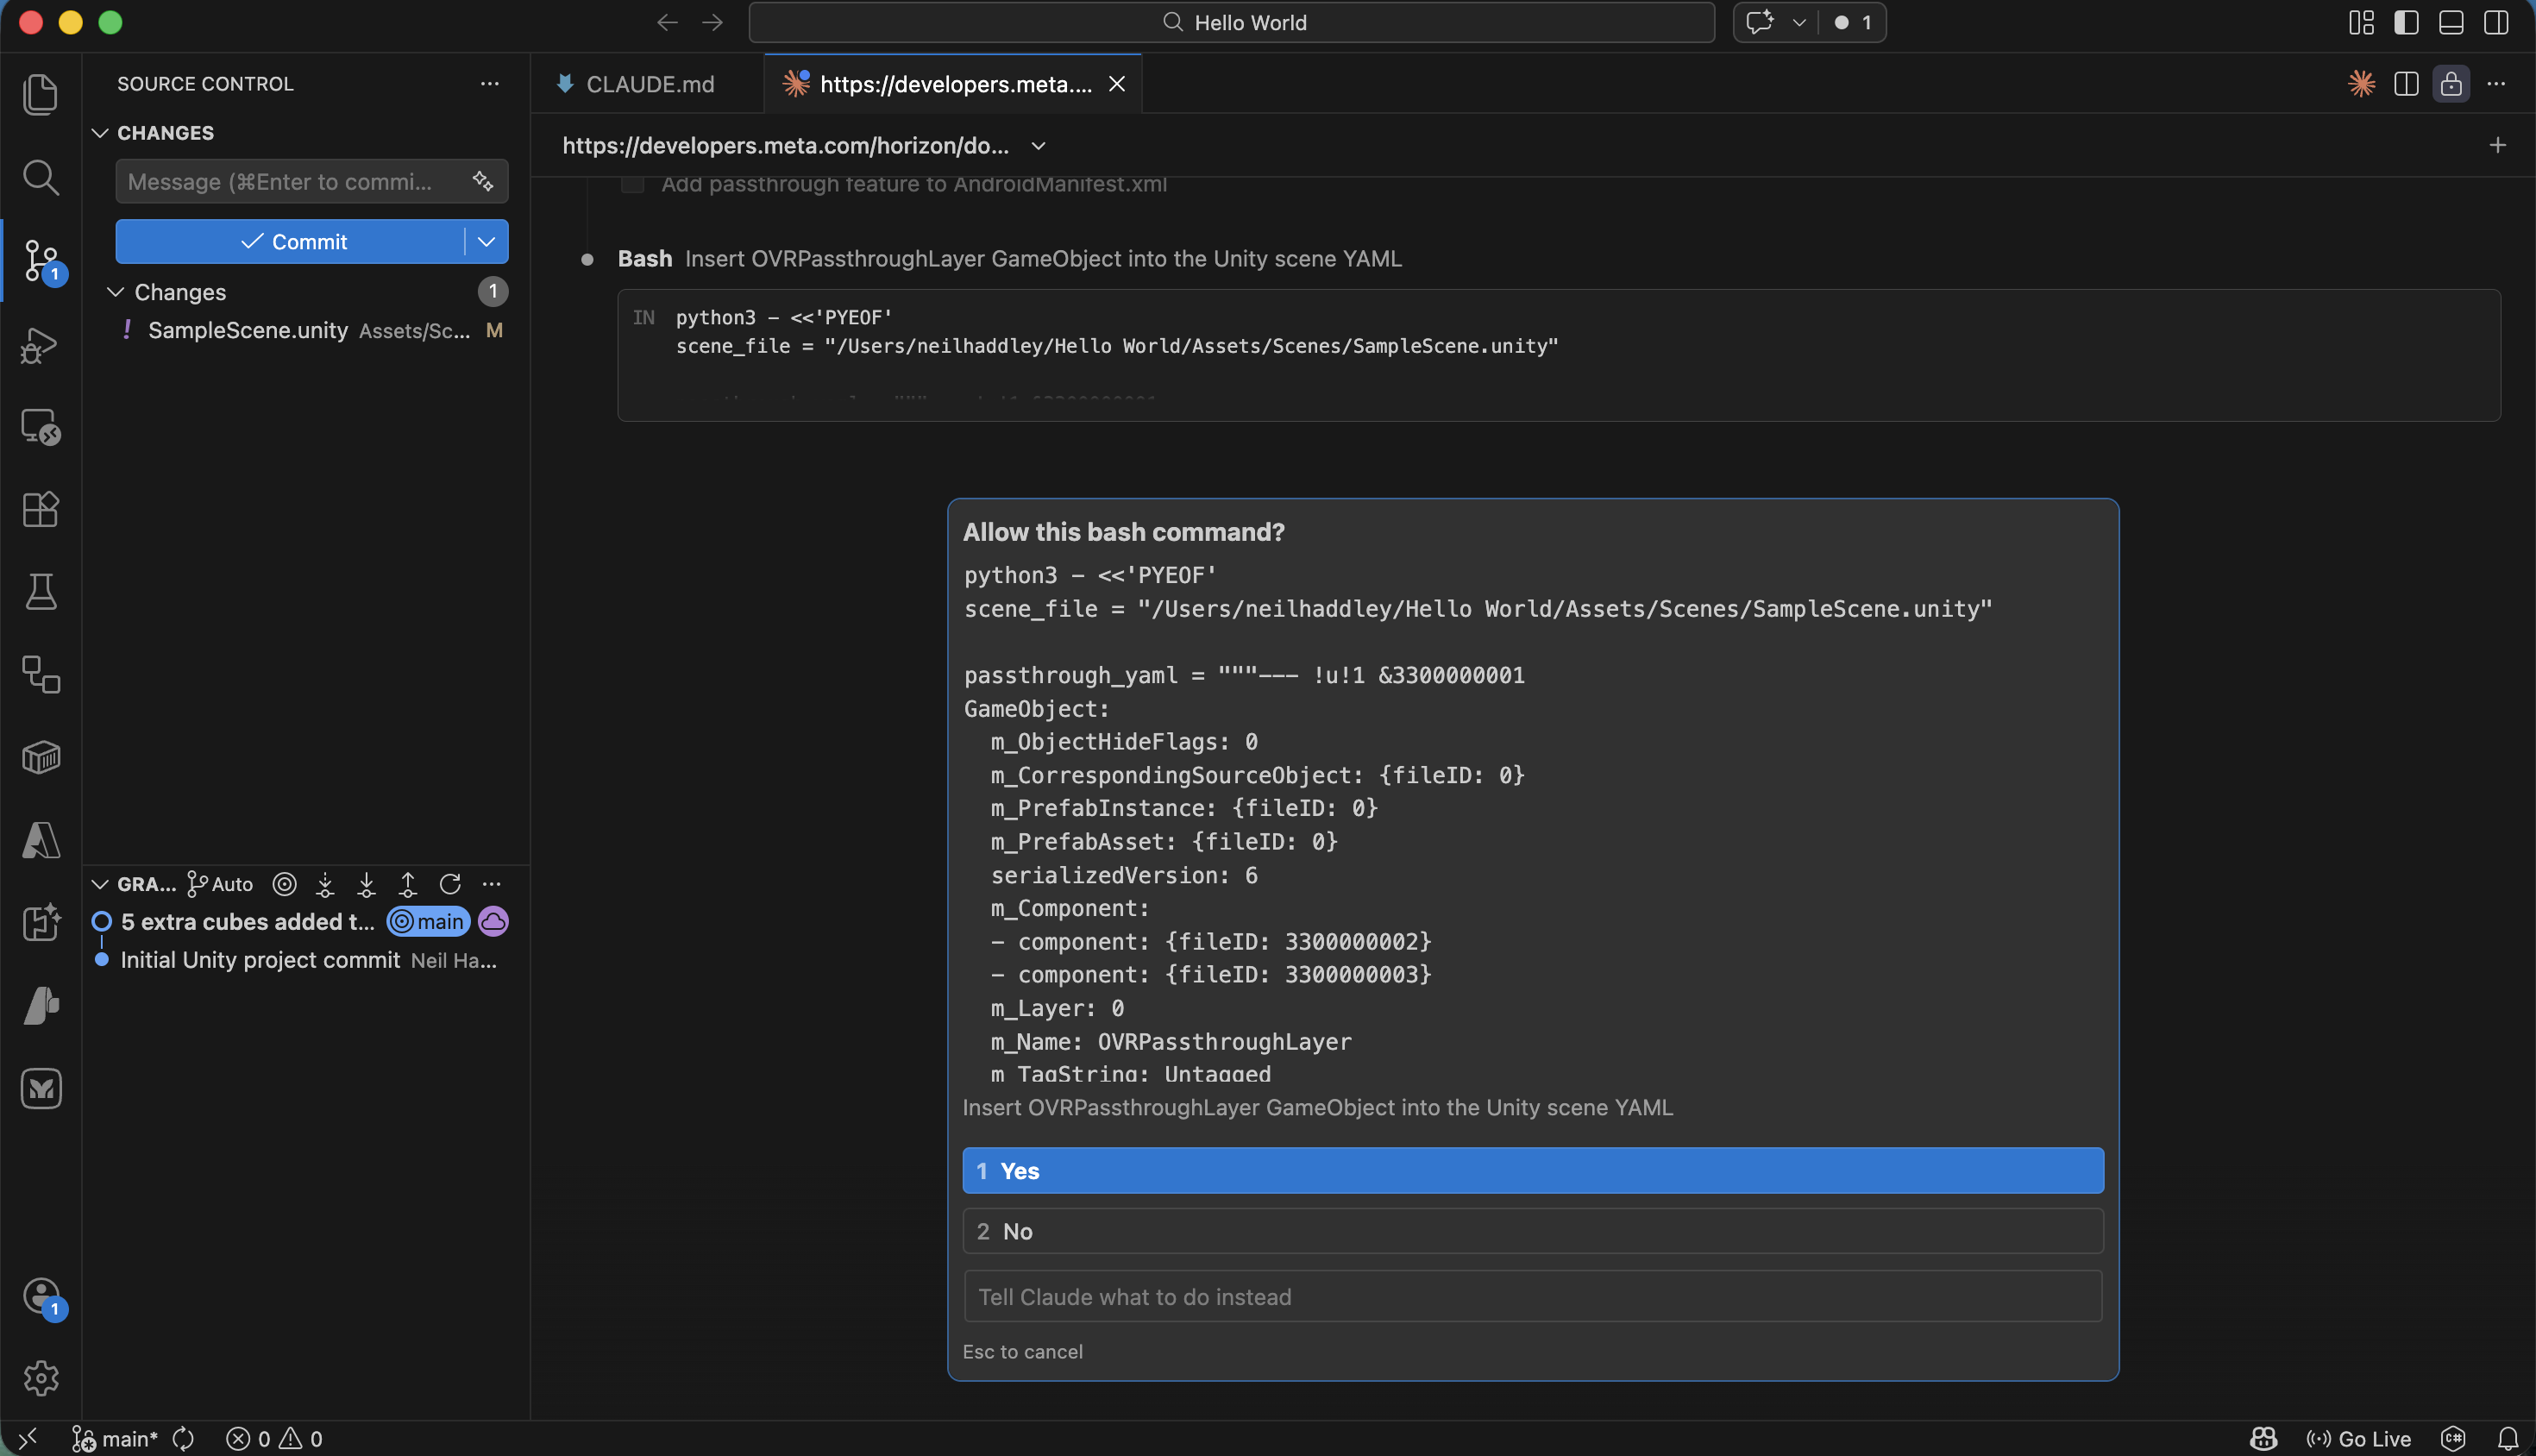
I clicked Yes to allow Claude Code to insert the OVRPassthroughLayer object into the scene
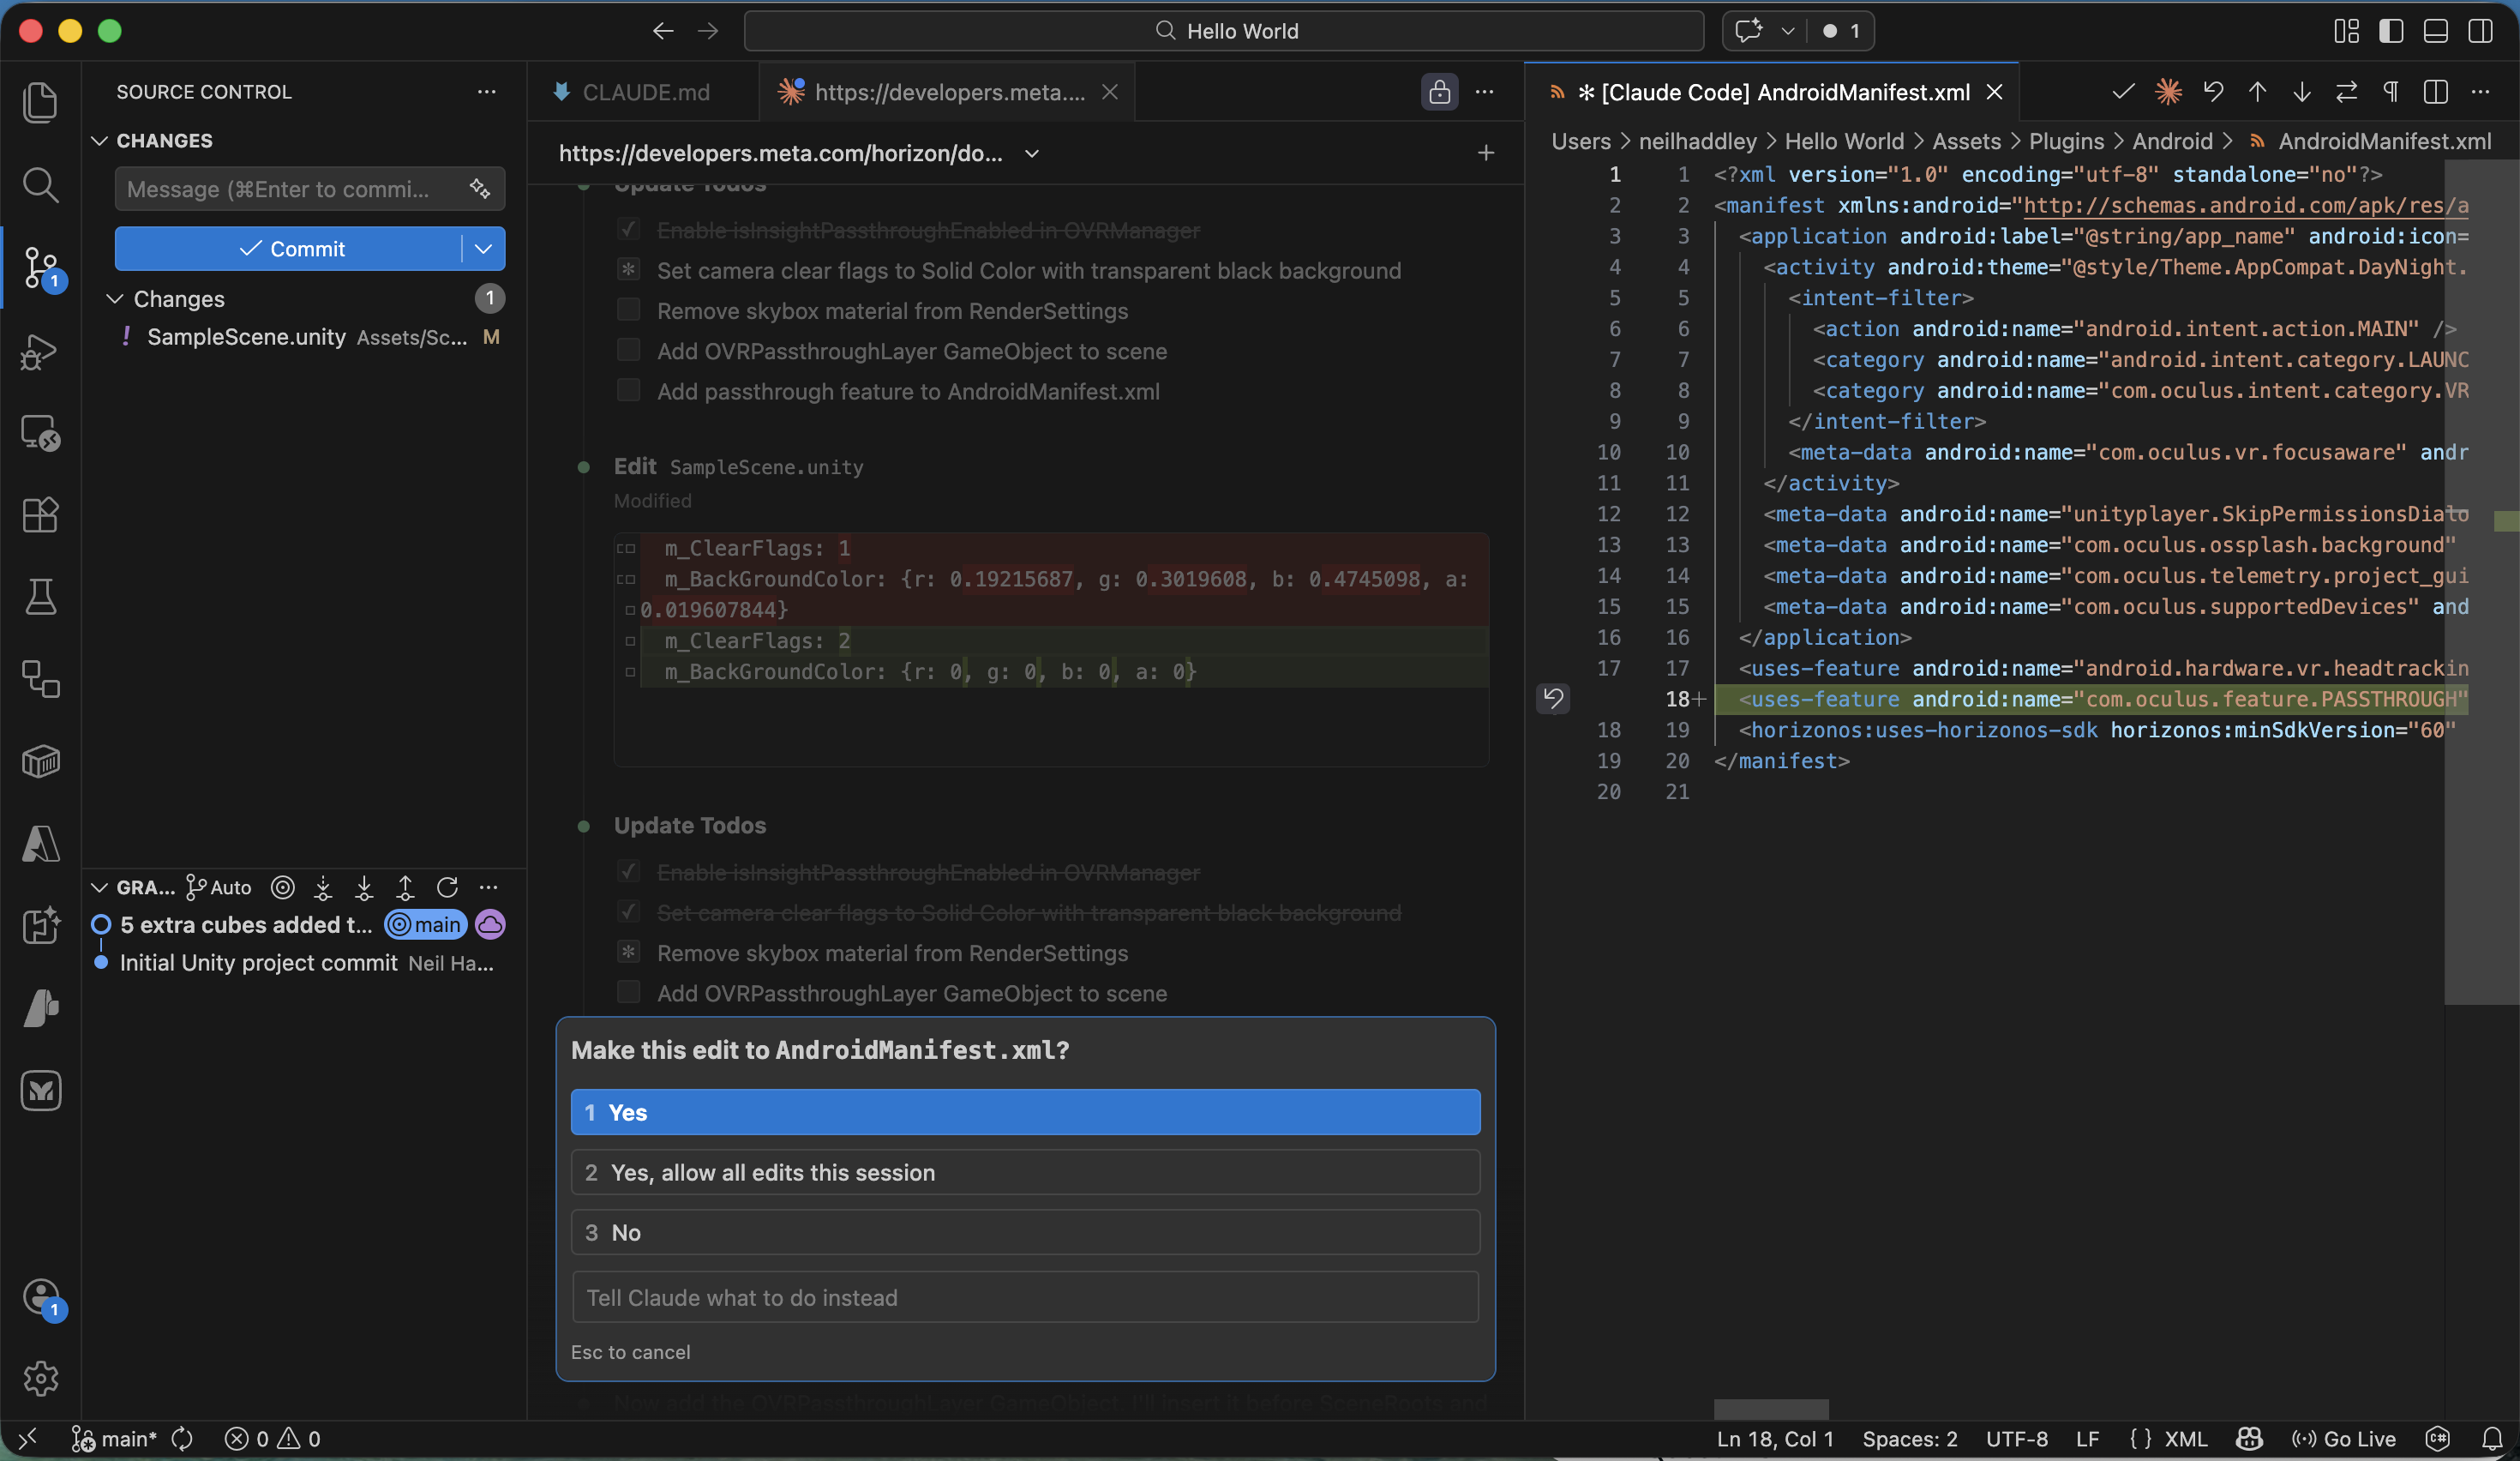
I clicked Yes to allow Claude Code to edit the AndroidManifest.xml
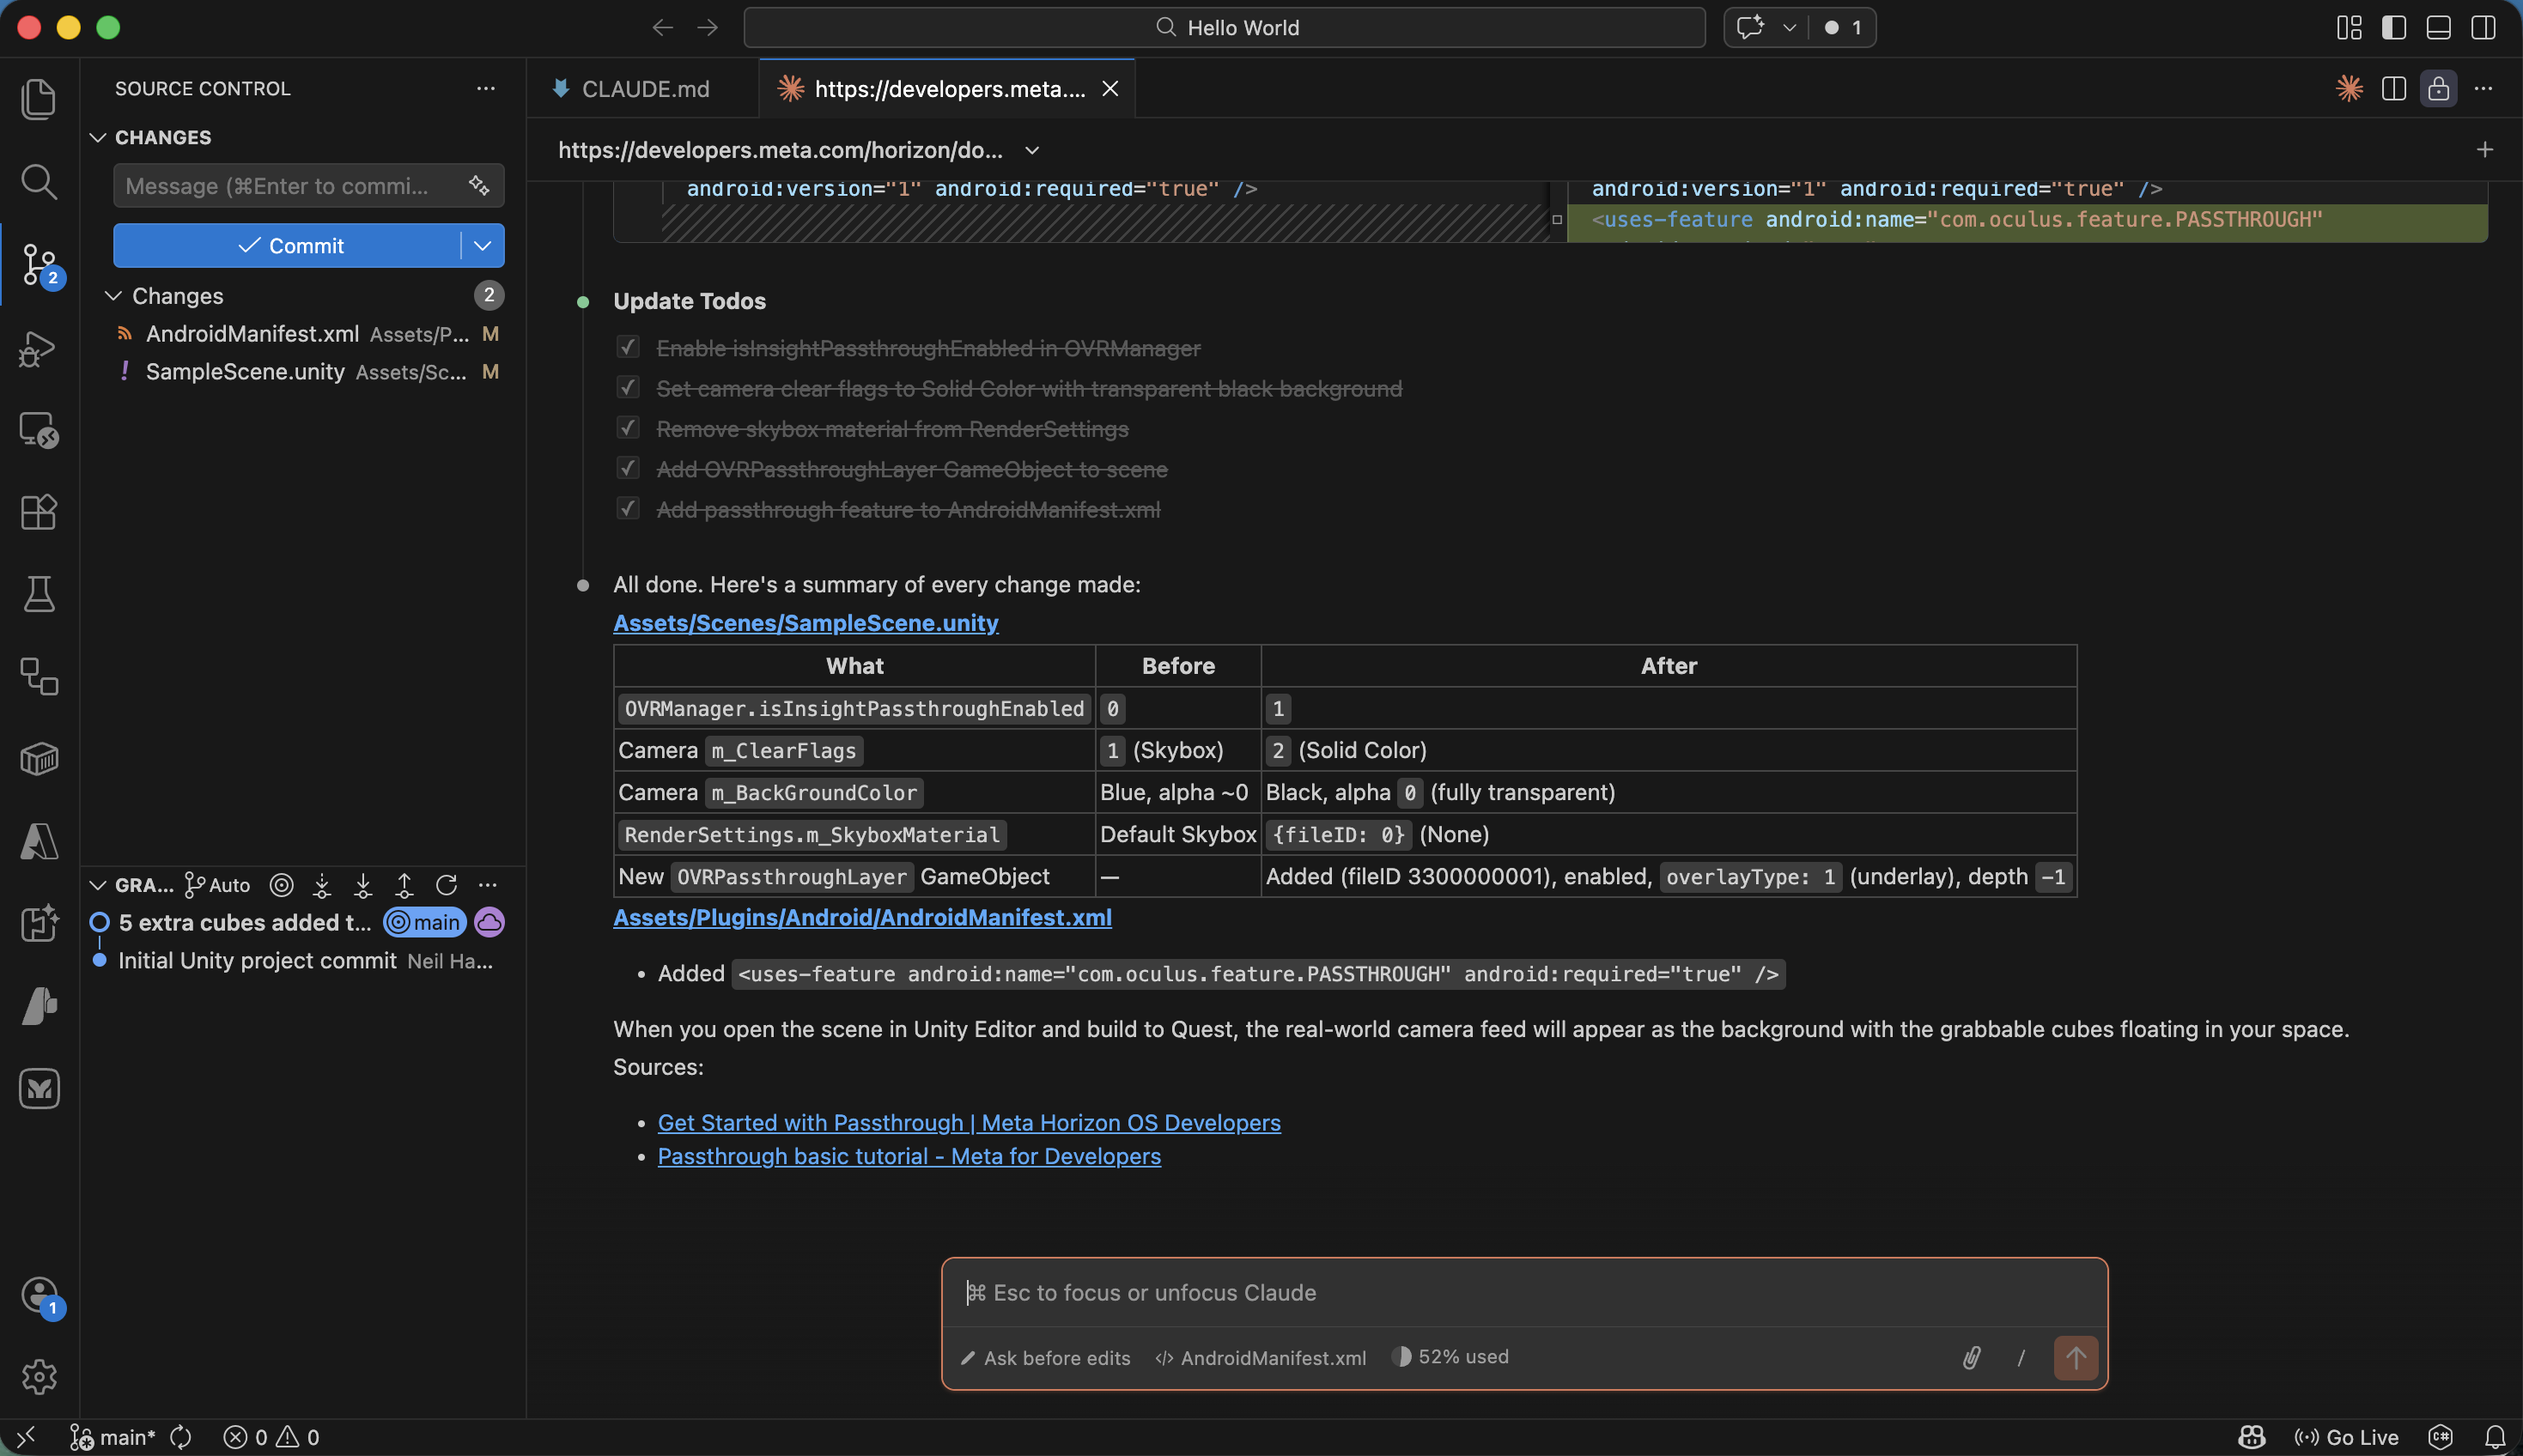
Claude Code completed all 4 passthrough changes and showed a summary
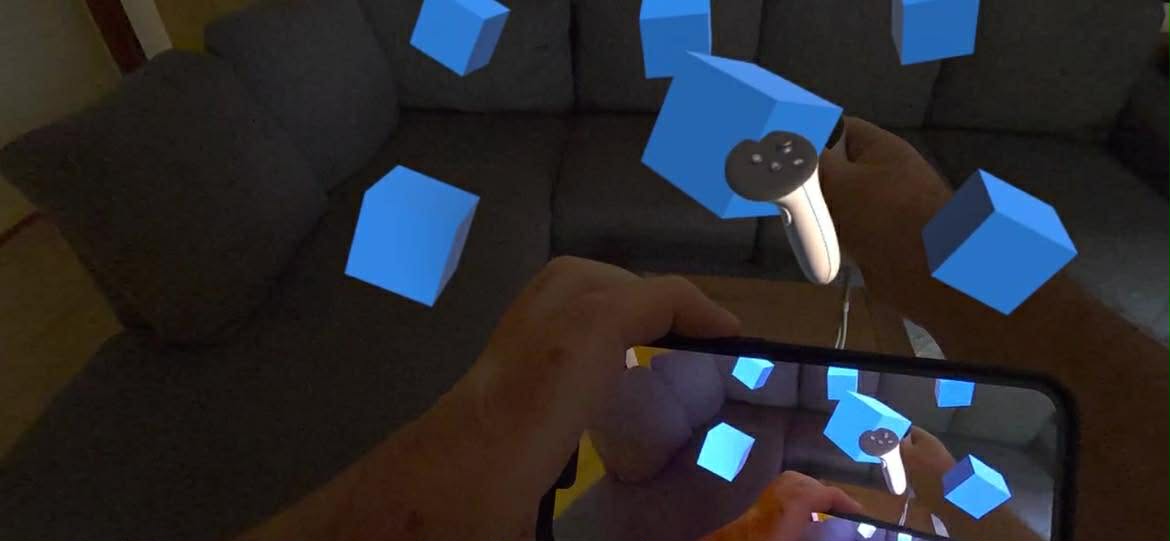
The passthrough view showed the real world with blue cubes floating in my space
Fixing my Vision with Claude Code
PROMPT
1I have been prescribed glasses that help me to see properly (without leaning my head towards my left shoulder) Add a feature that allows me to adjust the feed to my left and right eyes so that I am less tempted to lean my head. Show a spirit level that lets me see how horizontal my head/eye position is Here is the prescription Right Eye (OD): 5.50 Prism Diopters Base Down + 1.0 Prism Diopter Base Out.
2Left Eye (OS): 5.50 Prism Diopters Base Up + 1.0 Prism Diopter Base Out.
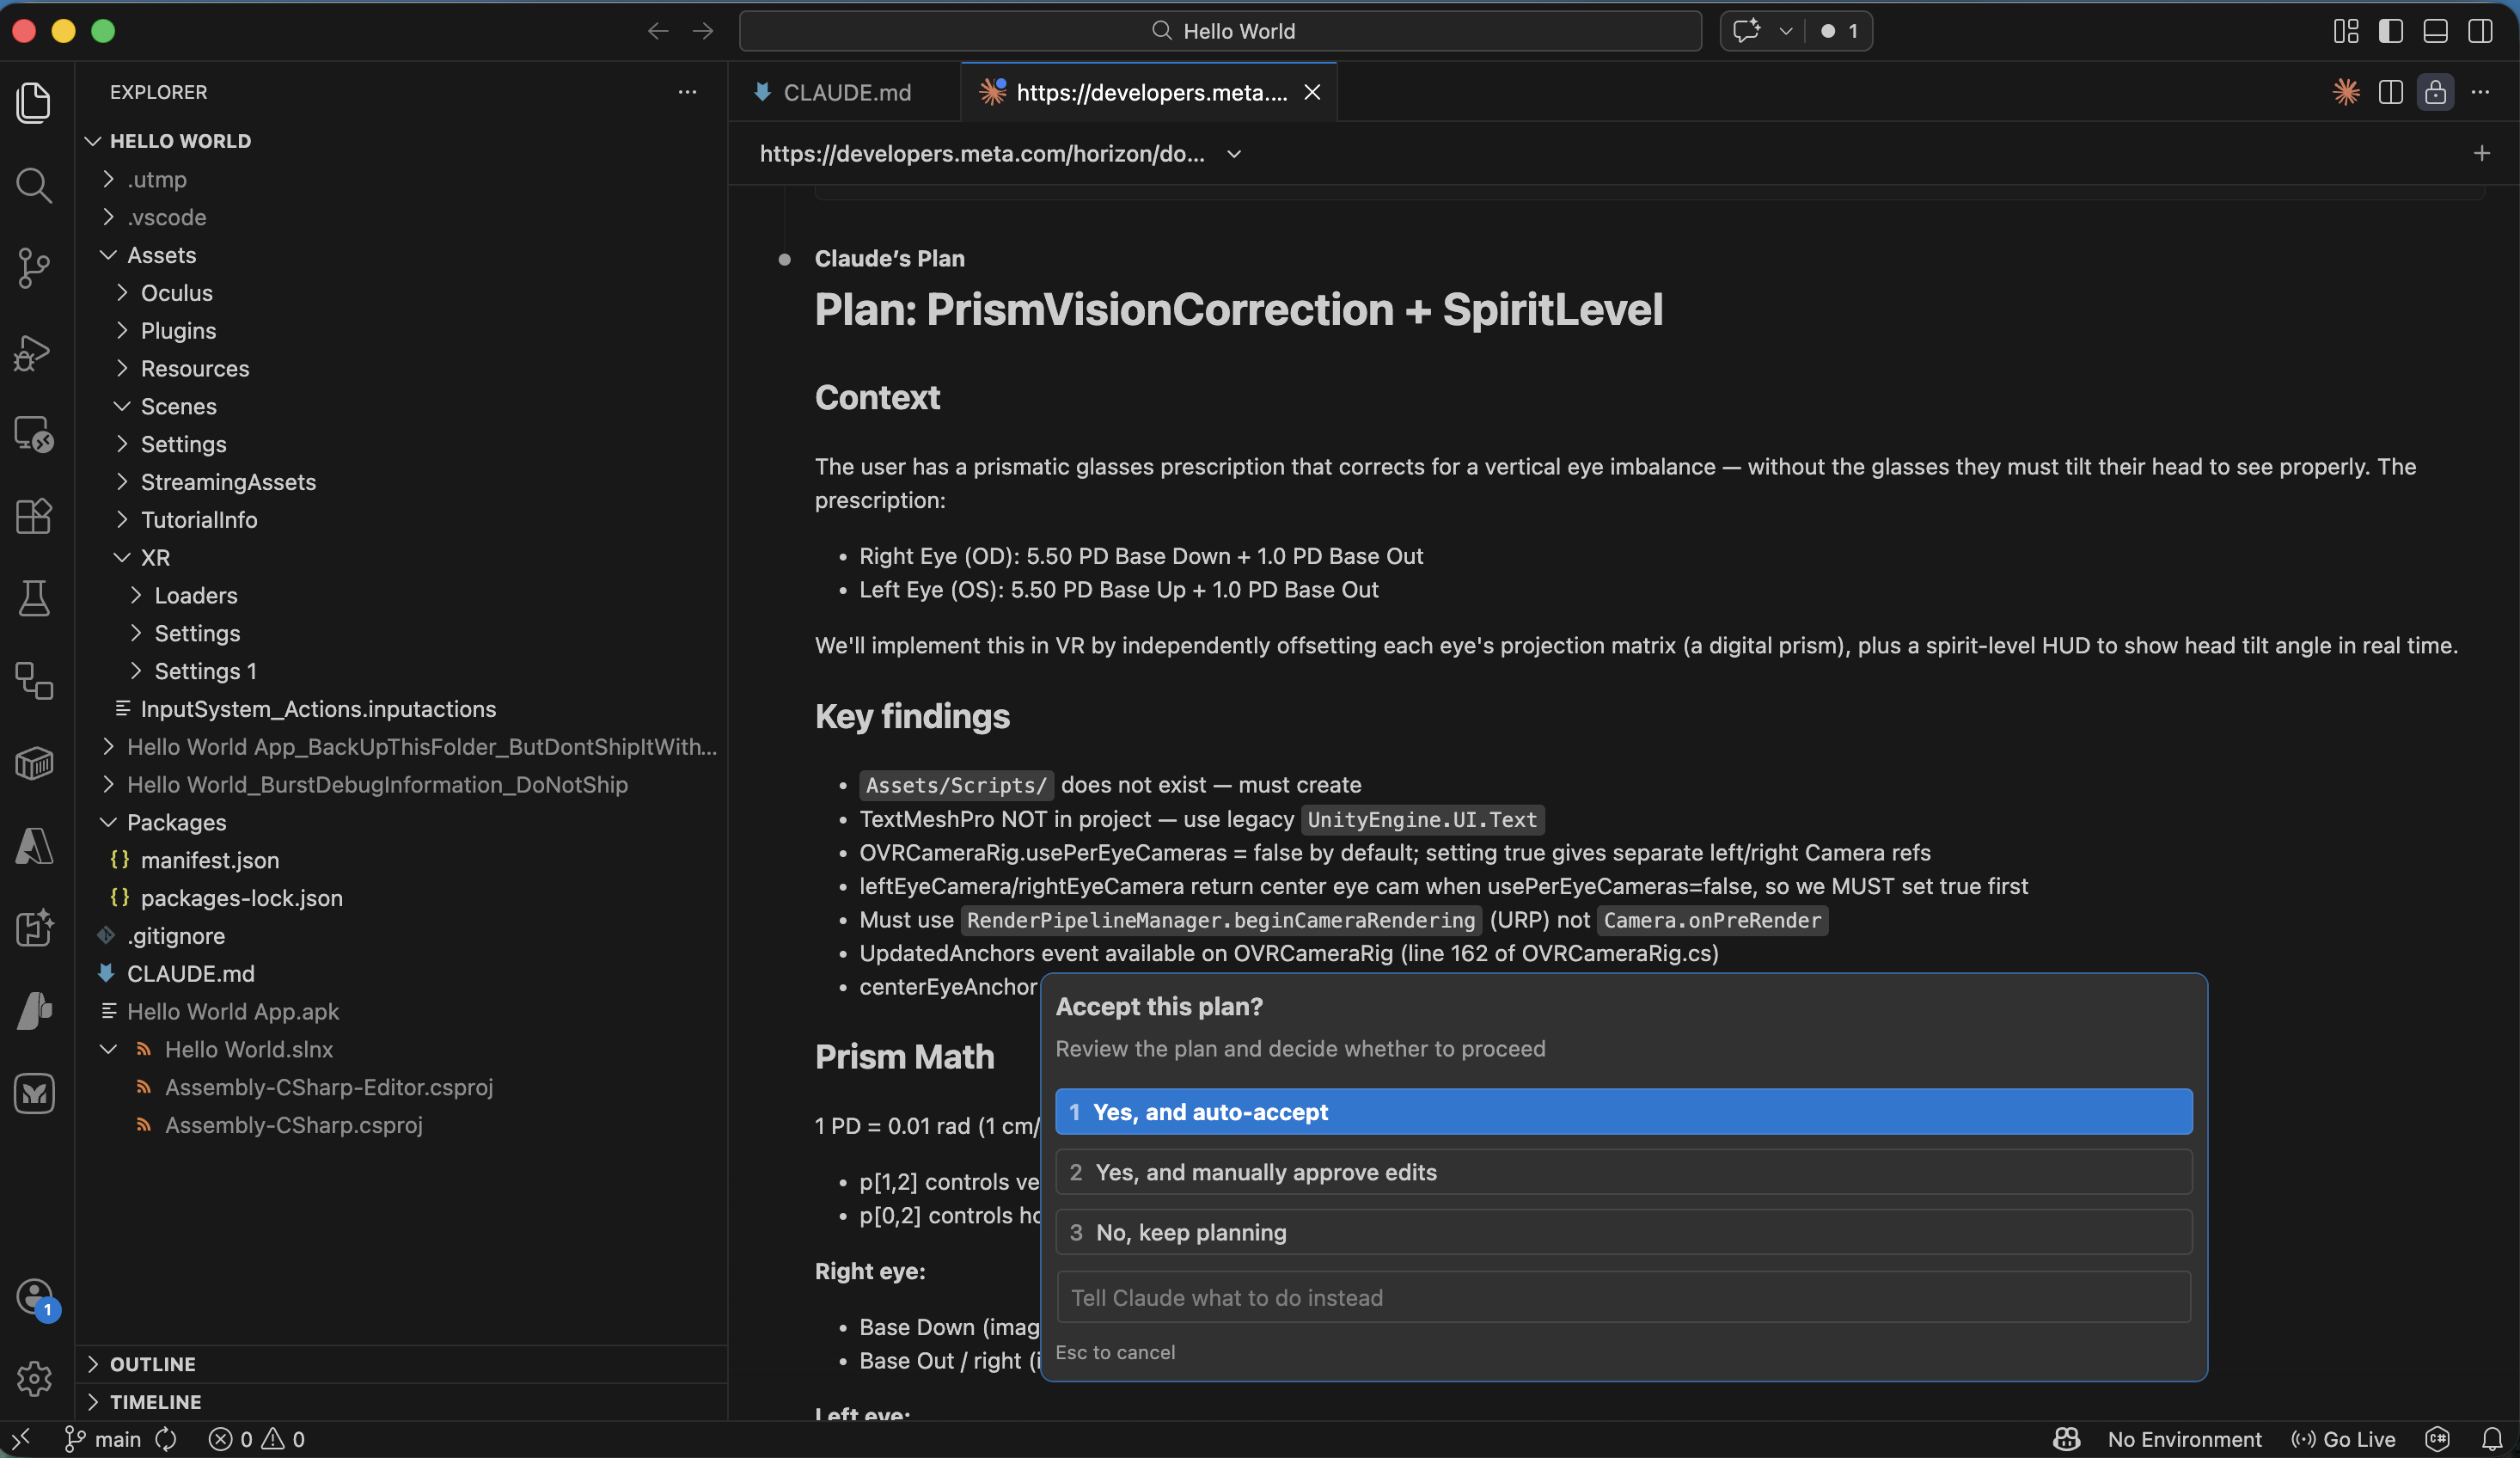
I reviewed Claude Code's plan for PrismVisionCorrection + SpiritLevel and selected Yes, and auto-accept
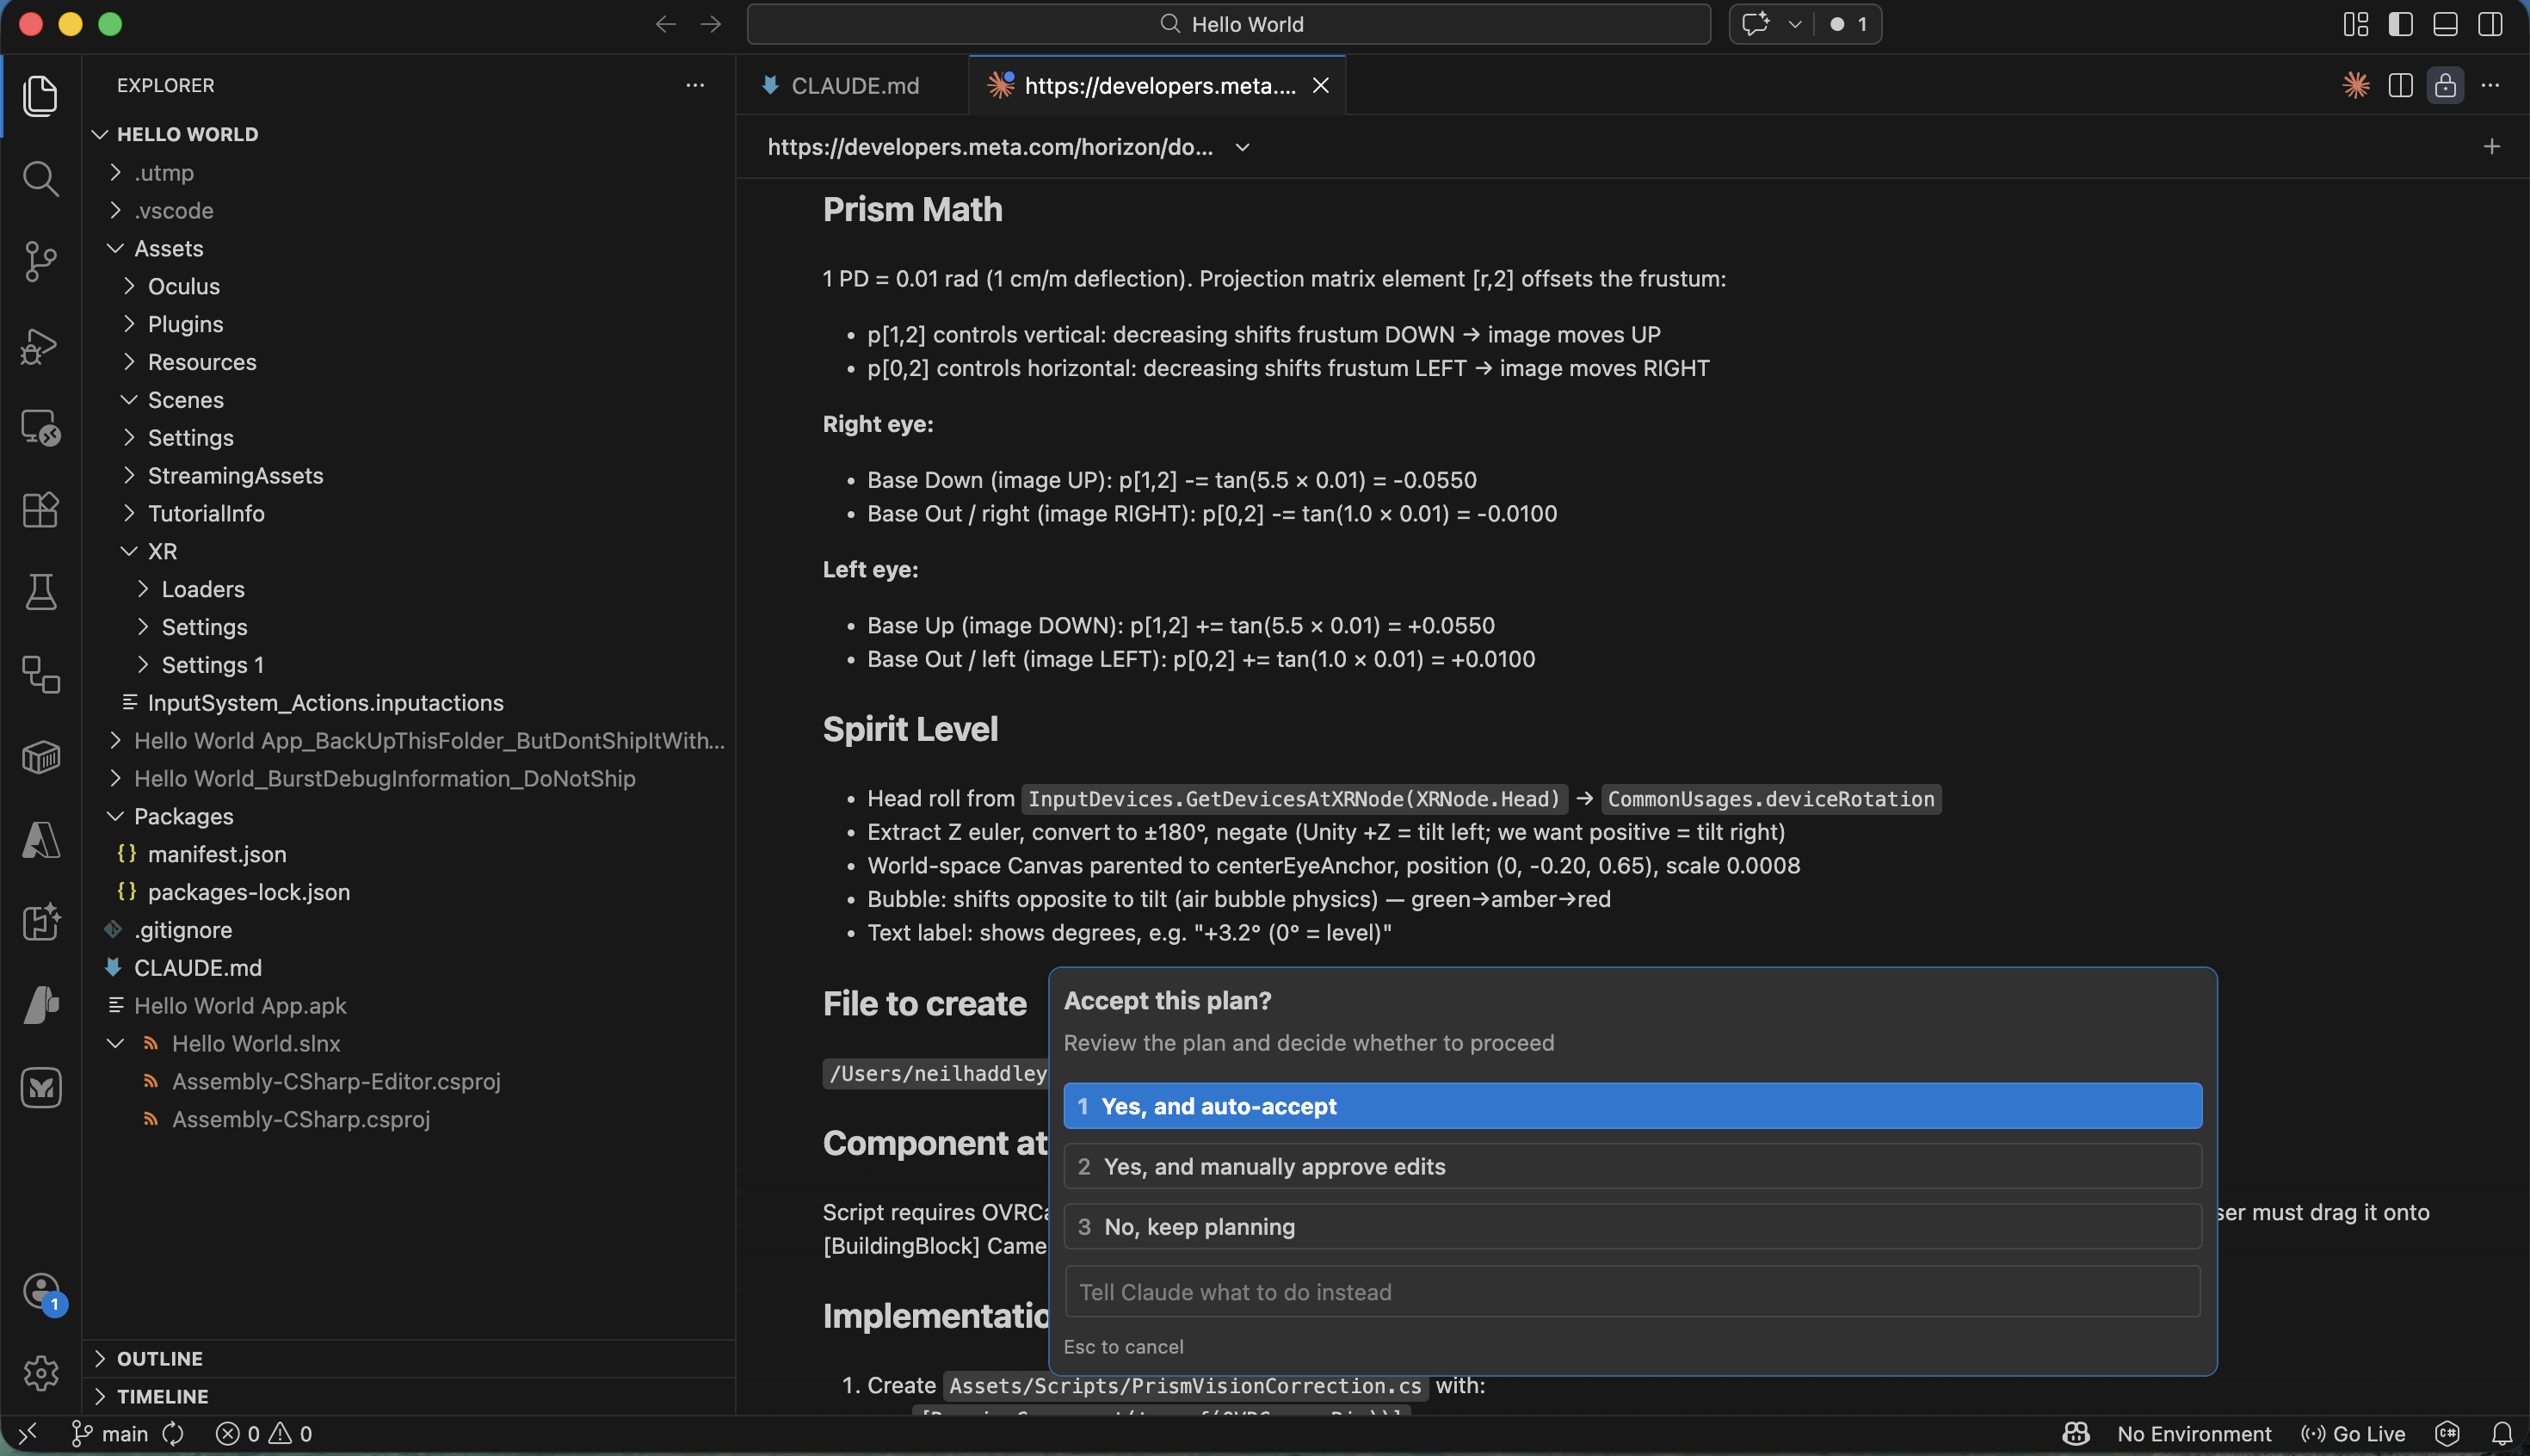
I reviewed the prism math and spirit level implementation details
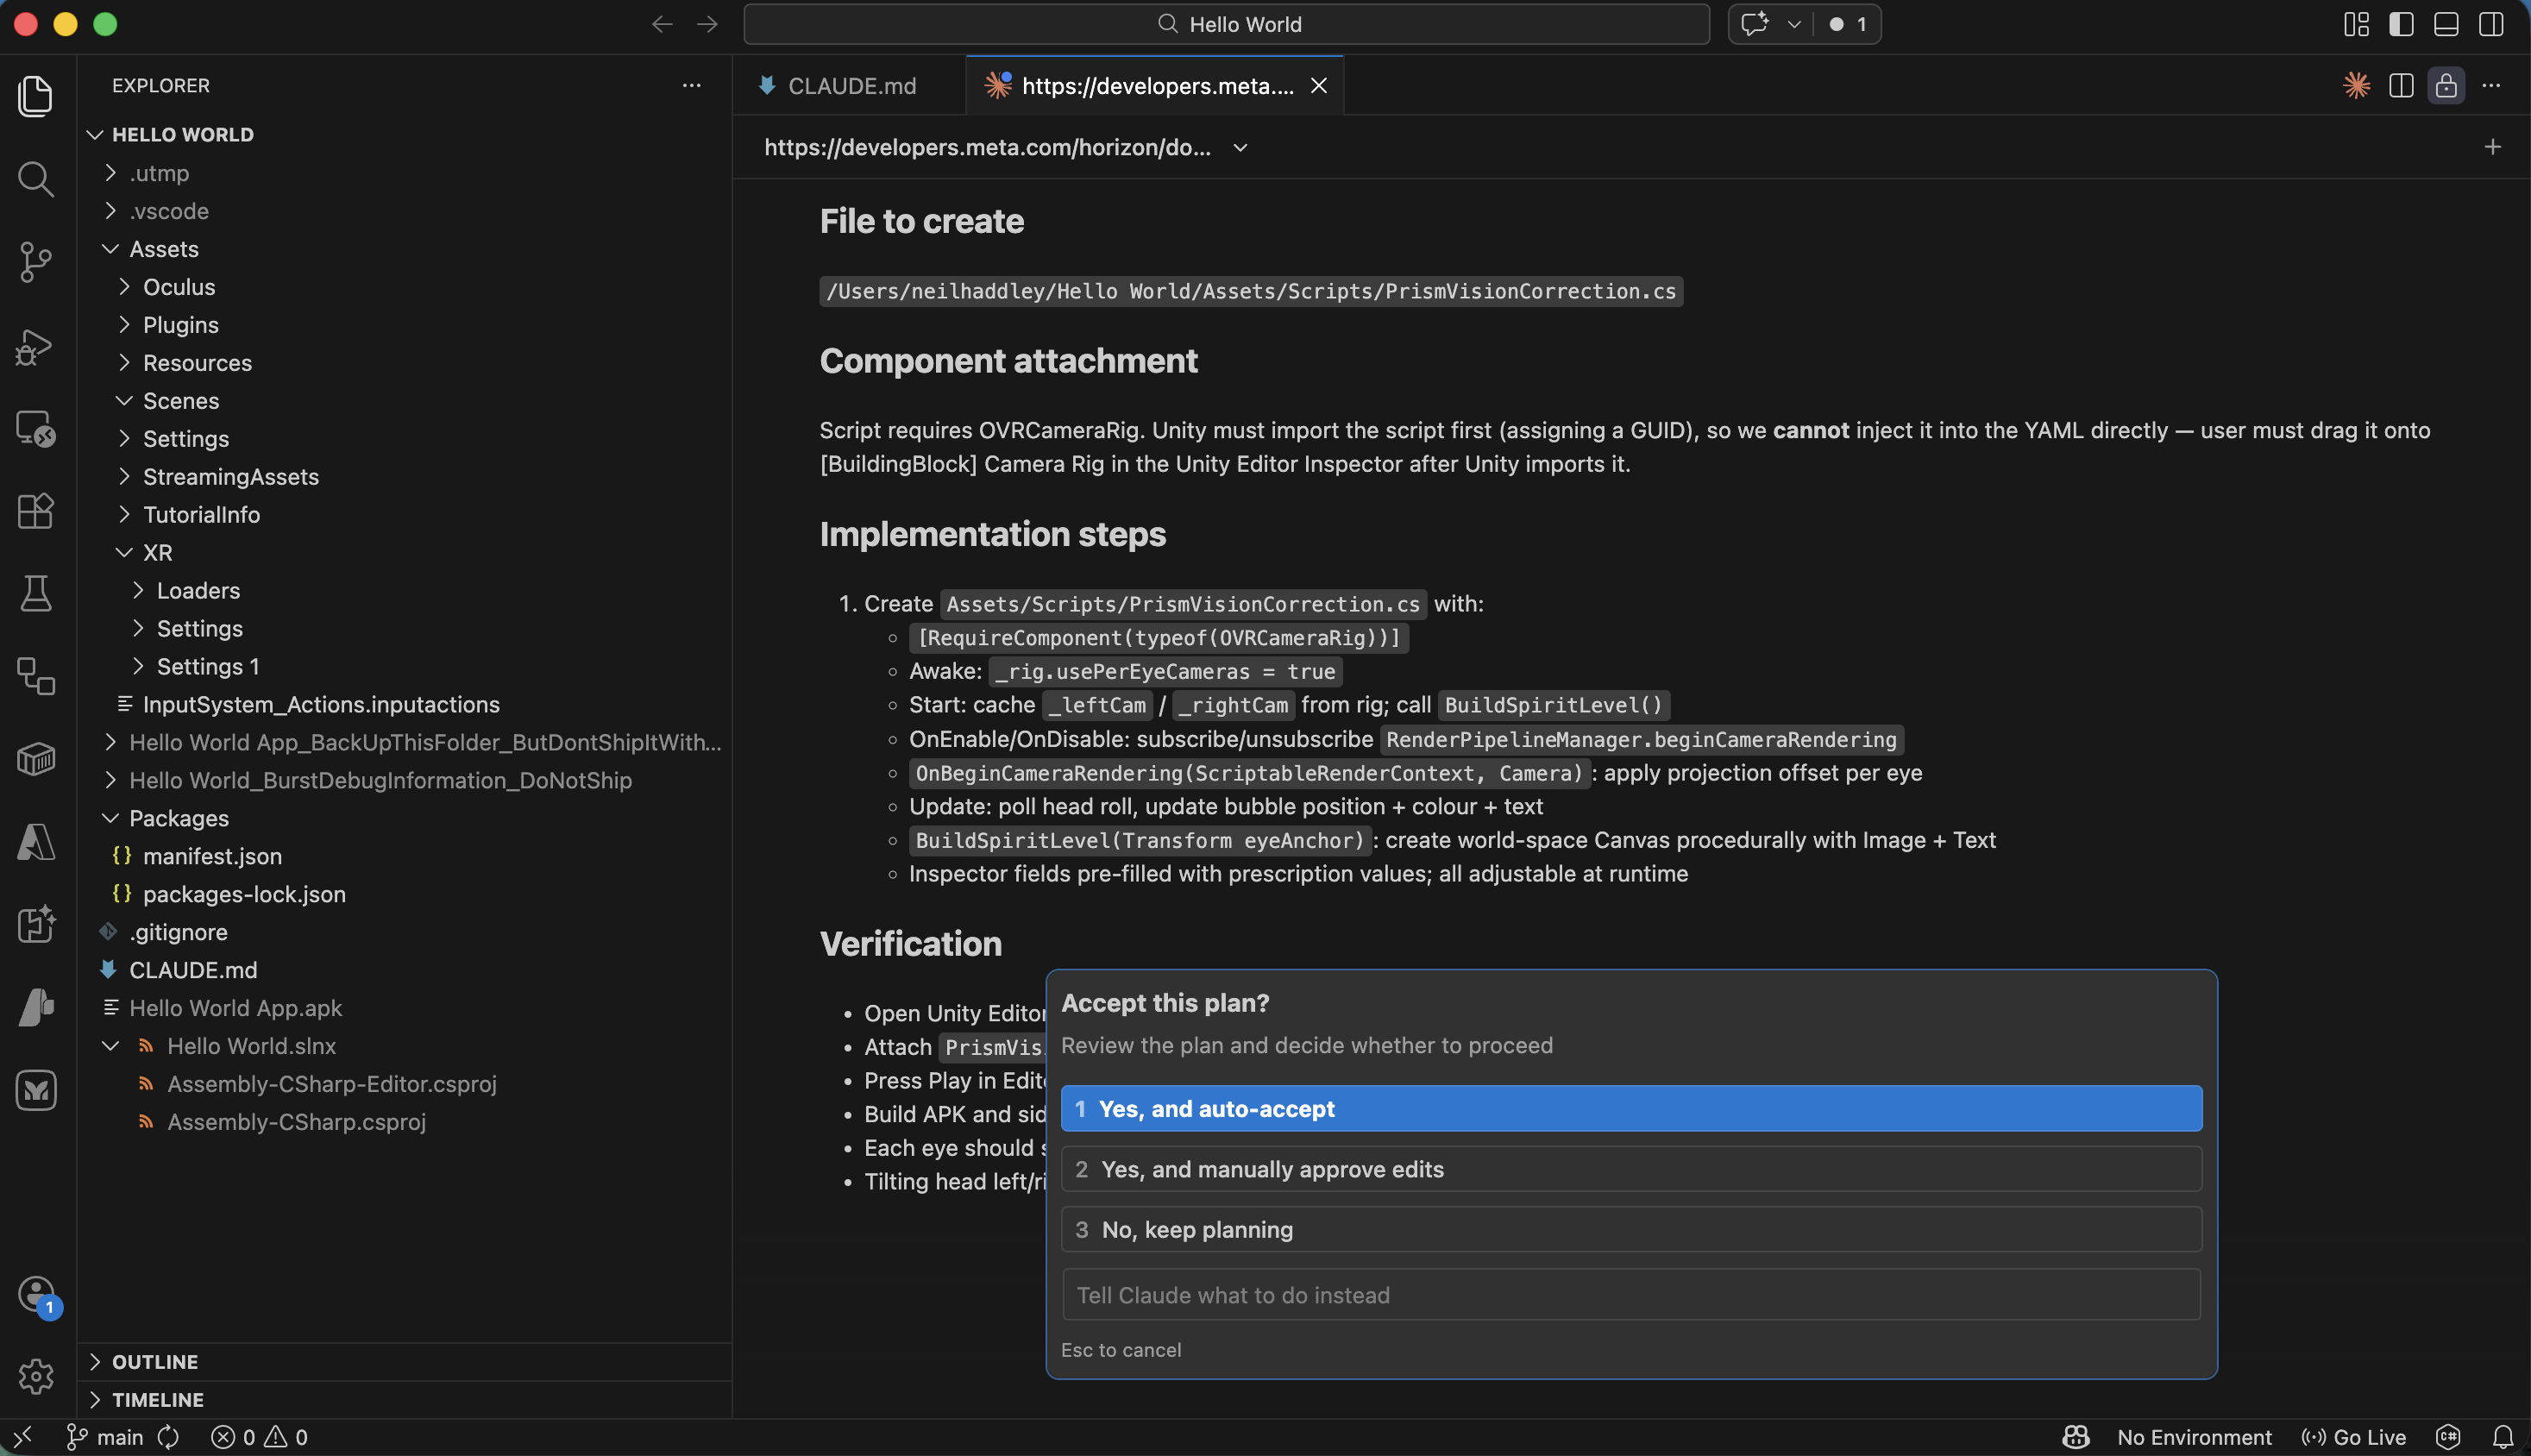
I reviewed the implementation steps and verification checklist
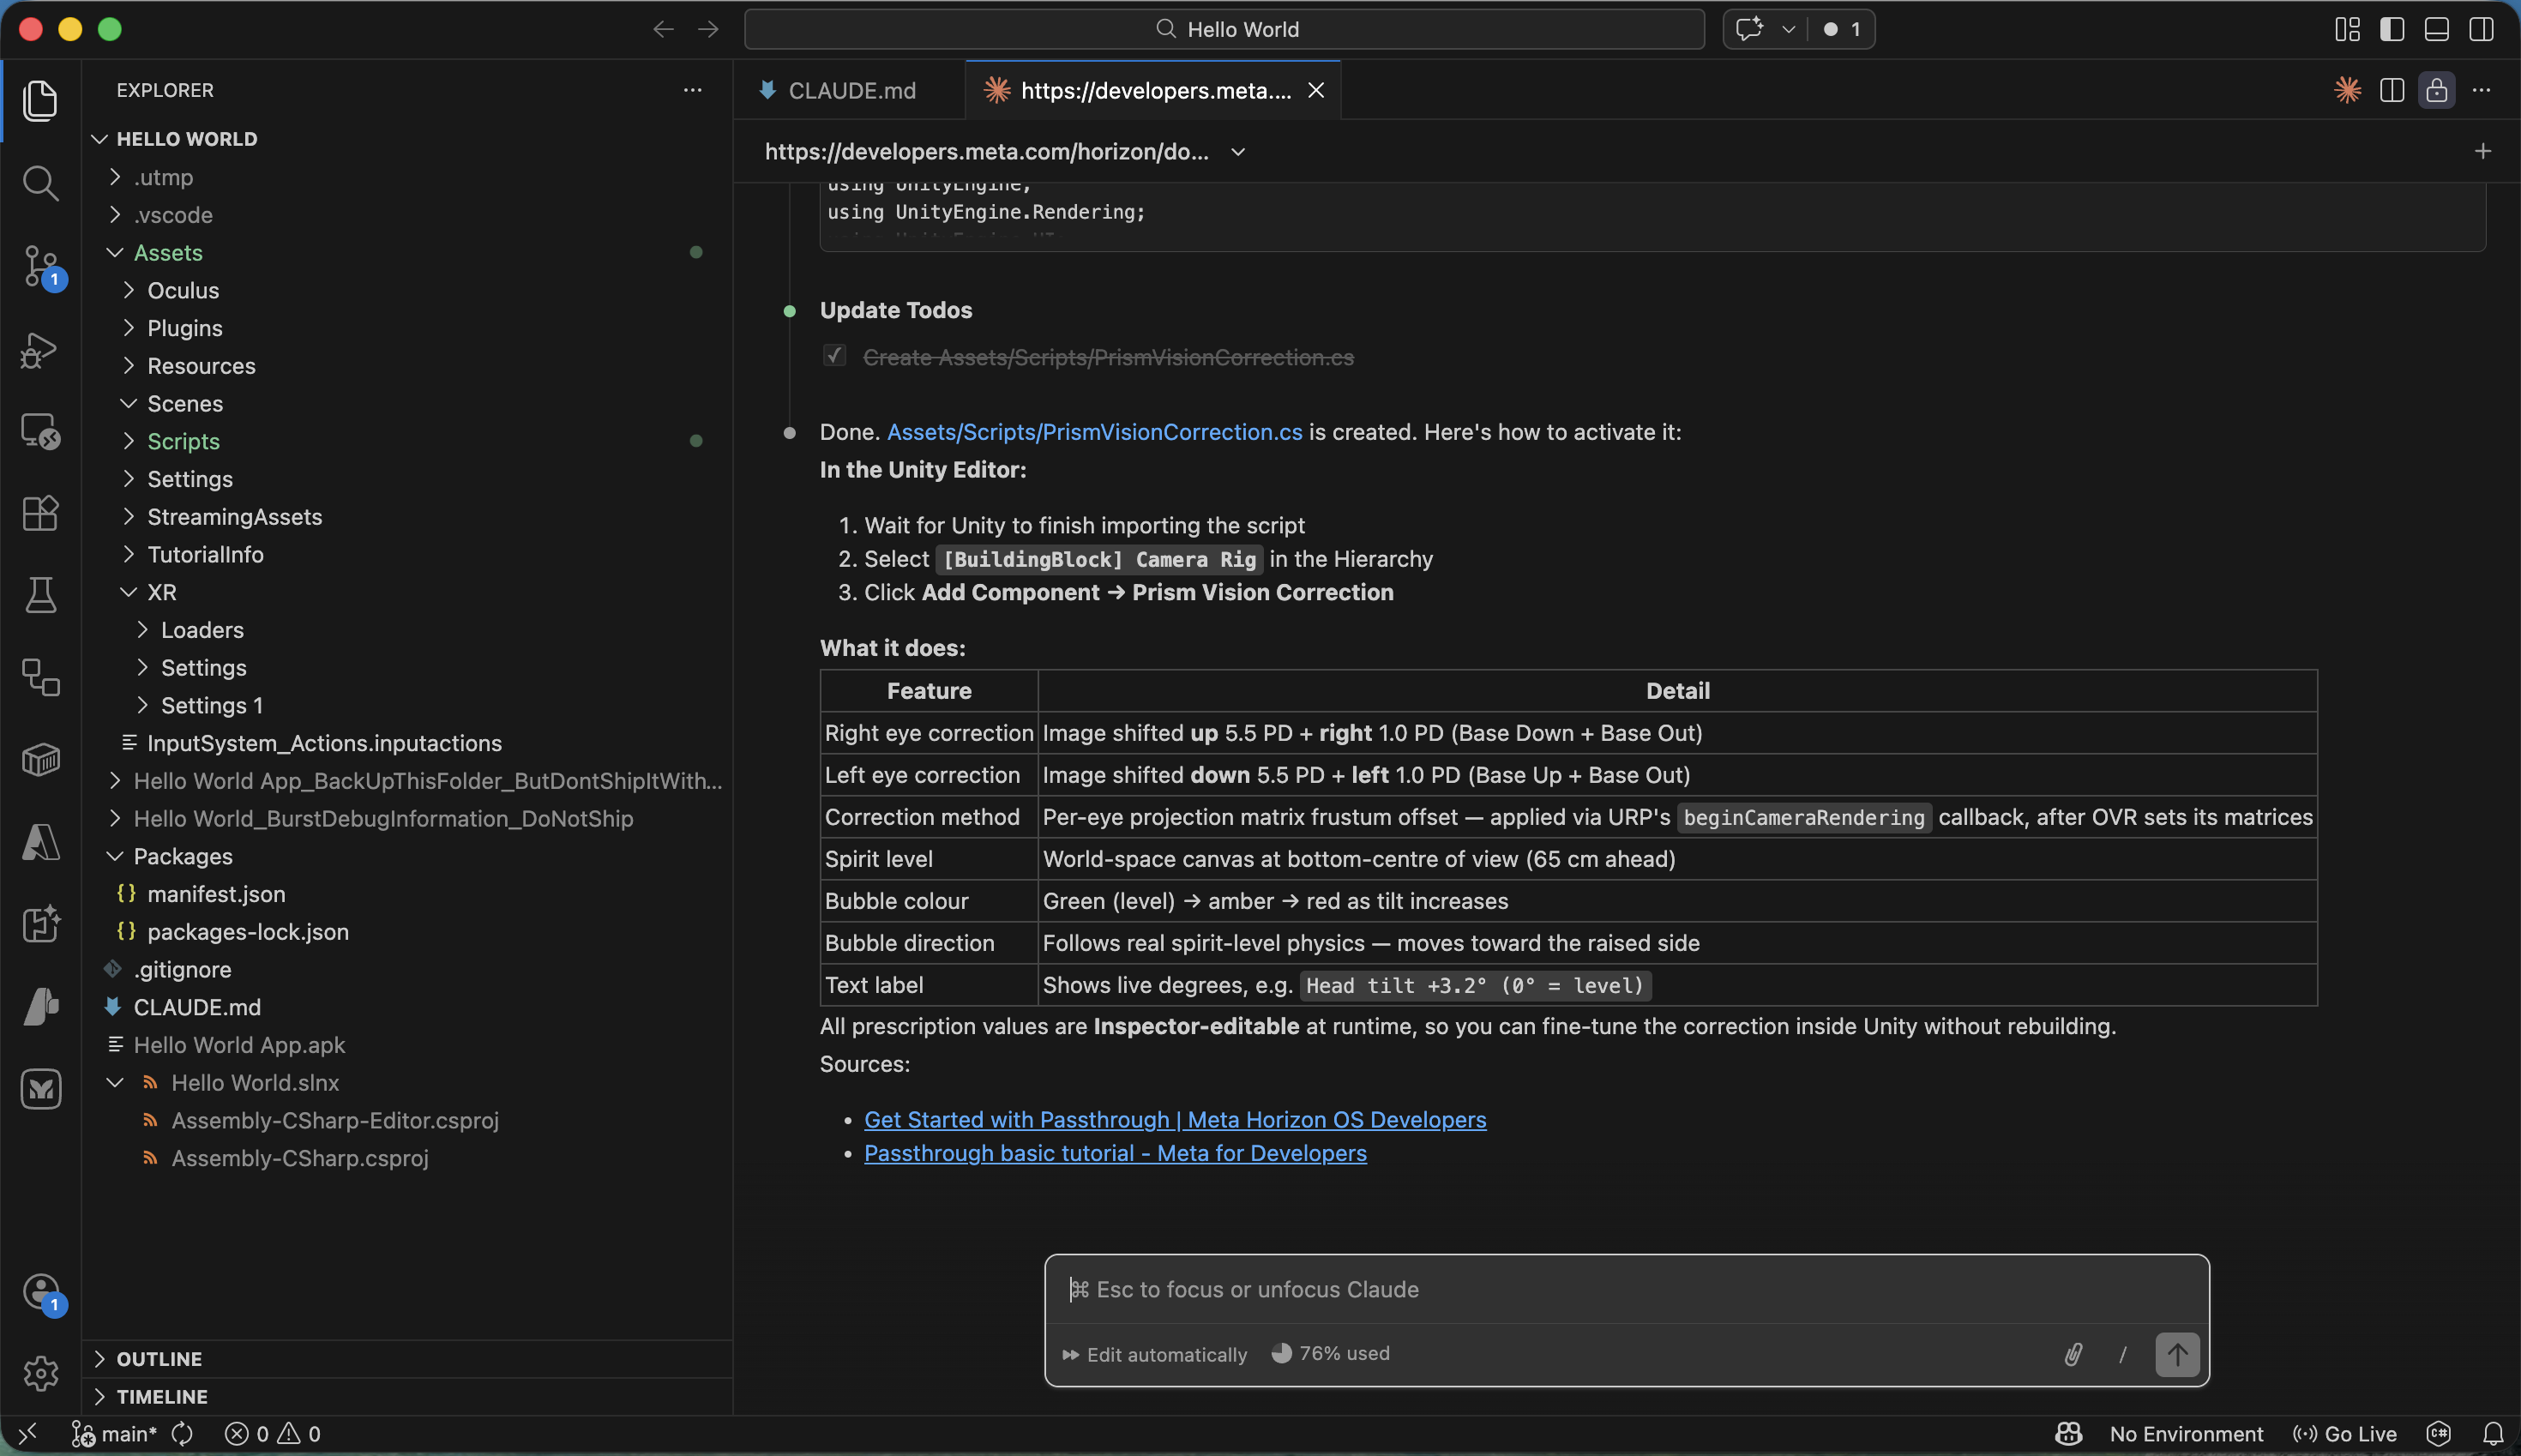
Claude Code completed the changes and summarised what was created
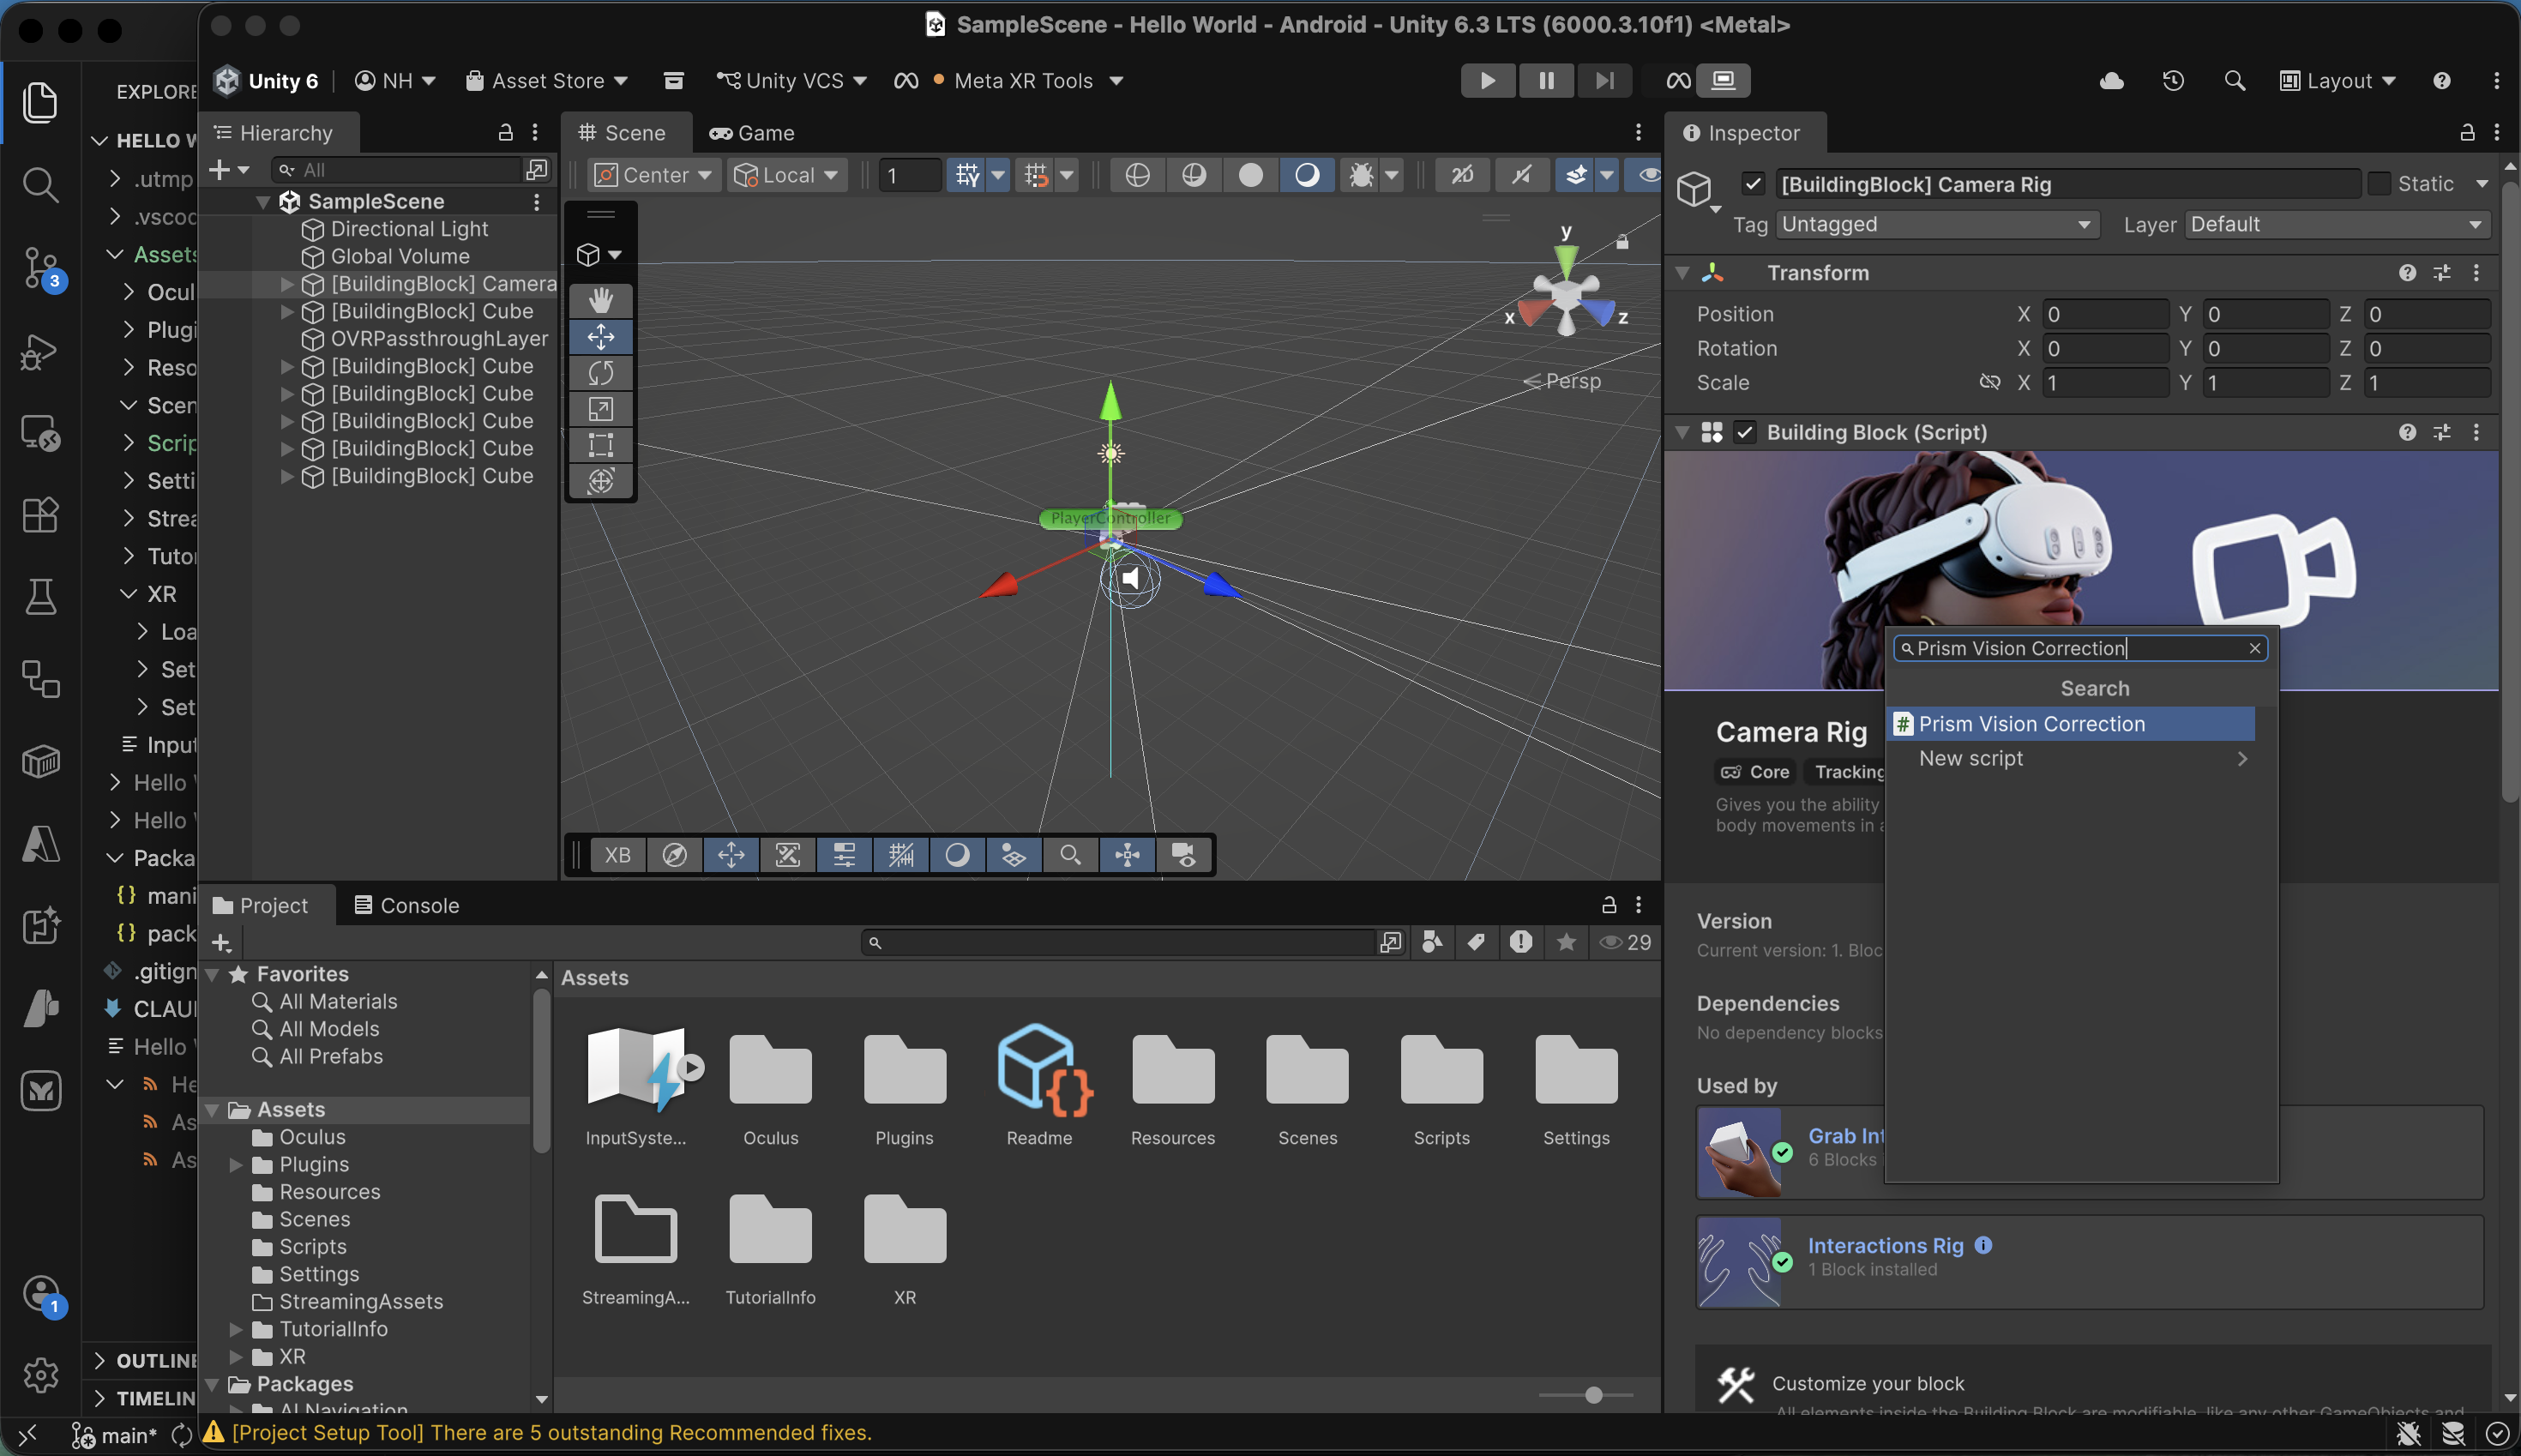
I attached the Prism Vision Correction script to the Camera Rig in the Unity Editor
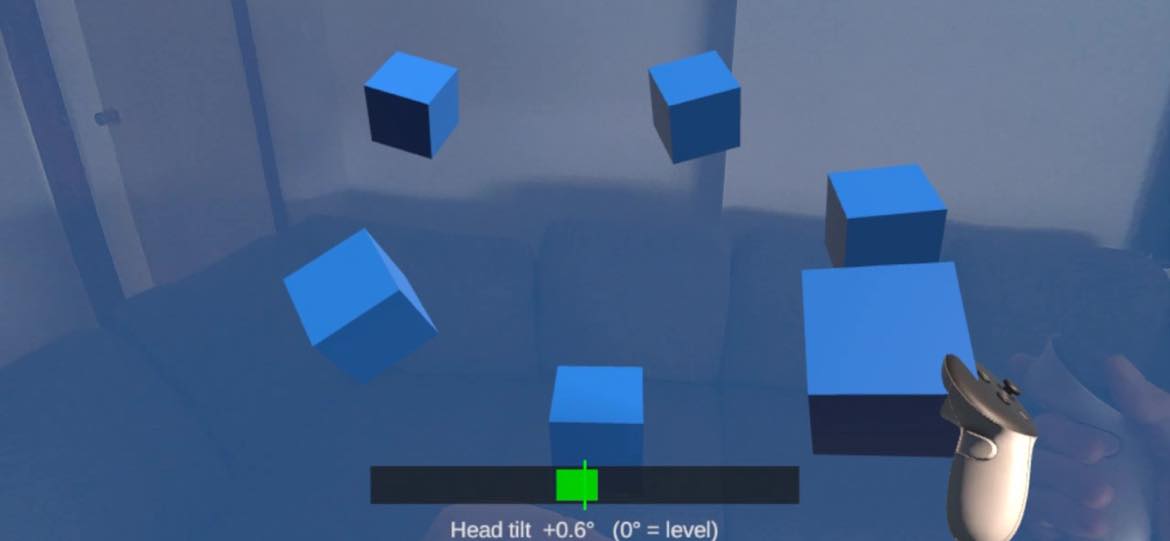
The spirit level at the bottom of the view showed my head tilt in real time
Understanding the Code
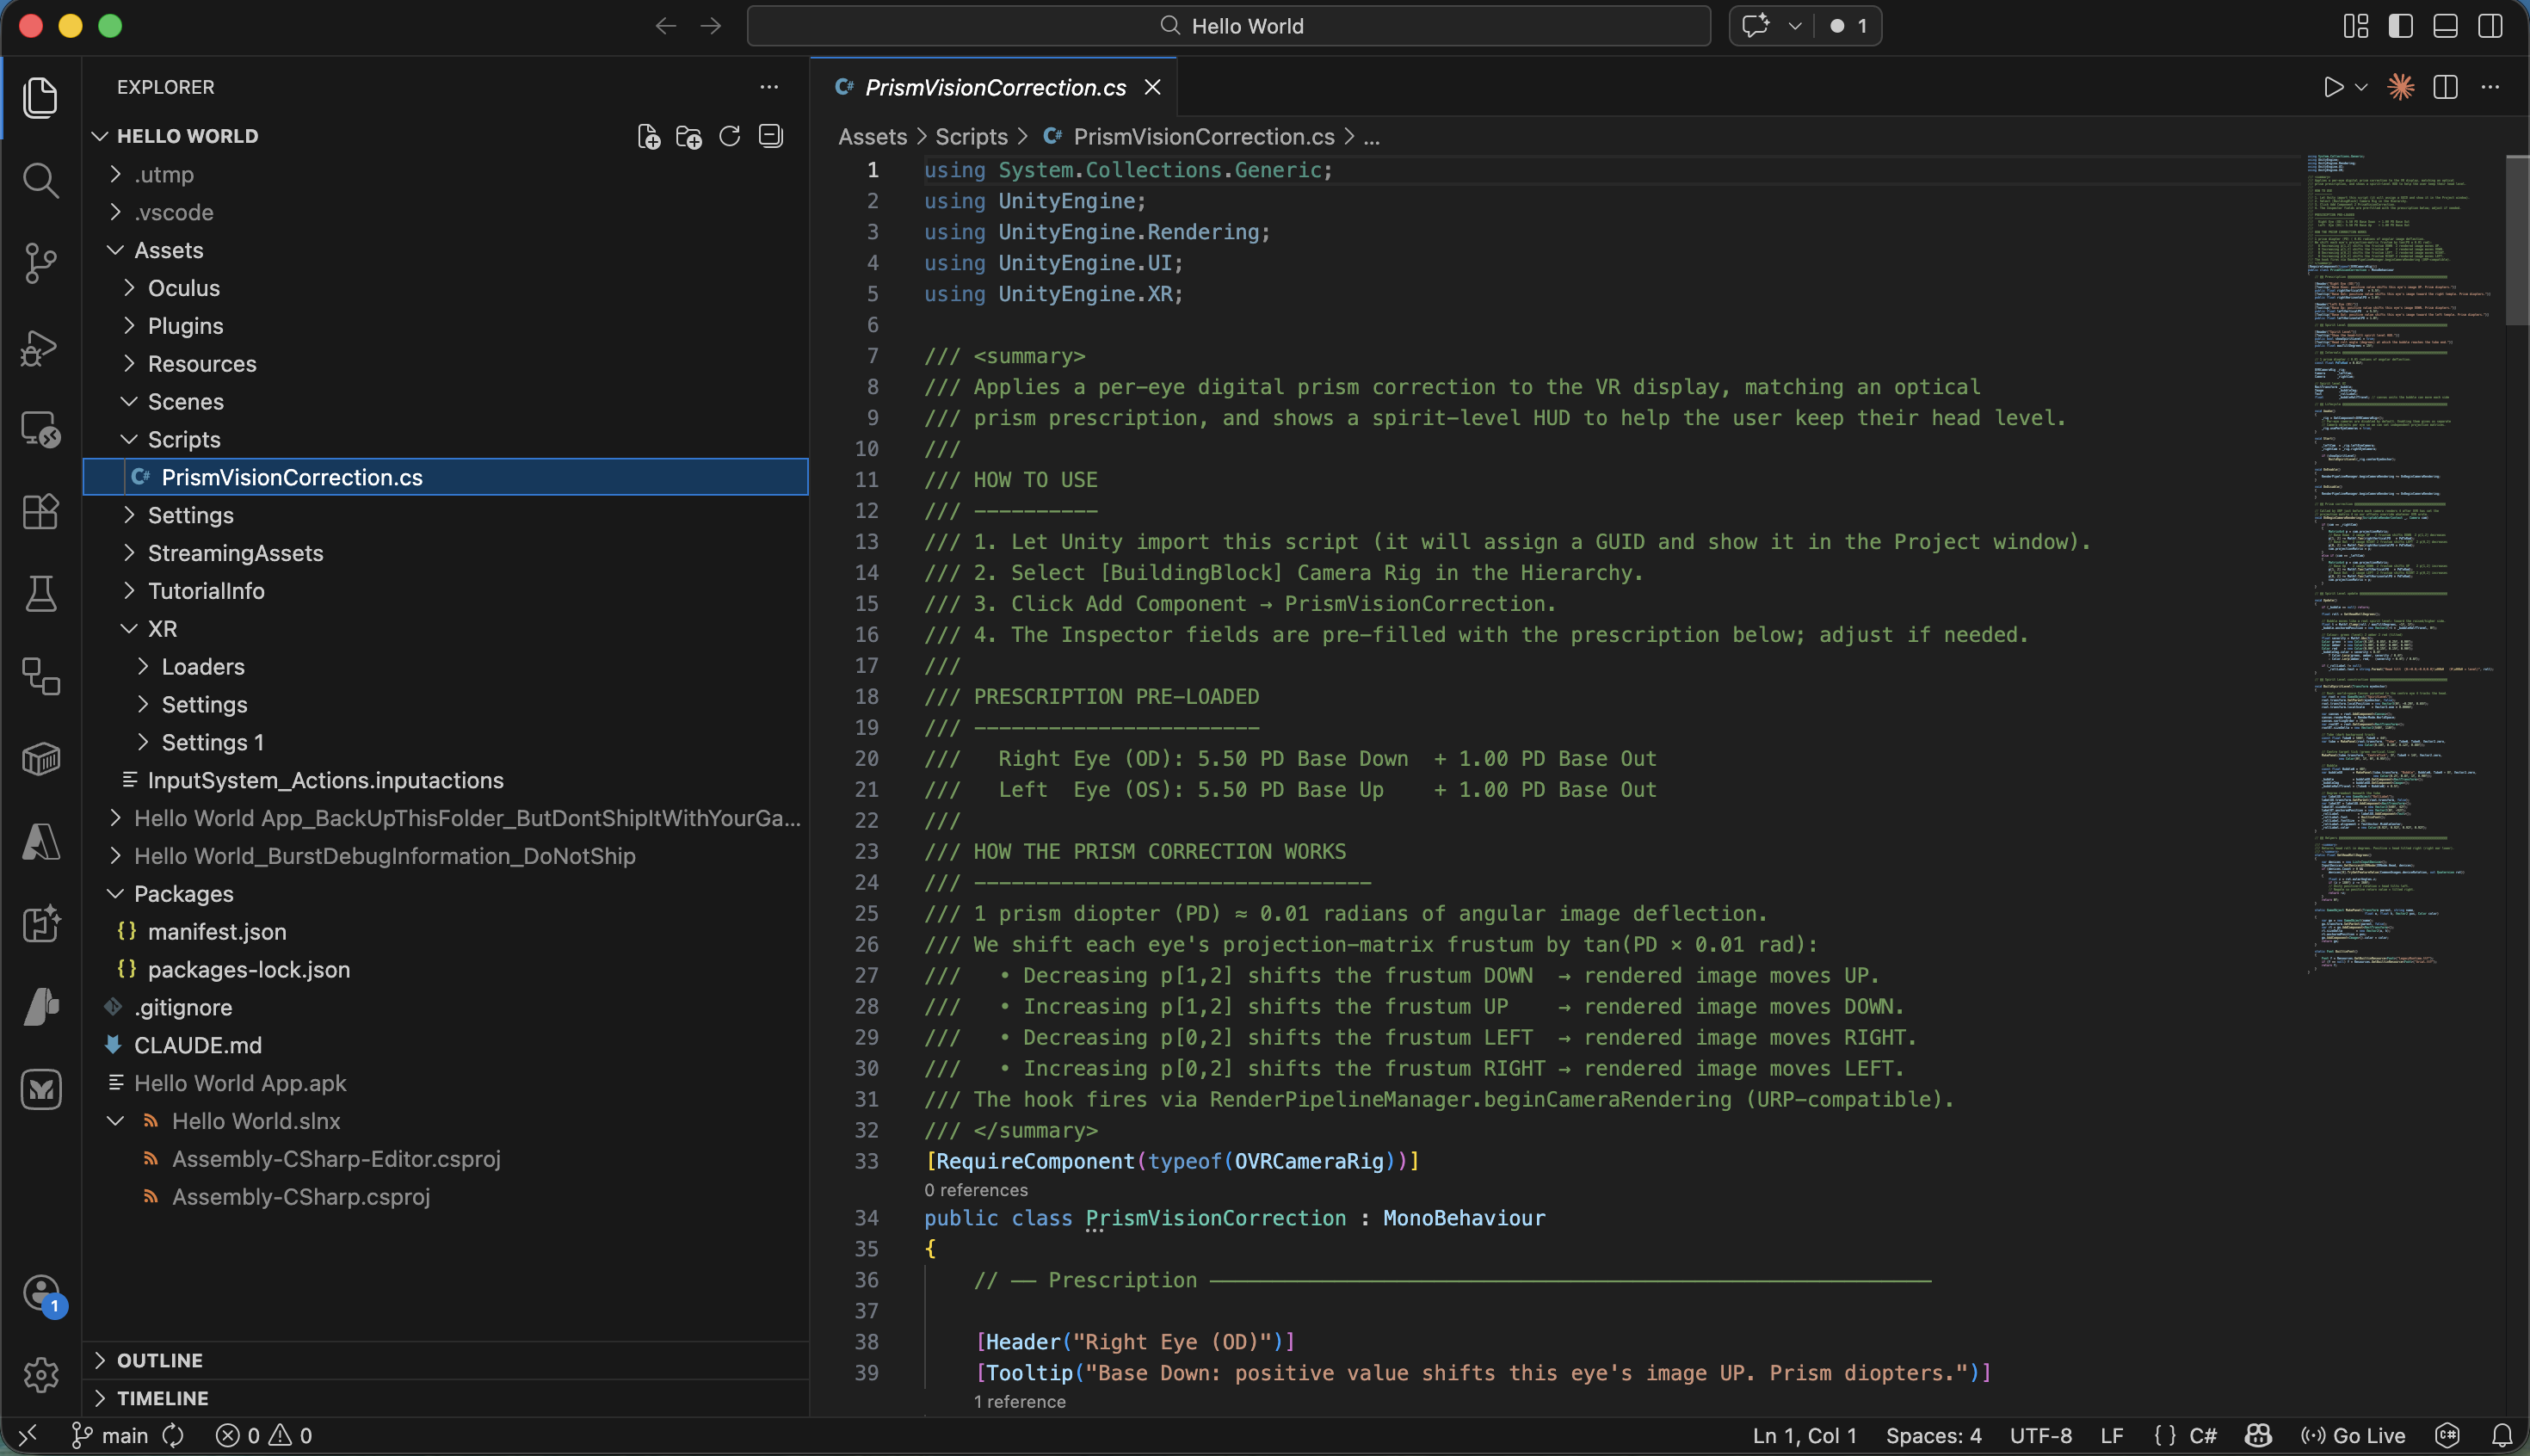
I opened PrismVisionCorrection.cs in VS Code
PROMPT
1explain PrismVisionCorrection.cs
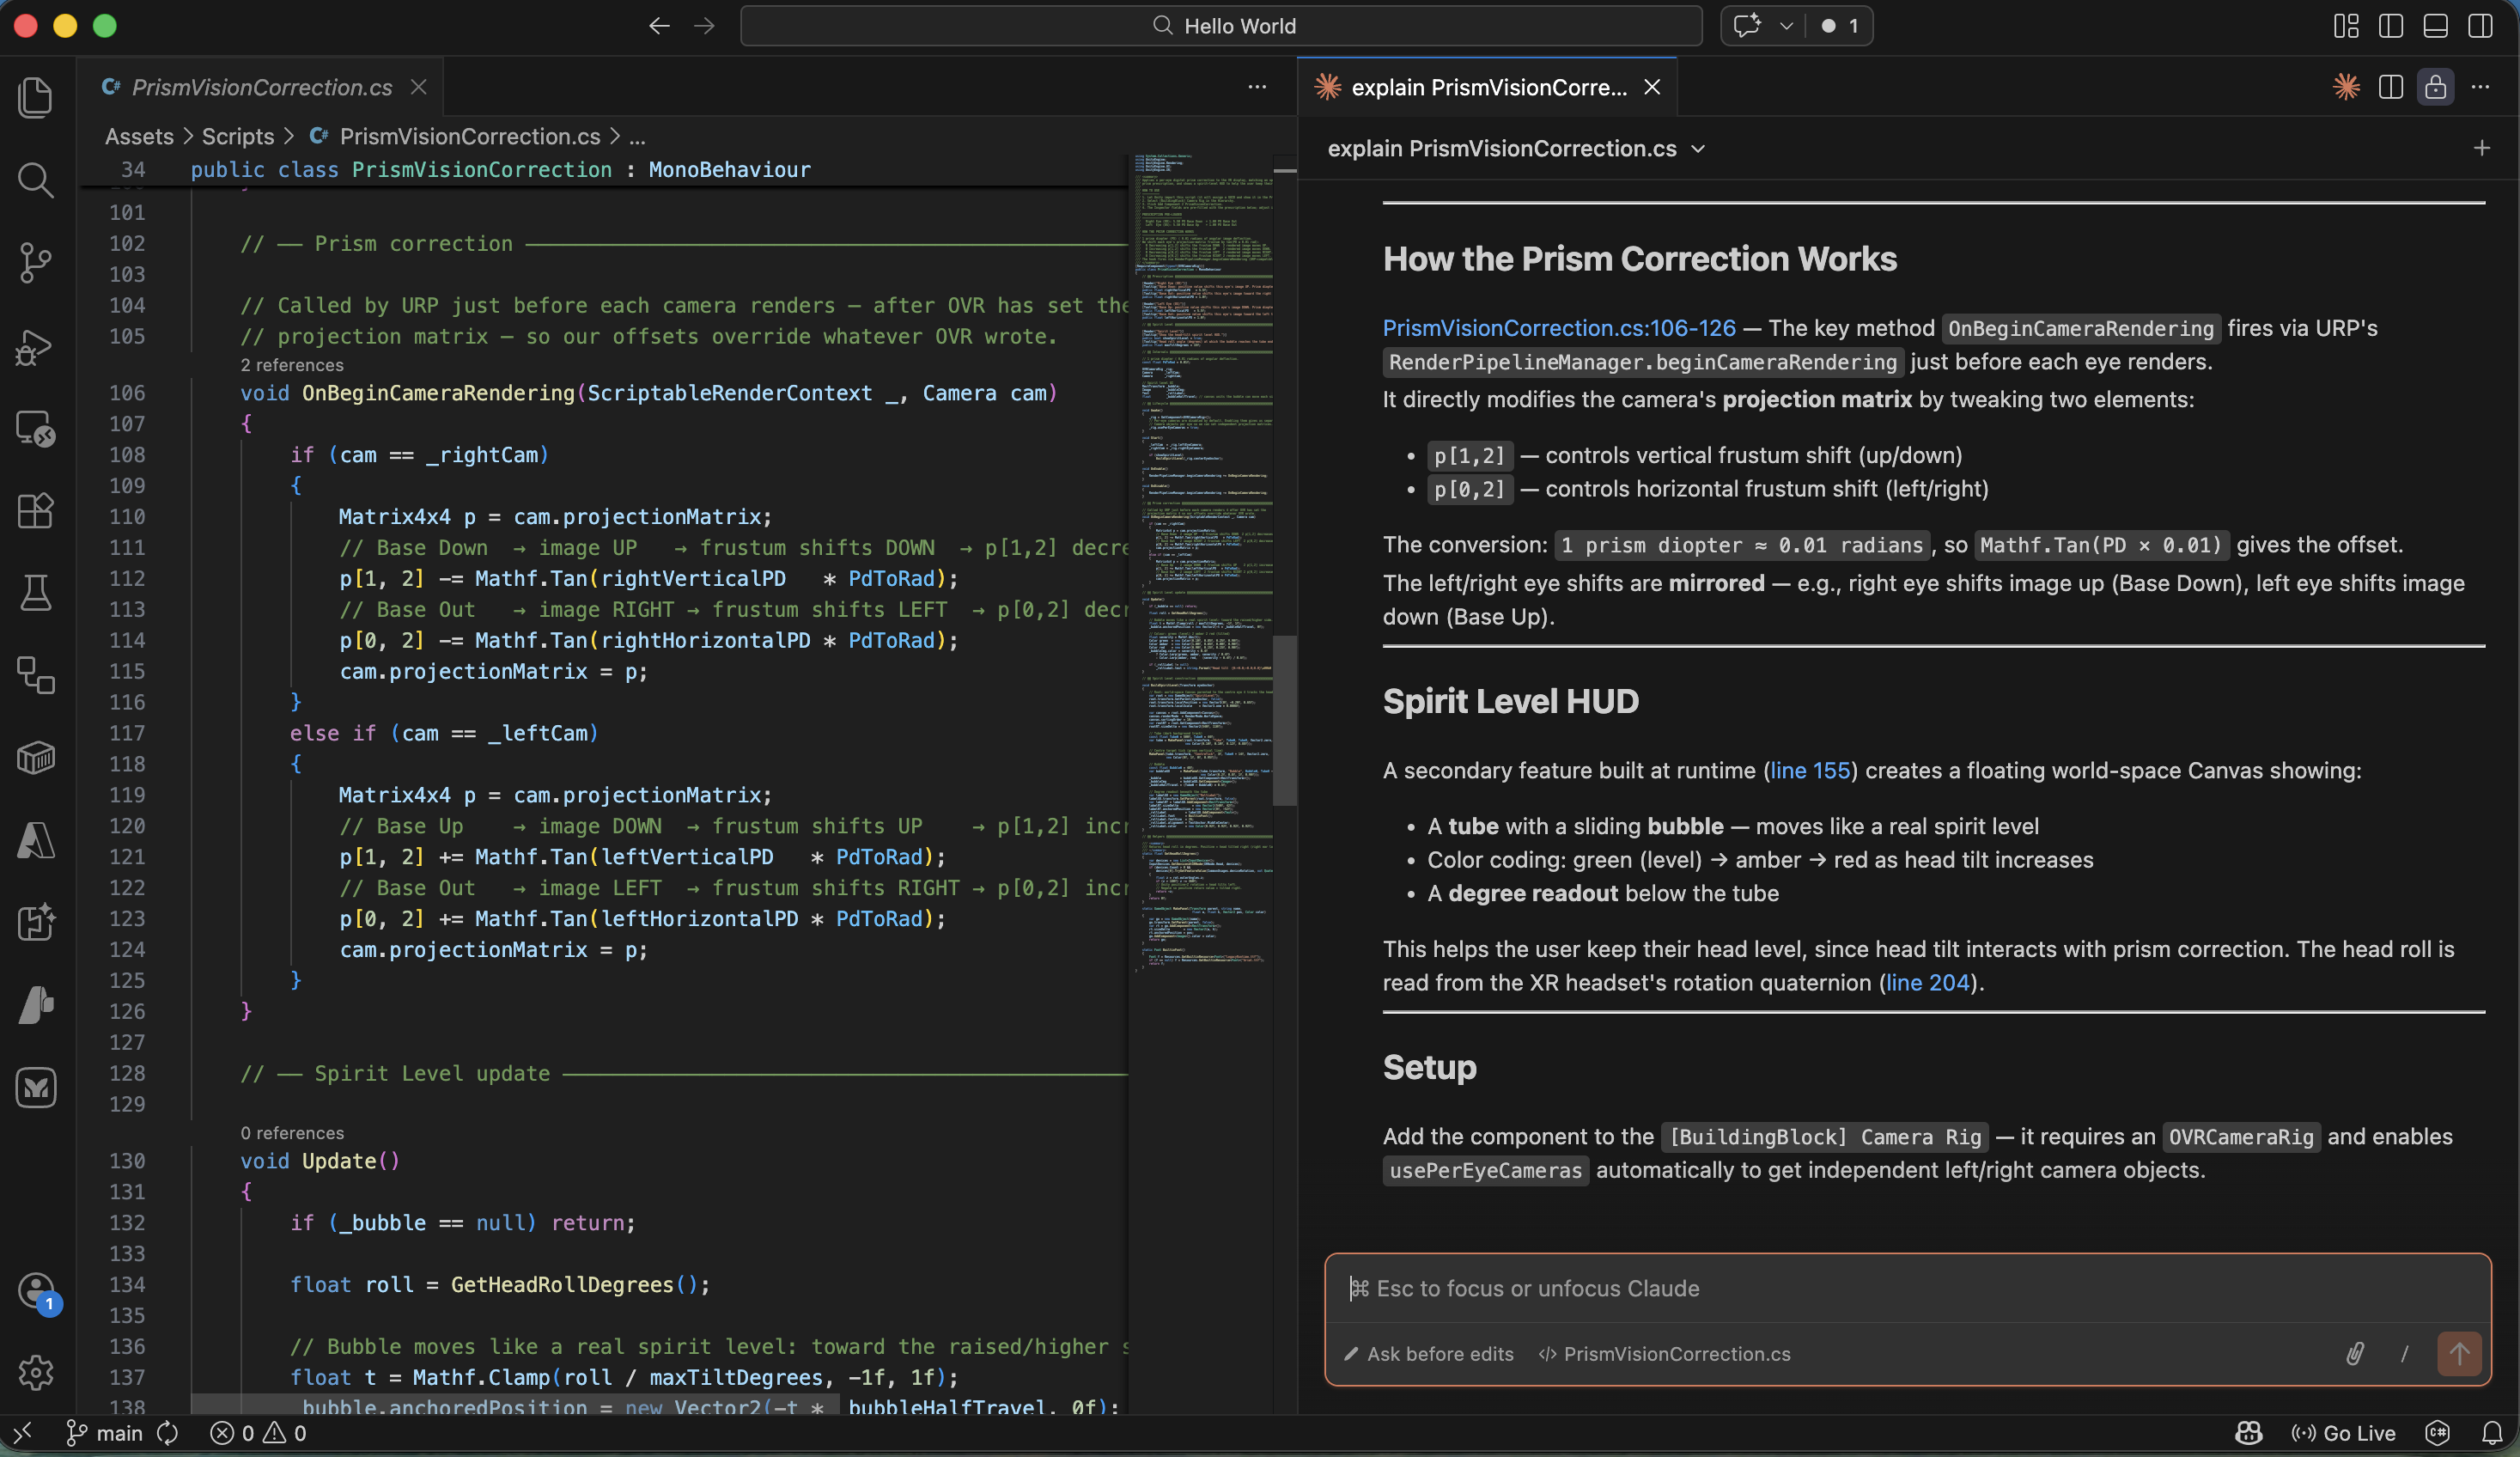
Claude Code explained how the prism correction and spirit level work
Dynamically adjusting Prism values
PROMPT
1Please update the PrismVisionCorrection script to include the following features:
2
31. Automatic Tilt Compensation
4
5The prism correction should adjust dynamically based on lateral head tilt (roll).
6When the head is level, the full horizontal and vertical prescription values are applied.
7Tilting toward the left shoulder gradually reduces the correction, reaching zero when the tilt reaches the compensationAngle (e.g., 16°).
8Tilting toward the right shoulder gradually increases the correction, reaching double the original prescription at the same angle.
9
102. More Robust Head‑Tilt Measurement
11
12Replace the current method for measuring head roll with a more reliable approach that accurately detects side‑to‑side tilt, even when the head is turned or angled up/down.
13The output should be positive for right tilt, negative for left tilt.
14
153. Enhanced HUD Display (Spirit Level)
16
17Slightly enlarge the HUD area:
18
19Line 1 (dim grey): Show the base prescription values (the original values from the prescription, or zero if the Y‑button reset has been used).
20Line 2 (light blue): Show the actual applied values after tilt adjustment, along with the current tilt scale factor, measured head tilt, and the compensationAngle.
21Both lines must update in real time as head movement occurs or prescription values are changed.
22
234. Quick Reset Buttons (Left Controller)
24
25Y button: Reset all four prism values (horizontal and vertical for both eyes) to zero.
26X button: Restore the original prescription values as they were set in the Inspector when the scene started.
27
28Do you have any questions?

Claude Code read the script and confirmed it had no questions before implementing all four features
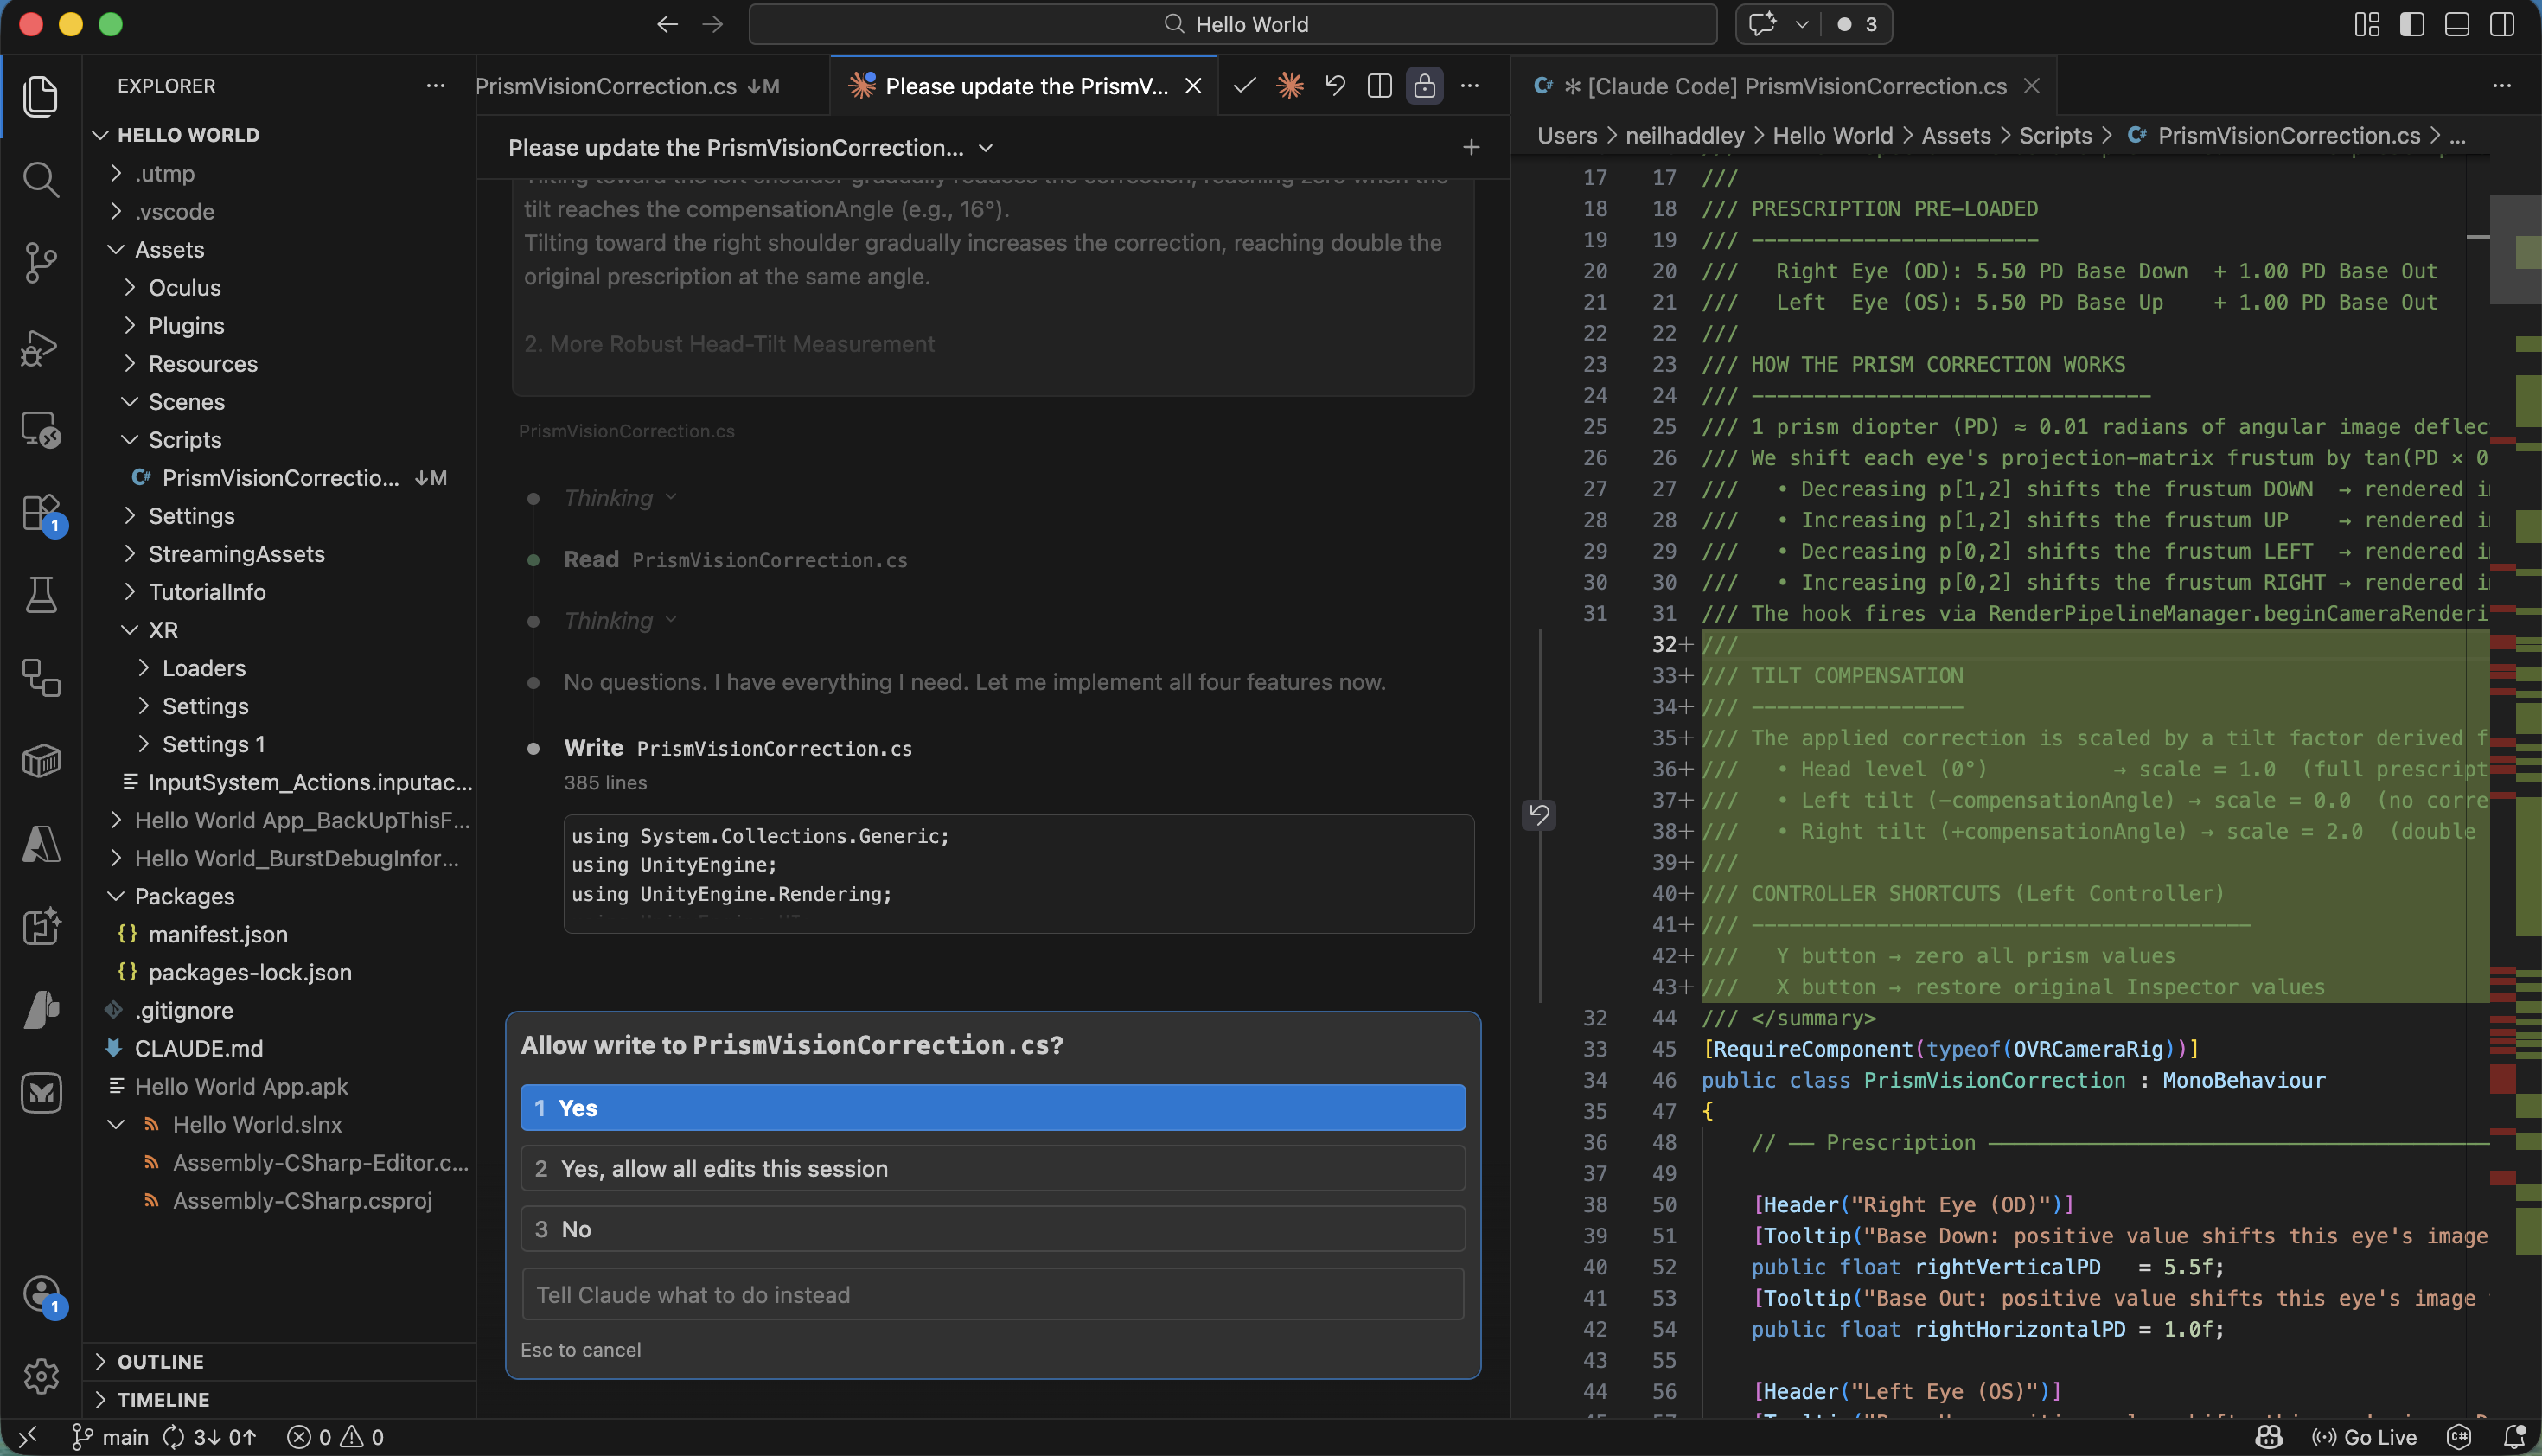
I clicked Yes to allow Claude Code to write the updated PrismVisionCorrection.cs
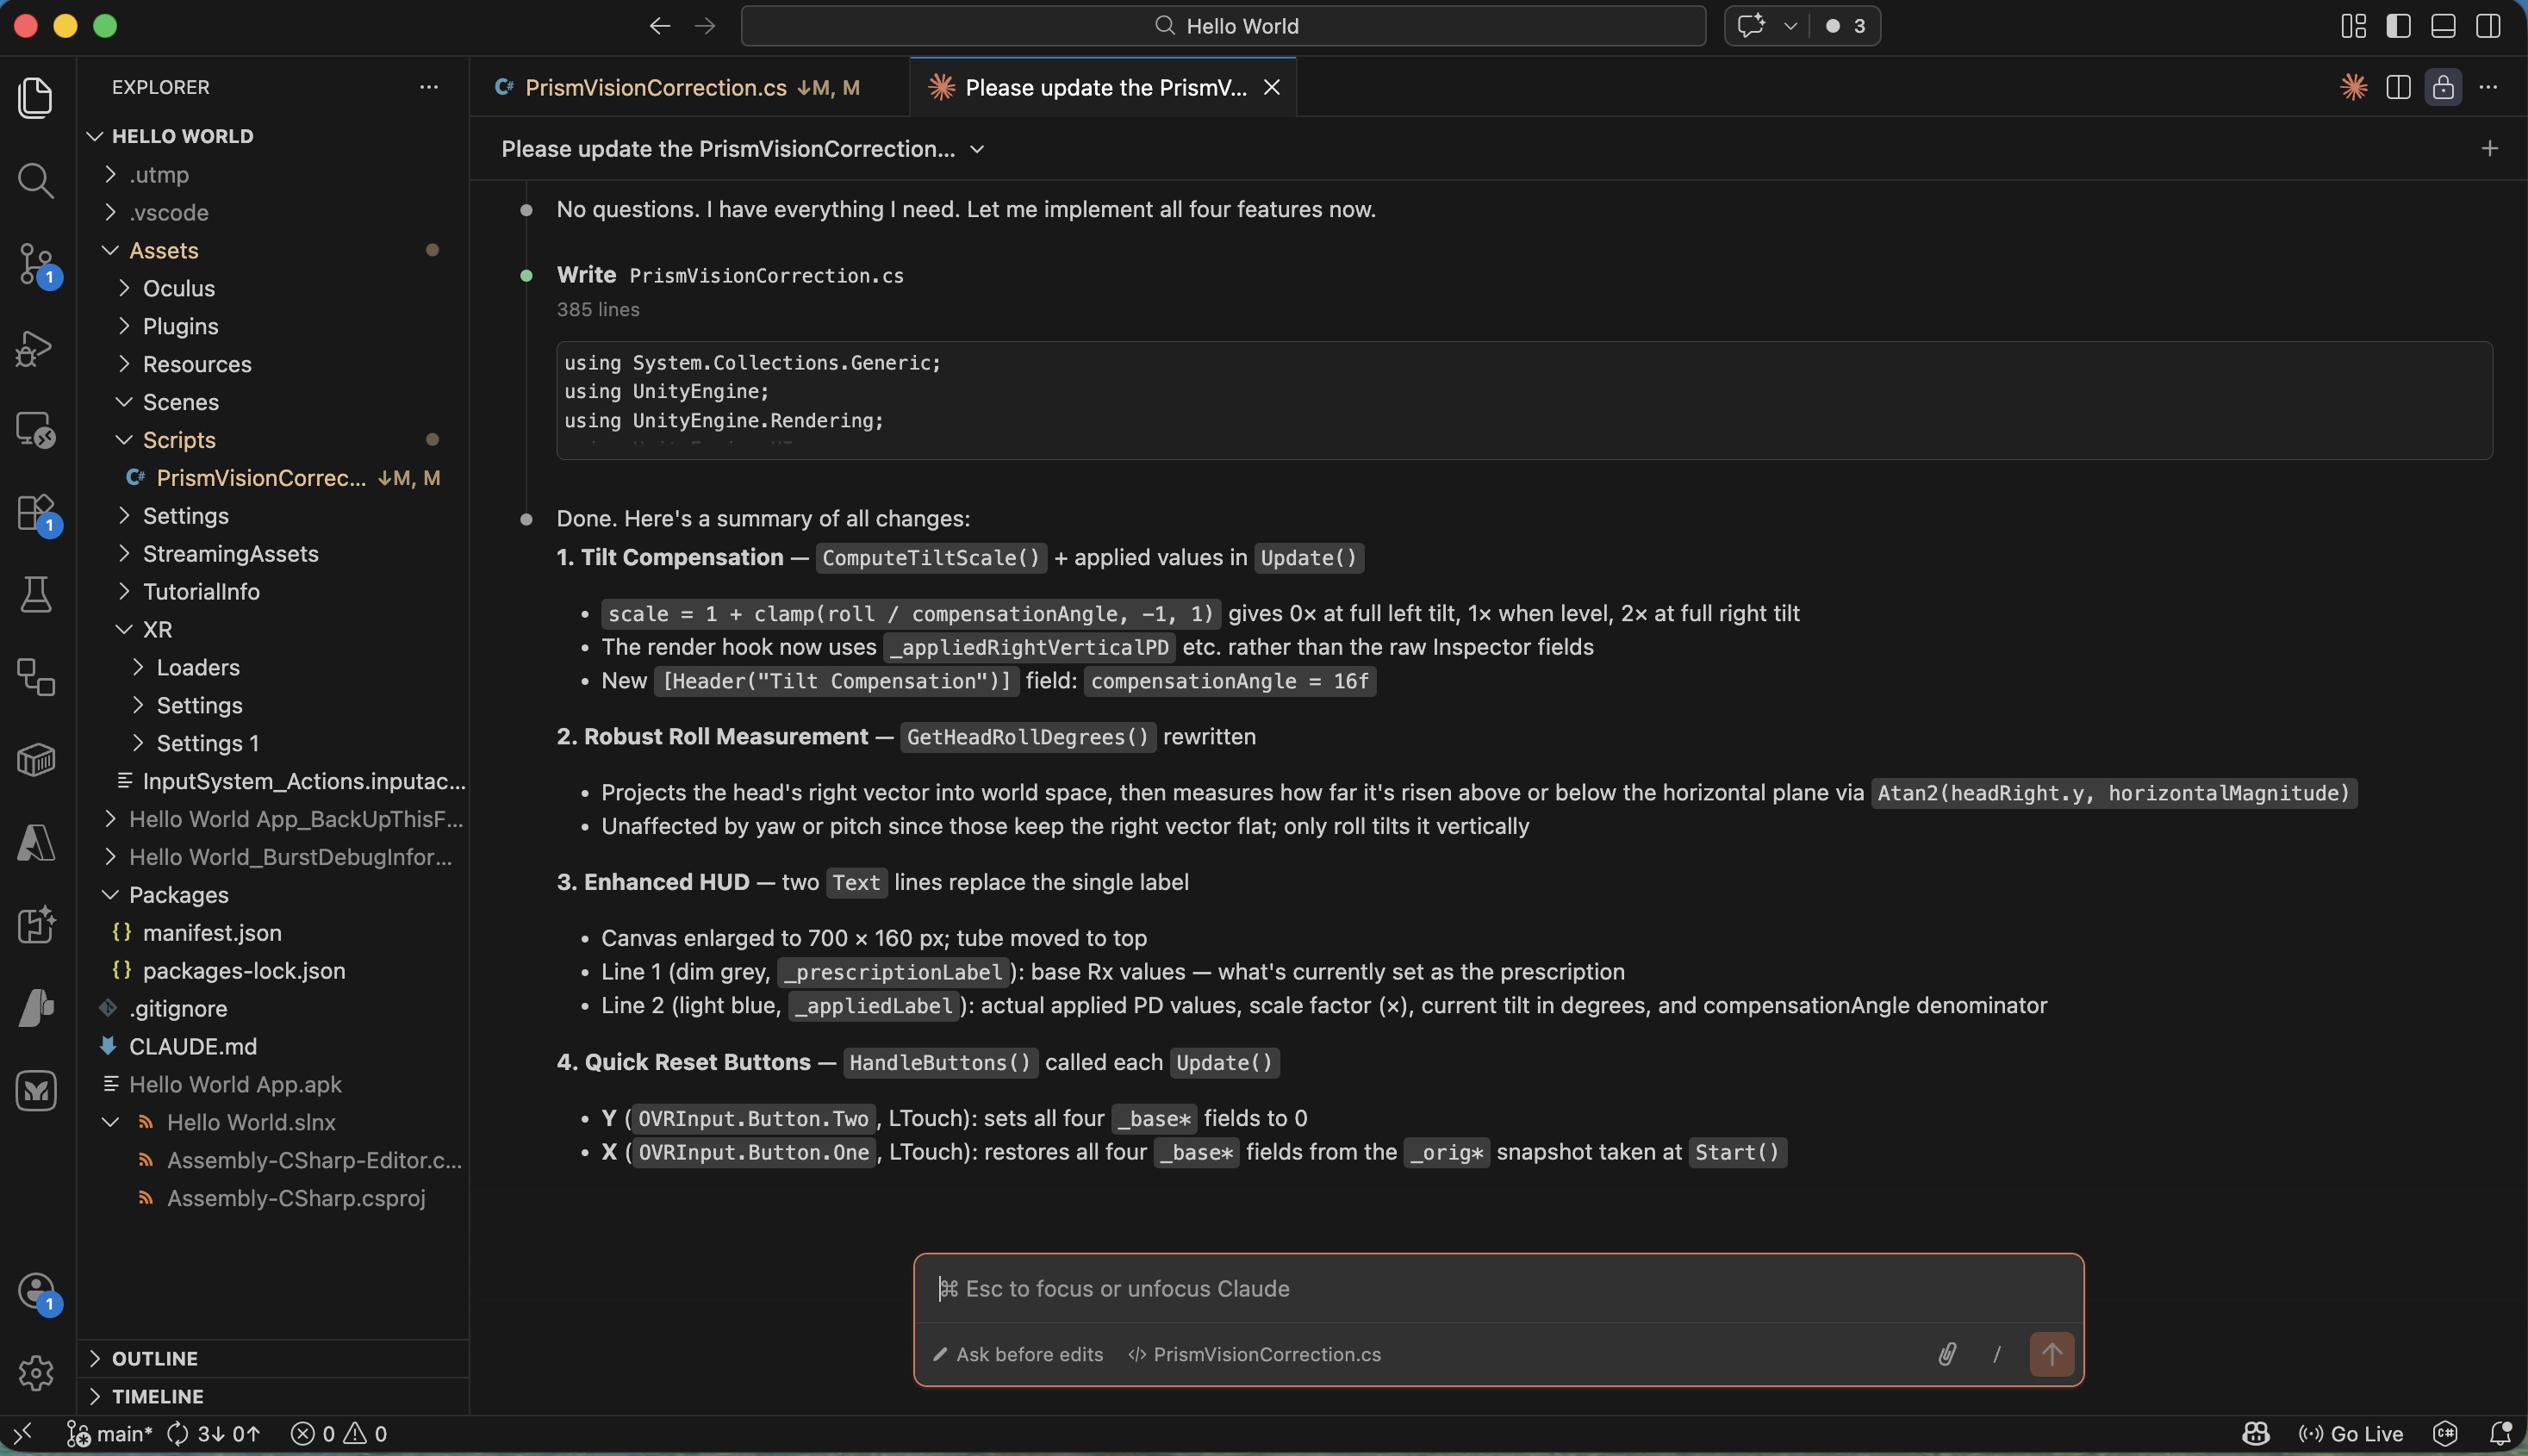
Claude Code completed all four changes and showed a summary of the tilt compensation, robust roll measurement, enhanced HUD, and quick reset buttons
CSHARP
1using UnityEngine;
2using UnityEngine.Rendering;
3using UnityEngine.UI;
4
5/// <summary>
6/// Applies a per-eye digital prism correction to the VR display, matching an optical
7/// prism prescription, and shows a spirit-level HUD to help the user keep their head level.
8///
9/// HOW TO USE
10/// ----------
11/// 1. Let Unity import this script (it will assign a GUID and show it in the Project window).
12/// 2. Select [BuildingBlock] Camera Rig in the Hierarchy.
13/// 3. Click Add Component → PrismVisionCorrection.
14/// 4. The Inspector fields are pre-filled with the prescription below; adjust if needed.
15///
16/// PRESCRIPTION PRE-LOADED
17/// -----------------------
18///   Right Eye (OD): 5.50 PD Base Down  + 1.00 PD Base Out
19///   Left  Eye (OS): 5.50 PD Base Up    + 1.00 PD Base Out
20///
21/// HOW THE PRISM CORRECTION WORKS
22/// --------------------------------
23/// 1 prism diopter (PD) ≈ 0.01 radians of angular image deflection.
24/// We shift each eye's projection-matrix frustum by tan(PD × 0.01 rad):
25///   • Decreasing p[1,2] shifts the frustum DOWN  → rendered image moves UP.
26///   • Increasing p[1,2] shifts the frustum UP    → rendered image moves DOWN.
27///   • Decreasing p[0,2] shifts the frustum LEFT  → rendered image moves RIGHT.
28///   • Increasing p[0,2] shifts the frustum RIGHT → rendered image moves LEFT.
29/// The hook fires via RenderPipelineManager.beginCameraRendering (URP-compatible).
30///
31/// TILT COMPENSATION
32/// -----------------
33/// The applied correction is scaled by a tilt factor derived from head roll:
34///   • Head level (0°)                  → scale = 1.0  (full prescription)
35///   • Left tilt  (−compensationAngle)  → scale = 0.0  (no correction)
36///   • Right tilt (+compensationAngle)  → scale = 2.0  (double correction)
37///
38/// CONTROLLER SHORTCUTS (Left Controller)
39/// ----------------------------------------
40///   Y button → zero all prism values
41///   X button → restore original Inspector values
42/// </summary>
43[RequireComponent(typeof(OVRCameraRig))]
44public class PrismVisionCorrection : MonoBehaviour
45{
46    // ── Prescription ──────────────────────────────────────────────────────────
47
48    [Header("Right Eye (OD)")]
49    [Tooltip("Base Down: positive value shifts this eye's image UP. Prism diopters.")]
50    public float rightVerticalPD   = 5.5f;
51    [Tooltip("Base Out: positive value shifts this eye's image toward the right temple. Prism diopters.")]
52    public float rightHorizontalPD = 1.0f;
53
54    [Header("Left Eye (OS)")]
55    [Tooltip("Base Up: positive value shifts this eye's image DOWN. Prism diopters.")]
56    public float leftVerticalPD   = 5.5f;
57    [Tooltip("Base Out: positive value shifts this eye's image toward the left temple. Prism diopters.")]
58    public float leftHorizontalPD = 1.0f;
59
60    // ── Spirit Level ──────────────────────────────────────────────────────────
61
62    [Header("Spirit Level")]
63    [Tooltip("Show the head-tilt spirit level HUD.")]
64    public bool showSpiritLevel = true;
65    [Tooltip("Head roll angle (degrees) at which the bubble reaches the tube end.")]
66    public float maxTiltDegrees = 15f;
67
68    // ── Tilt Compensation ─────────────────────────────────────────────────────
69
70    [Header("Tilt Compensation")]
71    [Tooltip("Degrees of LEFT-shoulder tilt at which the applied correction falls to zero.\n" +
72             "Set to 0 to disable (full prescription always applied).\n" +
73             "Example: 16 means at 16° left tilt the correction is 0, at 0° it is full,\n" +
74             "at 16° right tilt it is doubled.")]
75    public float compensationAngle = 16f;
76
77    // ── Internals ─────────────────────────────────────────────────────────────
78
79    // 1 prism diopter ≈ 0.01 radians of angular deflection.
80    const float PdToRad = 0.01f;
81
82    OVRCameraRig _rig;
83    Camera       _leftCam;
84    Camera       _rightCam;
85
86    // Snapshot of Inspector values taken at Awake (restored by X button).
87    float _defaultRightVerticalPD;
88    float _defaultRightHorizontalPD;
89    float _defaultLeftVerticalPD;
90    float _defaultLeftHorizontalPD;
91
92    // Tilt-scaled applied values — written by Update(), read by OnBeginCameraRendering.
93    float _appliedRightVerticalPD;
94    float _appliedRightHorizontalPD;
95    float _appliedLeftVerticalPD;
96    float _appliedLeftHorizontalPD;
97
98    // Spirit level UI
99    RectTransform _bubble;
100    Image         _bubbleImg;
101    Text          _prescriptionLabel; // Line 1: current prescription (dim grey)
102    Text          _appliedLabel;      // Line 2: applied values + tilt info (light blue)
103    float         _bubbleHalfTravel;  // canvas units the bubble can move each side
104
105    // ── Lifecycle ─────────────────────────────────────────────────────────────
106
107    void Awake()
108    {
109        _rig = GetComponent<OVRCameraRig>();
110        // Per-eye cameras are disabled by default. Enabling them gives us separate
111        // Camera objects per eye so we can set independent projection matrices.
112        _rig.usePerEyeCameras = true;
113
114        // Guard against the scene having serialized compensationAngle as 0 before
115        // the field existed (Unity keeps old serialized values even when the code
116        // default changes, so this ensures the feature is always active).
117        if (compensationAngle == 0f) compensationAngle = 16f;
118
119        // Snapshot Inspector values so X can always restore them.
120        _defaultRightVerticalPD   = rightVerticalPD;
121        _defaultRightHorizontalPD = rightHorizontalPD;
122        _defaultLeftVerticalPD    = leftVerticalPD;
123        _defaultLeftHorizontalPD  = leftHorizontalPD;
124    }
125
126    void Start()
127    {
128        _leftCam  = _rig.leftEyeCamera;
129        _rightCam = _rig.rightEyeCamera;
130
131        // When usePerEyeCameras is true the per-eye cameras are created fresh and
132        // do not inherit the centre eye's passthrough clear settings.  Without this
133        // the cameras render a solid (blue) background instead of compositing over
134        // the passthrough layer.
135        ConfigurePassthroughCamera(_leftCam);
136        ConfigurePassthroughCamera(_rightCam);
137
138        // Seed applied values so the first frame renders correctly before Update runs.
139        UpdateAppliedValues(1f);
140
141        if (showSpiritLevel)
142            BuildSpiritLevel(_rig.centerEyeAnchor);
143    }
144
145    static void ConfigurePassthroughCamera(Camera cam)
146    {
147        if (cam == null) return;
148        cam.clearFlags      = CameraClearFlags.SolidColor;
149        cam.backgroundColor = Color.clear; // alpha = 0 → passthrough shows through
150    }
151
152    void OnEnable()
153    {
154        RenderPipelineManager.beginCameraRendering += OnBeginCameraRendering;
155    }
156
157    void OnDisable()
158    {
159        RenderPipelineManager.beginCameraRendering -= OnBeginCameraRendering;
160    }
161
162    // ── Prism correction ──────────────────────────────────────────────────────
163
164    // Called by URP just before each camera renders — after OVR has set the
165    // projection matrix — so our offsets override whatever OVR wrote.
166    void OnBeginCameraRendering(ScriptableRenderContext _, Camera cam)
167    {
168        if (cam == _rightCam)
169        {
170            Matrix4x4 p = cam.projectionMatrix;
171            // Base Down  → image UP   → frustum shifts DOWN  → p[1,2] decreases
172            p[1, 2] -= Mathf.Tan(_appliedRightVerticalPD   * PdToRad);
173            // Base Out   → image RIGHT → frustum shifts LEFT  → p[0,2] decreases
174            p[0, 2] -= Mathf.Tan(_appliedRightHorizontalPD * PdToRad);
175            cam.projectionMatrix = p;
176        }
177        else if (cam == _leftCam)
178        {
179            Matrix4x4 p = cam.projectionMatrix;
180            // Base Up    → image DOWN  → frustum shifts UP    → p[1,2] increases
181            p[1, 2] += Mathf.Tan(_appliedLeftVerticalPD   * PdToRad);
182            // Base Out   → image LEFT  → frustum shifts RIGHT → p[0,2] increases
183            p[0, 2] += Mathf.Tan(_appliedLeftHorizontalPD * PdToRad);
184            cam.projectionMatrix = p;
185        }
186    }
187
188    // ── Update ────────────────────────────────────────────────────────────────
189
190    void Update()
191    {
192        // ── Quick reset buttons ───────────────────────────────────────────────
193        // Y → zero prescription   X → restore Inspector defaults
194        if (OVRInput.GetDown(OVRInput.Button.Four))        // Y (left controller)
195        {
196            rightVerticalPD = rightHorizontalPD = leftVerticalPD = leftHorizontalPD = 0f;
197        }
198        else if (OVRInput.GetDown(OVRInput.Button.Three))  // X (left controller)
199        {
200            rightVerticalPD   = _defaultRightVerticalPD;
201            rightHorizontalPD = _defaultRightHorizontalPD;
202            leftVerticalPD    = _defaultLeftVerticalPD;
203            leftHorizontalPD  = _defaultLeftHorizontalPD;
204        }
205
206        // ── Tilt compensation ─────────────────────────────────────────────────
207        // scale = 1 + roll / compensationAngle
208        //   roll =  0                  → scale = 1.0 → full prescription
209        //   roll = −compensationAngle  → scale = 0.0 → no correction
210        //   roll = +compensationAngle  → scale = 2.0 → doubled
211        float roll      = GetHeadRollDegrees();
212        float tiltScale = Mathf.Abs(compensationAngle) > 0.01f
213            ? Mathf.Max(0f, 1f + roll / compensationAngle)
214            : 1f;
215        UpdateAppliedValues(tiltScale);
216
217        if (_bubble == null) return;
218
219        // ── Spirit level bubble ───────────────────────────────────────────────
220        float t = Mathf.Clamp(roll / maxTiltDegrees, -1f, 1f);
221        _bubble.anchoredPosition = new Vector2(-t * _bubbleHalfTravel, 0f);
222
223        // Colour: green (level) → amber → red (tilted).
224        float severity = Mathf.Abs(t);
225        Color green = new Color(0.10f, 0.85f, 0.25f, 0.90f);
226        Color amber = new Color(1.00f, 0.65f, 0.00f, 0.90f);
227        Color red   = new Color(0.90f, 0.15f, 0.15f, 0.90f);
228        _bubbleImg.color = severity < 0.4f
229            ? Color.Lerp(green, amber, severity / 0.4f)
230            : Color.Lerp(amber, red,   (severity - 0.4f) / 0.6f);
231
232        // ── HUD labels ────────────────────────────────────────────────────────
233
234        // Line 1: current prescription (dim grey).
235        if (_prescriptionLabel != null)
236            _prescriptionLabel.text = string.Format(
237                "Rx  RV:{0:+0.00;-0.00;0.00}  RH:{1:+0.00;-0.00;0.00}  LV:{2:+0.00;-0.00;0.00}  LH:{3:+0.00;-0.00;0.00}",
238                rightVerticalPD, rightHorizontalPD,
239                leftVerticalPD,  leftHorizontalPD);
240
241        // Line 2: applied values + tilt diagnostics (light blue).
242        if (_appliedLabel != null)
243            _appliedLabel.text = string.Format(
244                "Applied  RV:{0:+0.00;-0.00;0.00}  RH:{1:+0.00;-0.00;0.00}  LV:{2:+0.00;-0.00;0.00}  LH:{3:+0.00;-0.00;0.00}   \u00d7{4:0.00}  tilt:{5:+0.0;-0.0;0.0}\u00b0/{6:0}\u00b0",
245                _appliedRightVerticalPD, _appliedRightHorizontalPD,
246                _appliedLeftVerticalPD,  _appliedLeftHorizontalPD,
247                tiltScale, roll, compensationAngle);
248    }
249
250    void UpdateAppliedValues(float scale)
251    {
252        _appliedRightVerticalPD   = rightVerticalPD   * scale;
253        _appliedRightHorizontalPD = rightHorizontalPD * scale;
254        _appliedLeftVerticalPD    = leftVerticalPD    * scale;
255        _appliedLeftHorizontalPD  = leftHorizontalPD  * scale;
256    }
257
258    // ── Spirit Level construction ─────────────────────────────────────────────
259
260    void BuildSpiritLevel(Transform eyeAnchor)
261    {
262        // Root: world-space Canvas parented to the centre eye — tracks the head.
263        var root = new GameObject("SpiritLevel");
264        root.transform.SetParent(eyeAnchor, false);
265        root.transform.localPosition = new Vector3(0f, -0.20f, 0.65f);
266        root.transform.localScale    = Vector3.one * 0.0008f;
267
268        var canvas = root.AddComponent<Canvas>();
269        canvas.renderMode   = RenderMode.WorldSpace;
270        canvas.sortingOrder = 10;
271        var rootRT = root.GetComponent<RectTransform>();
272        rootRT.sizeDelta = new Vector2(700f, 160f);
273
274        var font = BuiltinFont();
275
276        // Tube (dark background track) — positioned toward the top of the canvas.
277        const float TubeW = 660f, TubeH = 44f;
278        var tube = MakePanel(root.transform, "Tube", TubeW, TubeH,
279                             new Vector2(0f, 42f),
280                             new Color(0.10f, 0.10f, 0.12f, 0.88f));
281
282        // Centre target tick (green vertical line).
283        MakePanel(tube.transform, "CentreTick", 3f, TubeH + 14f, Vector2.zero,
284                  new Color(0f, 1f, 0f, 0.95f));
285
286        // Bubble.
287        const float BubbleW = 48f;
288        var bubbleGO   = MakePanel(tube.transform, "Bubble", BubbleW, TubeH - 8f, Vector2.zero,
289                                   new Color(0.2f, 0.8f, 1f, 0.90f));
290        _bubble        = bubbleGO.GetComponent<RectTransform>();
291        _bubbleImg     = bubbleGO.GetComponent<Image>();
292        _bubbleHalfTravel = (TubeW - BubbleW) * 0.5f;
293
294        // Line 1: current prescription (dim grey).
295        _prescriptionLabel = MakeLabel(root.transform, "PrescriptionLabel",
296                                       700f, 36f, new Vector2(0f, -4f),
297                                       font, 22, new Color(0.55f, 0.55f, 0.55f, 0.90f));
298
299        // Line 2: applied values + tilt info (light blue).
300        _appliedLabel = MakeLabel(root.transform, "AppliedLabel",
301                                  700f, 36f, new Vector2(0f, -44f),
302                                  font, 22, new Color(0.45f, 0.80f, 1.00f, 0.95f));
303    }
304
305    // ── Helpers ───────────────────────────────────────────────────────────────
306
307    /// <summary>
308    /// Returns head roll in degrees. Positive = head tilted right (right ear lower).
309    /// Measures rotation around the head's own forward (look) axis so it is immune to
310    /// pitch, yaw, and tracking-space orientation.
311    /// </summary>
312    float GetHeadRollDegrees()
313    {
314        if (_rig == null) return 0f;
315        Transform head = _rig.centerEyeAnchor;
316        Vector3 fwd = head.forward;
317        // Project gravity-up onto the plane perpendicular to the look direction.
318        // This gives the "level" reference up at the current yaw and pitch.
319        Vector3 refUp = Vector3.ProjectOnPlane(Vector3.up, fwd).normalized;
320        if (refUp.sqrMagnitude < 0.001f) return 0f; // looking straight up or down
321        // Signed angle from the gravity reference to the actual head up, rotating
322        // around the look axis. Negative because right-hand rule around +forward
323        // gives a clockwise (left-tilt) positive result; we invert to match the
324        // convention that positive = right tilt.
325        return -Vector3.SignedAngle(refUp, head.up, fwd);
326    }
327
328    static Text MakeLabel(Transform parent, string name,
329                           float w, float h, Vector2 pos,
330                           Font font, int fontSize, Color color)
331    {
332        var go = new GameObject(name);
333        go.transform.SetParent(parent, false);
334        var rt = go.AddComponent<RectTransform>();
335        rt.sizeDelta        = new Vector2(w, h);
336        rt.anchoredPosition = pos;
337        var txt       = go.AddComponent<Text>();
338        txt.font      = font;
339        txt.fontSize  = fontSize;
340        txt.alignment = TextAnchor.MiddleCenter;
341        txt.color     = color;
342        return txt;
343    }
344
345    static GameObject MakePanel(Transform parent, string name,
346                                 float w, float h, Vector2 pos, Color color)
347    {
348        var go = new GameObject(name);
349        go.transform.SetParent(parent, false);
350        var rt = go.AddComponent<RectTransform>();
351        rt.sizeDelta        = new Vector2(w, h);
352        rt.anchoredPosition = pos;
353        go.AddComponent<Image>().color = color;
354        return go;
355    }
356
357    static Font BuiltinFont()
358    {
359        Font f = Resources.GetBuiltinResource<Font>("LegacyRuntime.ttf");
360        if (f == null) f = Resources.GetBuiltinResource<Font>("Arial.ttf");
361        return f;
362    }
363}
364
365
Testing on my Meta Quest 2

I ran the app on my Quest 2 headset — the black and white passthrough background works in the headset but doesn't appear in the cast view. The spirit level HUD and cube interactions worked correctly