Customizing Status Reasons in Power Platform
Neil Haddley • May 24, 2026
How to add custom Status Reason choices, surface them on forms and views, and enforce allowed transitions using Status Reason Transitions in the classic Solution Explorer
Every Dataverse table ships with two system columns you can't delete: Status (statecode) and Status Reason (statuscode). Status has exactly two values — Active and Inactive. Status Reason is the refinement: it tells you why a record is in that state. Out of the box each group has one choice — "Active" and "Inactive" respectively — but you can add as many custom reasons as your process needs.
In this post I walked through the full lifecycle on a new Time Off Request table: adding custom Status Reason choices, surfacing them on forms and views, and then using Status Reason Transitions in the classic Solution Explorer to enforce which reasons are reachable from which, turning a free dropdown into a real workflow guard.
Creating the table
I started by creating a new unmanaged solution and adding a Time Off Request table to it.
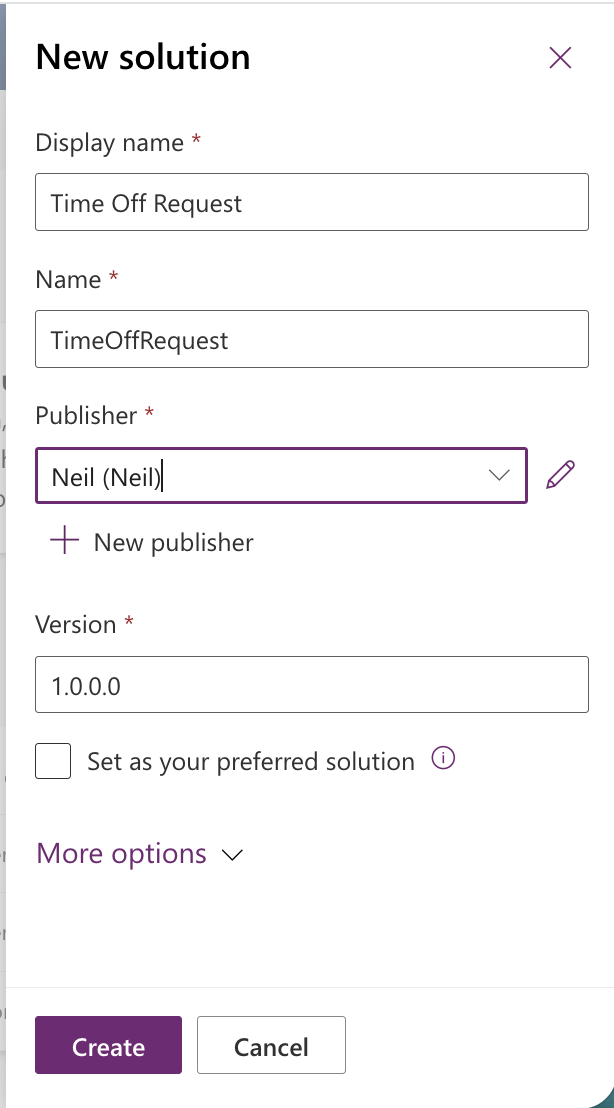
I created a new solution called "Time Off Request" to keep the customizations isolated.
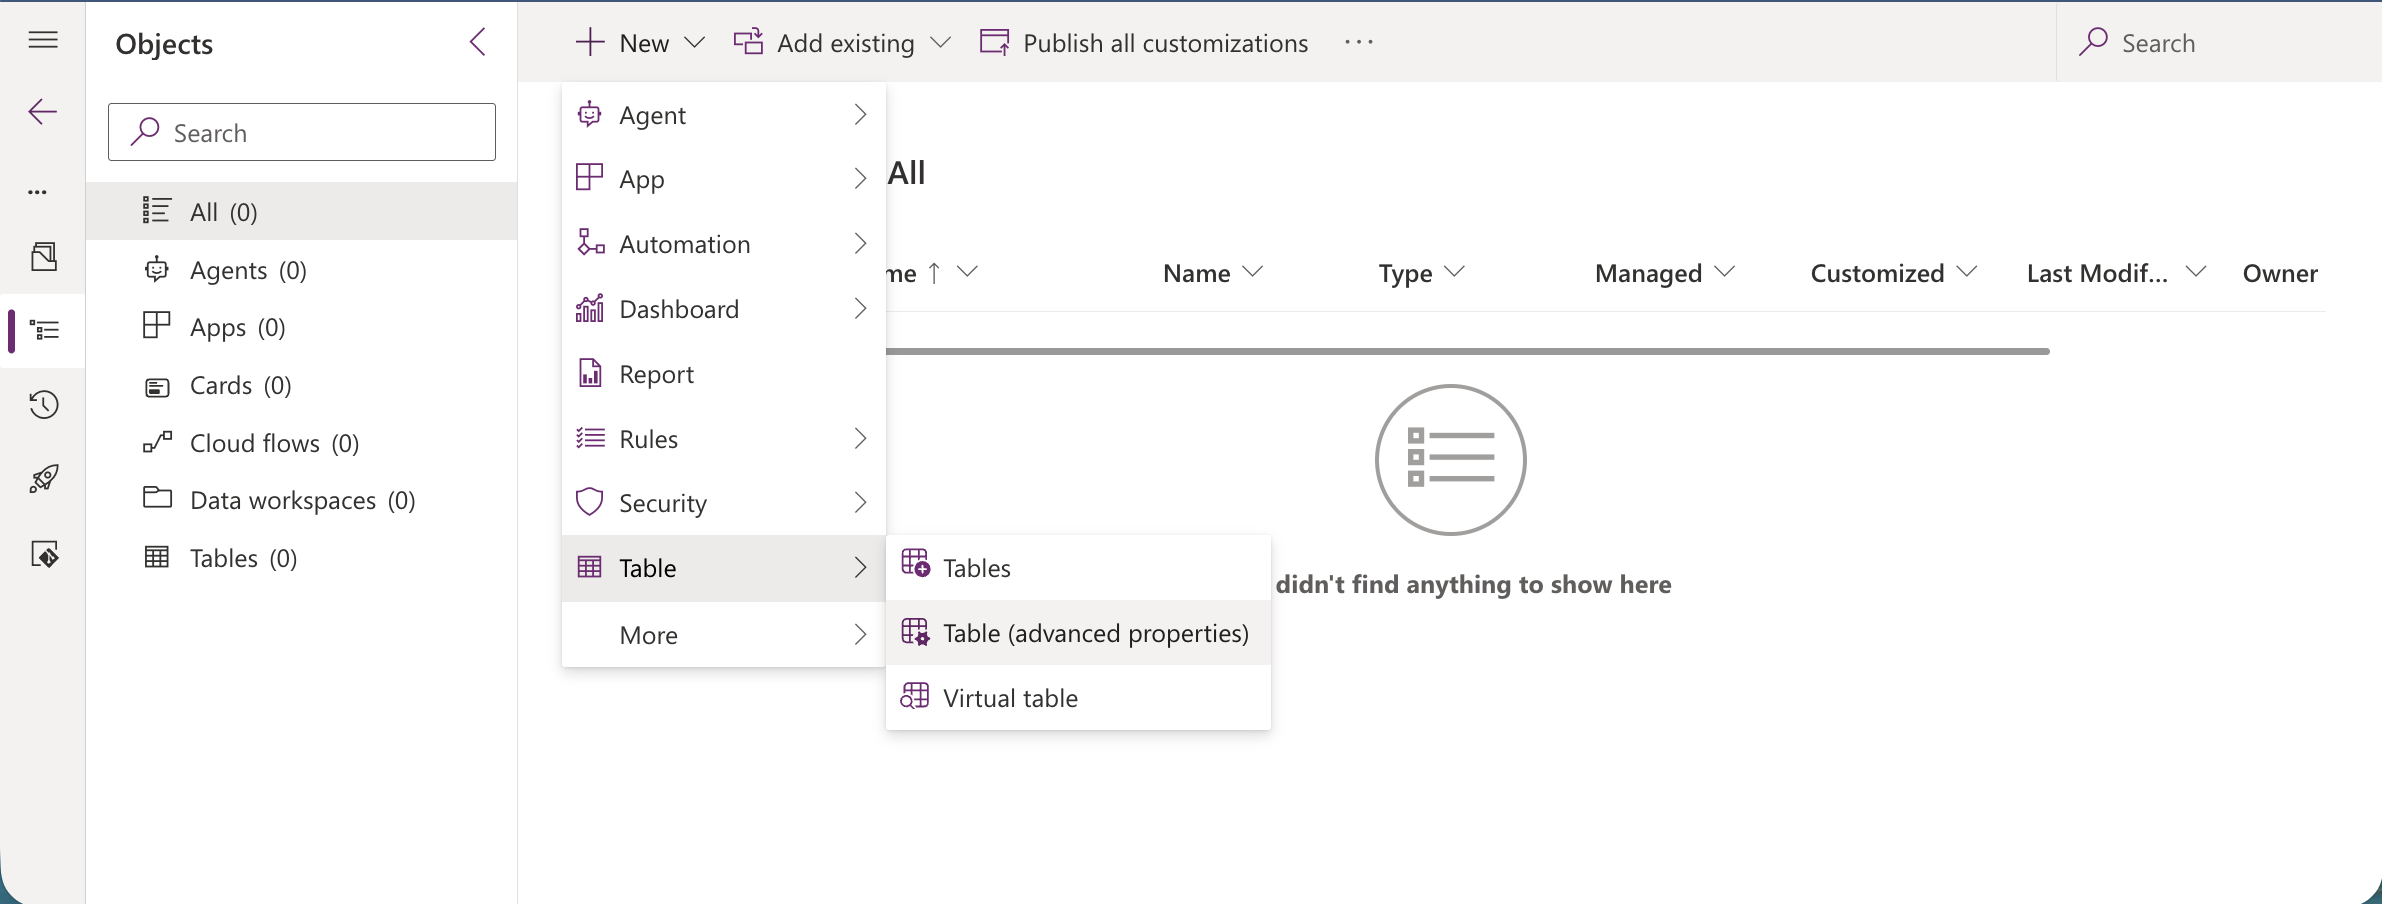
I selected New > Table from the solution explorer.
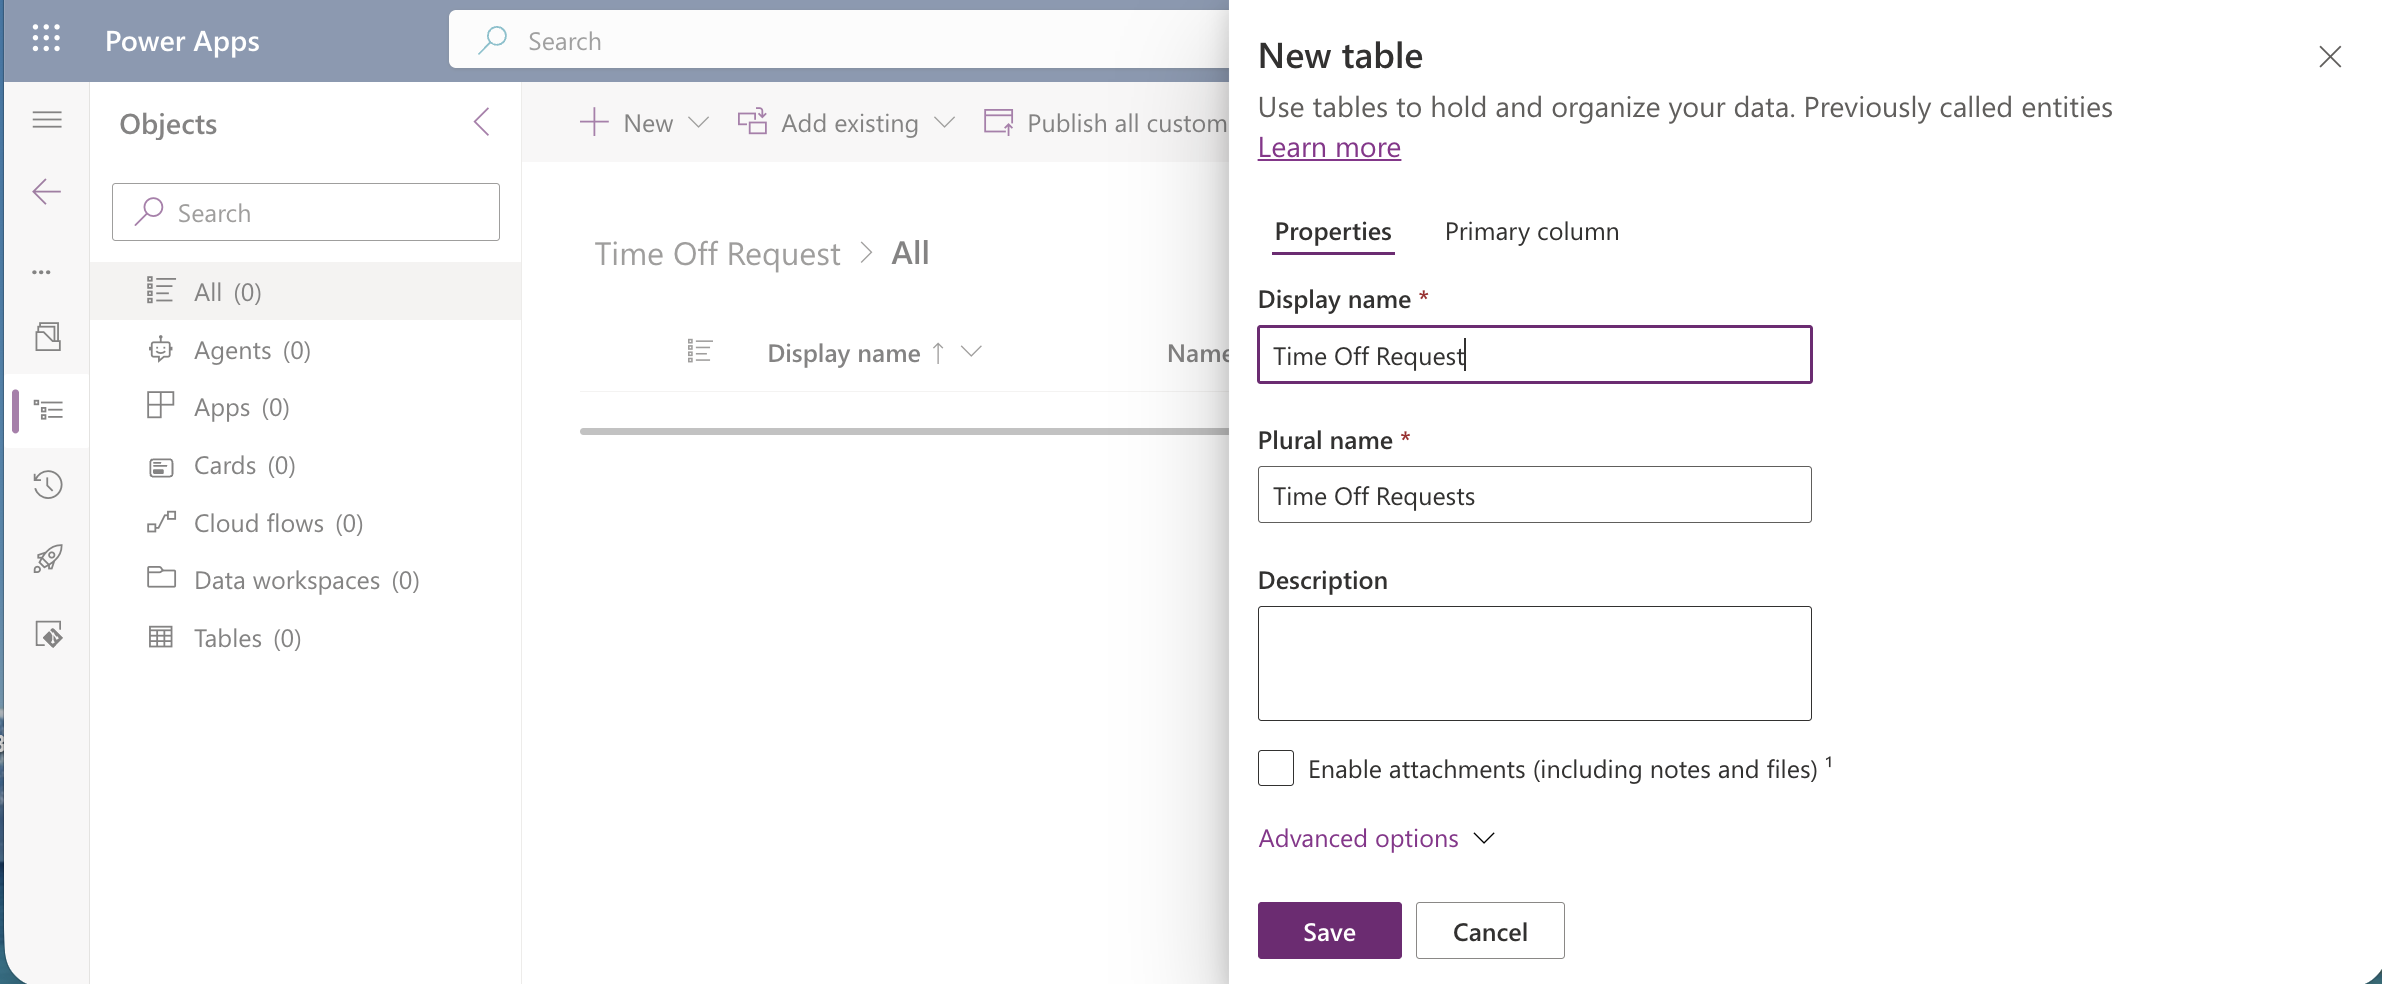
I named the new table "Time Off Request" in the new table panel.
Once the table was created, I opened its columns list to see what Dataverse had generated automatically.
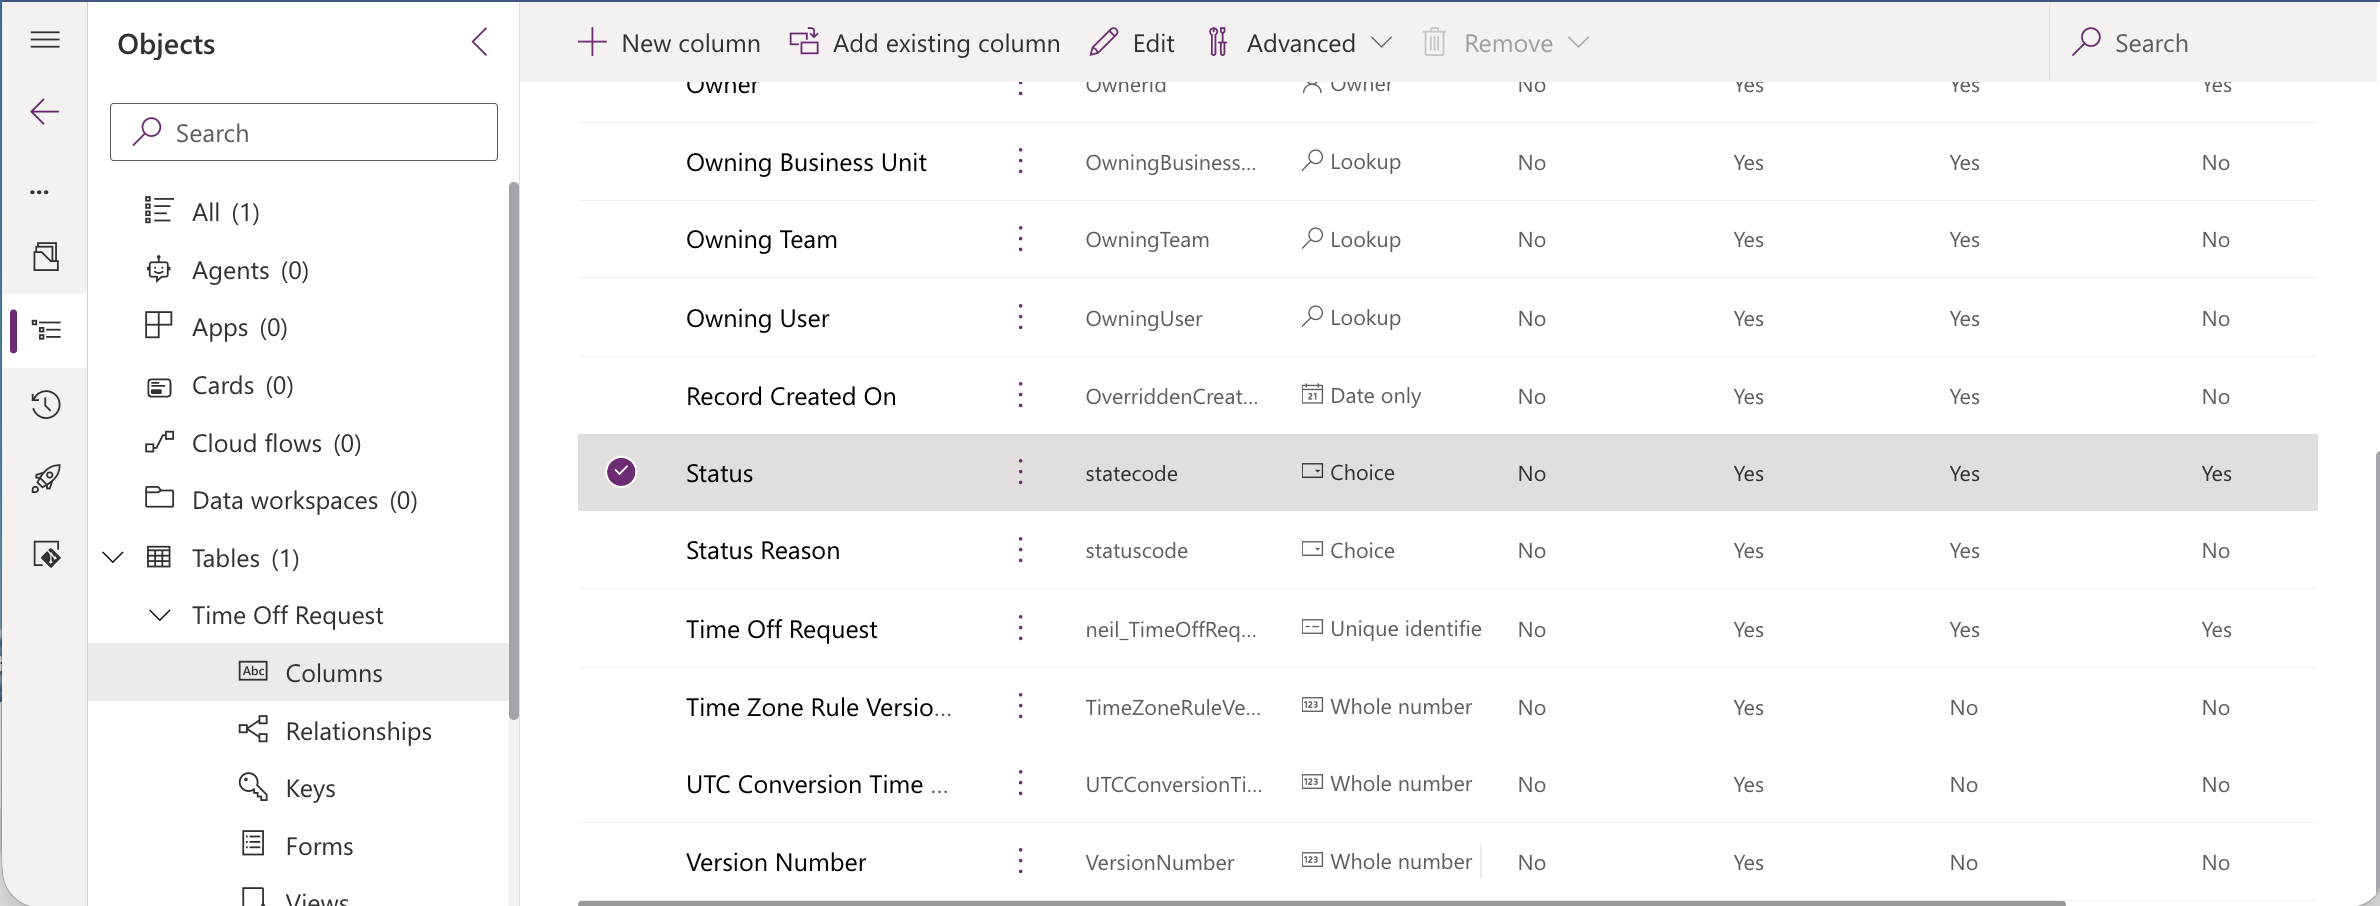
The columns list already included Status (statecode) and Status Reason (statuscode) — both system-managed fields that appear on every standard table.
The defaults: read-only Status, customisable Status Reason
Opening the Status column shows why you can't add choices to it directly.
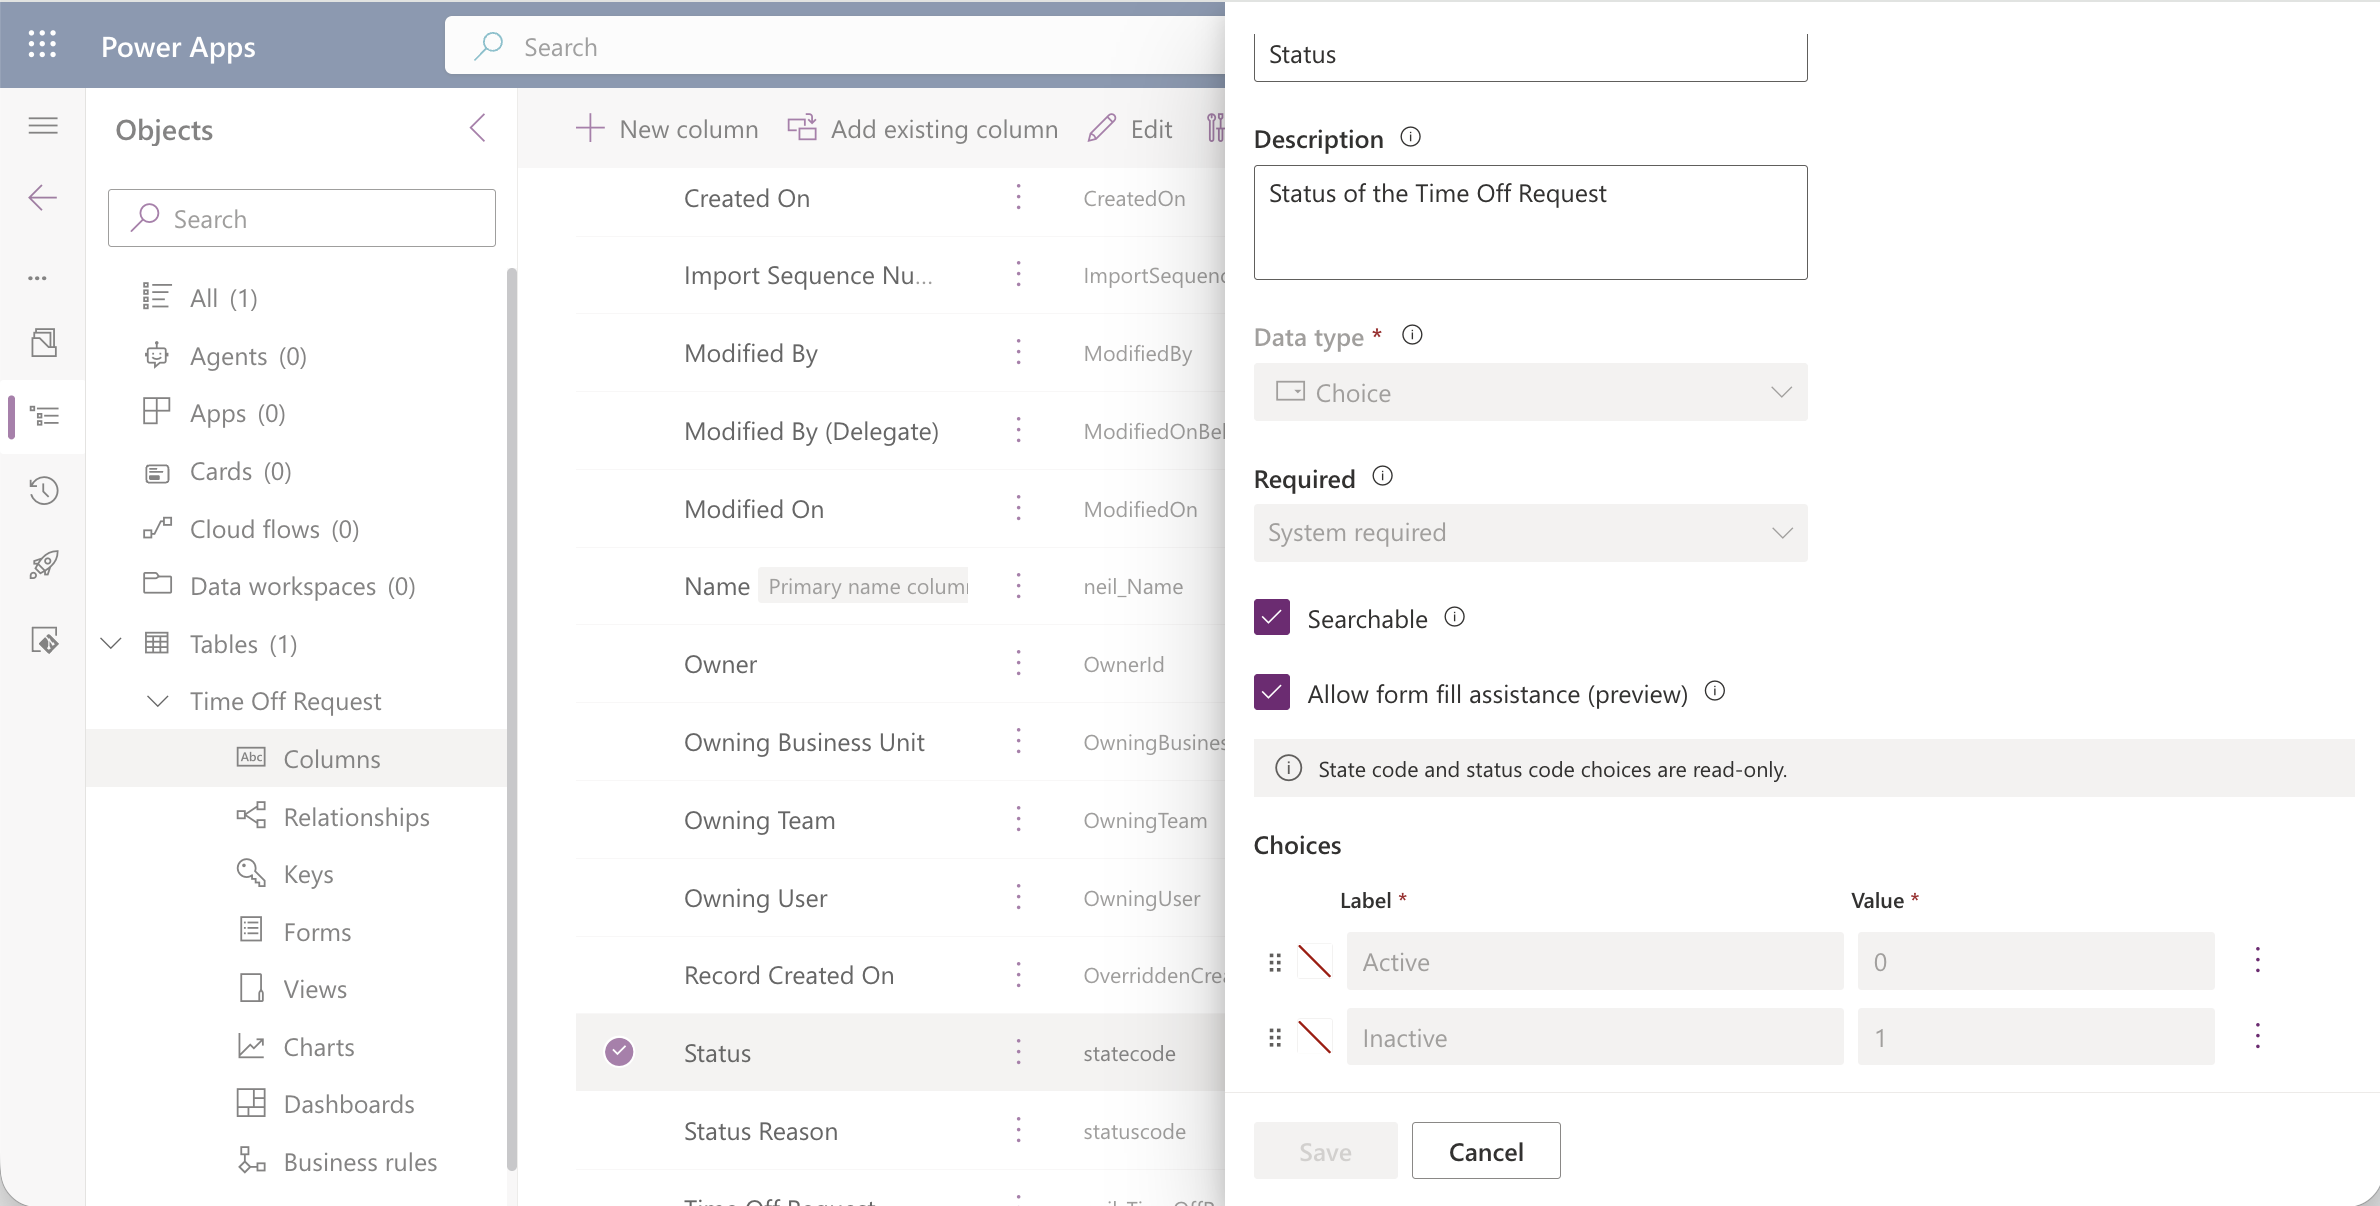
The Status column editor showed Active and Inactive as read-only entries — these values are expected by the platform and should not be changed.
Status Reason is different. Dataverse groups its choices by Status, so the Active group and the Inactive group each start with one default option.
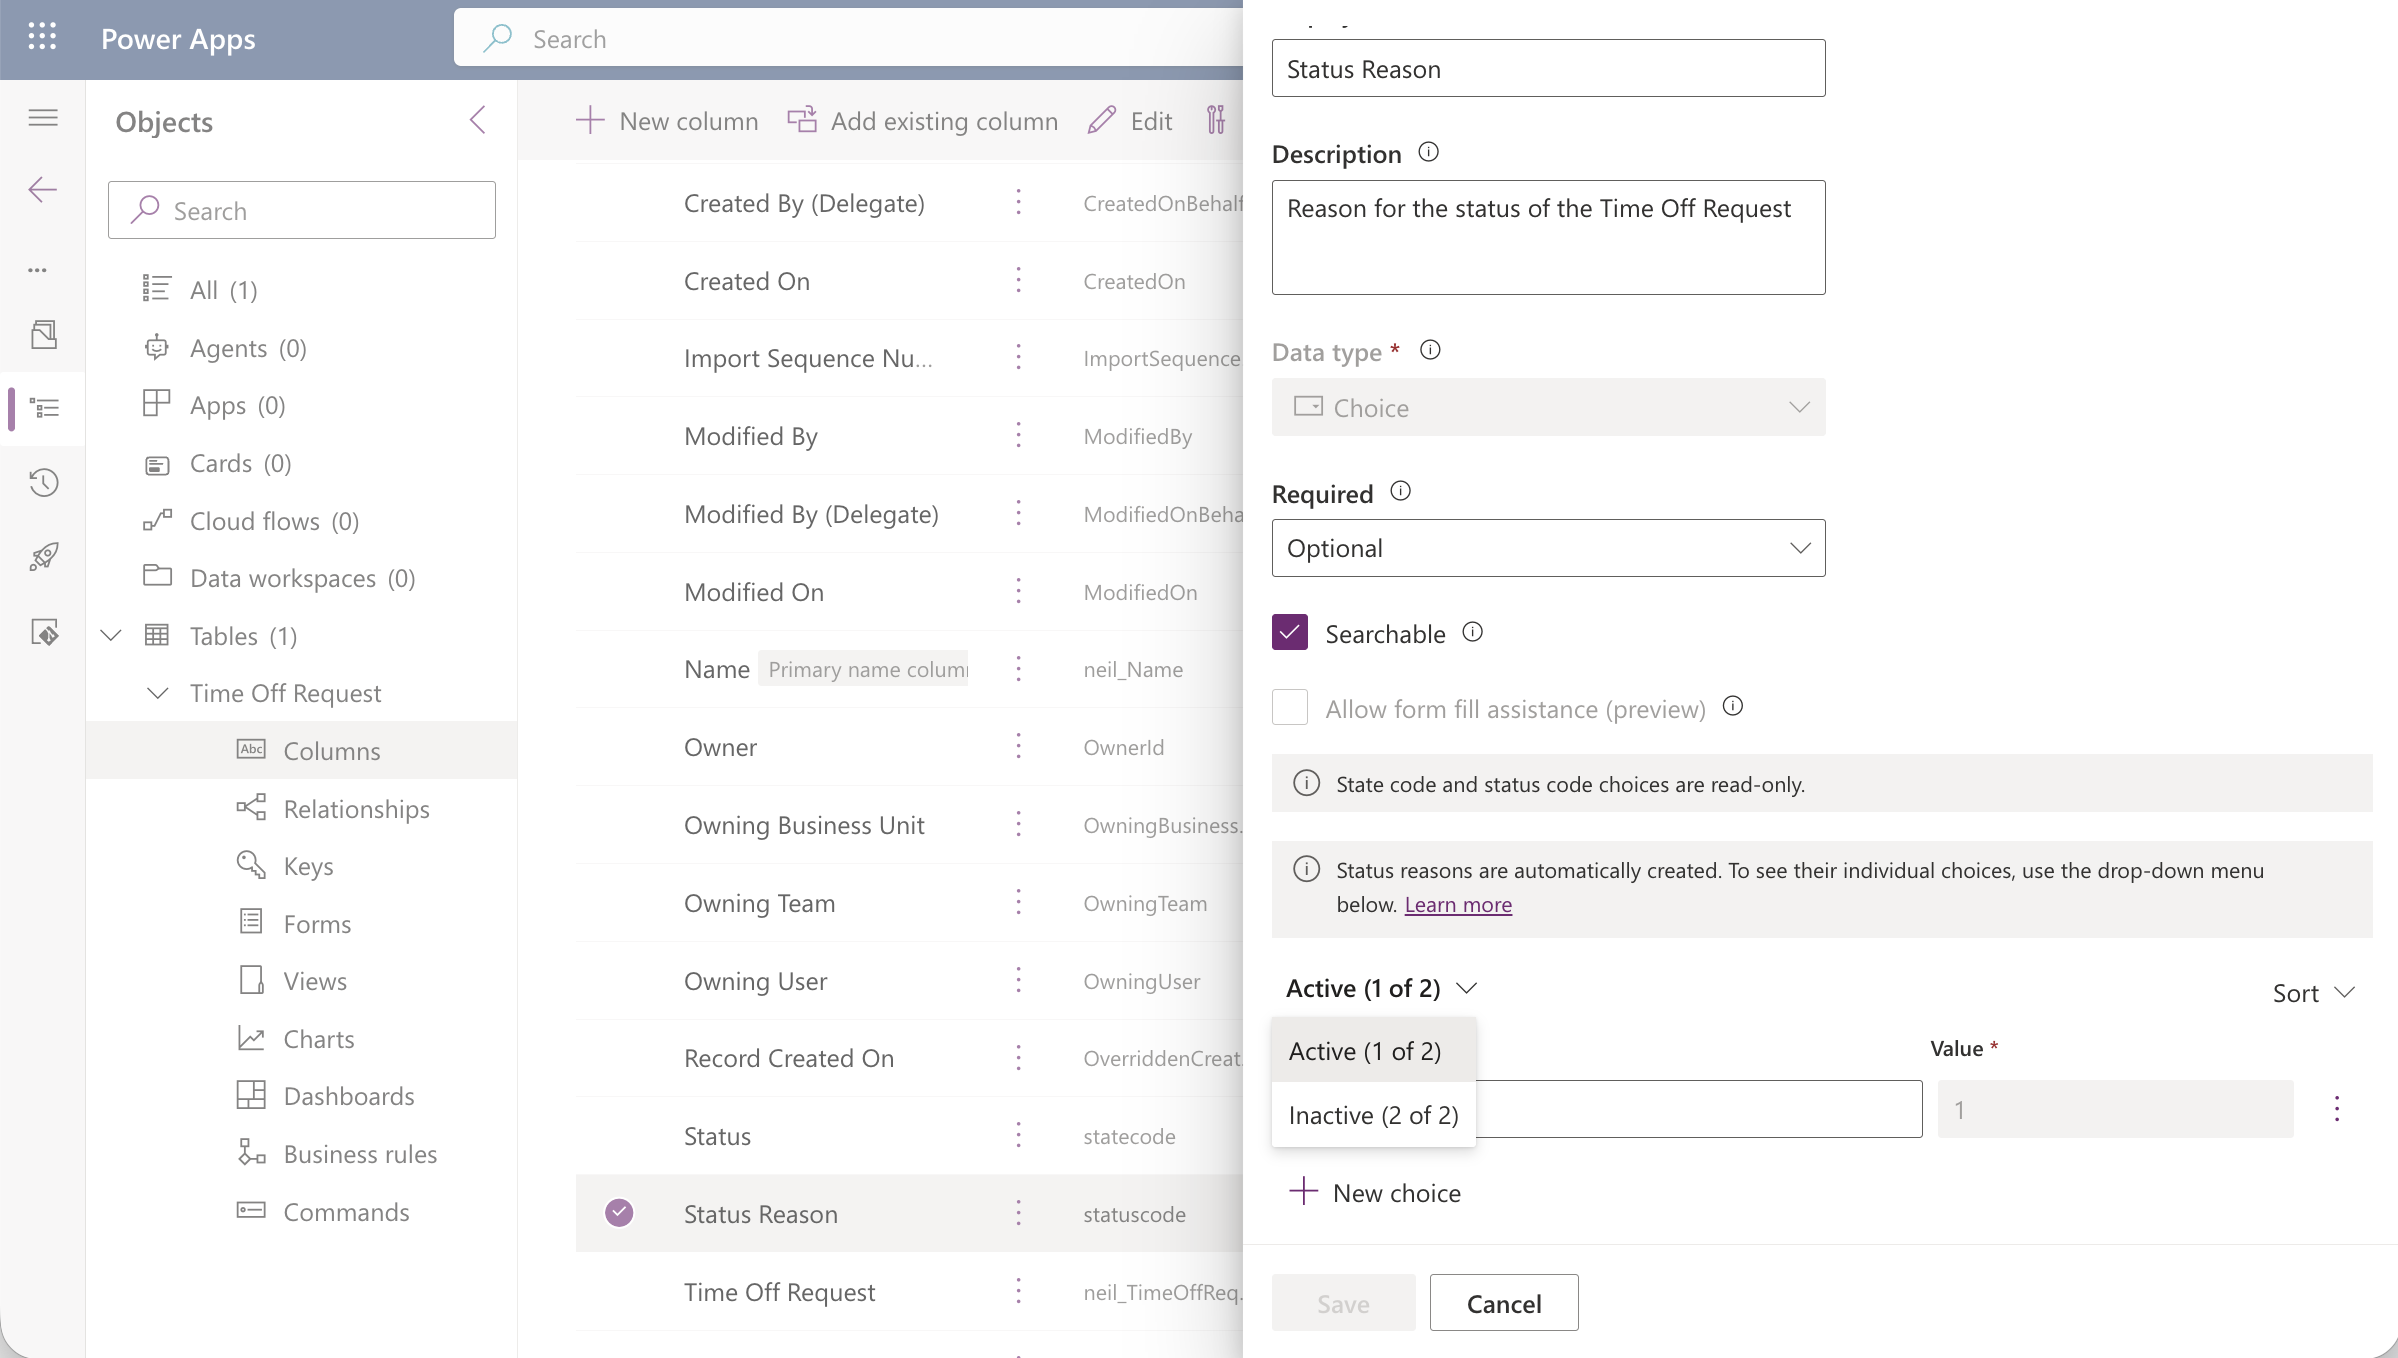
The Status Reason column editor showed two groups — Active and Inactive — each with their default choice.
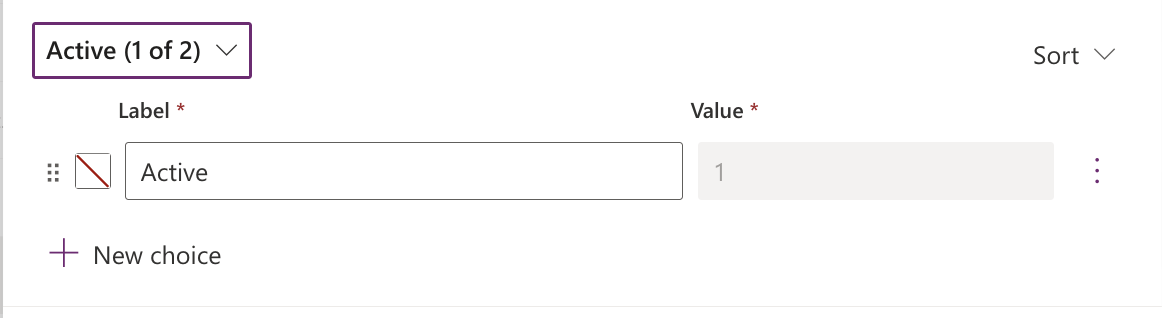
The Active group contained a single choice: "Active" with value 1.
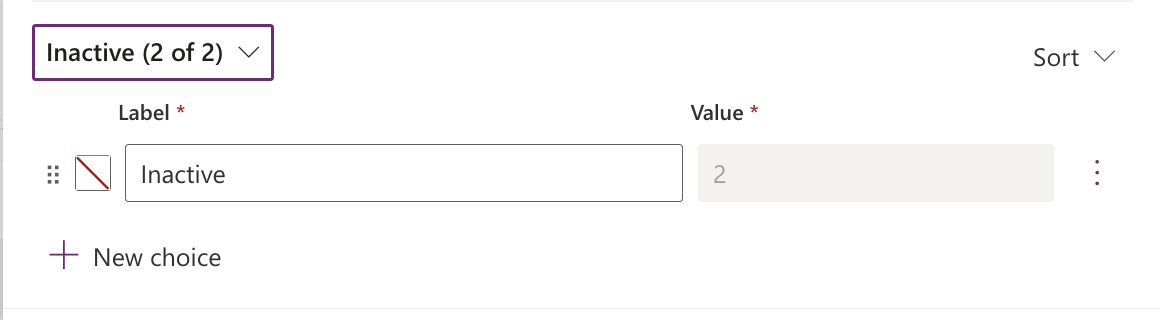
The Inactive group contained a single choice: "Inactive" with value 2.
Building a model-driven app to test with
I needed a live app to see how the Activate and Deactivate buttons behave, so I created a model-driven app against the new table.
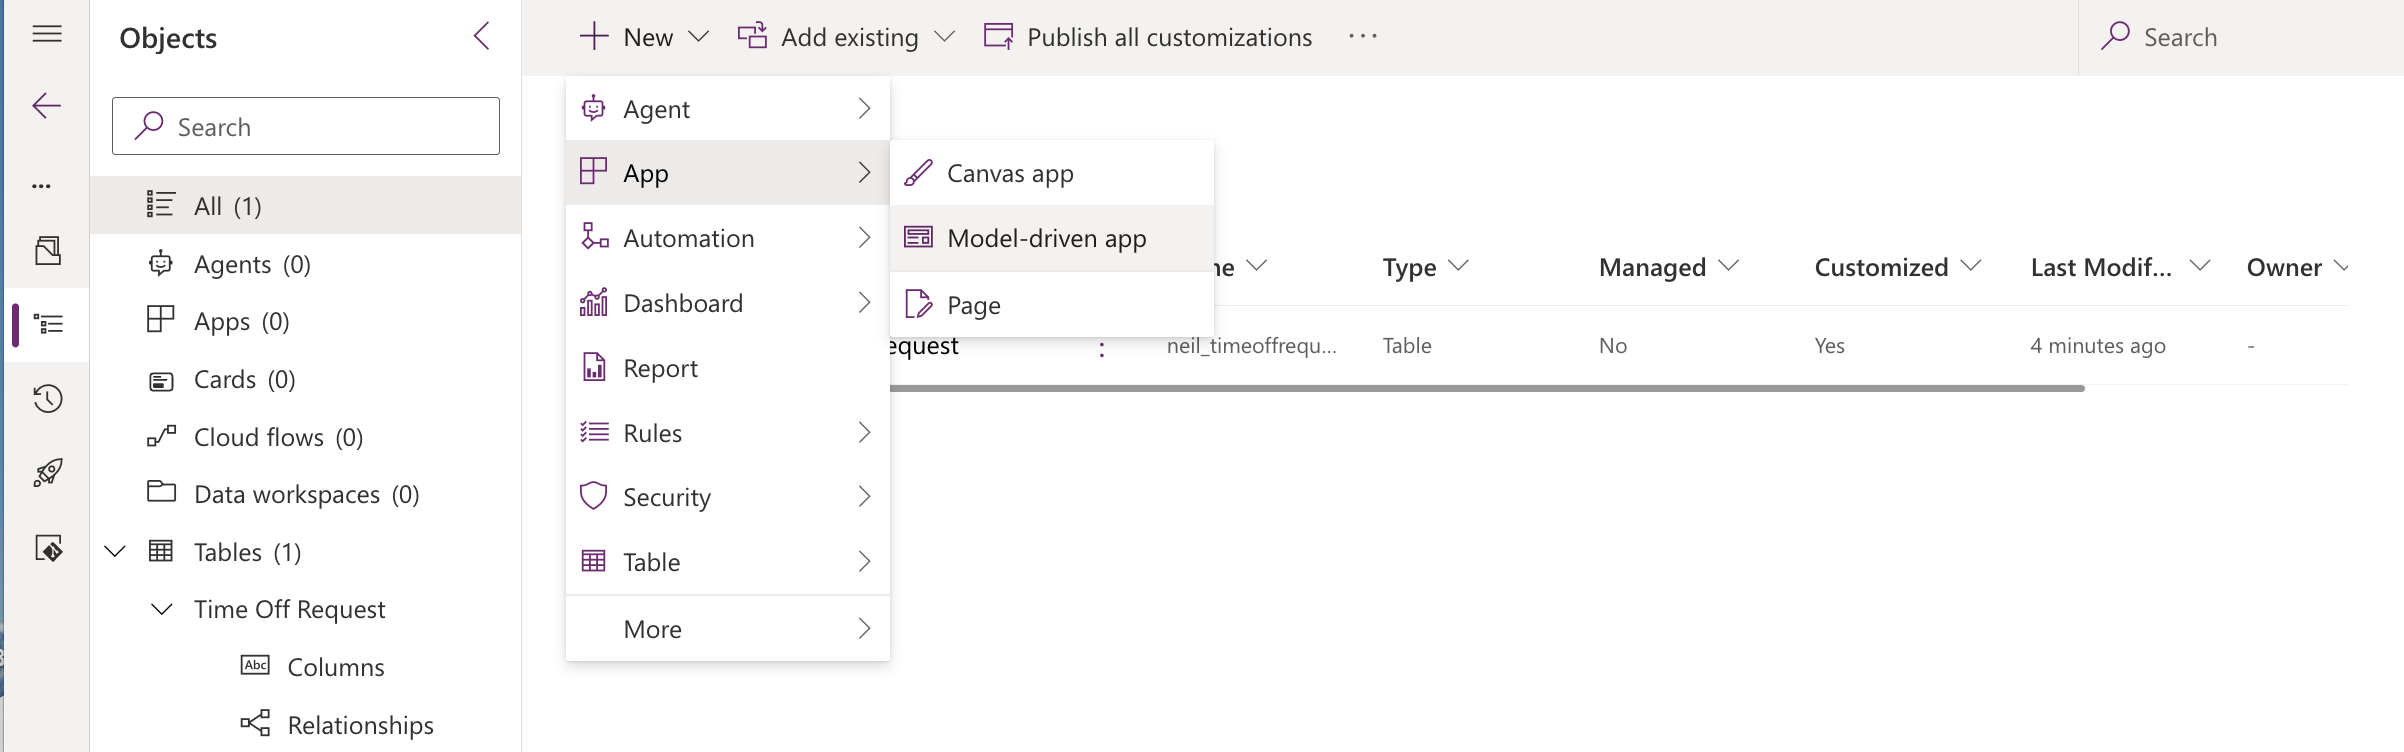
I selected New > App > Model-driven app from the solution menu.
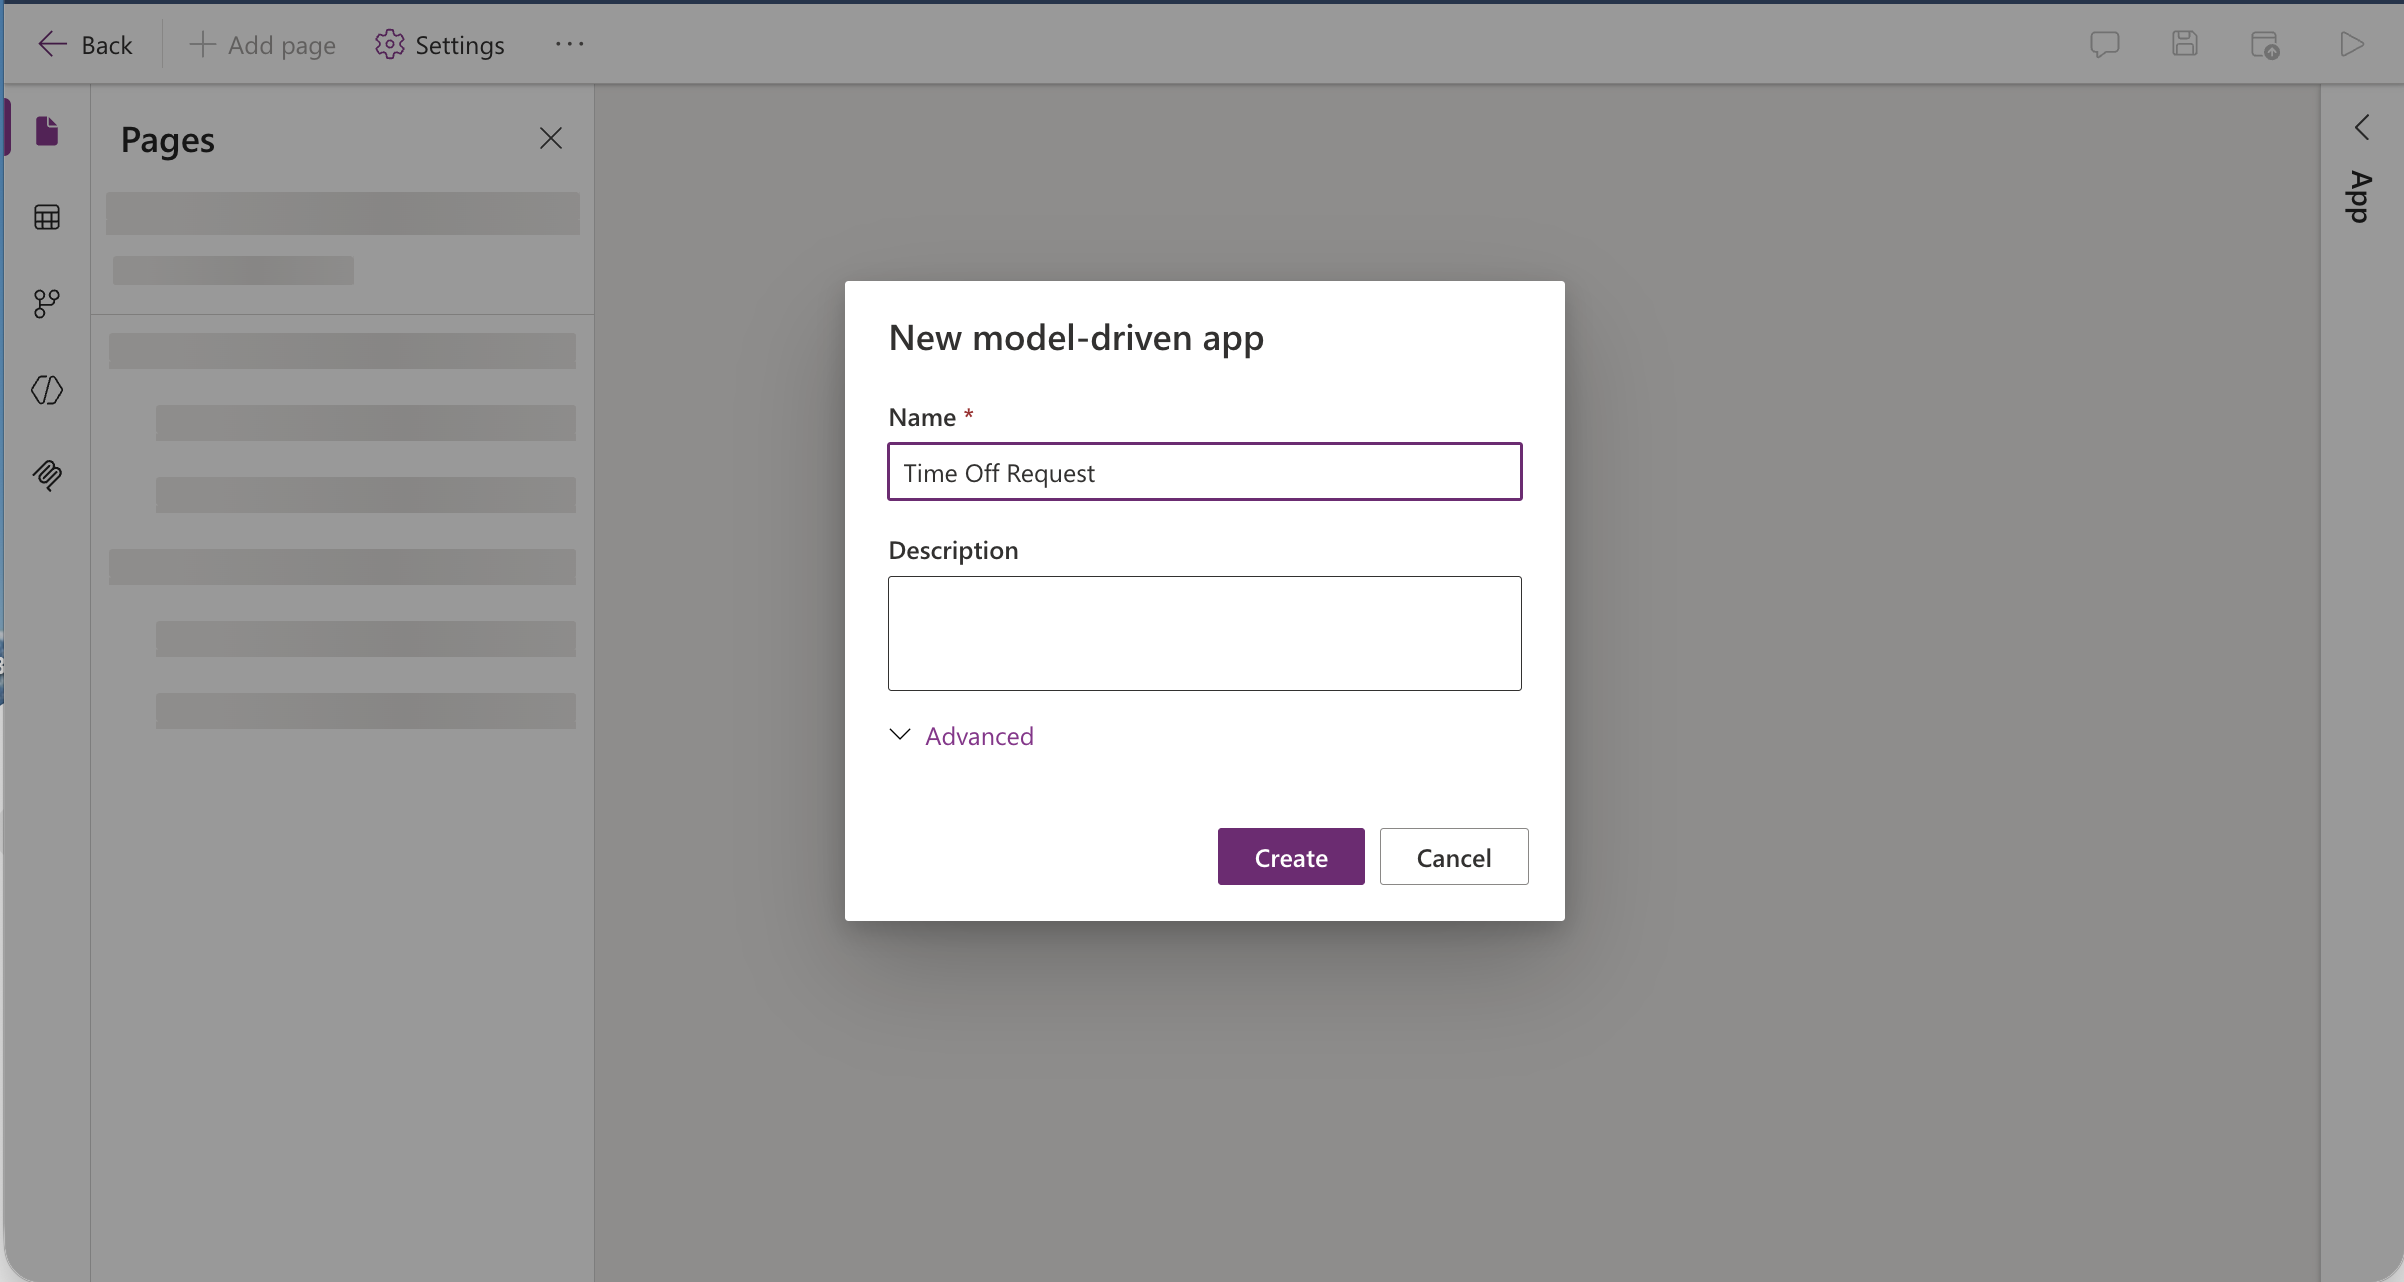
I named the new app "Time Off Request" in the dialog.
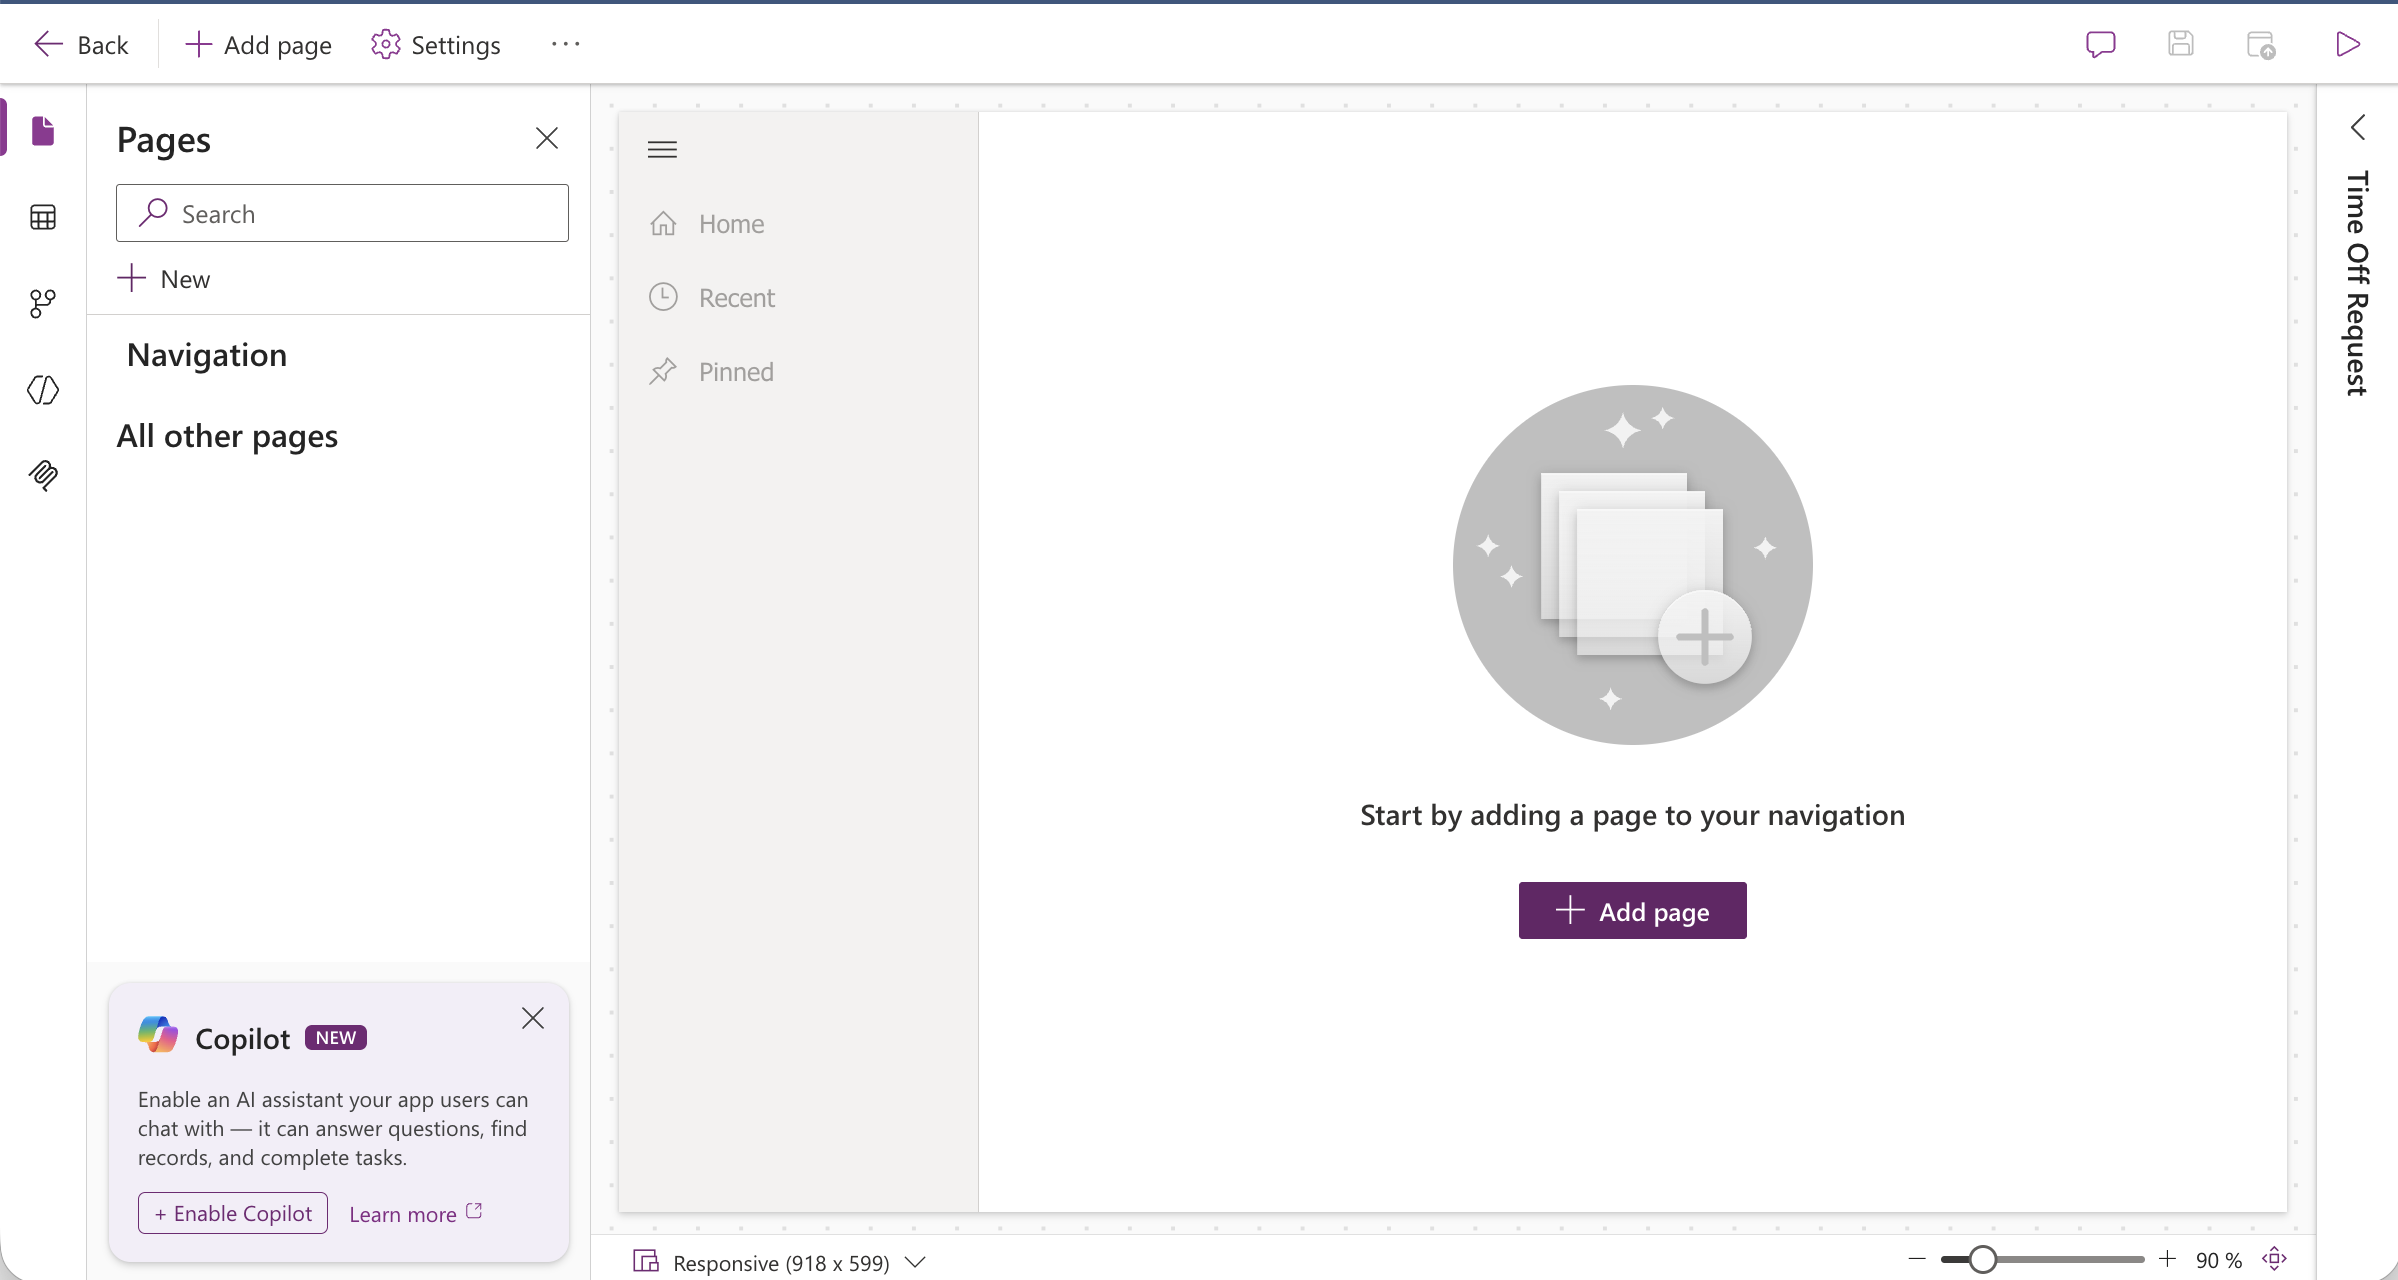
The app designer opened with no pages yet — I clicked Add page to wire up the table.
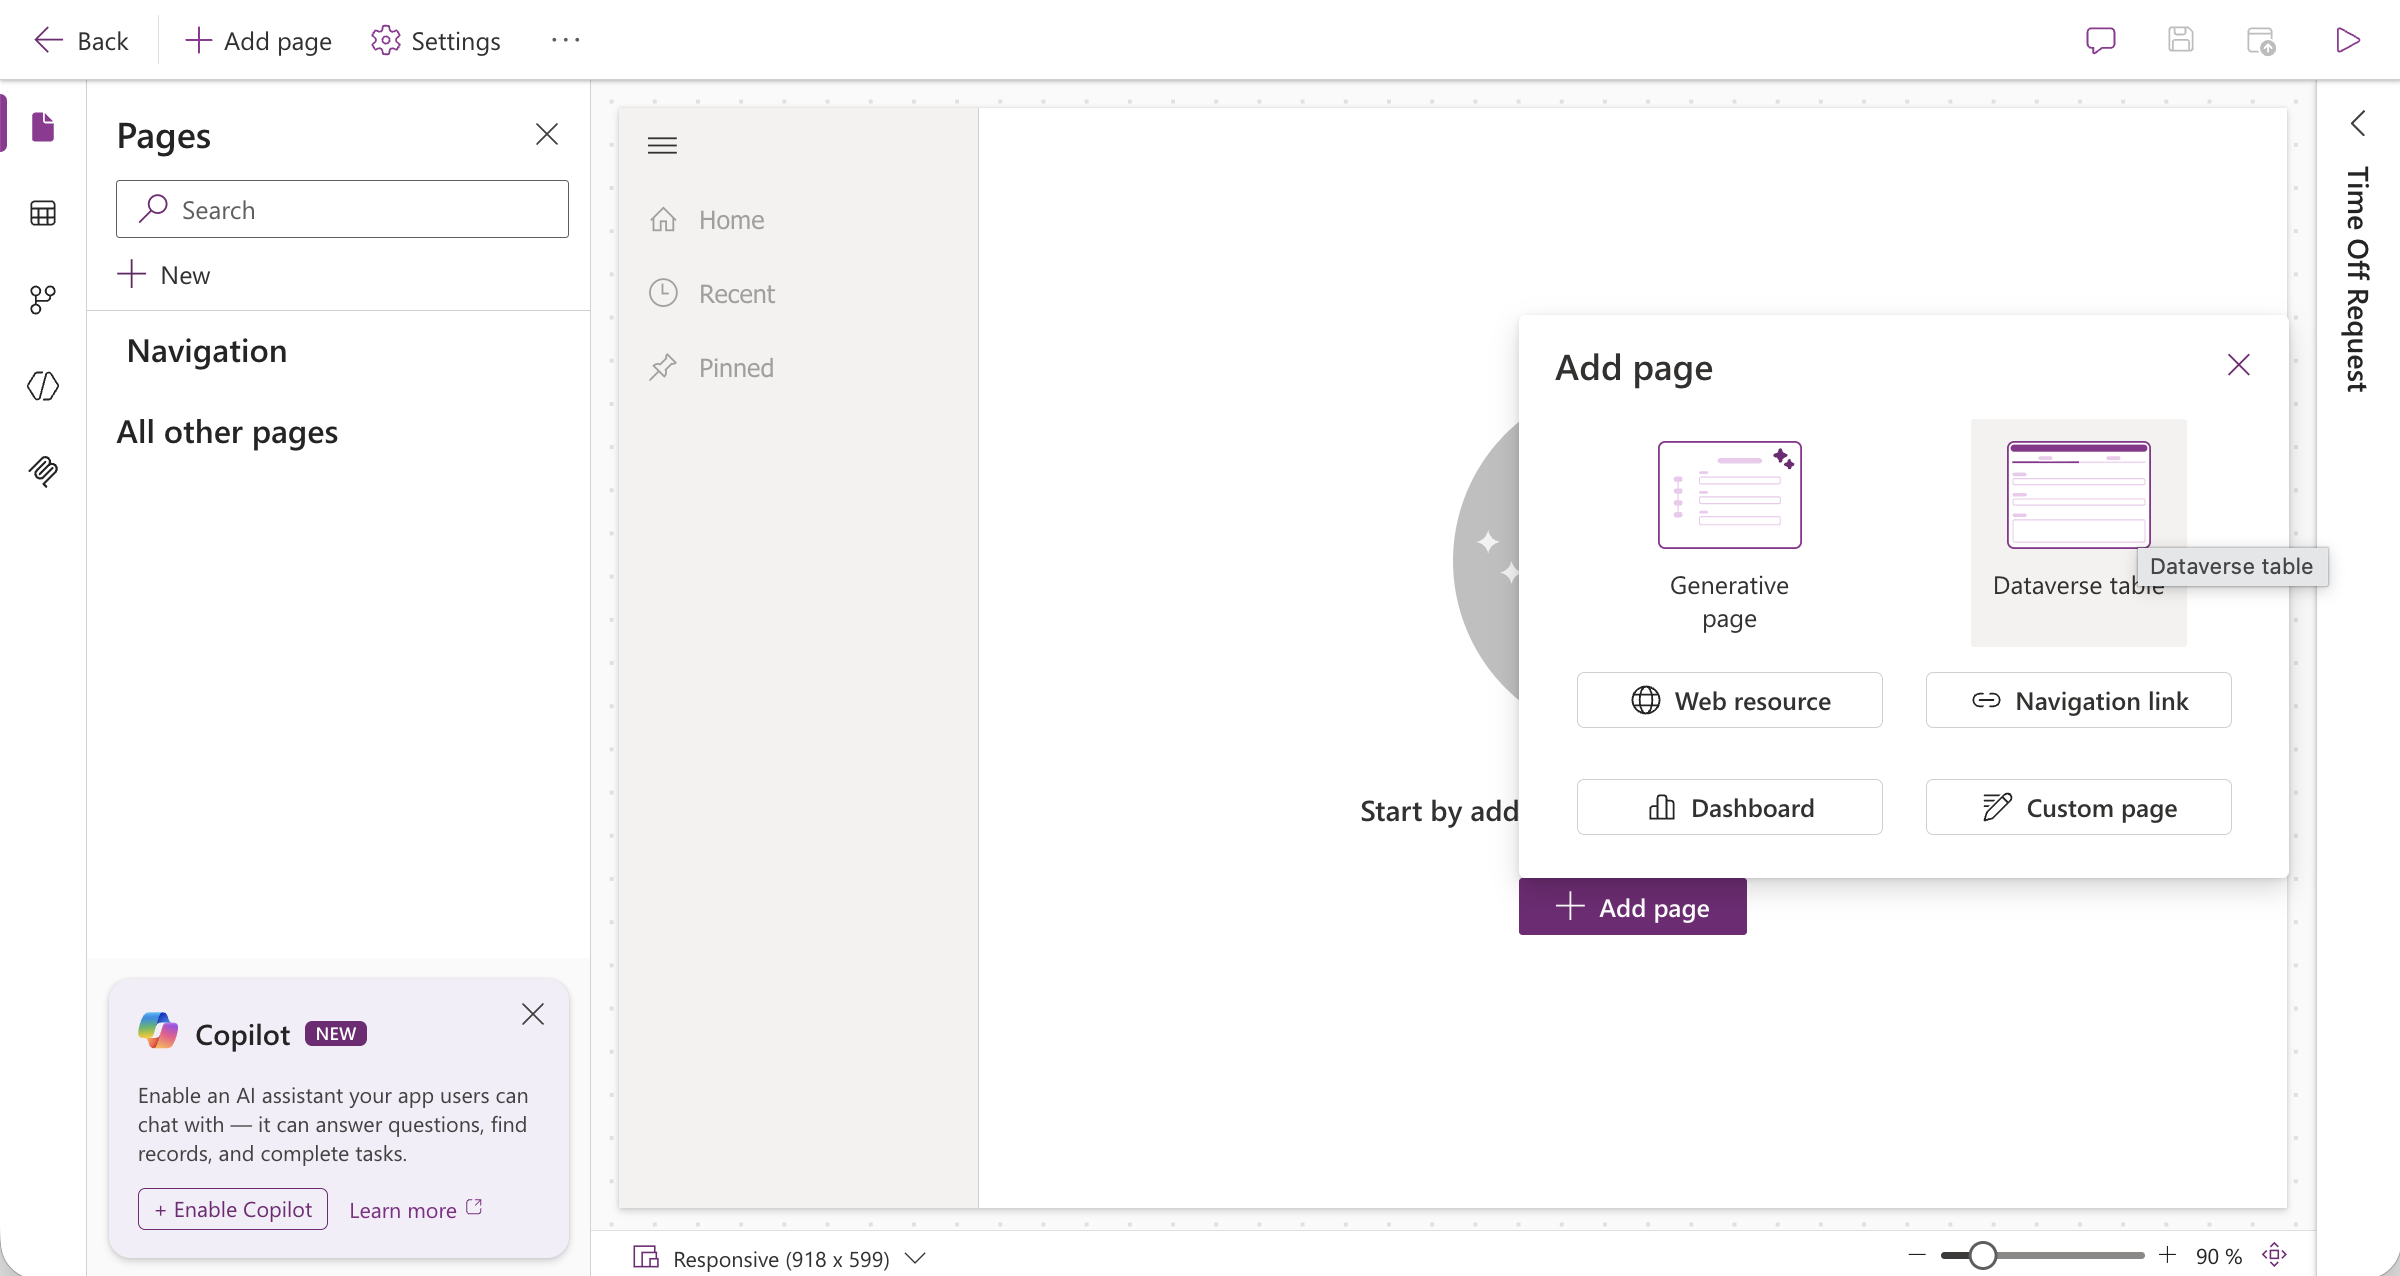
I selected Dataverse table as the page type.
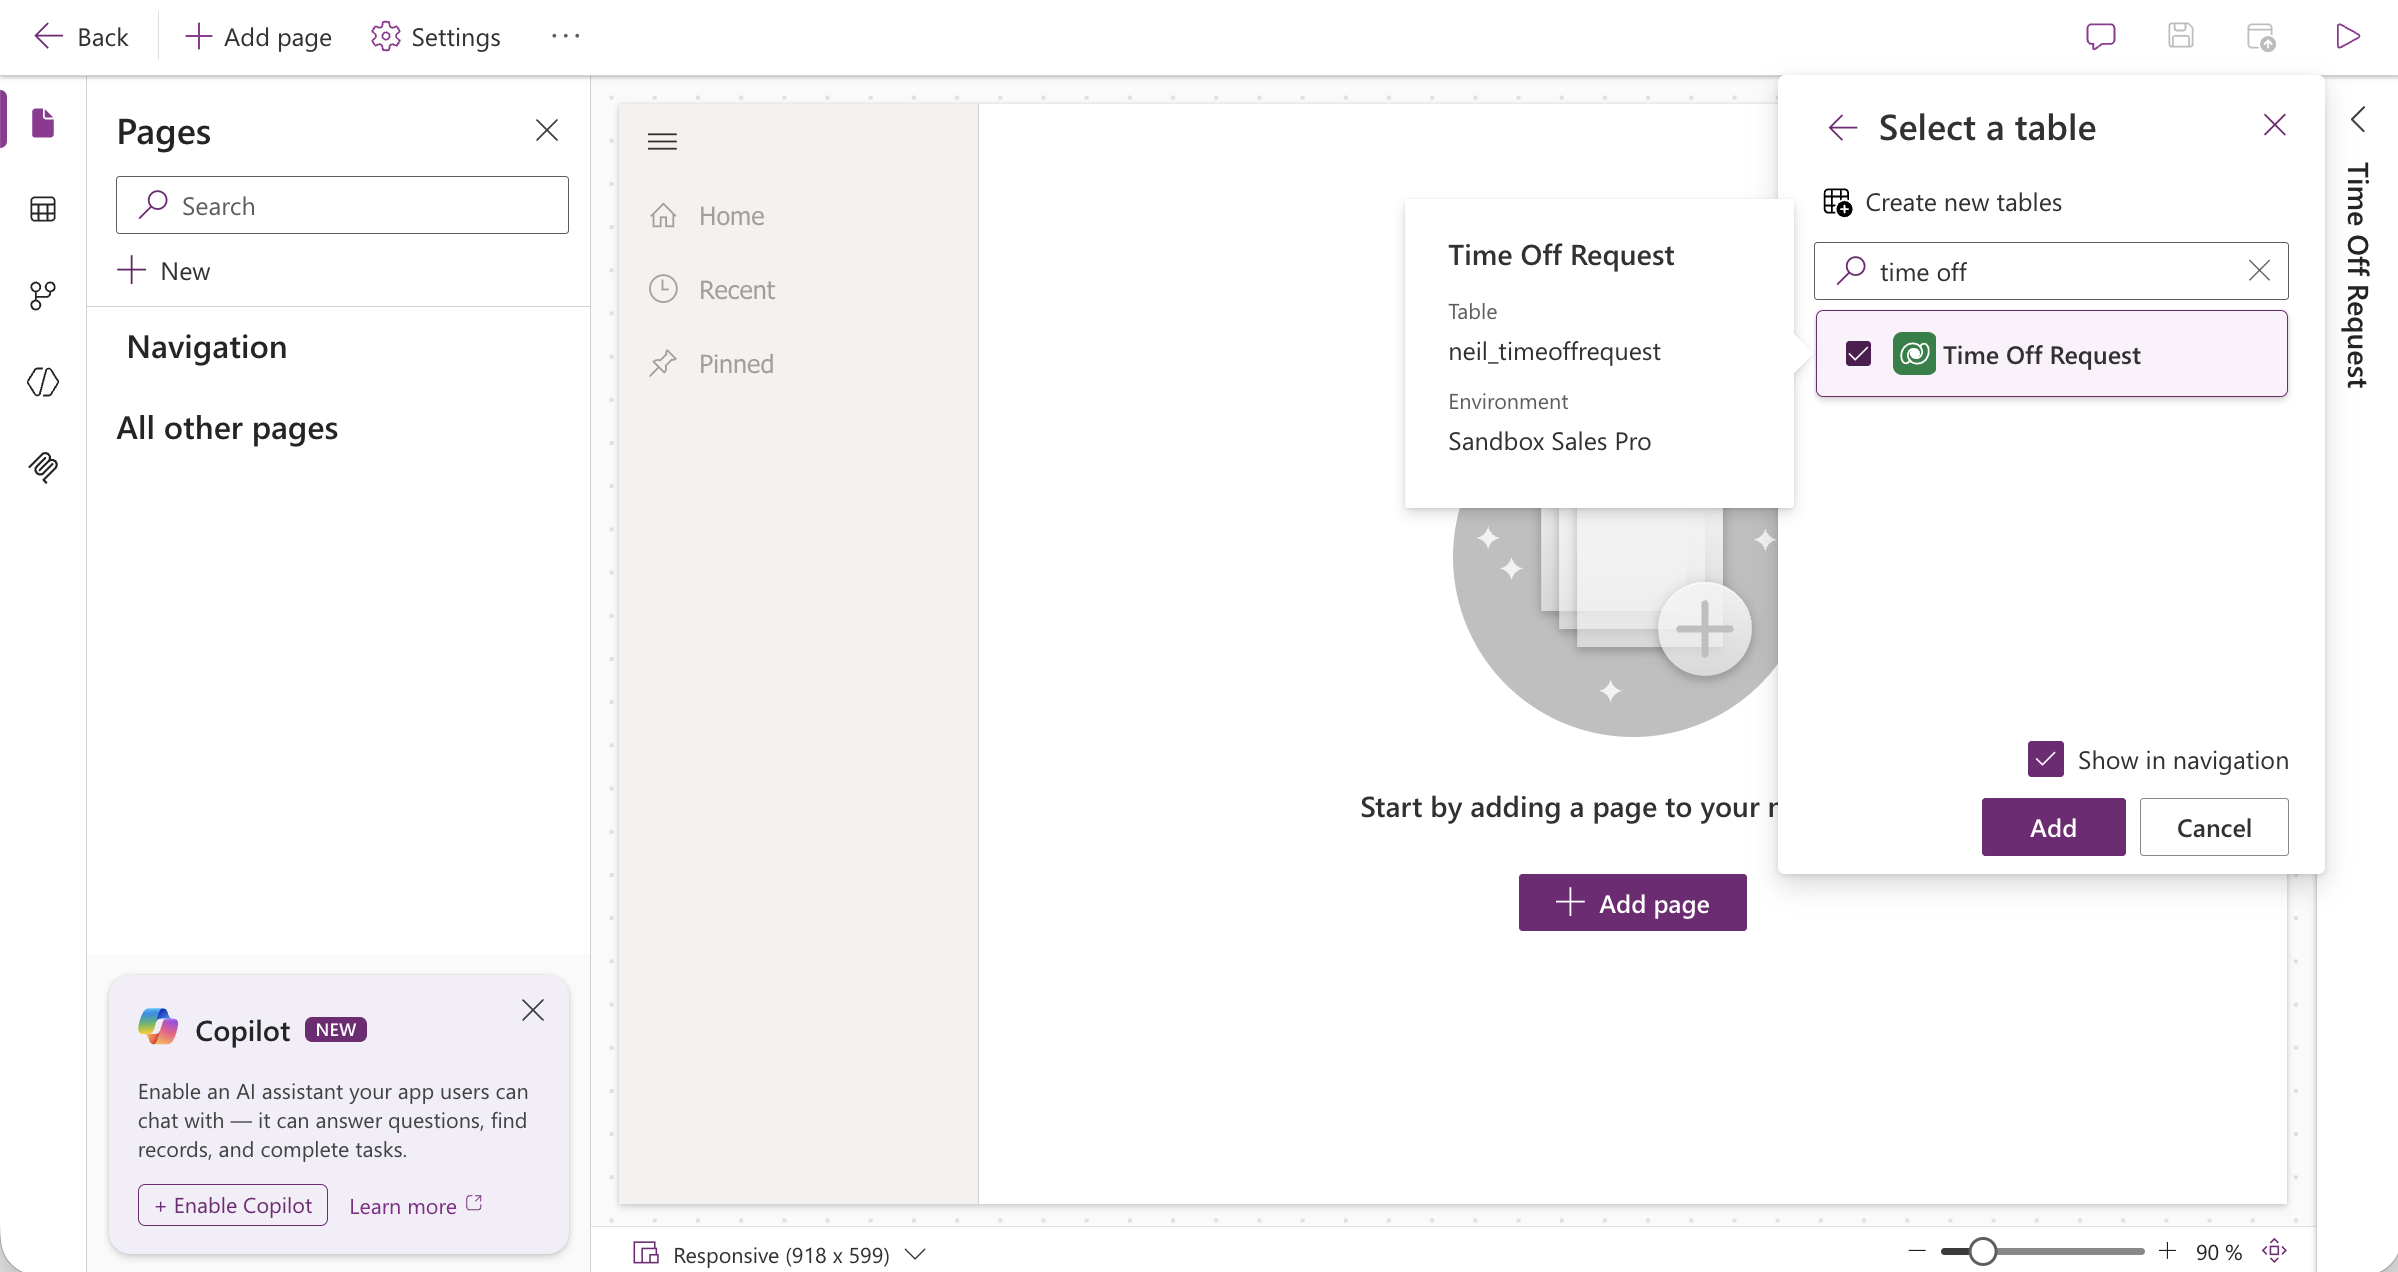
I selected the Time Off Request table from the picker.
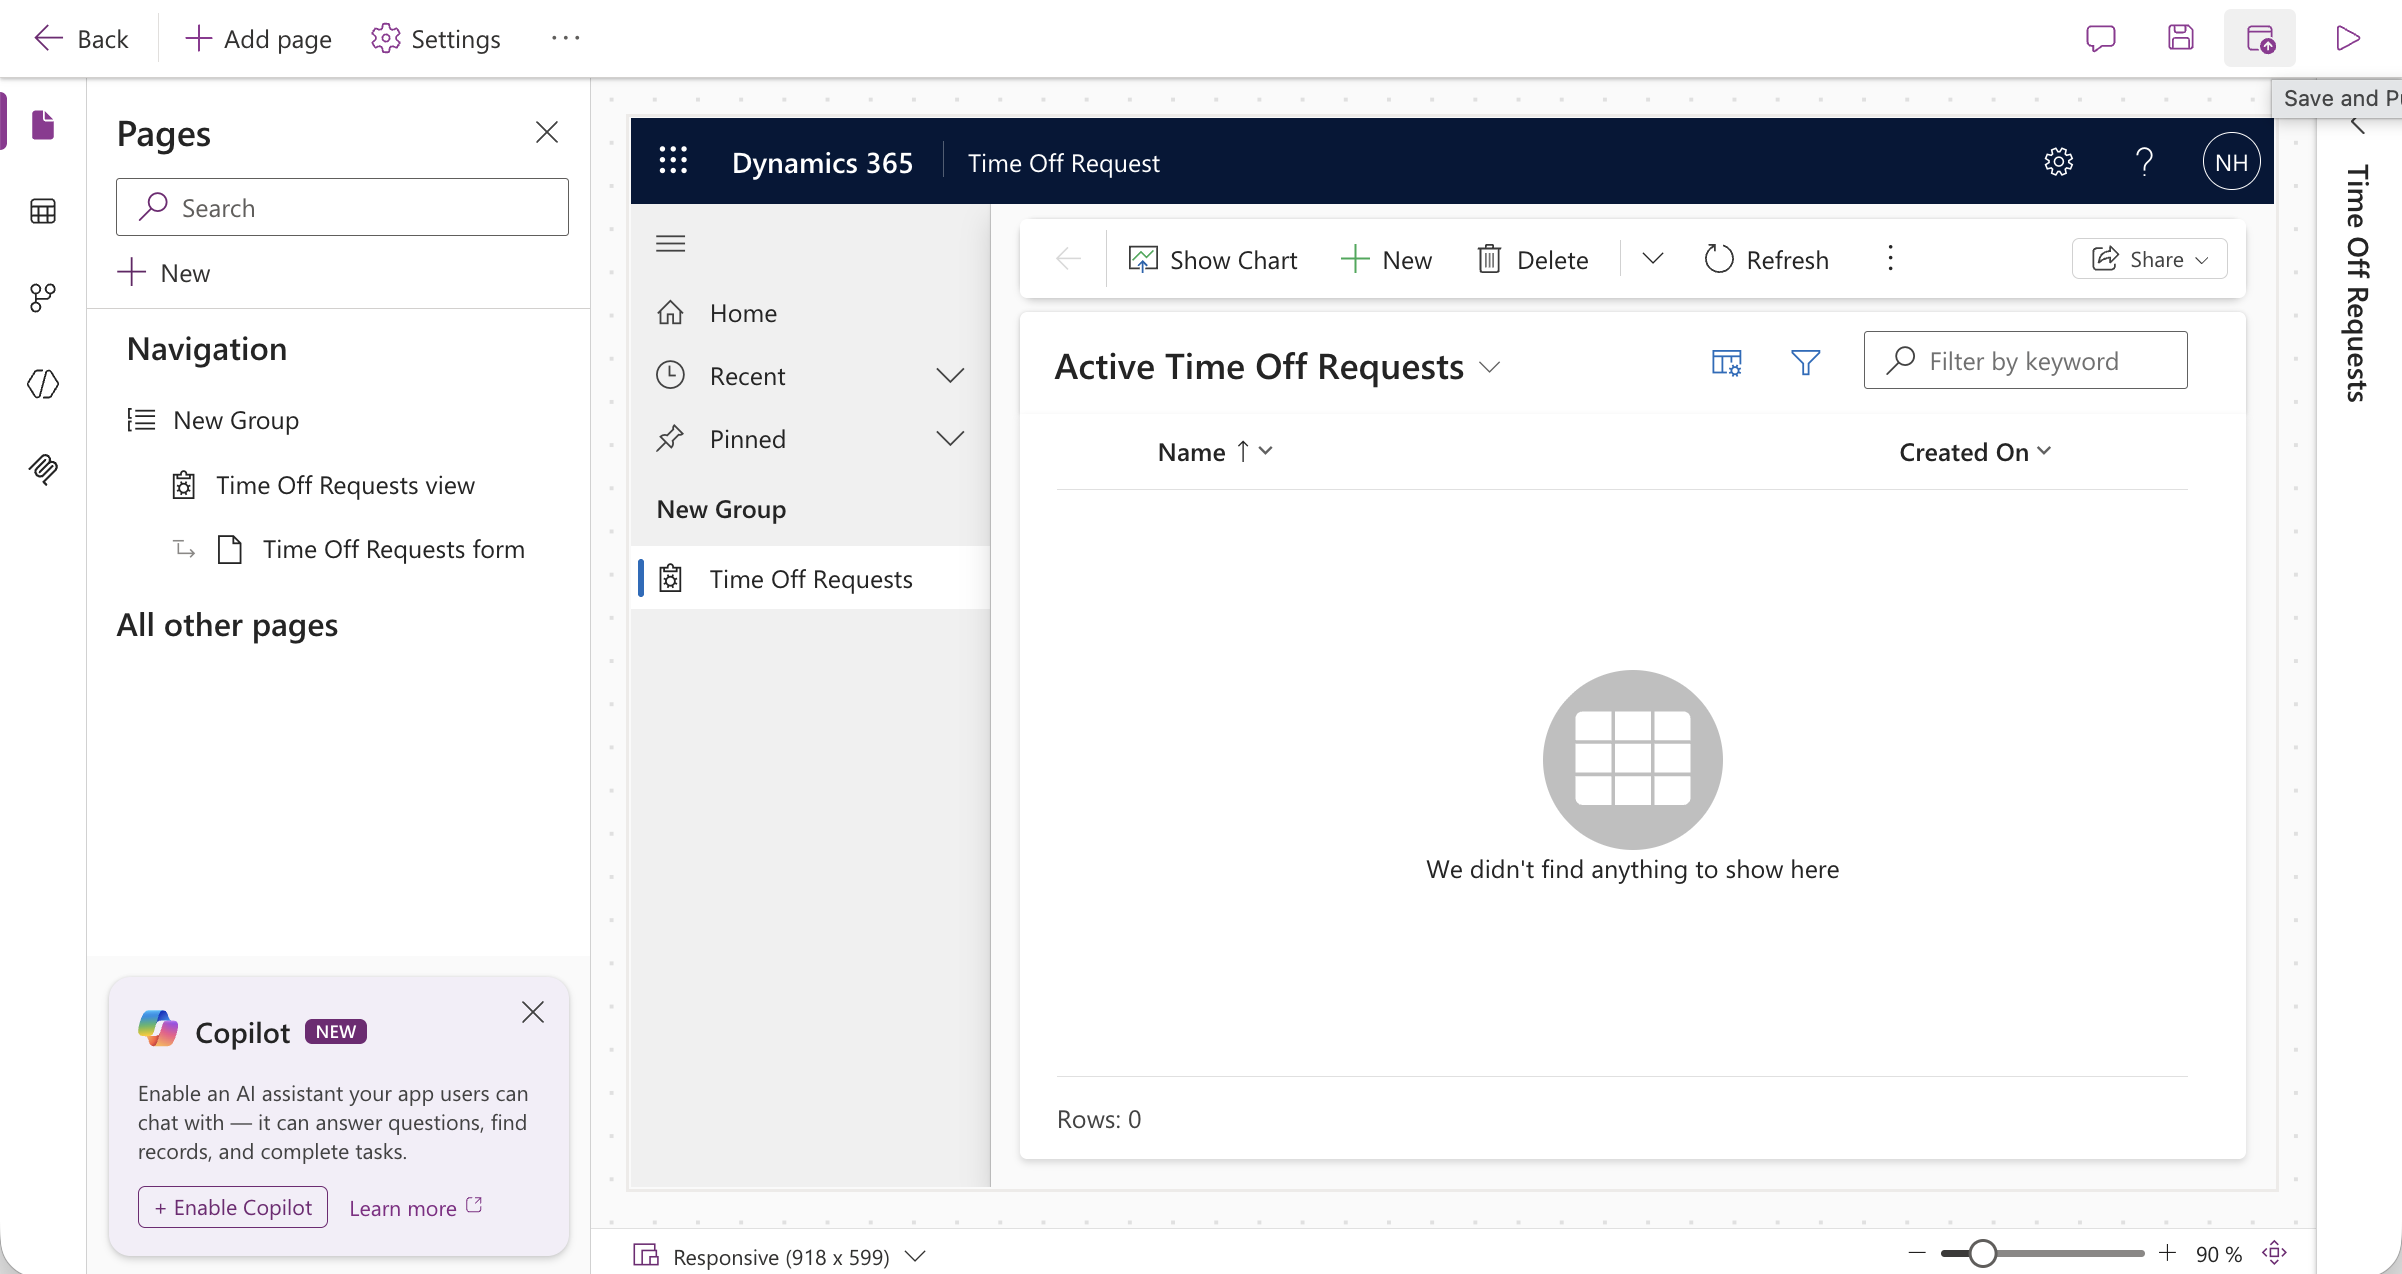
The app designer now showed a Time Off Requests view in the navigation.

The app preview showed the Deactivate button in the command bar — ready to test.
Default activate/deactivate behaviour
I published and opened the live app to see how the default Activate and Deactivate buttons behave before any customisation.
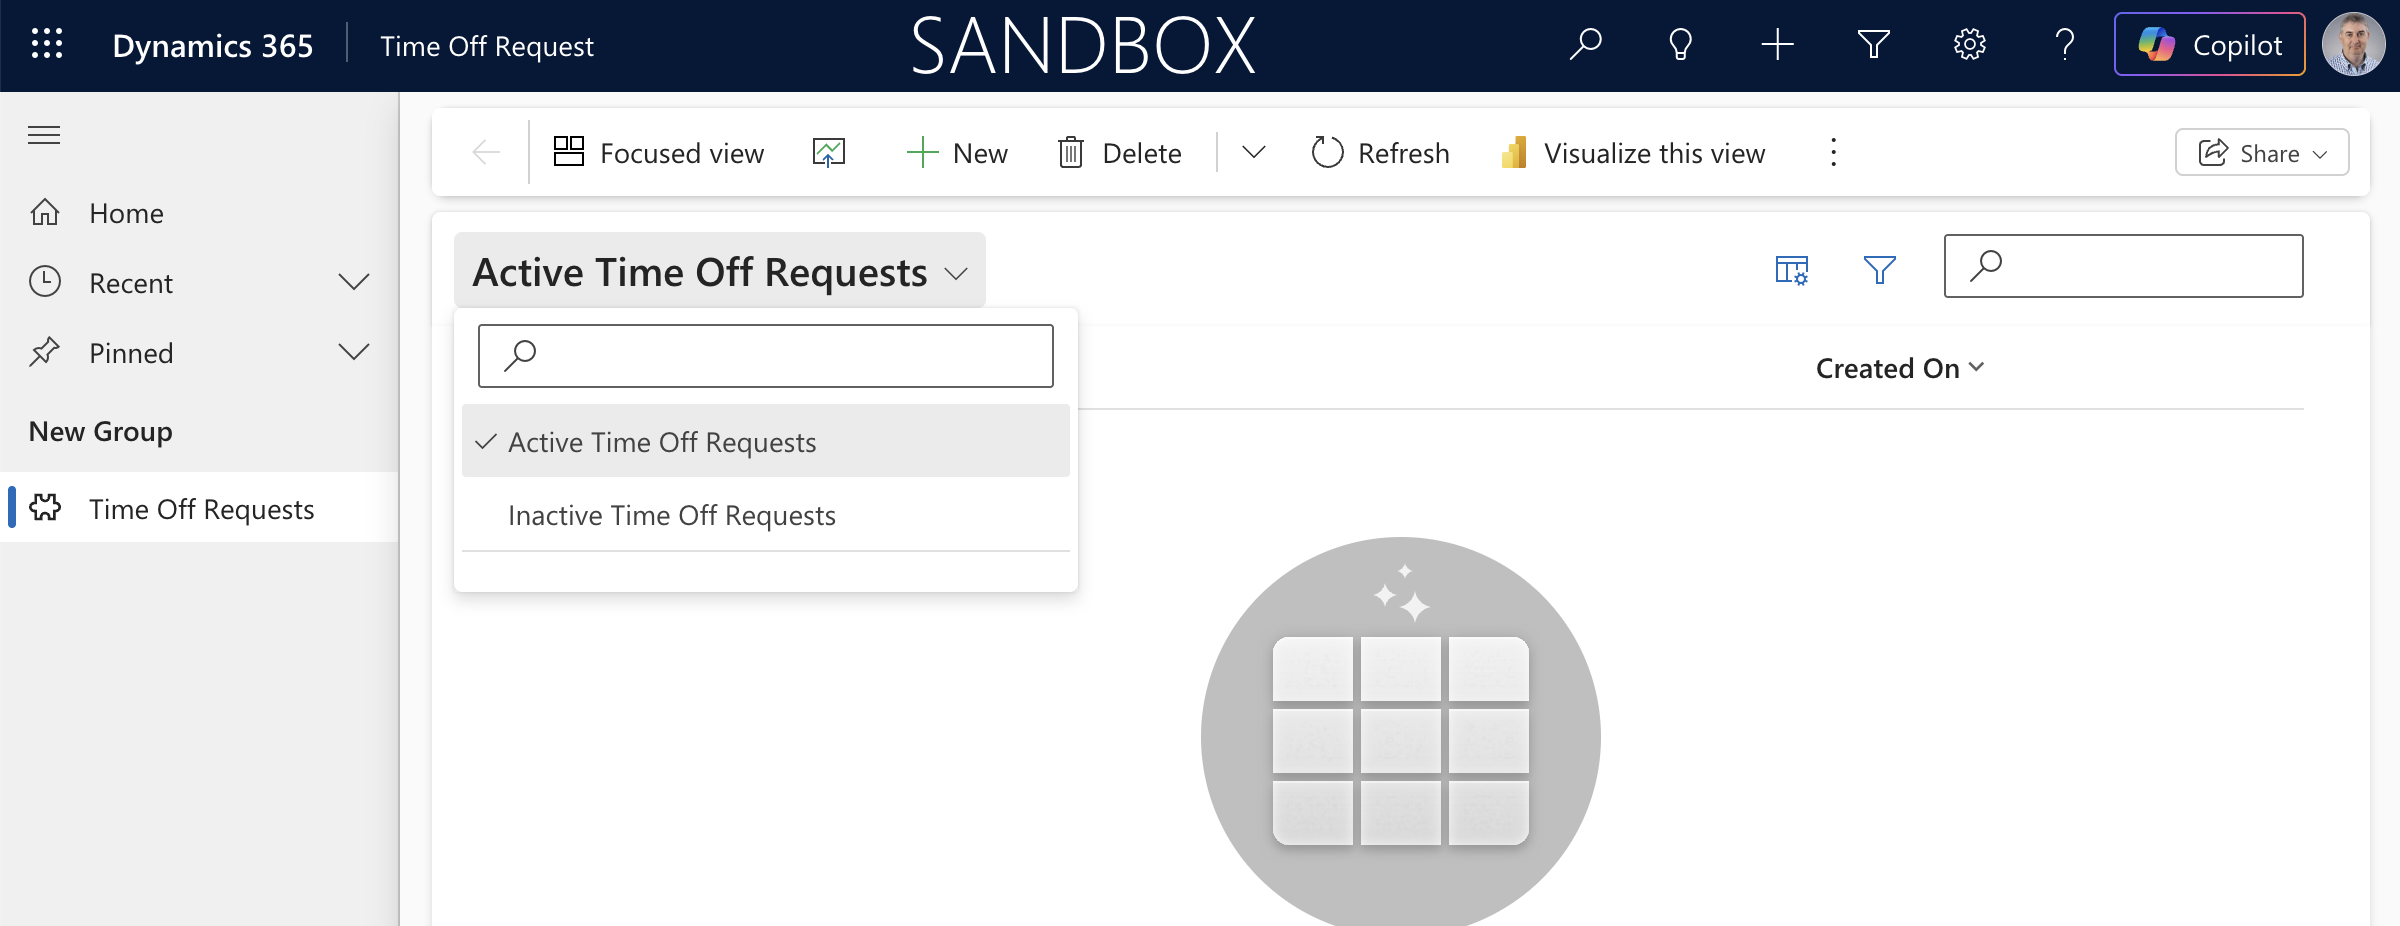
The live app showed the Active Time Off Requests view with a dropdown to switch to the Inactive view.
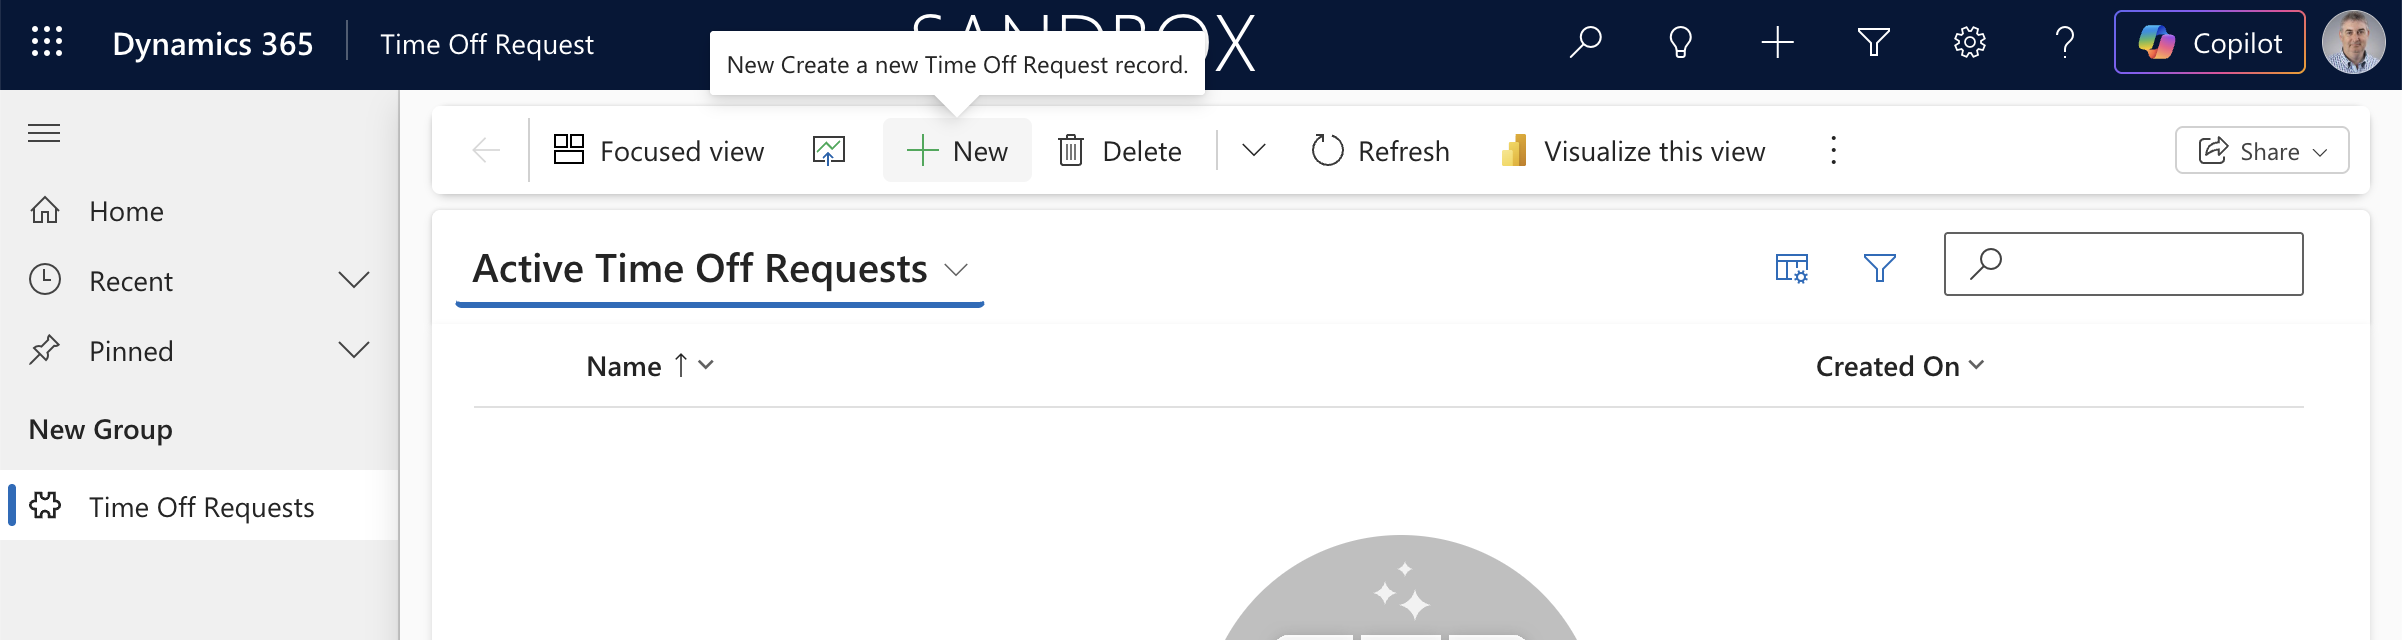
I hovered over the New button — ready to create my first test record.
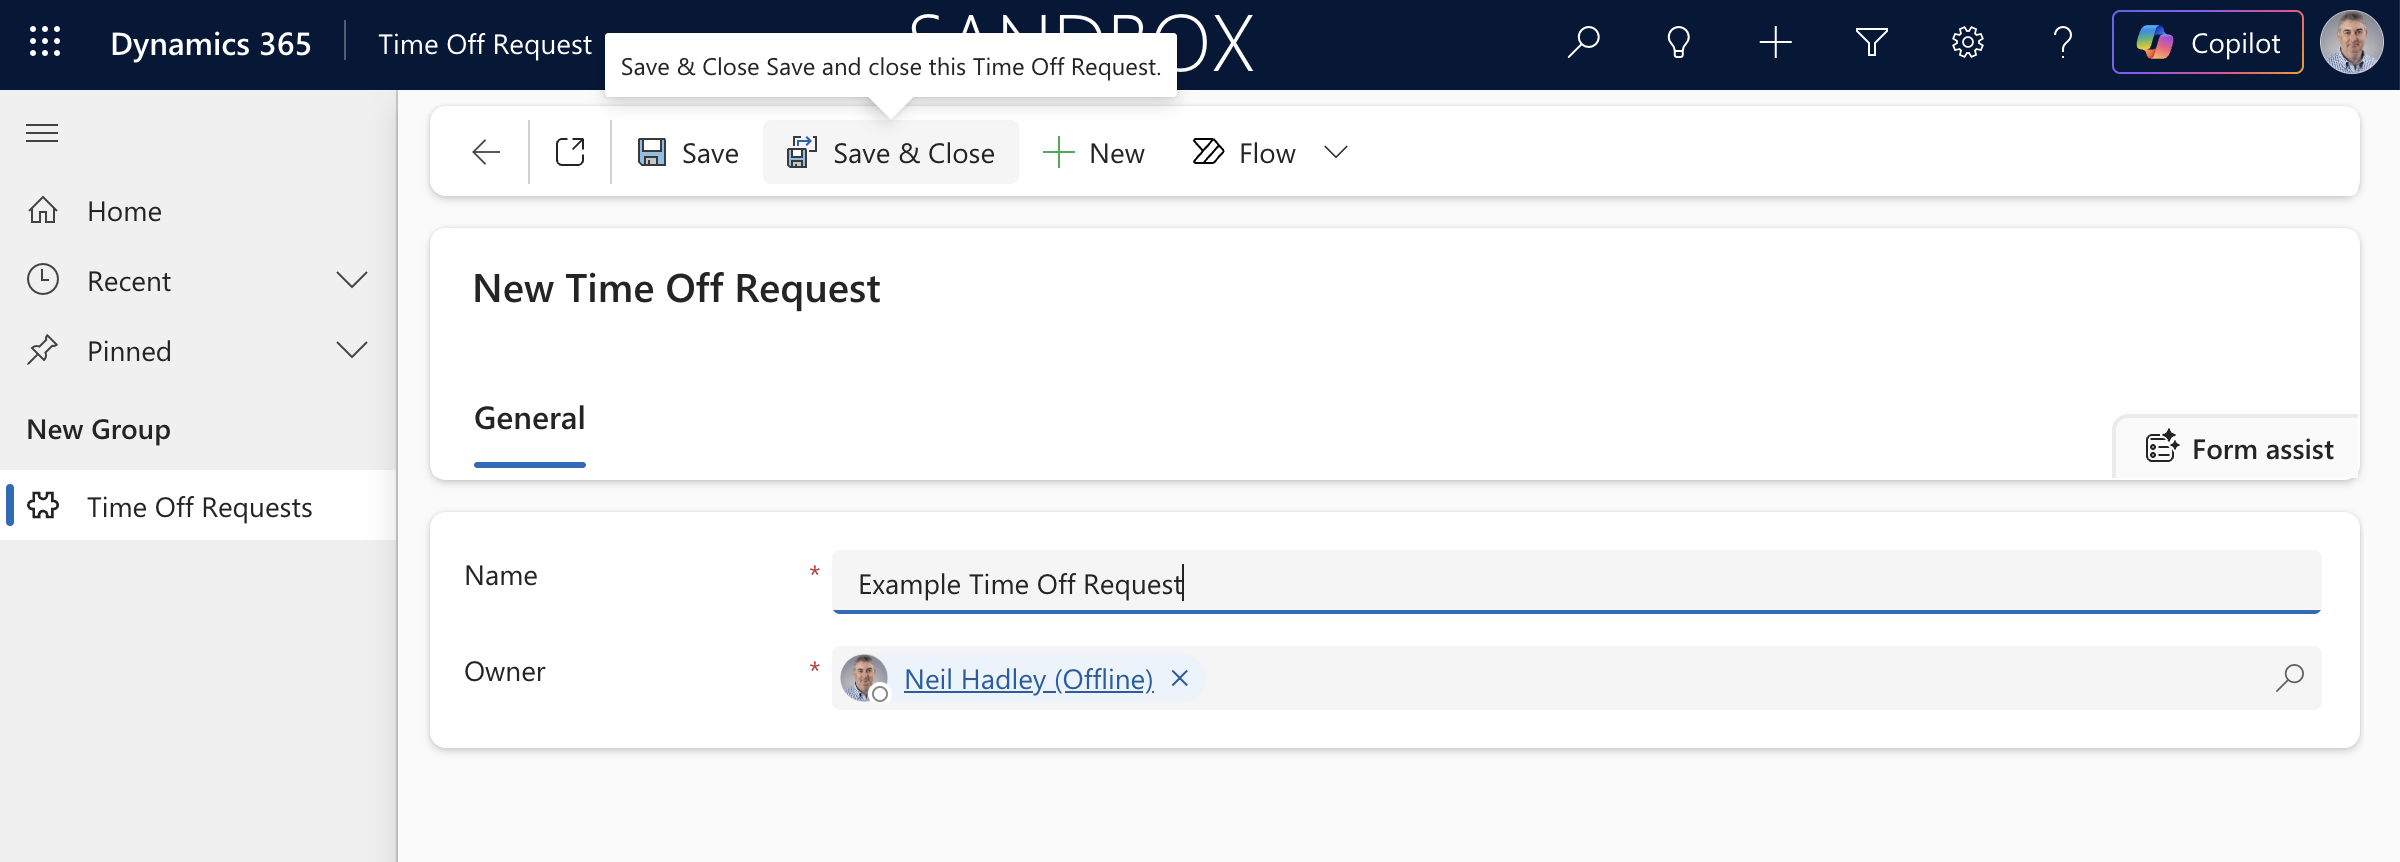
I created a new record called "Example Time Off Request" and saved it.
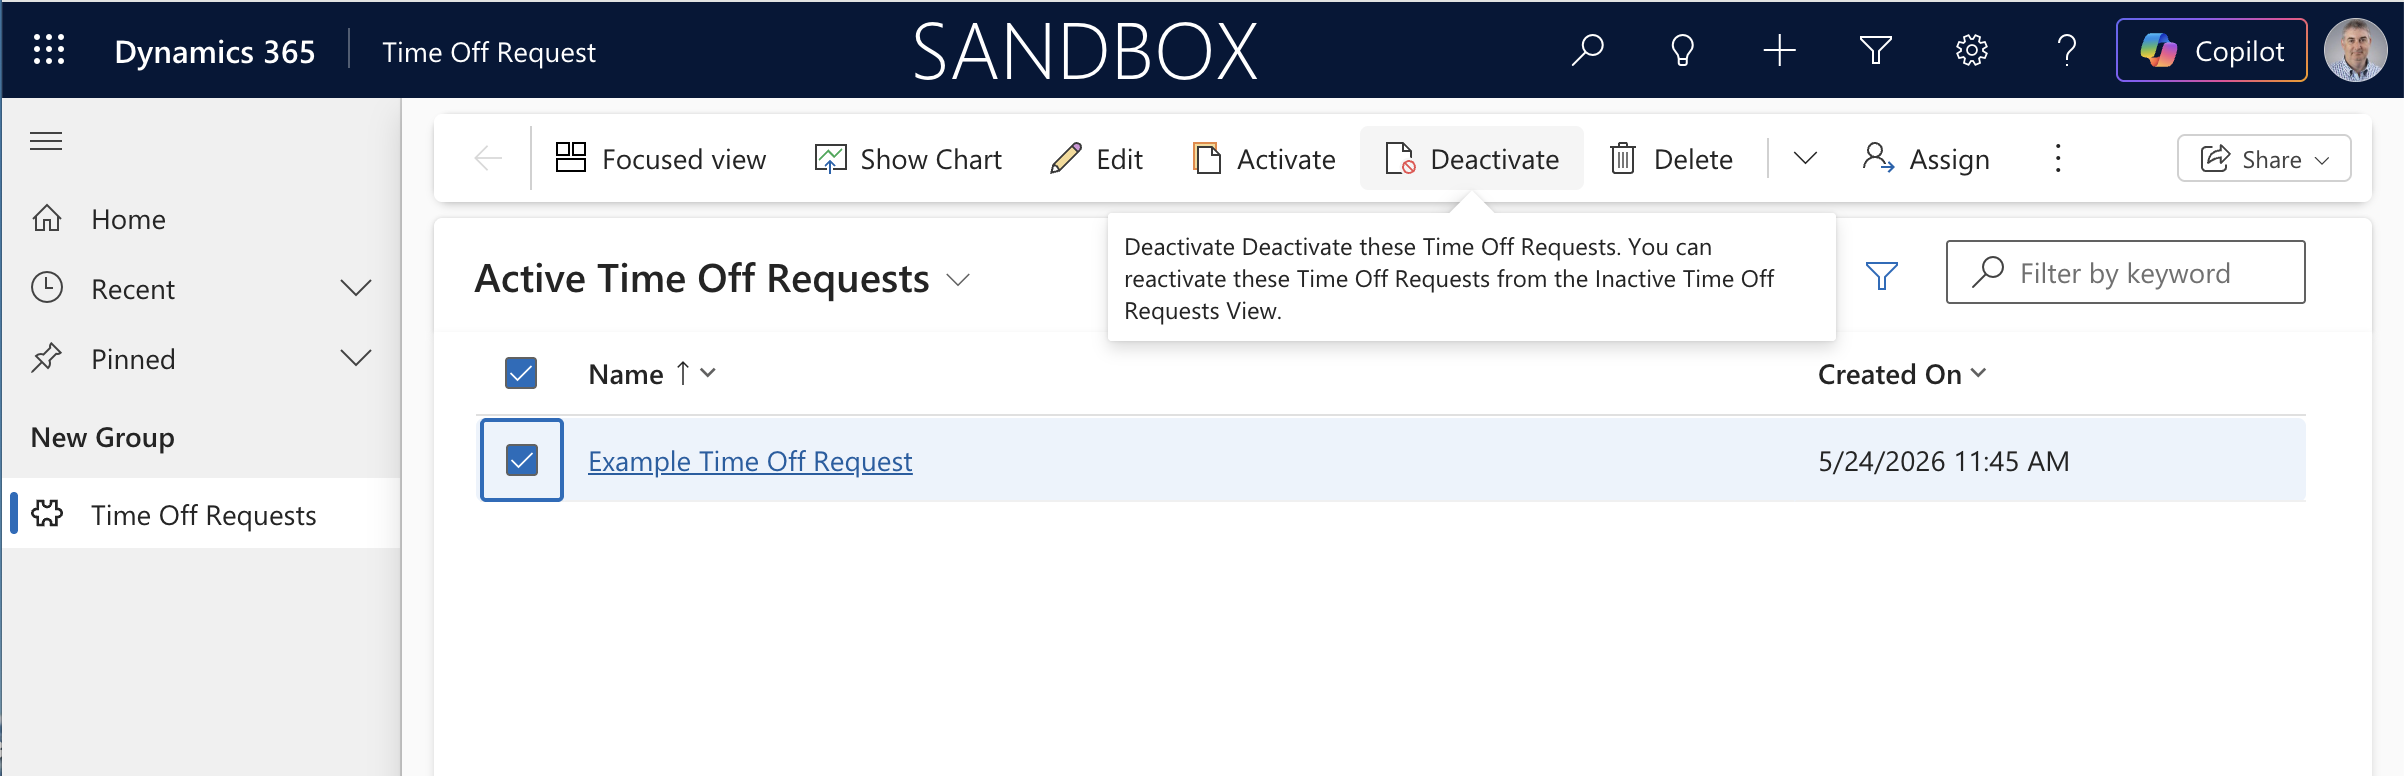
I selected the record in the list view and hovered over the Deactivate button.
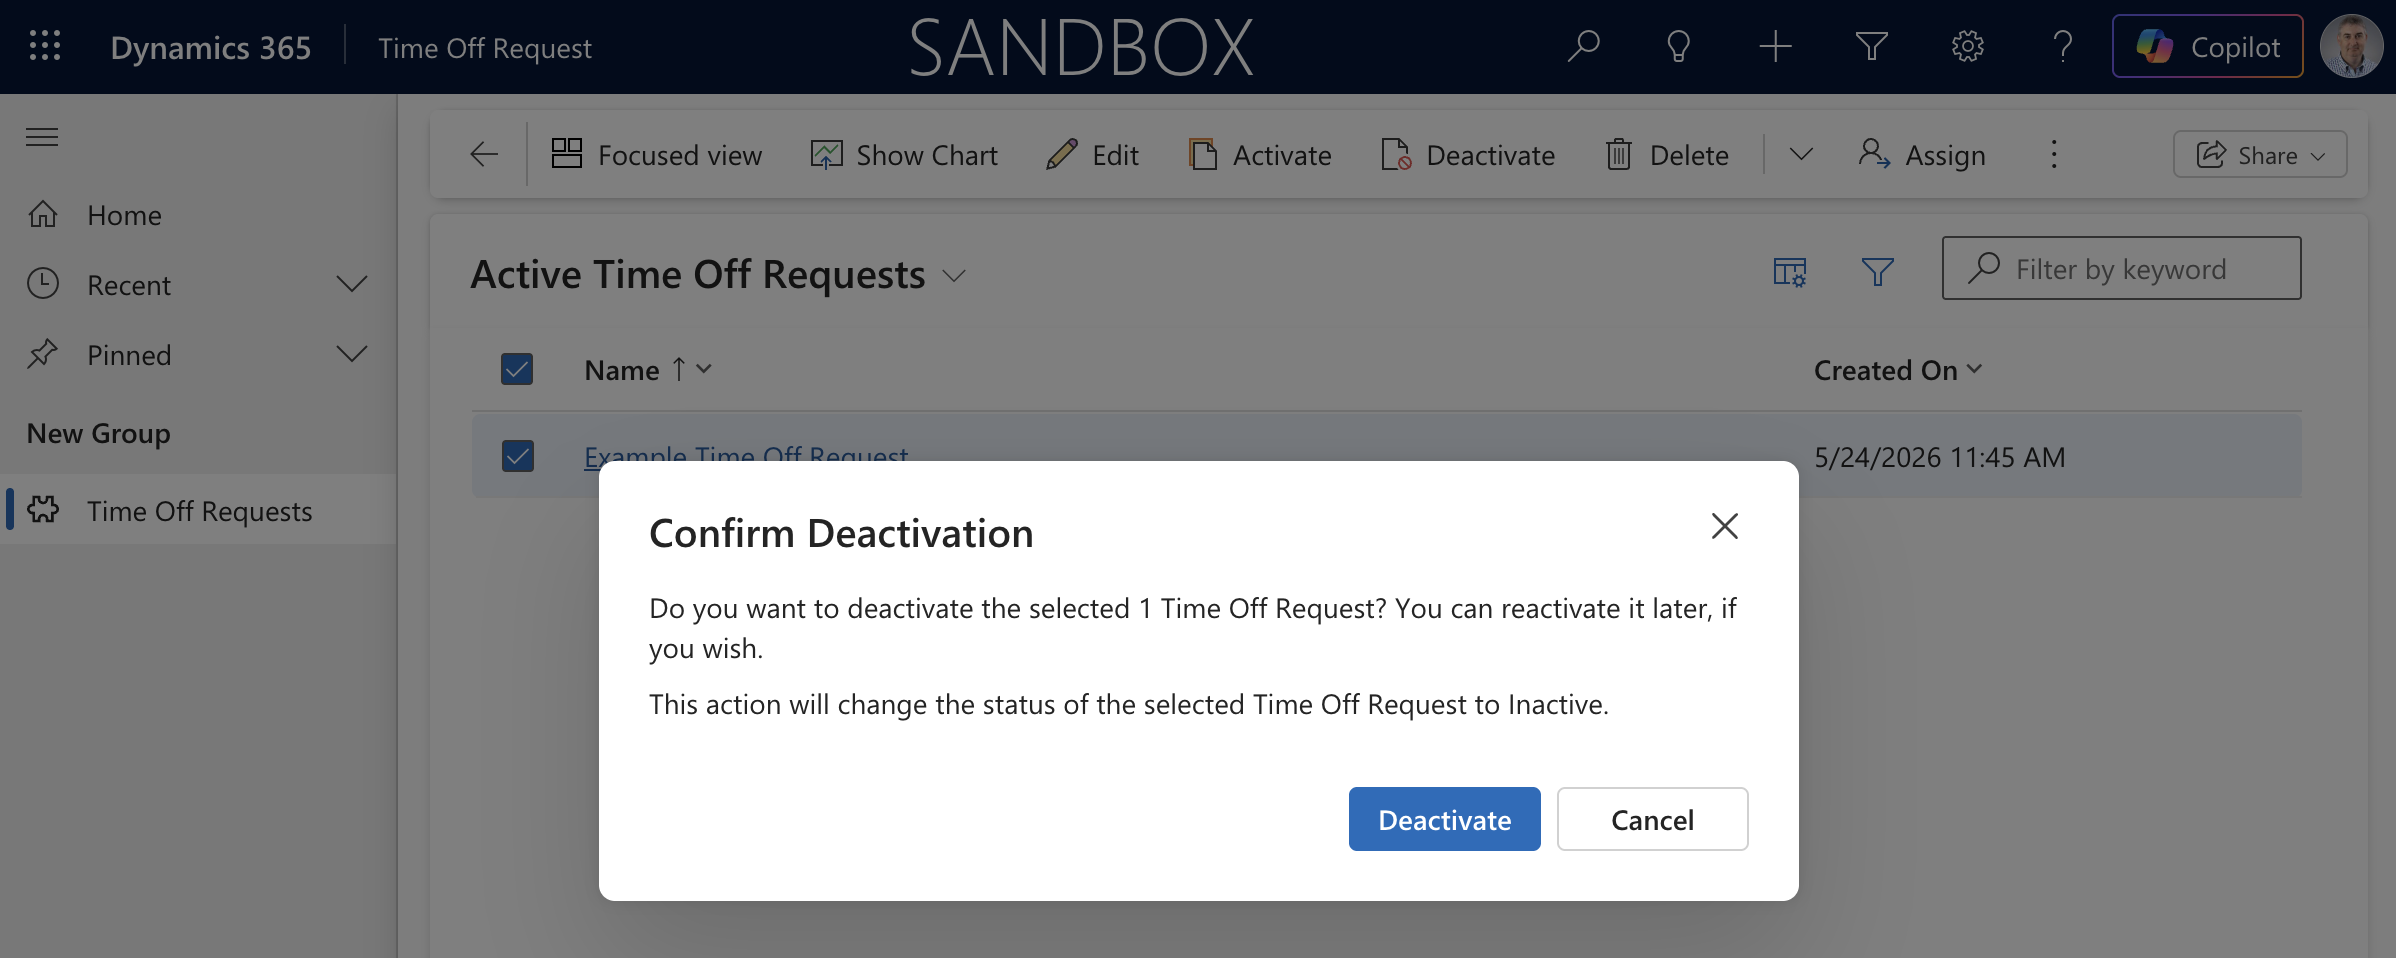
The Confirm Deactivation dialog appeared — but there was no Status Reason field. It just asked me to confirm.
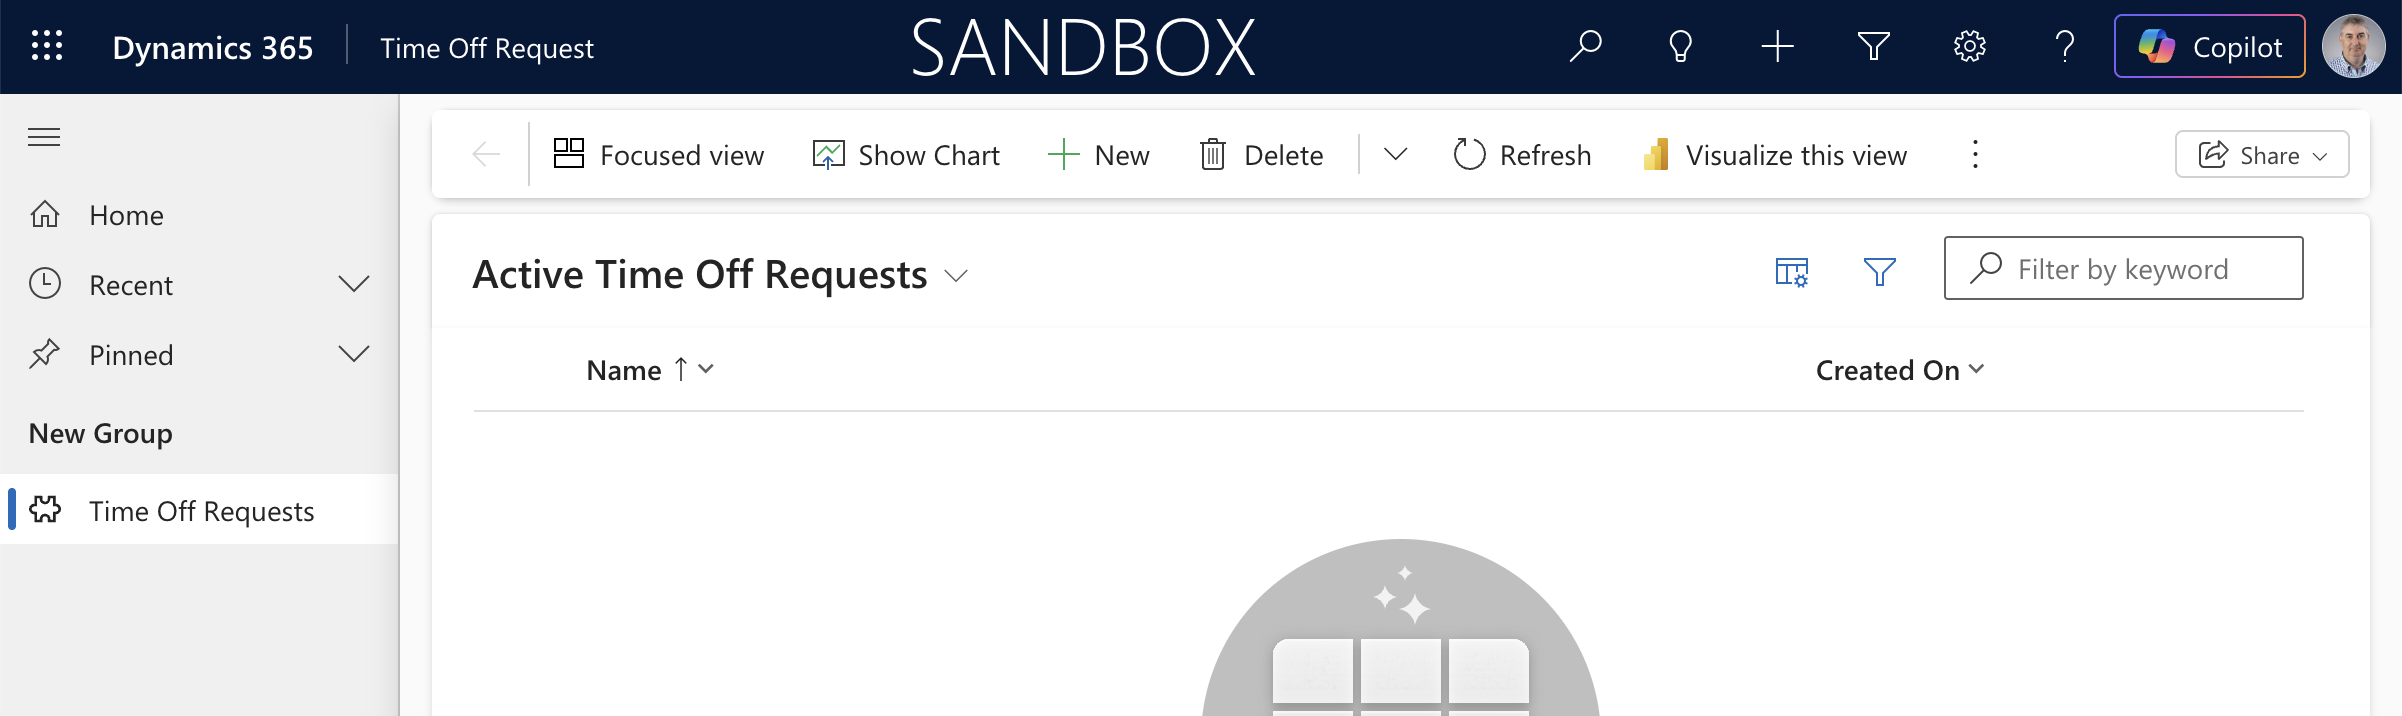
After confirming, the Active view was empty — the record had been deactivated with no reason captured.
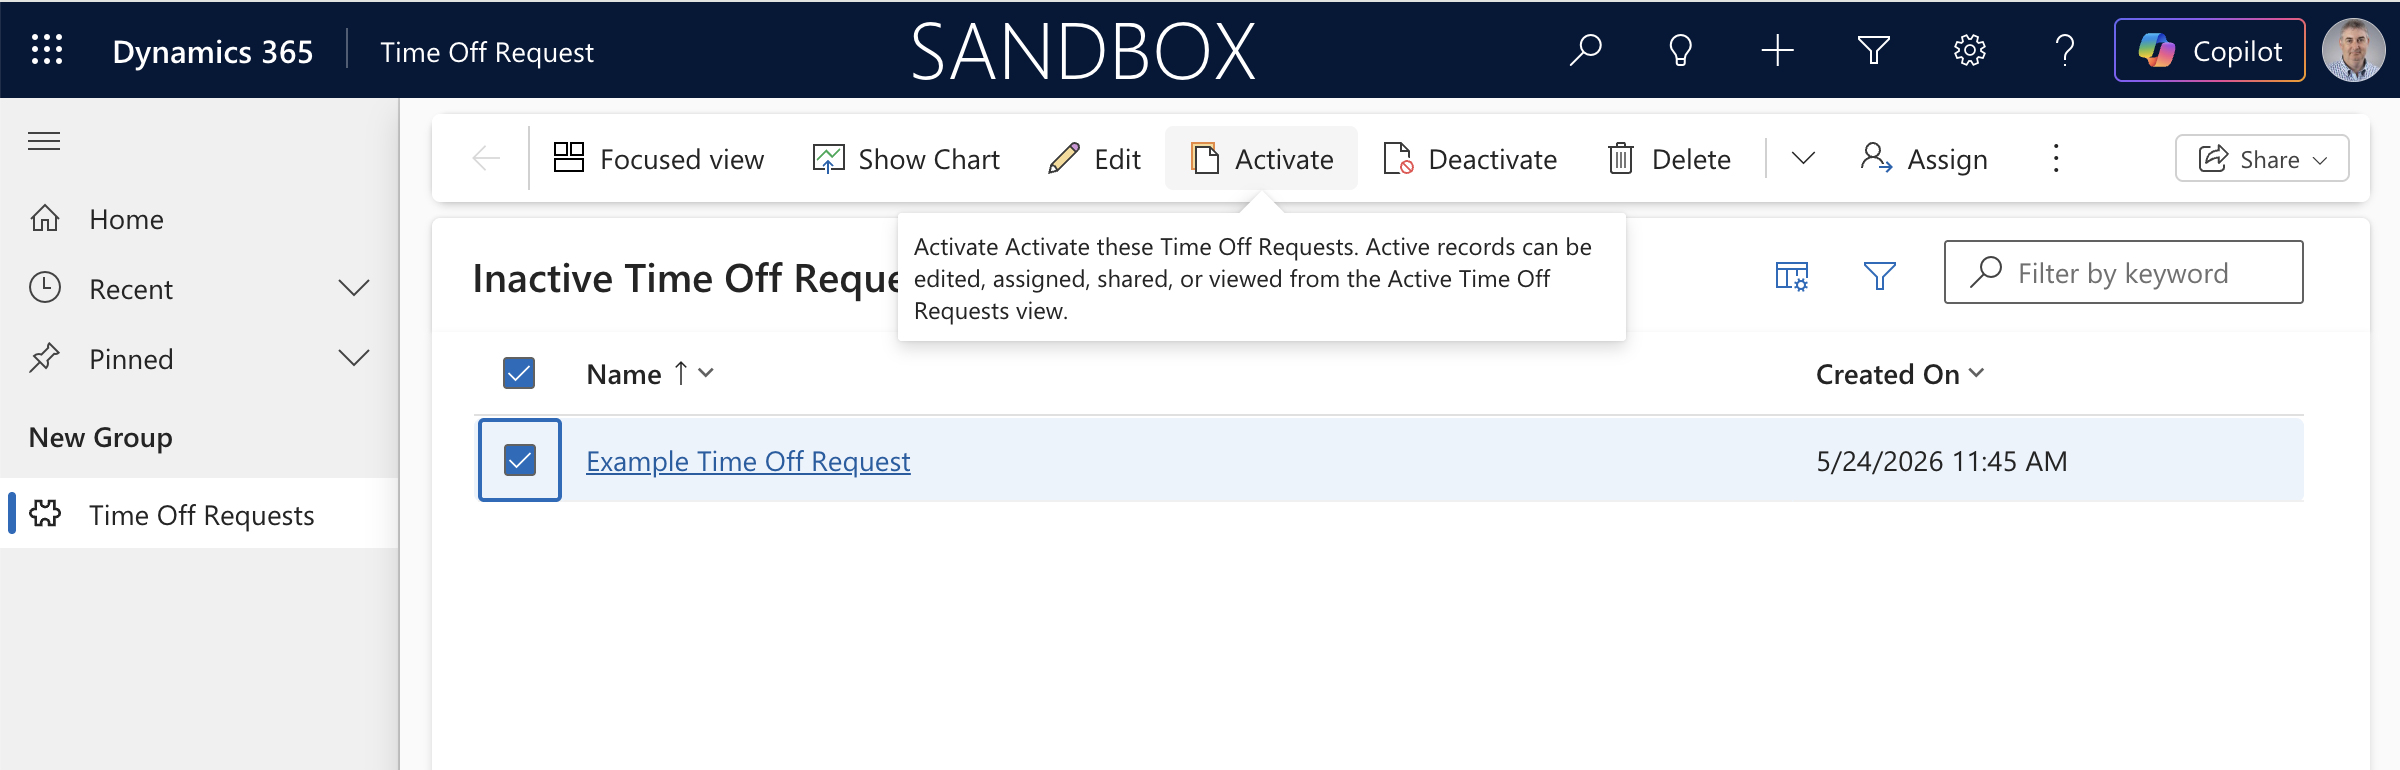
I switched to the Inactive view where the record now appeared. I hovered over the Activate button.
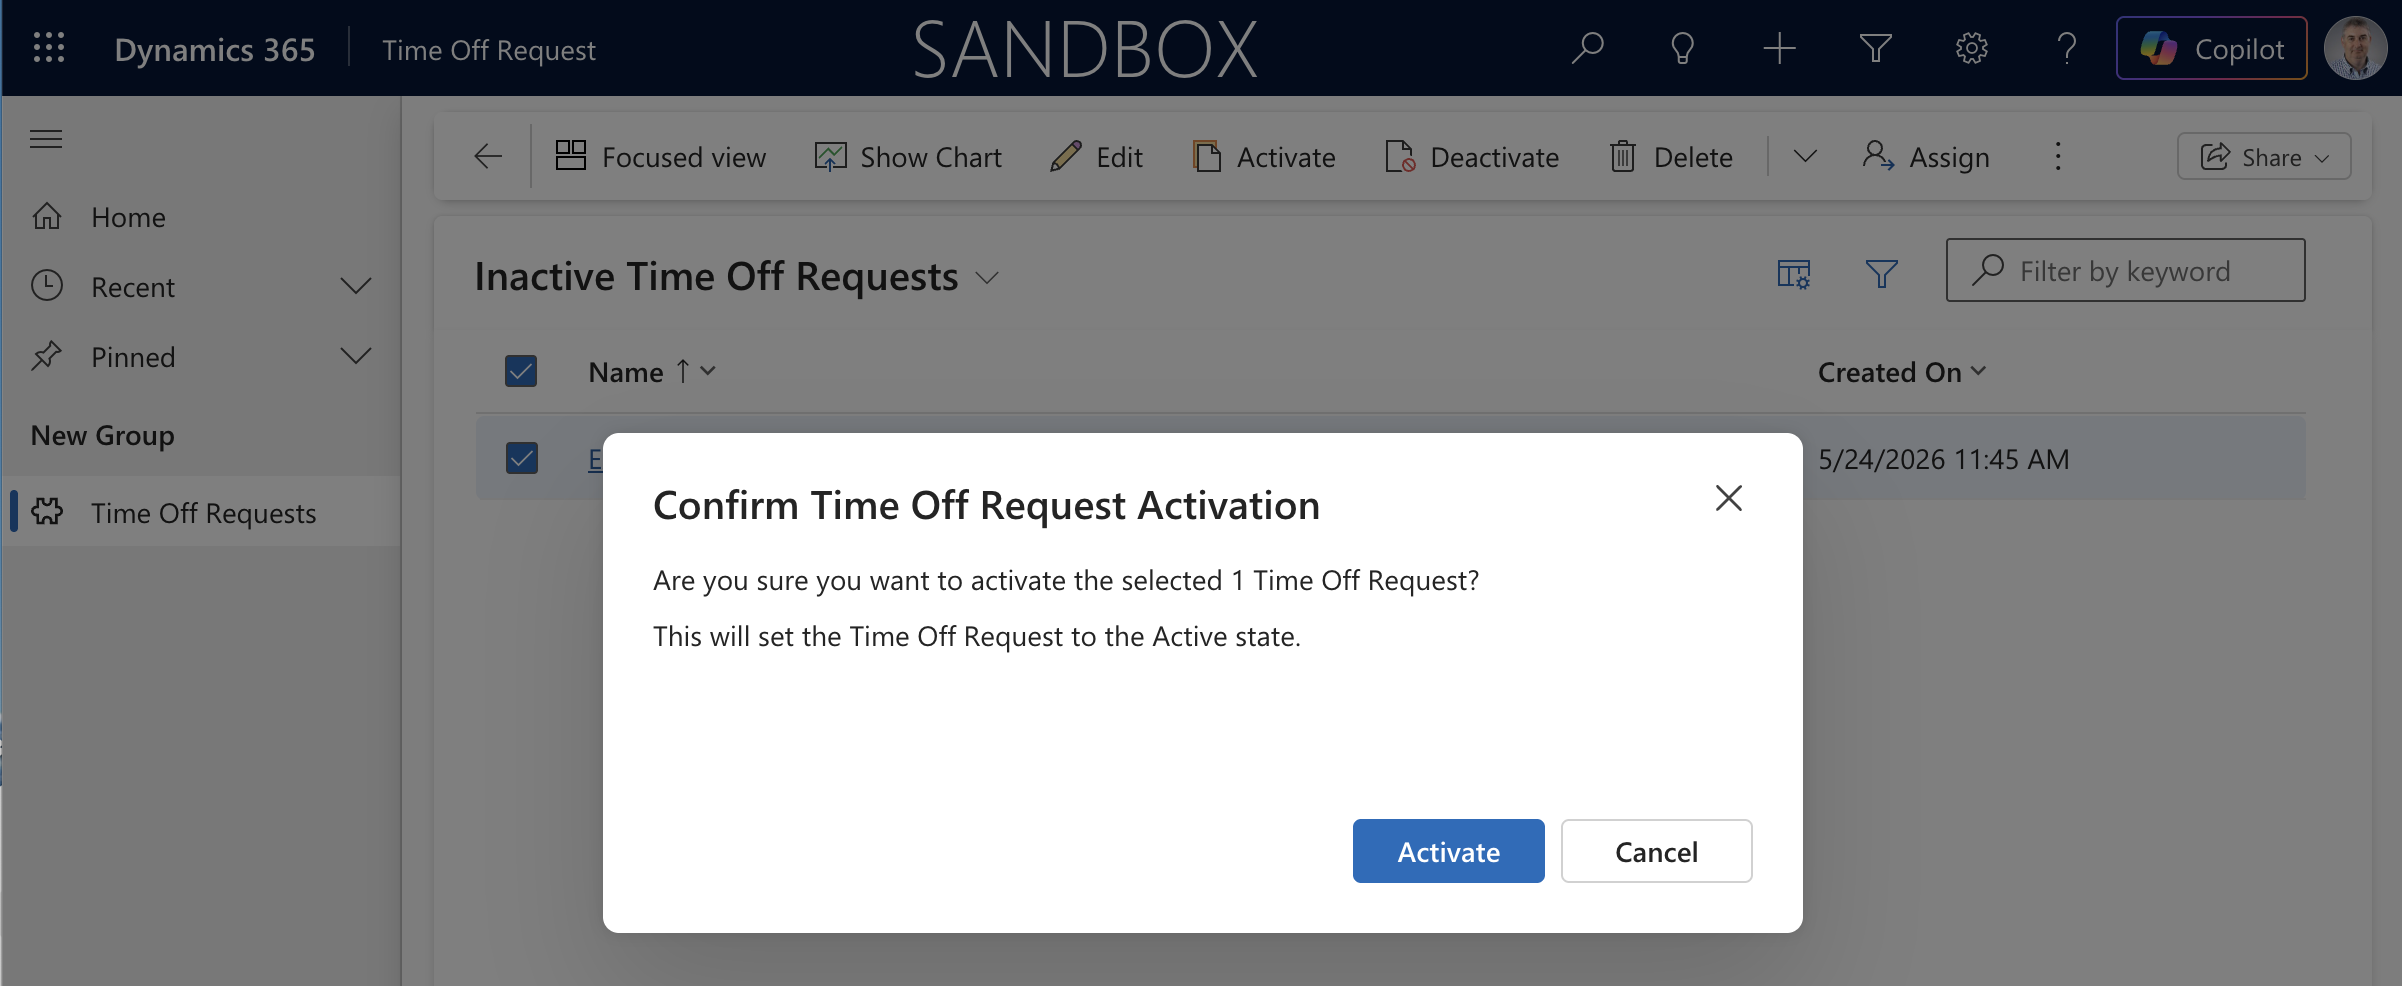
The Confirm Activation dialog also had no Status Reason field — the same no-prompt behaviour as Deactivate.
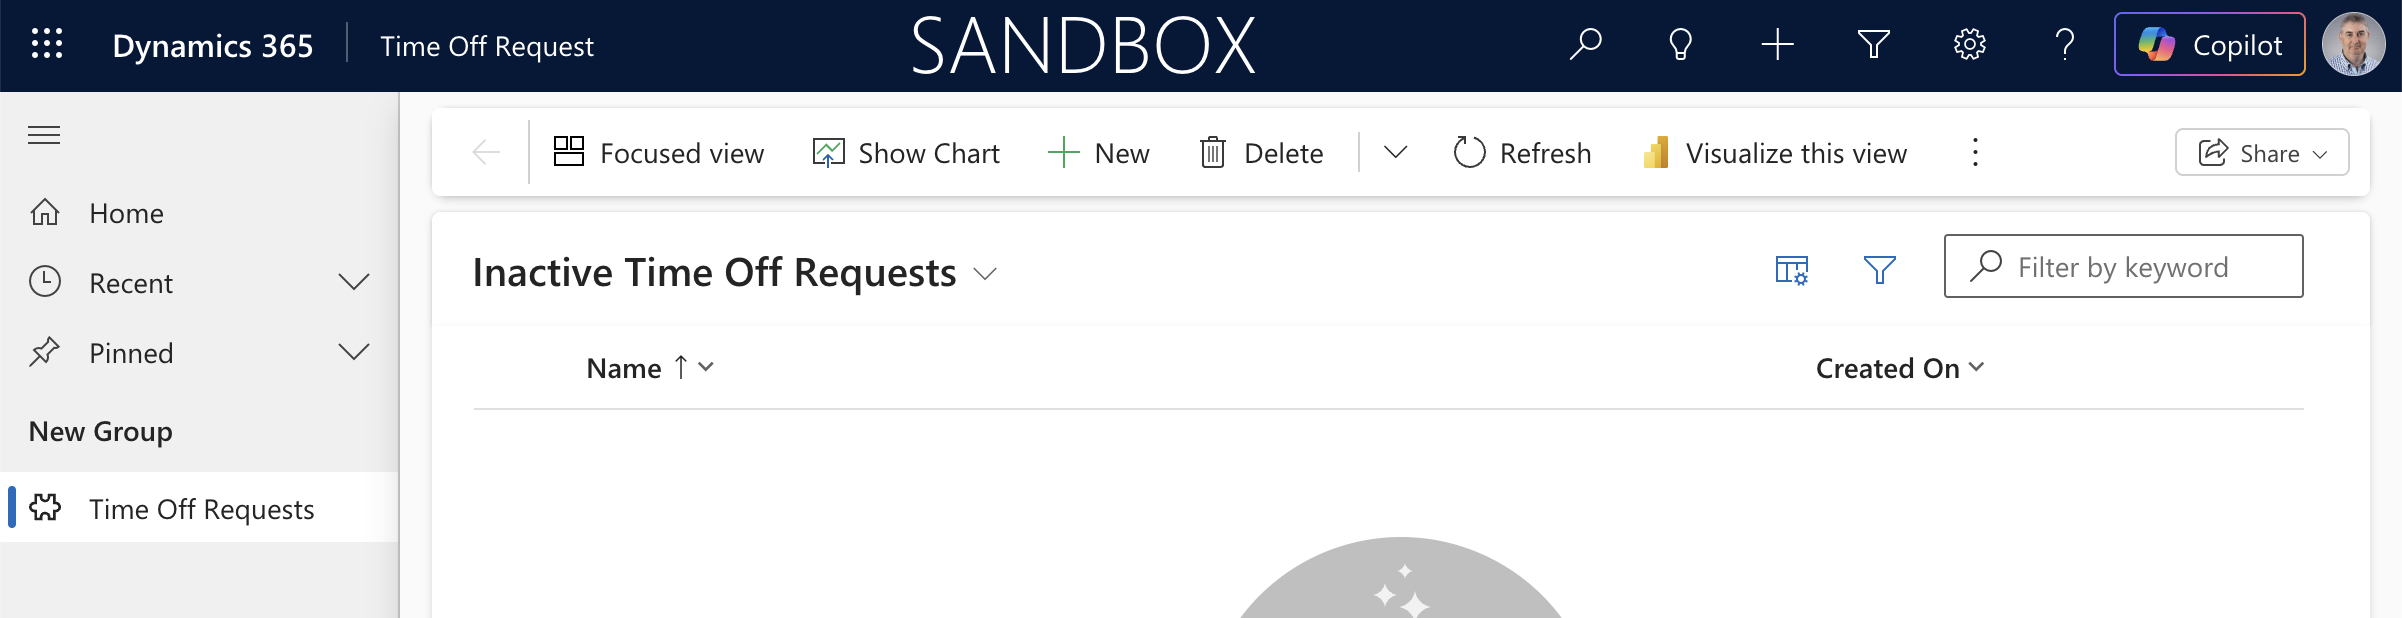
After confirming, the Inactive view was empty again.
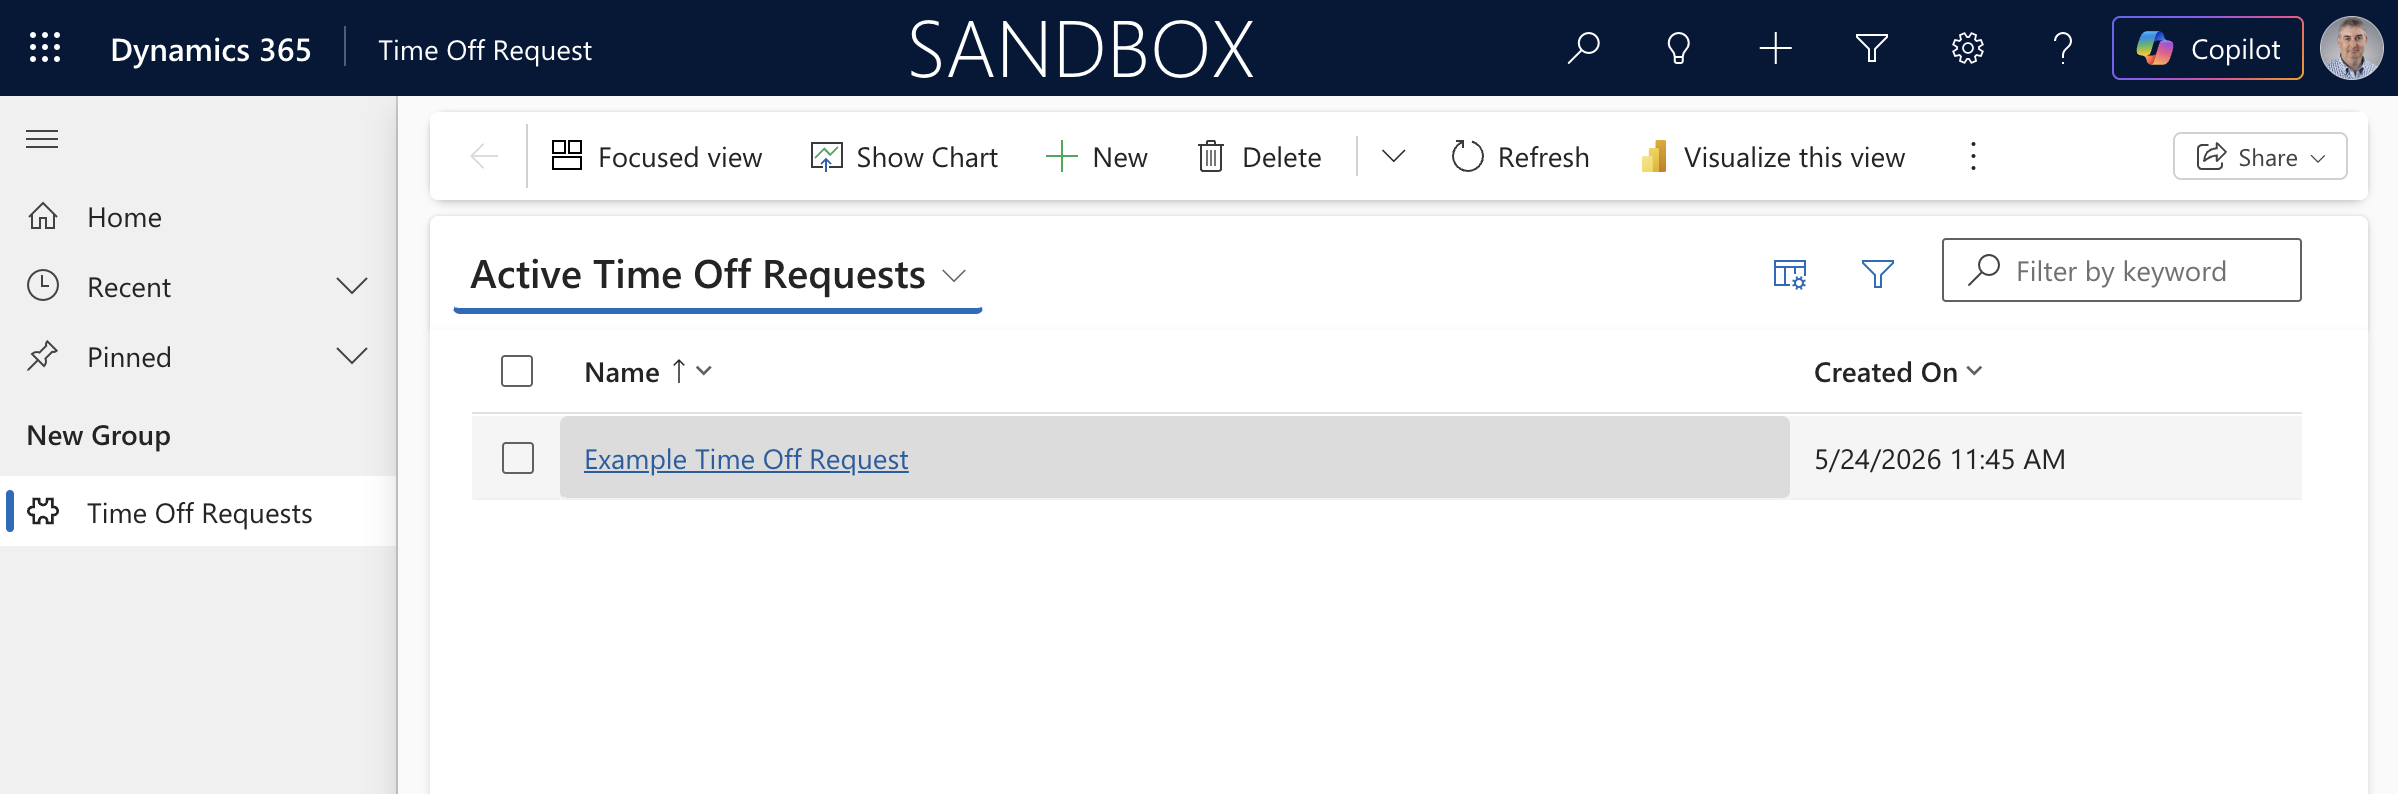
The record was back in the Active view. With only the default options, neither dialog prompted for a reason.
The key finding: with only the default "Active" and "Inactive" choices, Power Platform skips the Status Reason picker entirely on both dialogs. The next step is to add custom choices.
Adding custom Status Reason choices
I went back to the Status Reason column editor and added meaningful options for a time-off workflow. For the Active group I added three progression stages:
- Submitted (Pending Approval) — value 623,460,001
- Approved by Manager — value 623,460,002
- HR Review — value 623,460,003
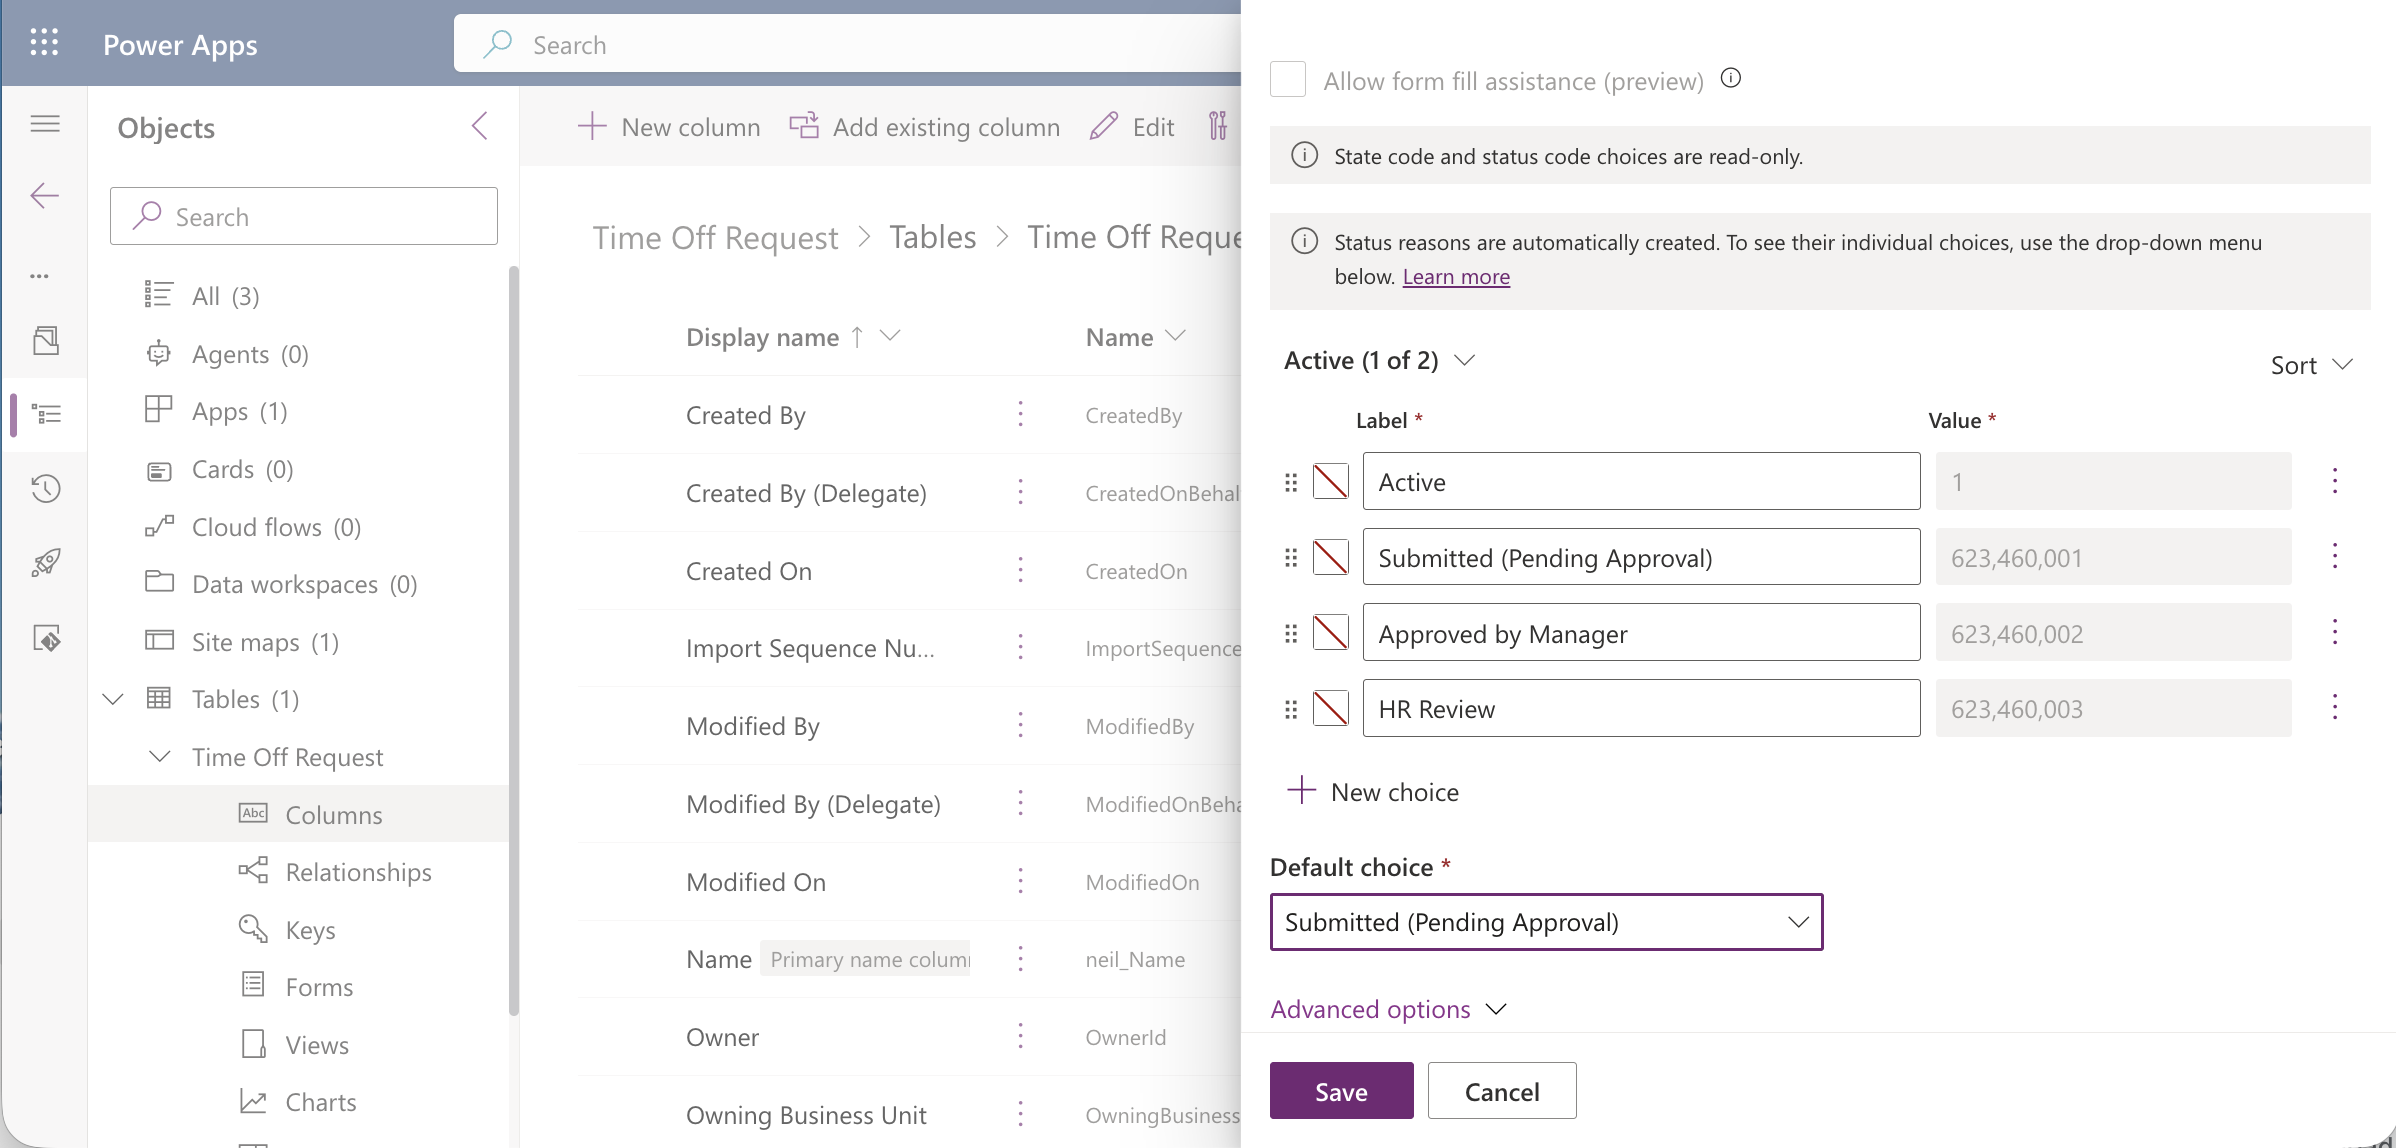
The Status Reason editor's Active group now showed my three custom choices alongside the original "Active" default.
For the Inactive group I added four terminal states:
- Approved (Time Taken) — value 623,460,004
- Denied - Insufficient Balance — value 623,460,005
- Denied - Blackout Period — value 623,460,006
- Cancelled by Employee — value 623,460,007
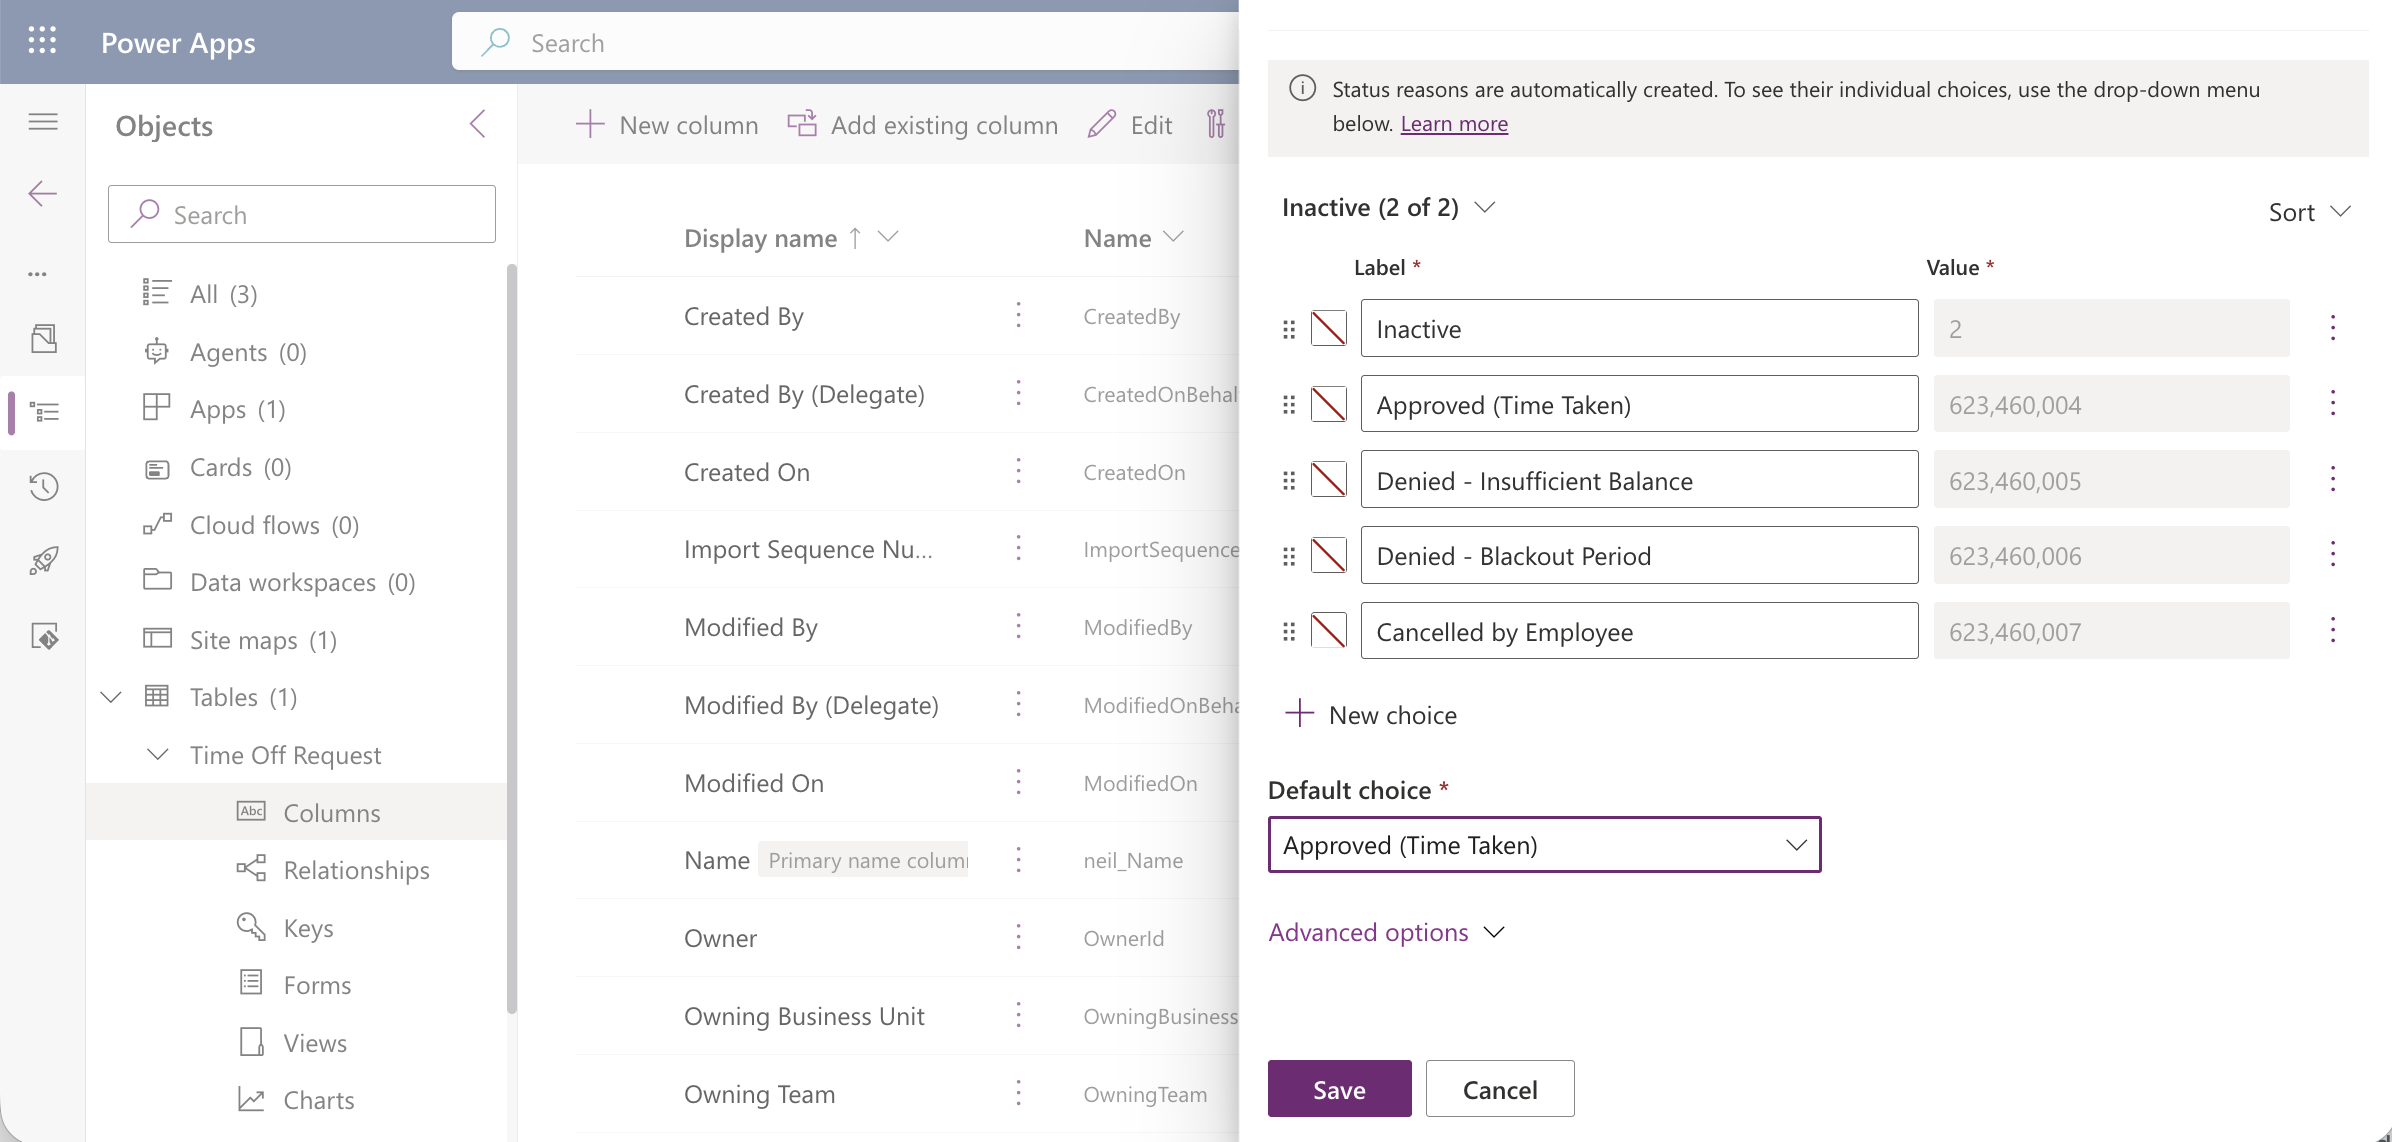
The Inactive group now had four custom denial and approval outcomes.
What changes after adding custom choices
With custom options in place, both dialogs now prompt for a Status Reason.
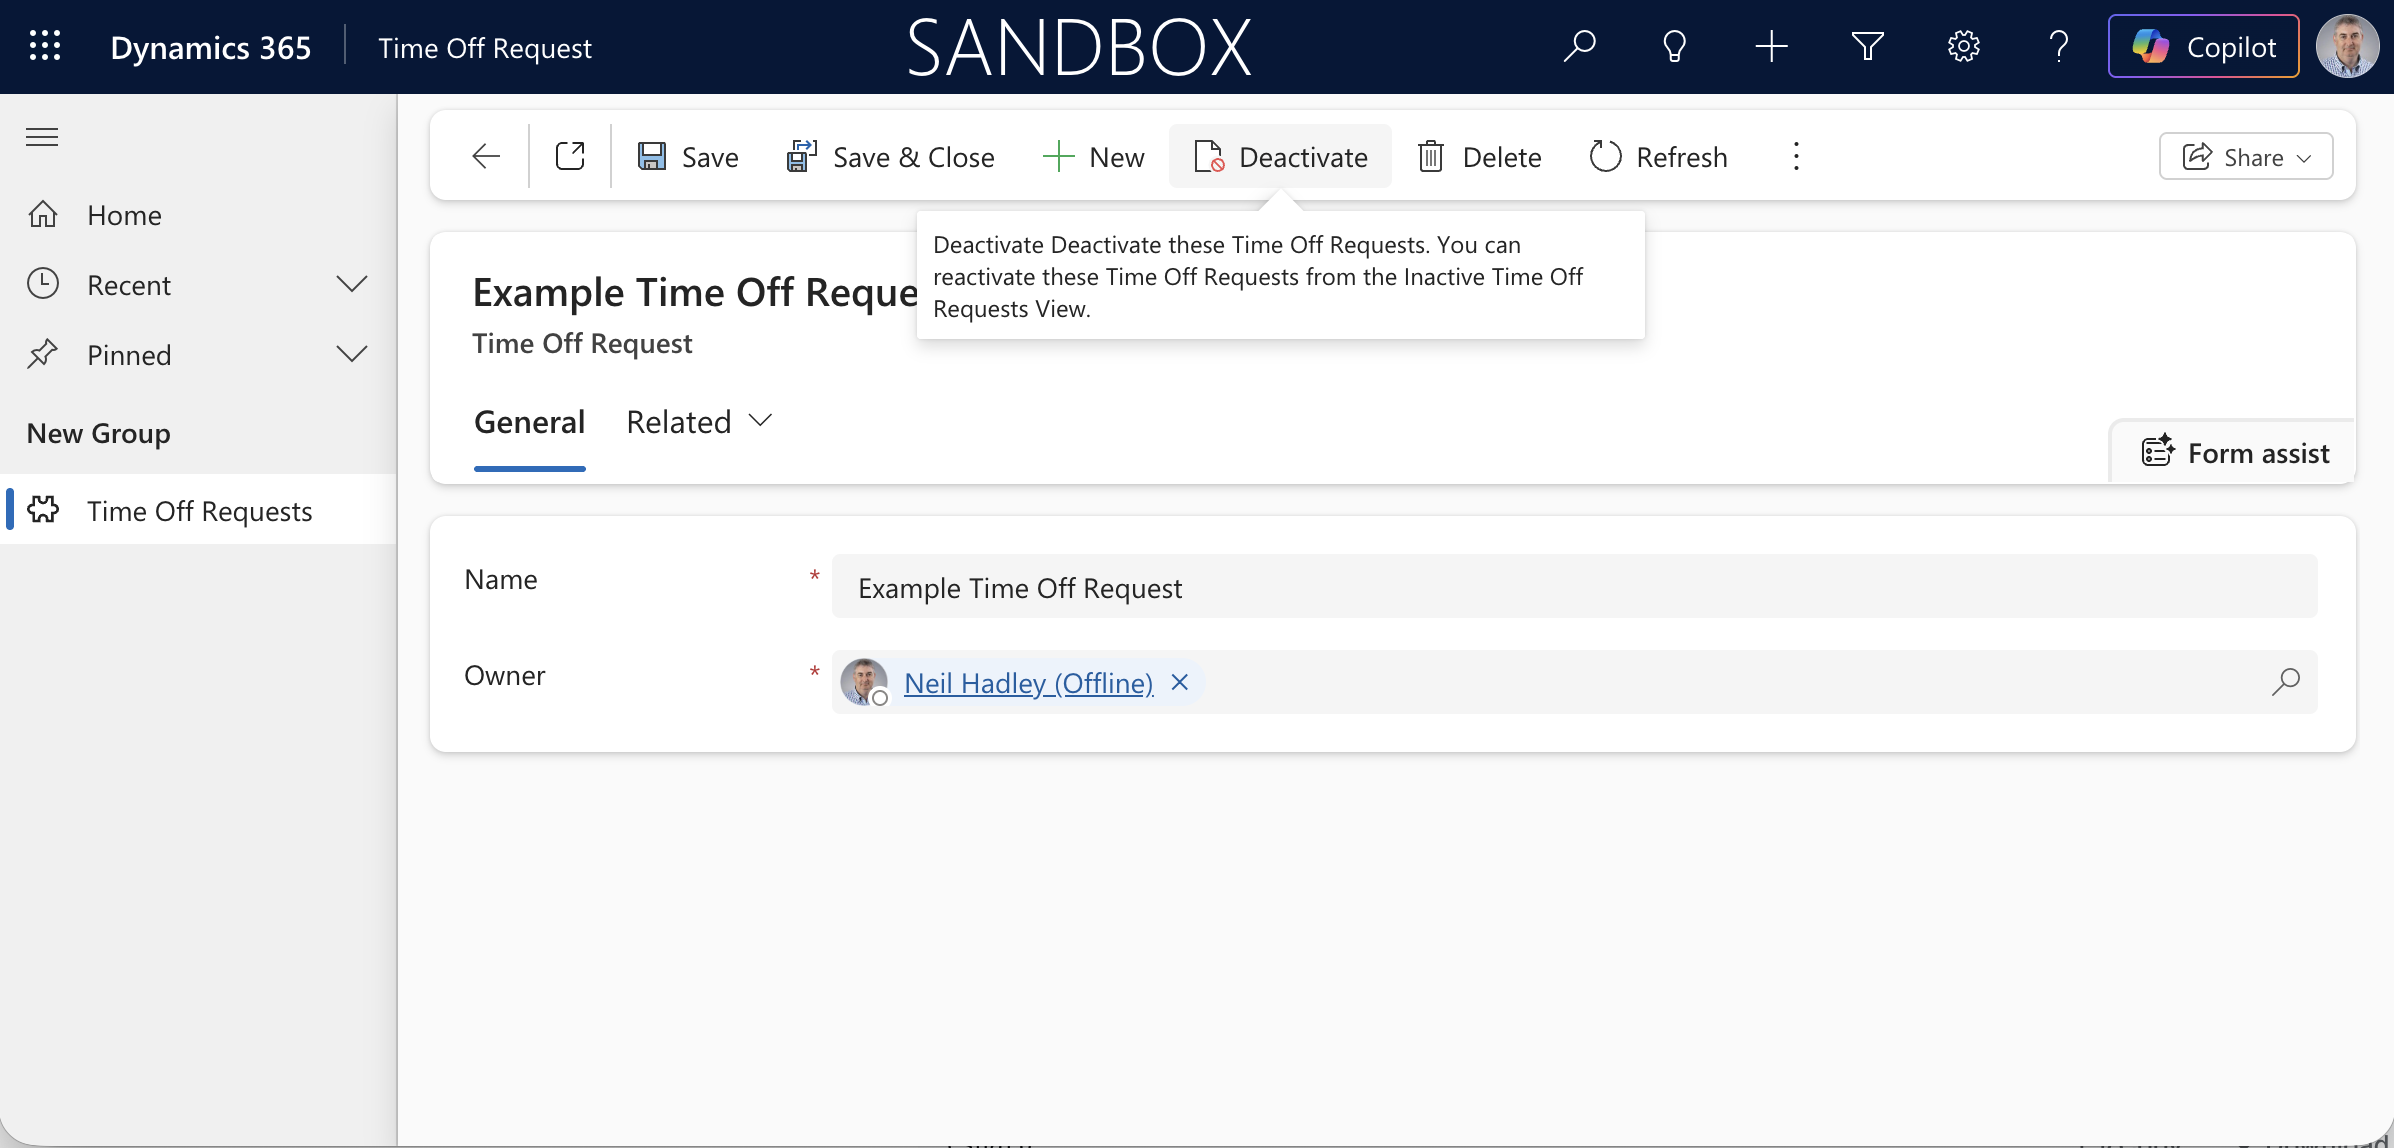
Back in the live app, I opened the record and hovered over the Deactivate button on the form's command bar.
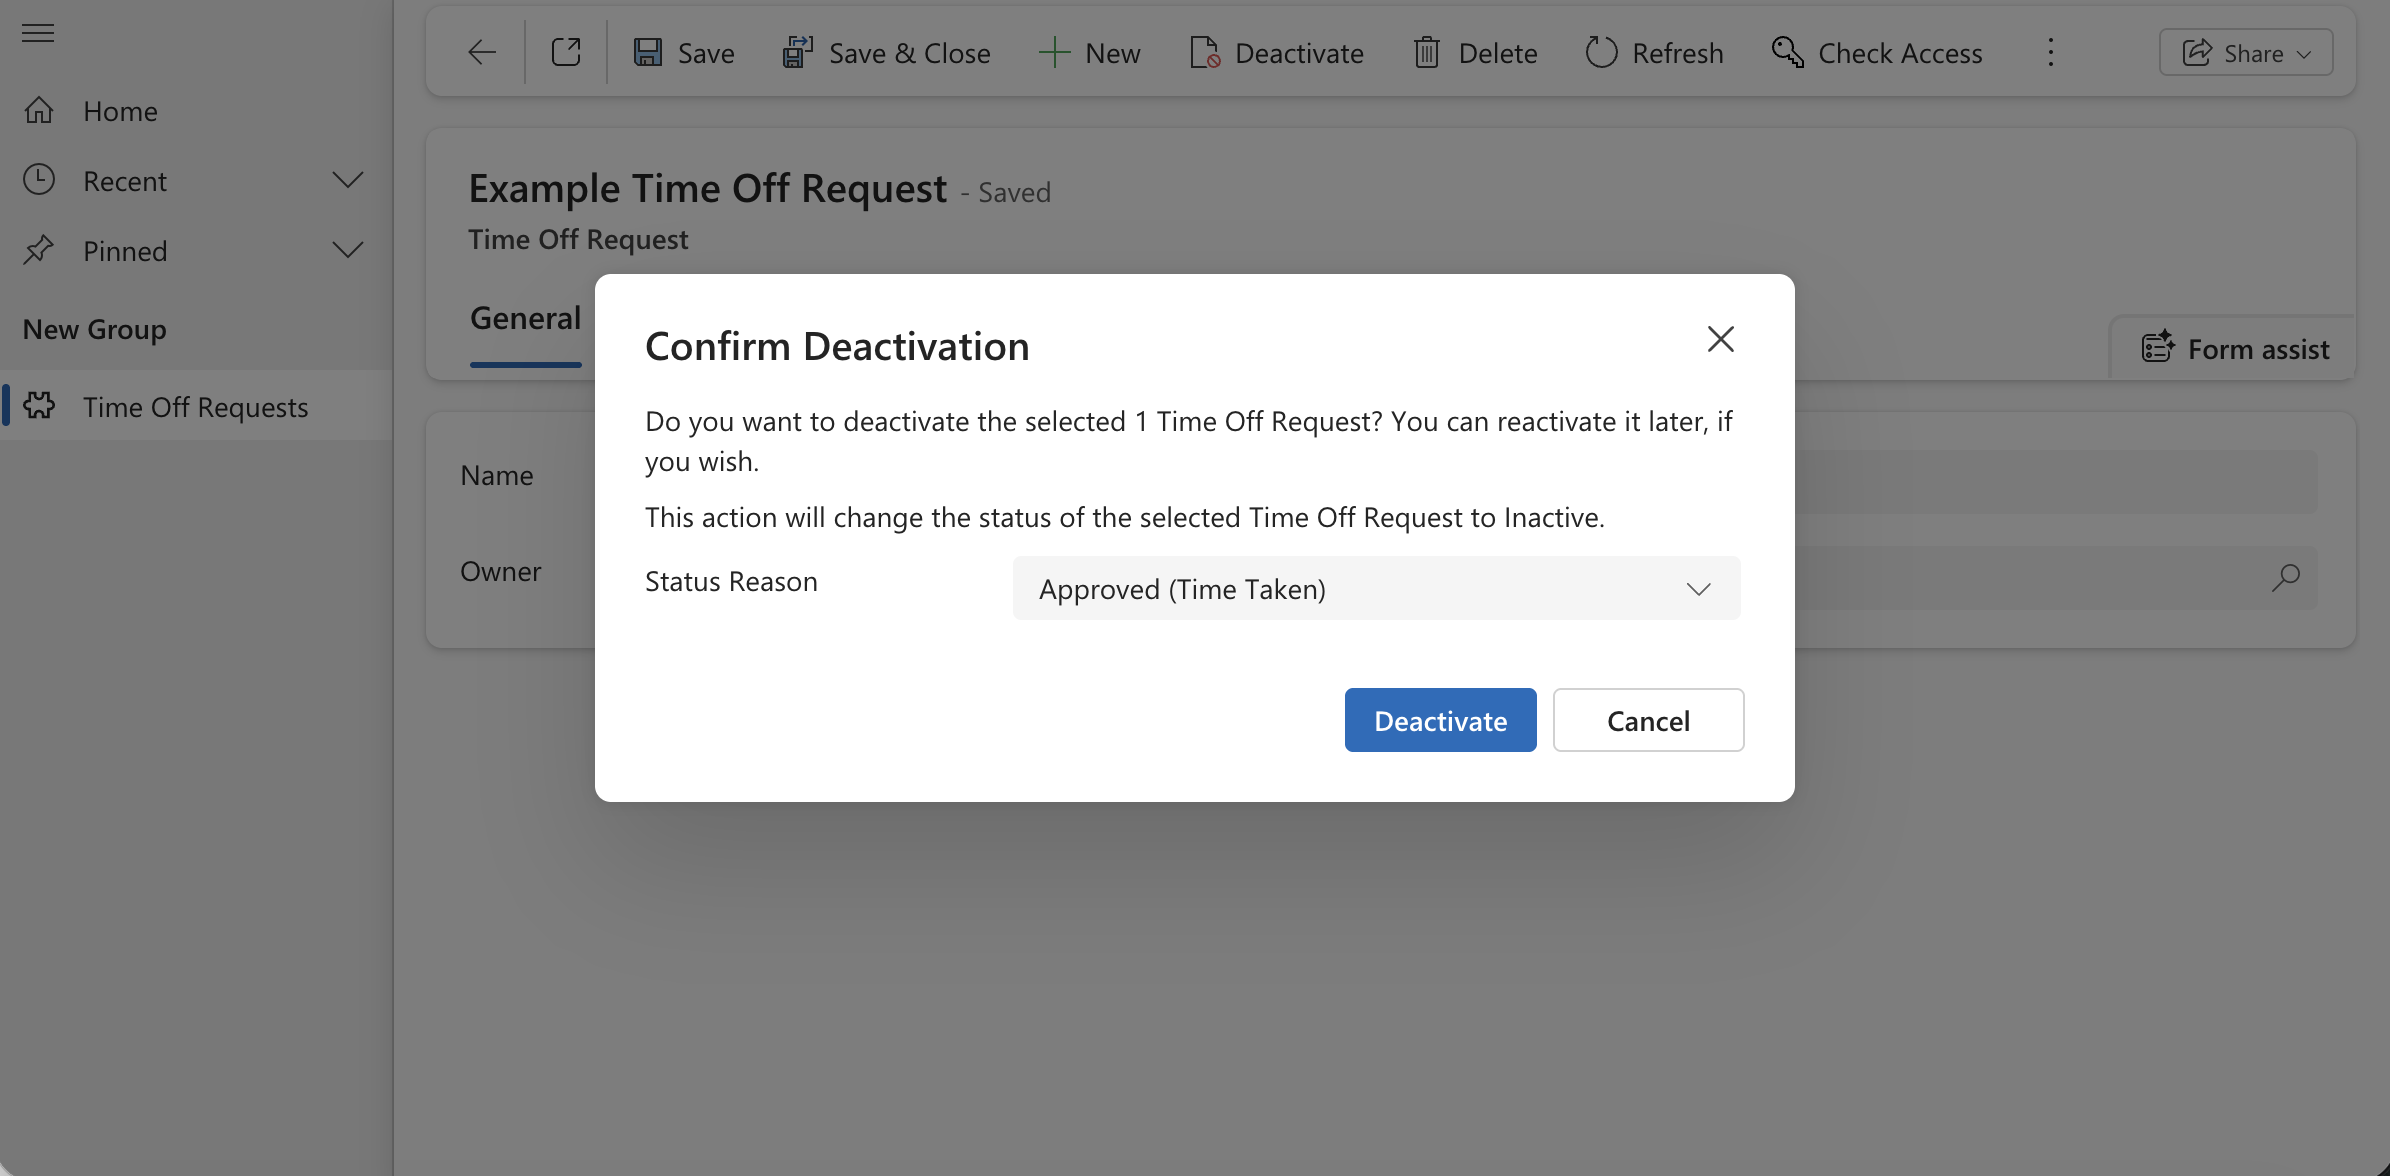
The Confirm Deactivation dialog showed a Status Reason dropdown with "Approved (Time Taken)" selected — I clicked Deactivate to confirm.
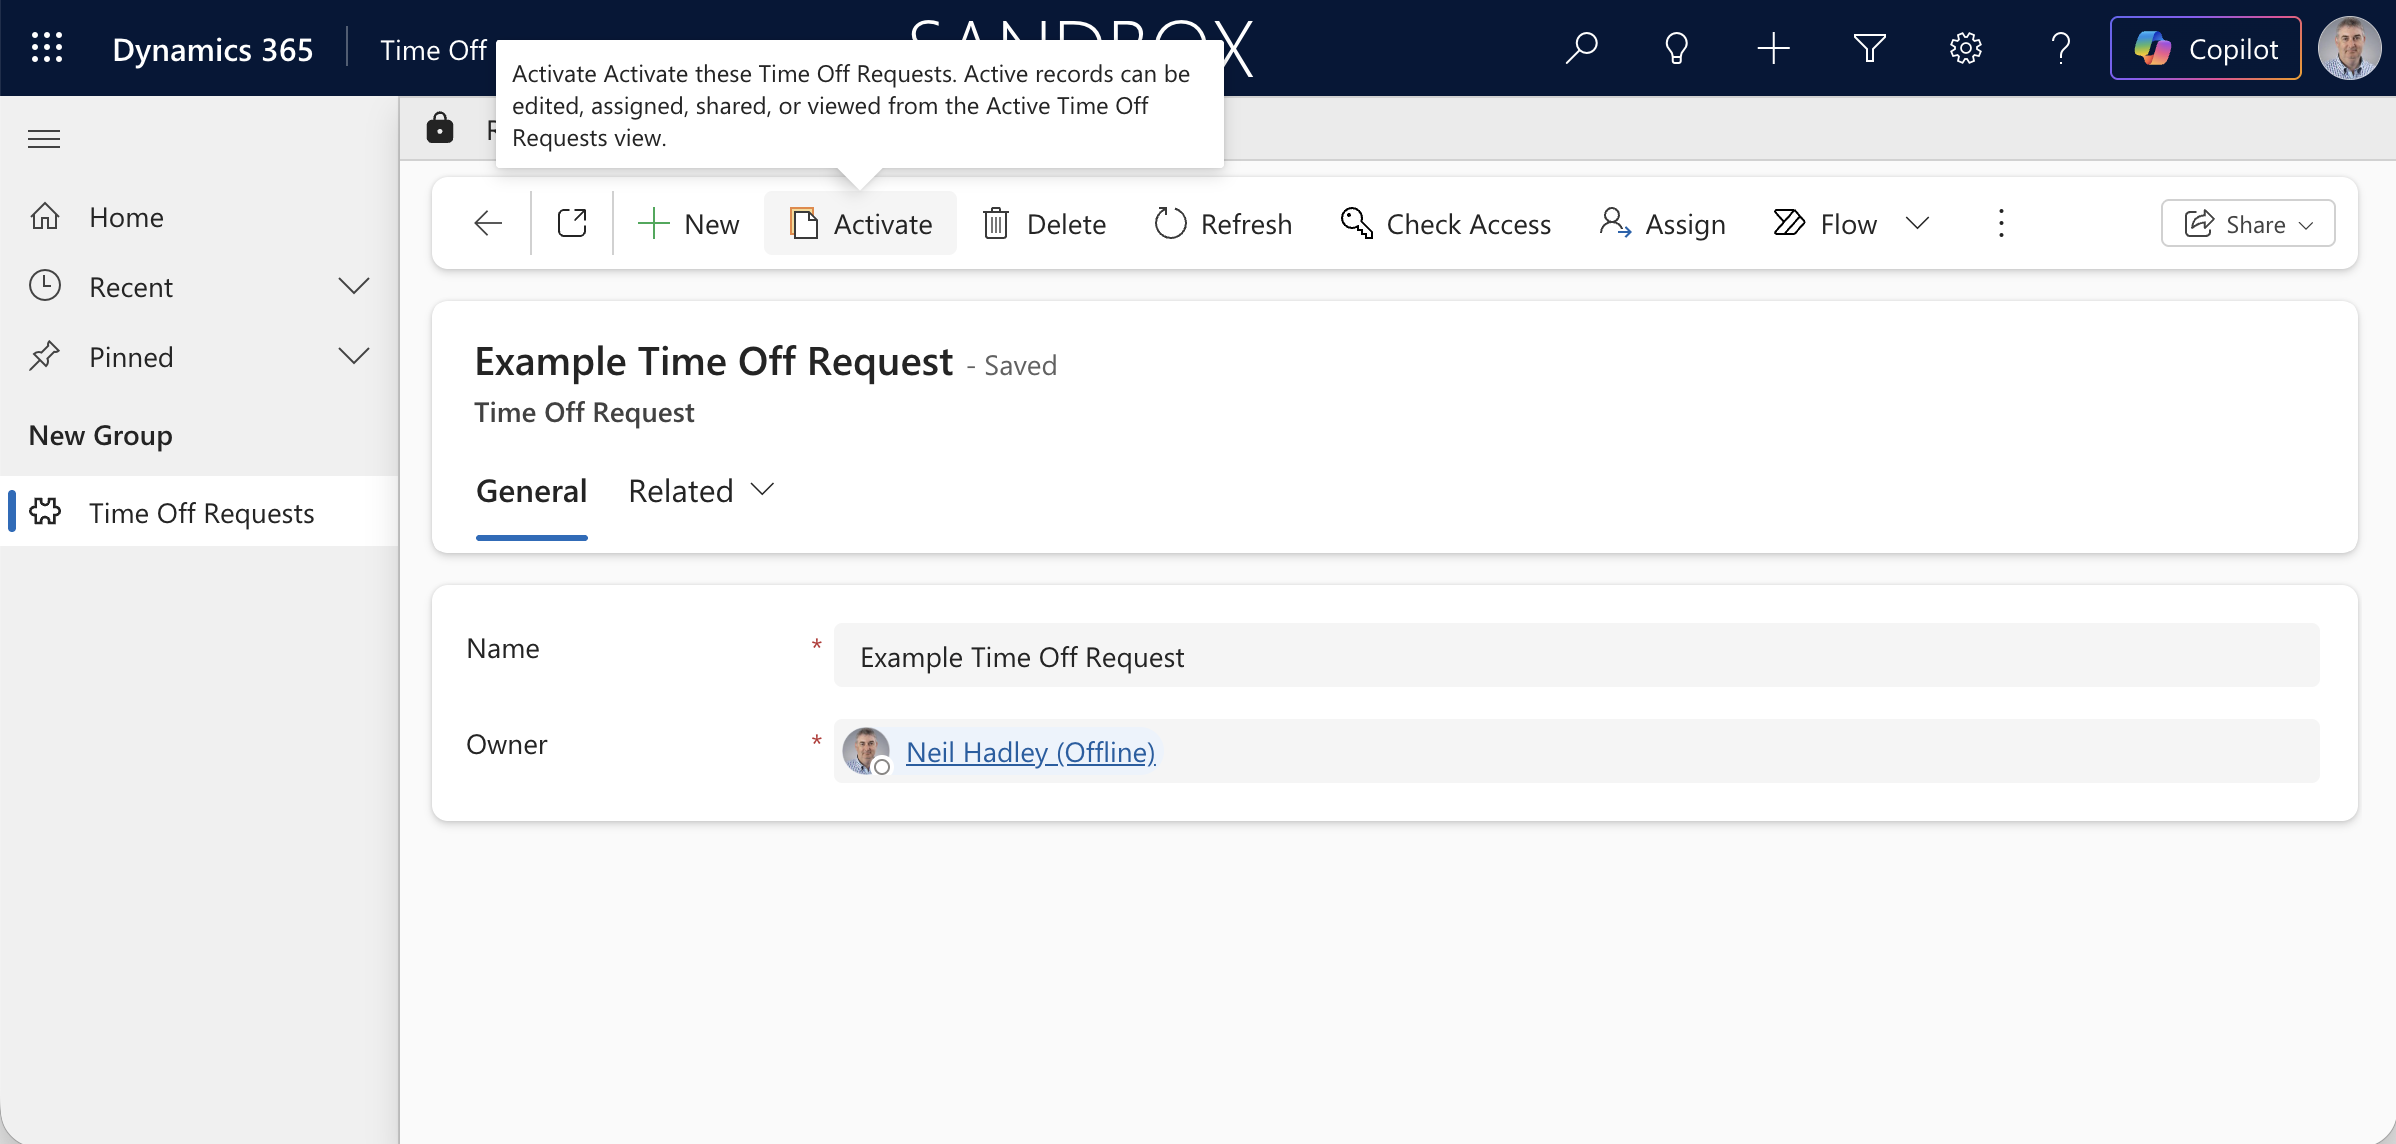
I switched to the Inactive view and hovered over the Activate button on the deactivated record.
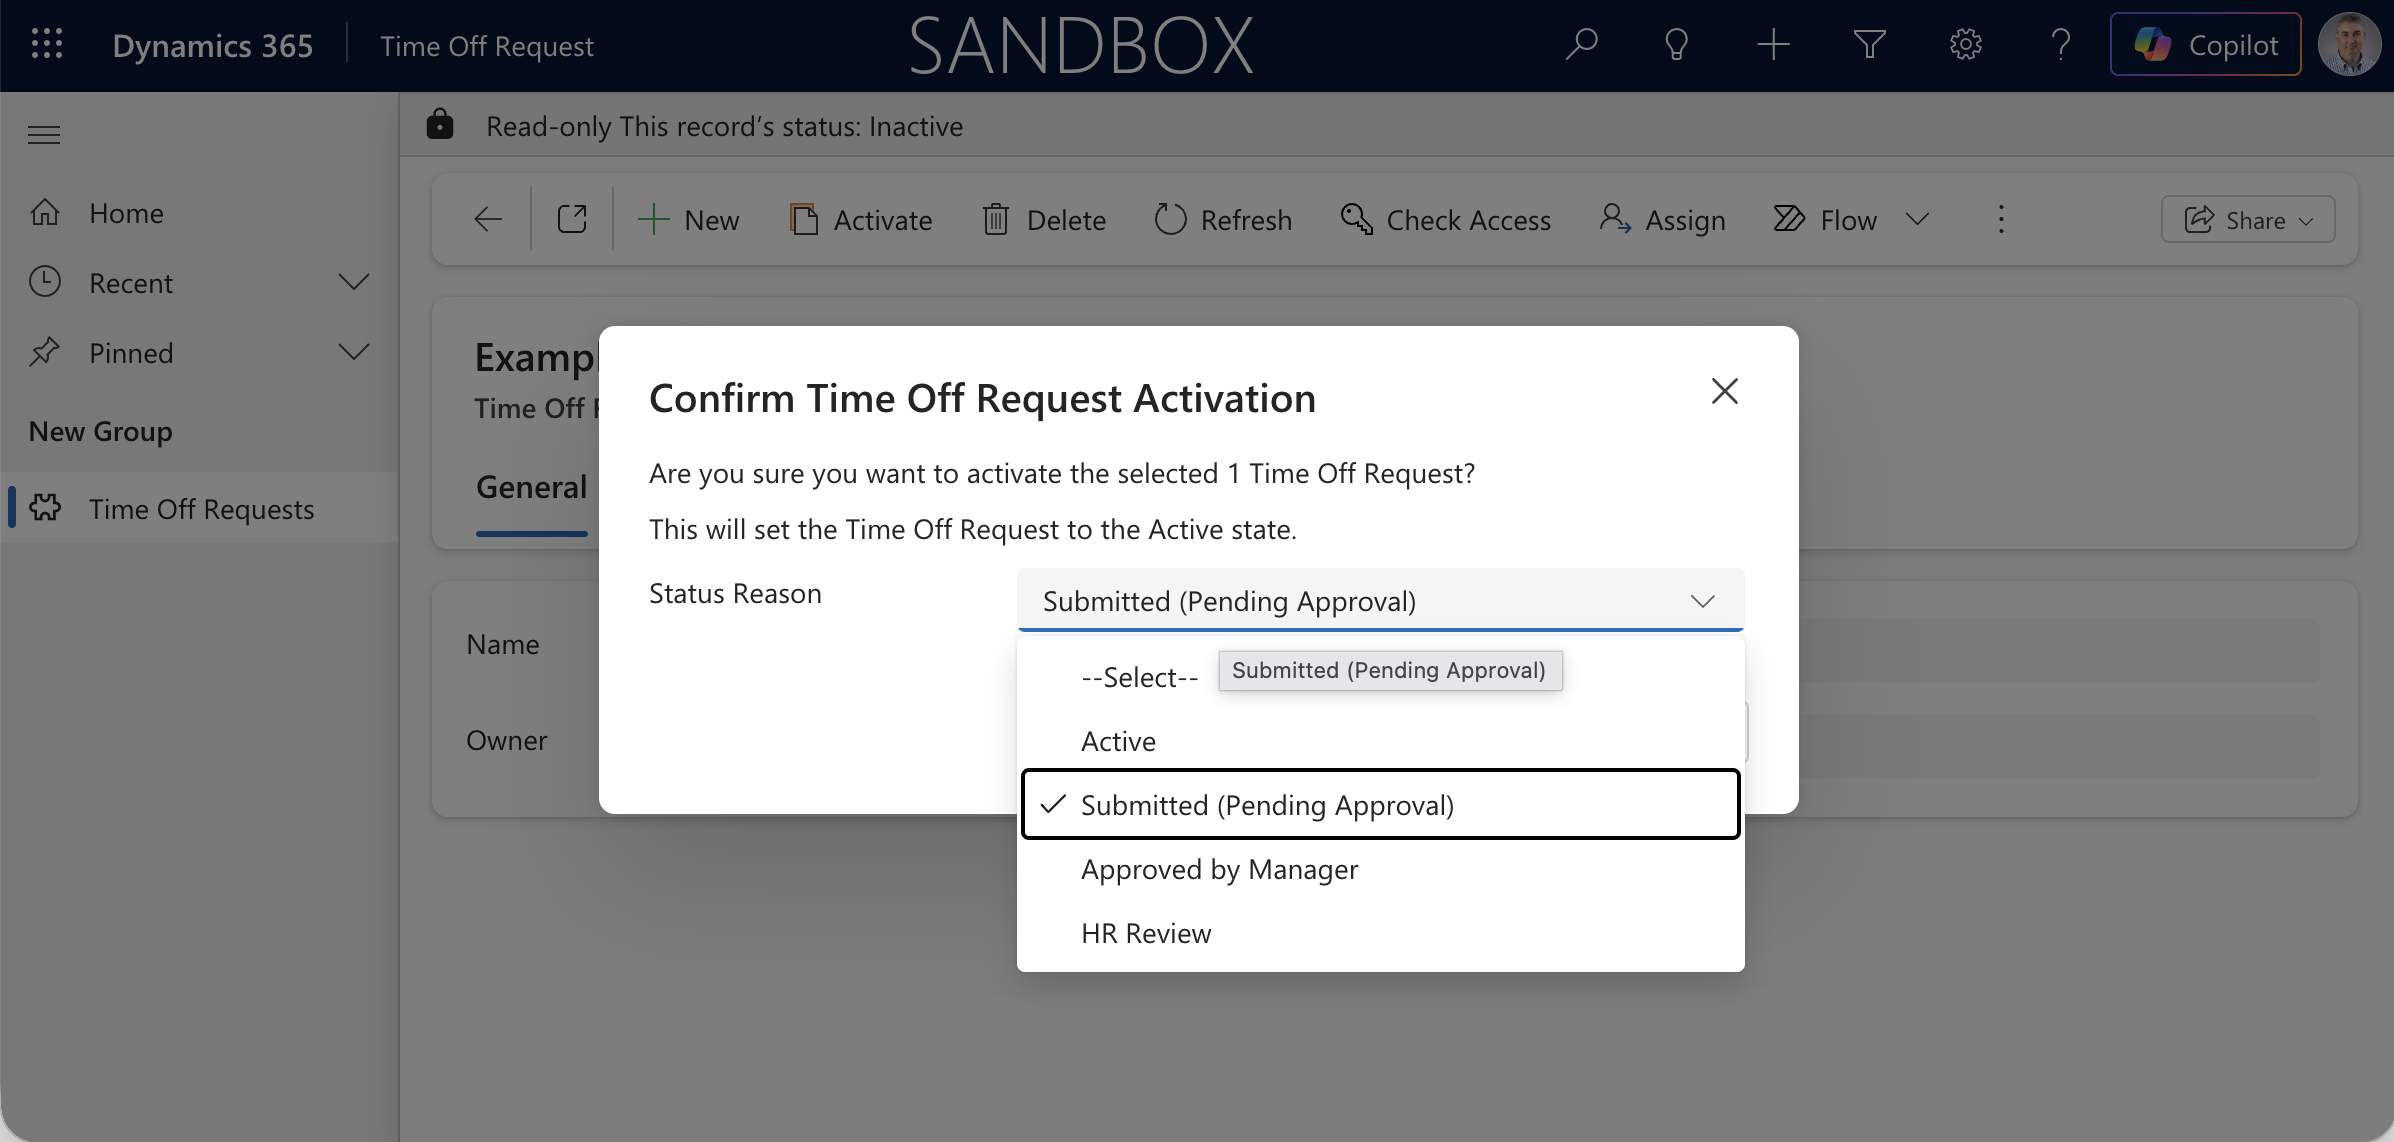
The Confirm Activation dialog showed a Status Reason dropdown listing my custom Active options — Submitted (Pending Approval), Approved by Manager, HR Review, plus the original Active.
Once you have more than one option in a status group, both the Activate and Deactivate dialogs prompt you to pick a Status Reason.
Adding Status and Status Reason to the form header
To make Status Reason editable directly on the form — and to make the current status visible at a glance — I added both fields to the form header.
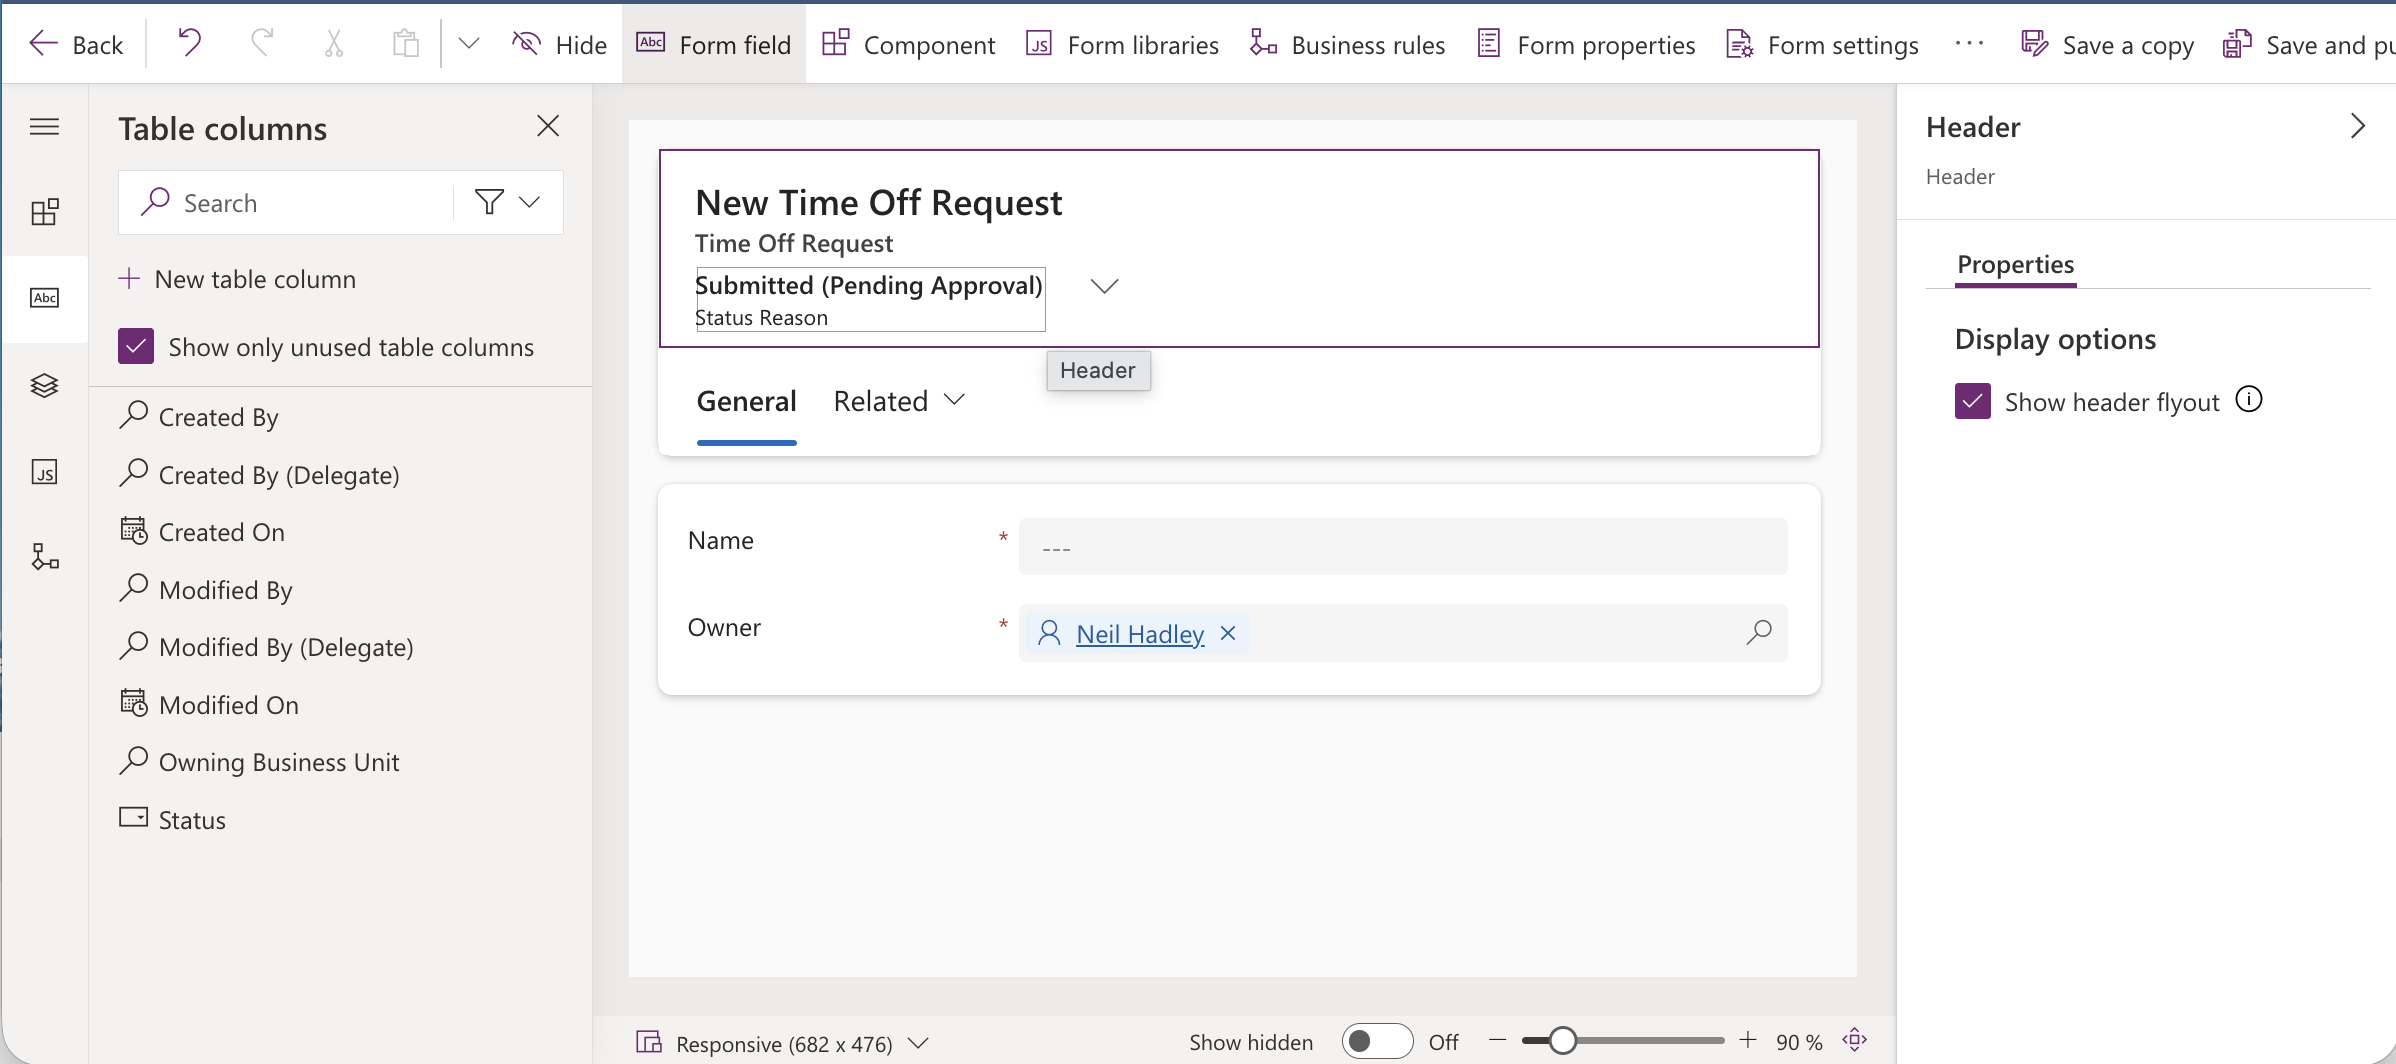
I opened the form editor and dragged Status Reason into the header area.
Status is a read-only system field, so I locked it down in properties to make the intent explicit.
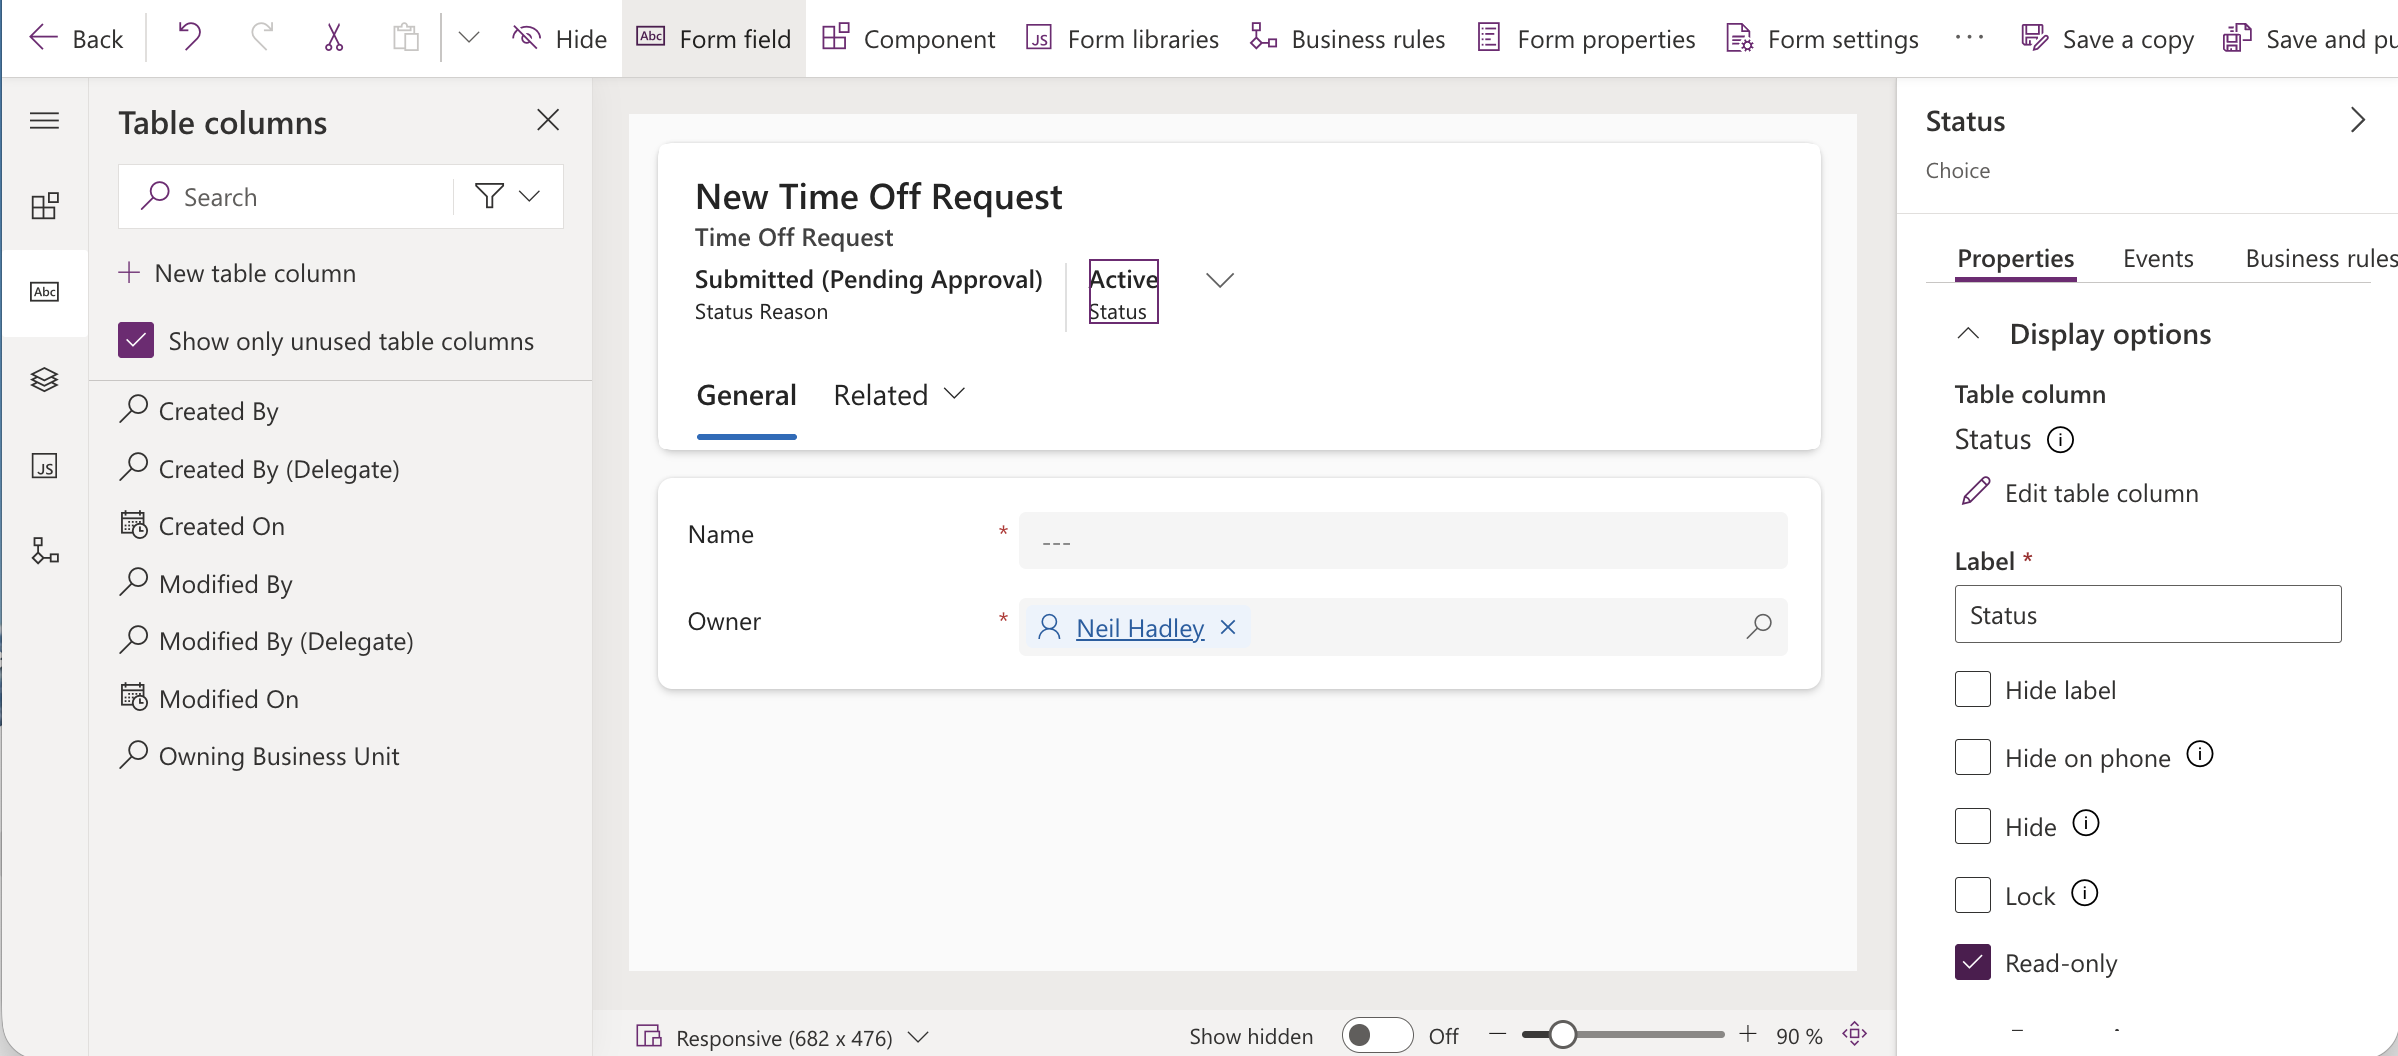
I opened the Status field properties and checked Read-only so users can see the status but not change it directly.
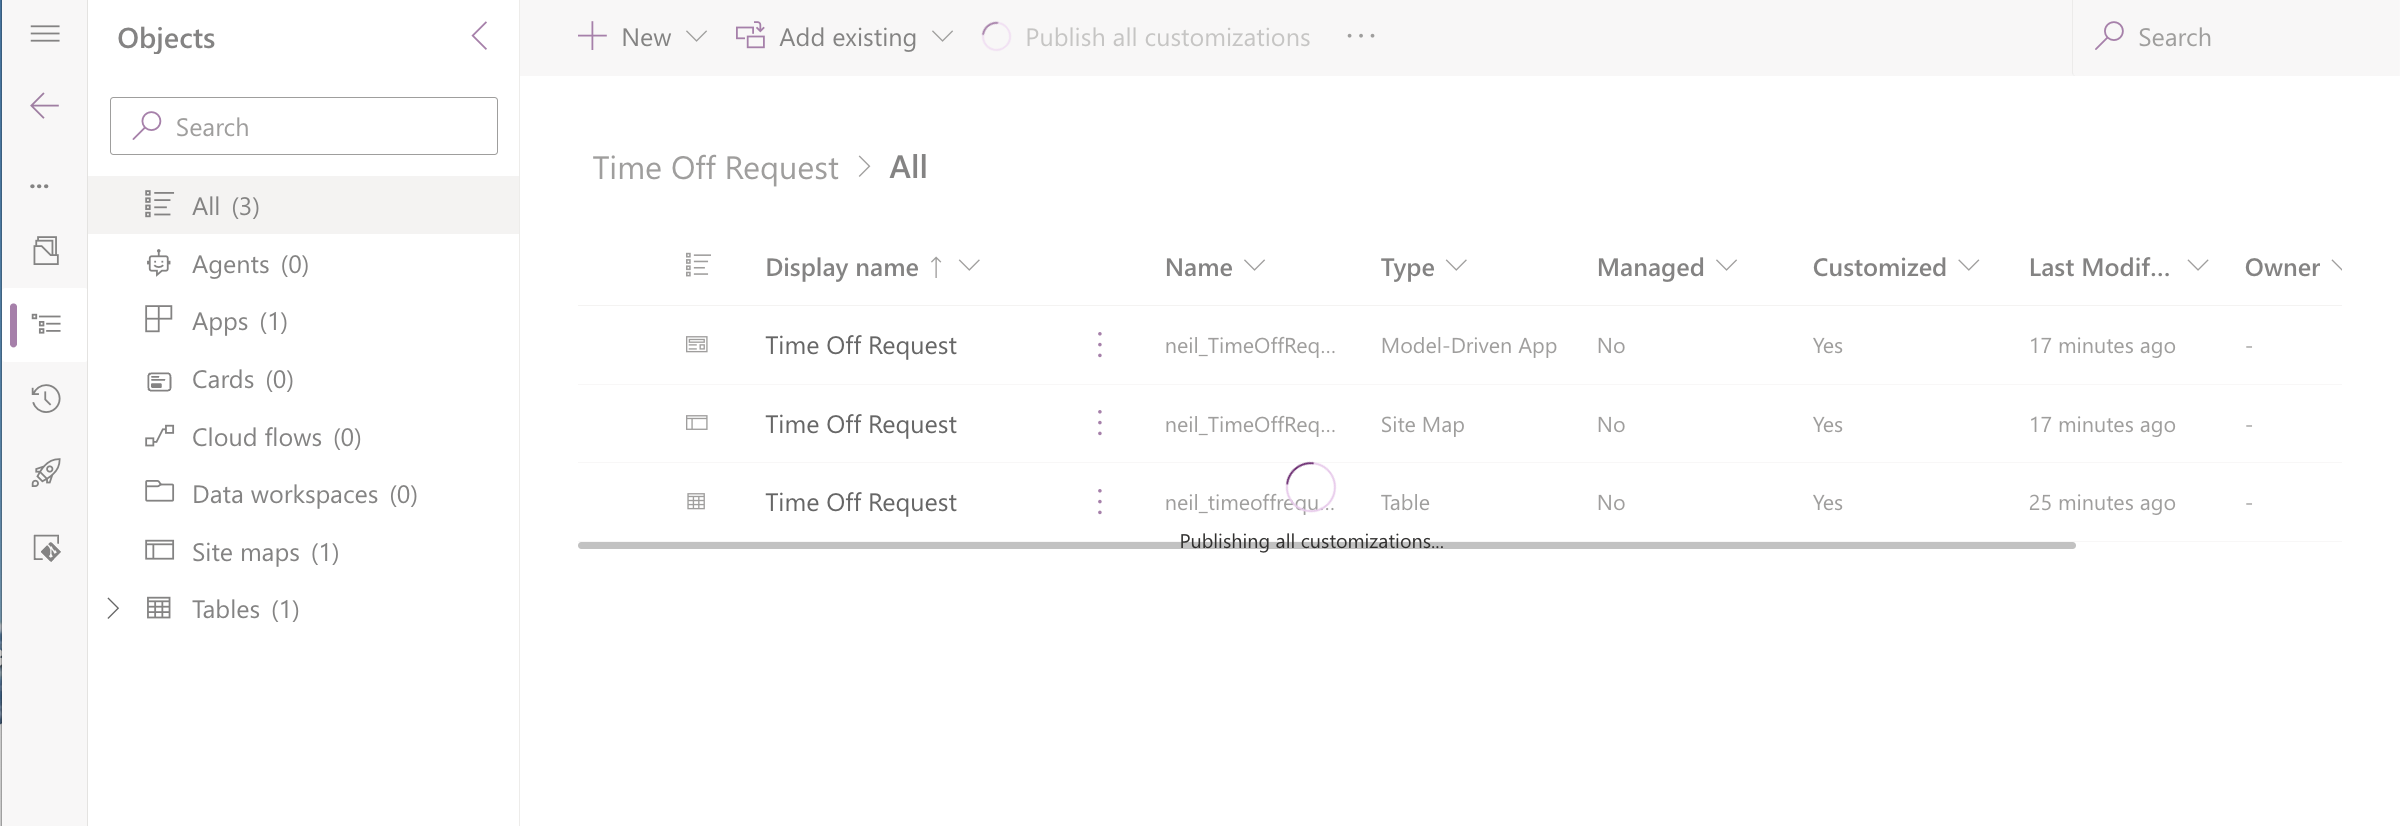
I clicked Publish All Customizations to push the form changes to the live app.
With the header updated, the record now showed both fields prominently.
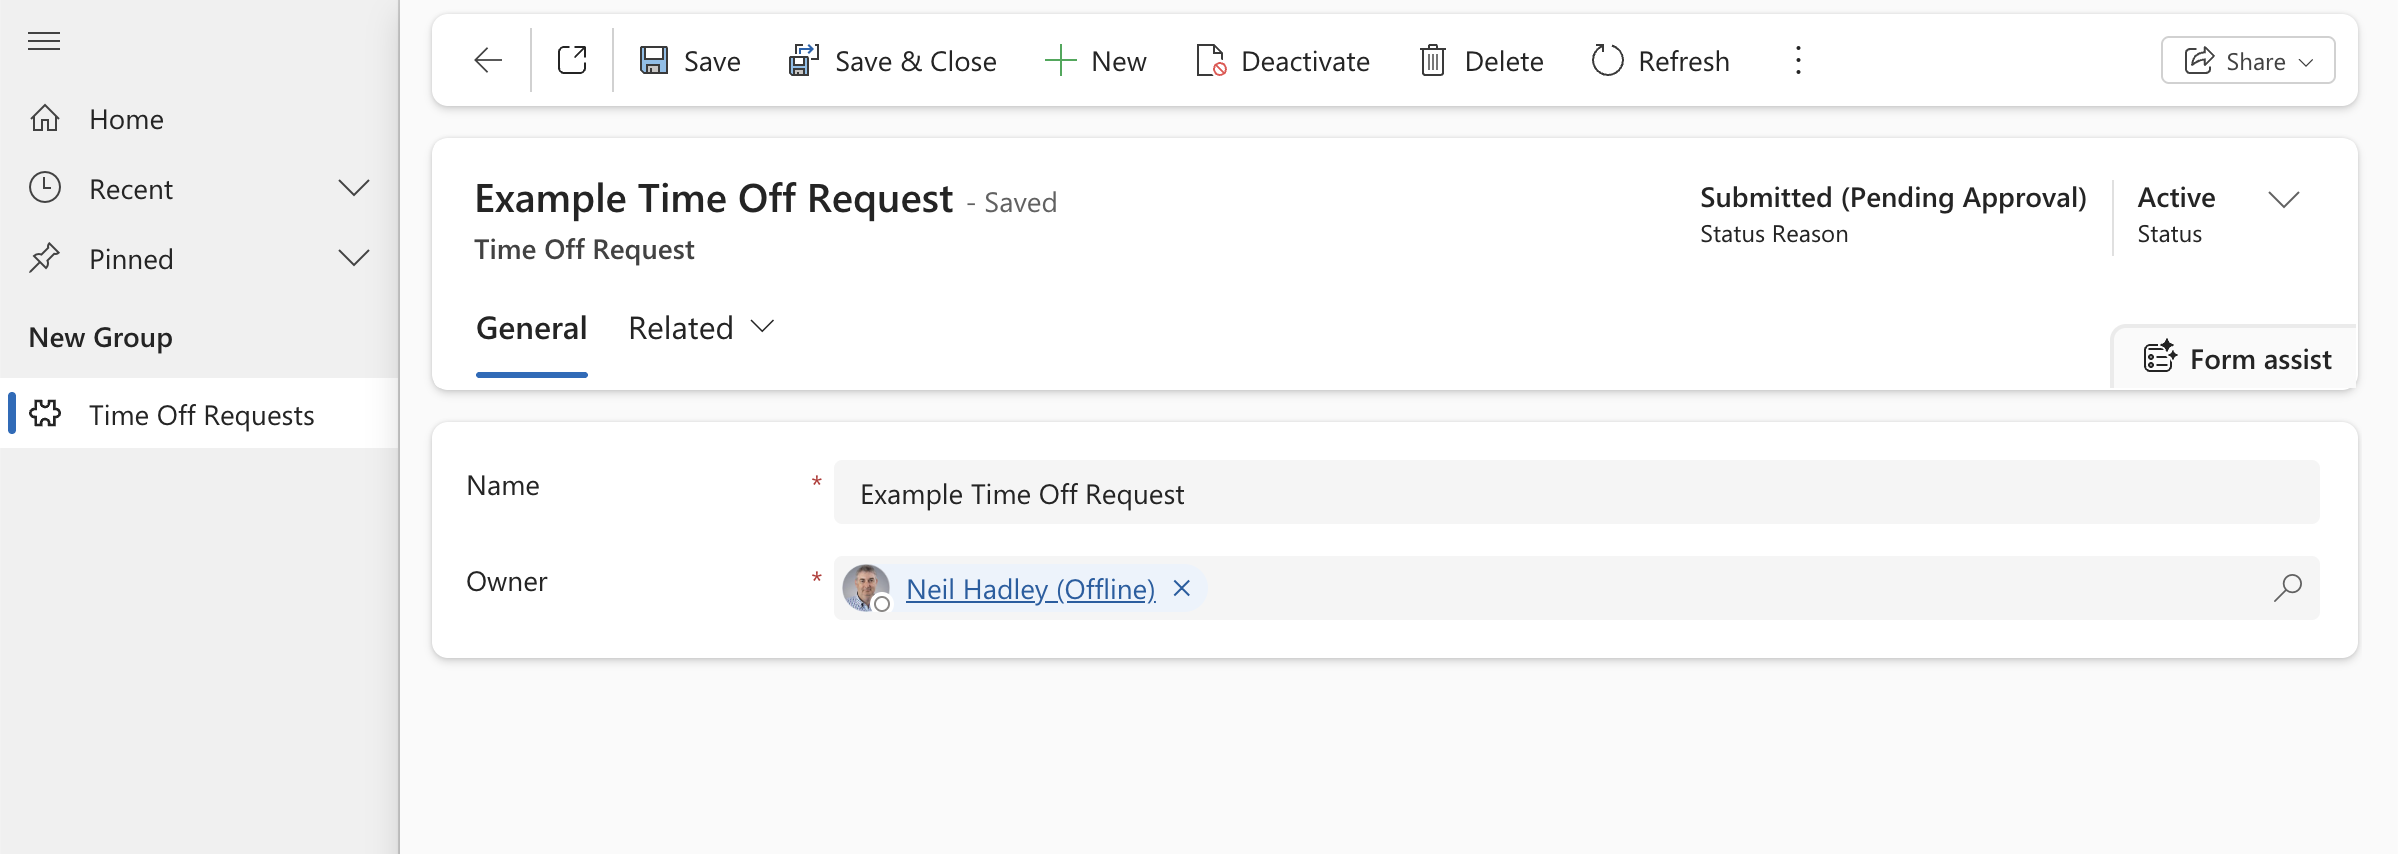
The saved record showed "Submitted (Pending Approval)" as the Status Reason and "Active" as the Status in the form header.
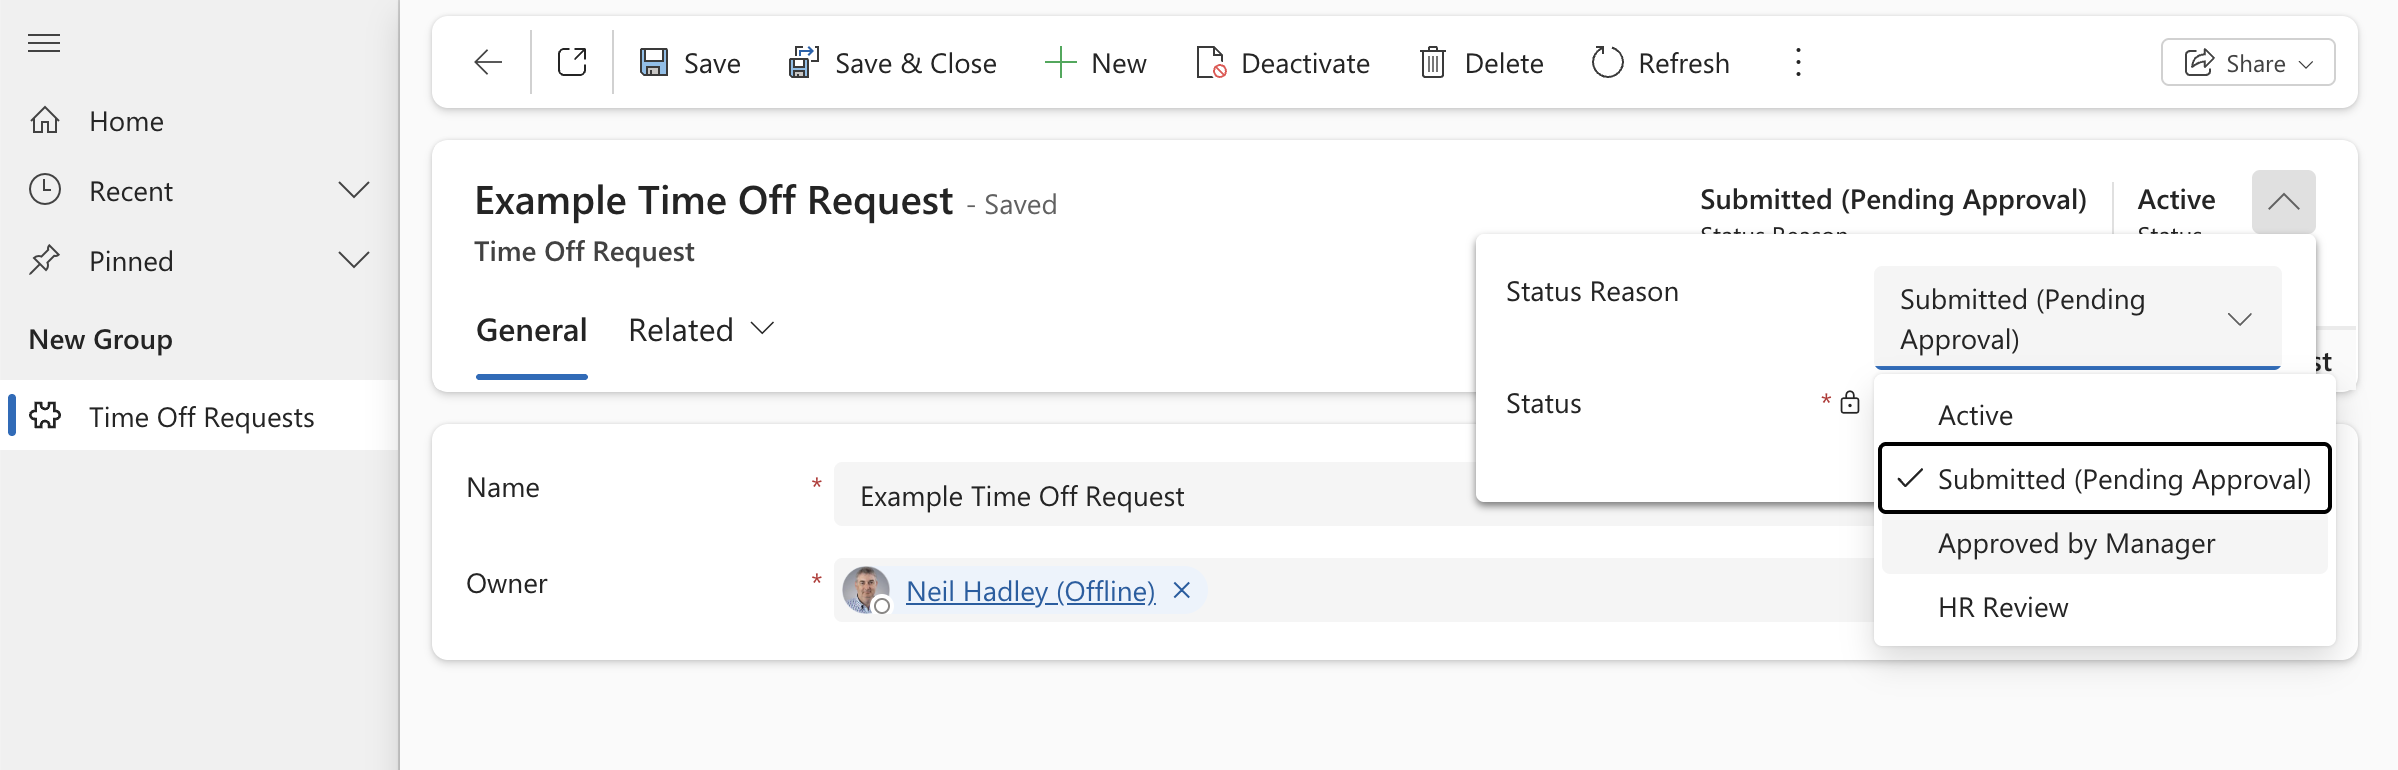
Clicking the Status Reason in the header expanded a dropdown showing all four Active options — I could advance the reason directly from the form.
I updated the record to "Approved by Manager" to test the deactivation flow now that Status Reason was on the form.
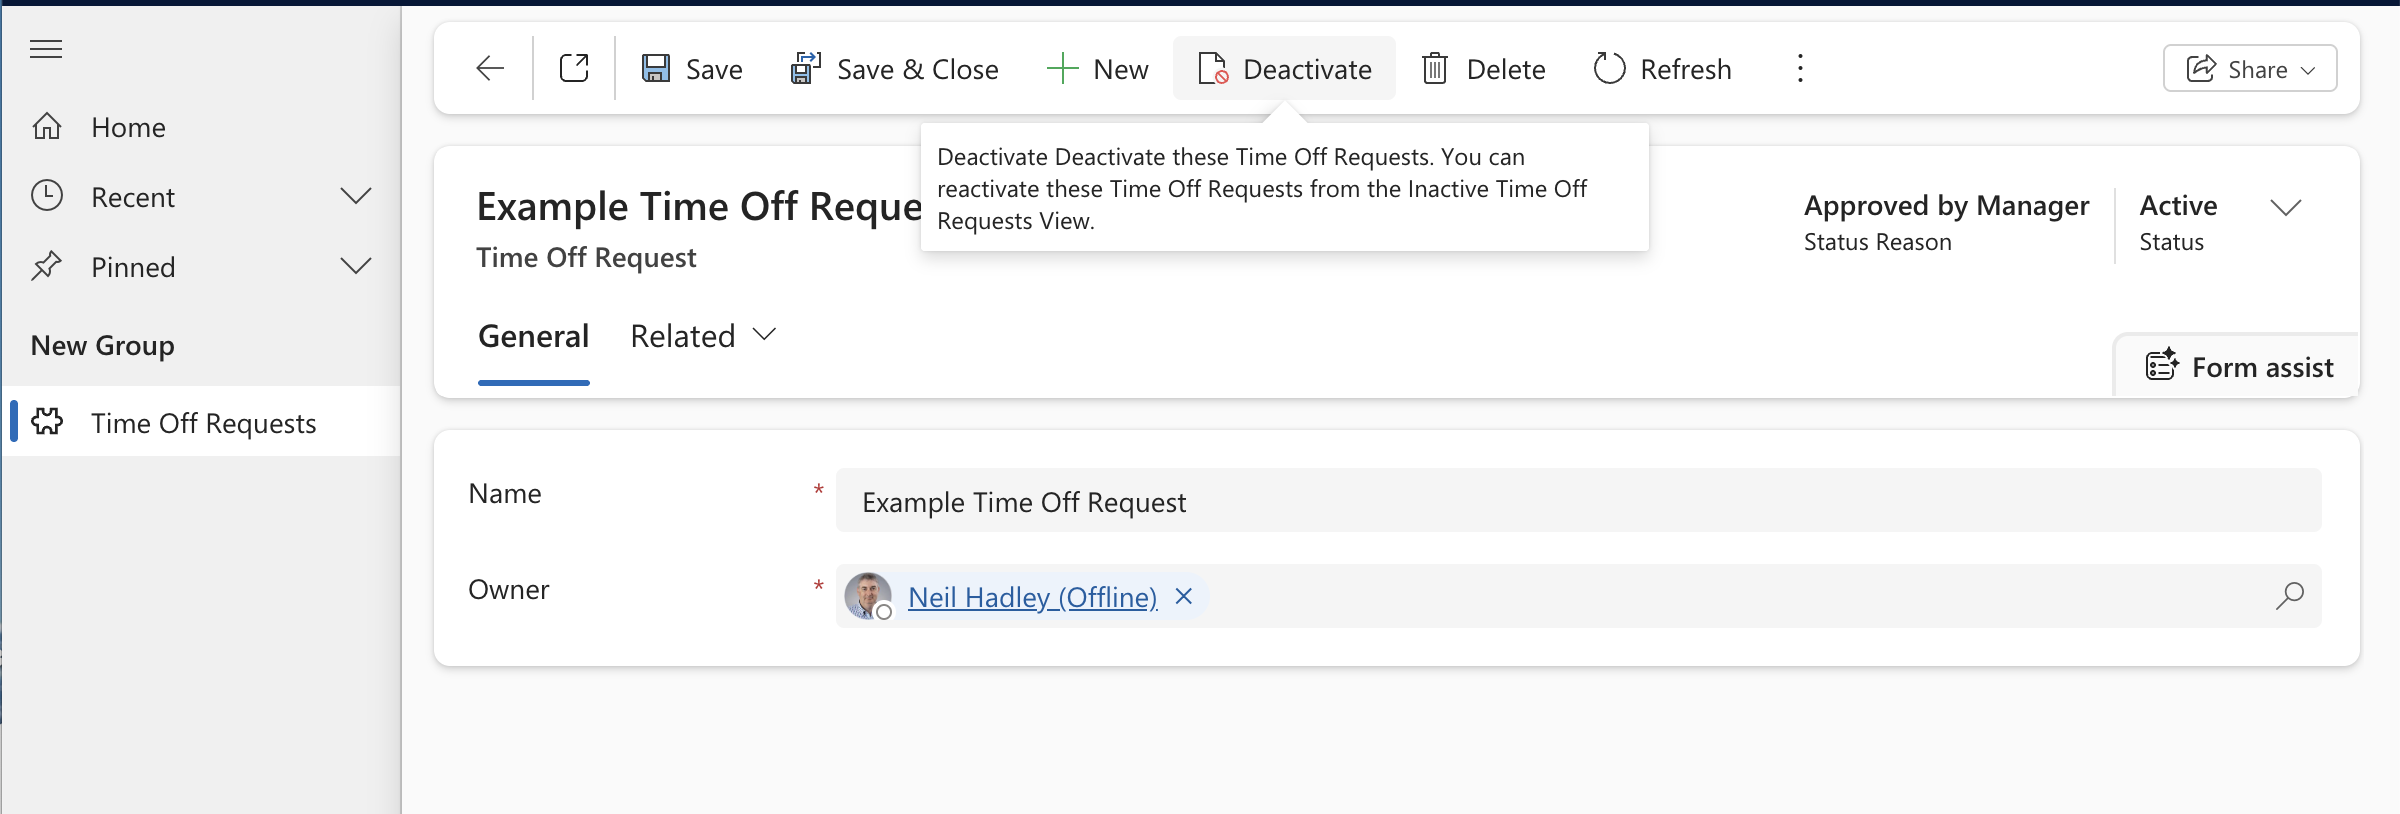
The record was set to "Approved by Manager". I hovered over the Deactivate button to trigger the dialog.
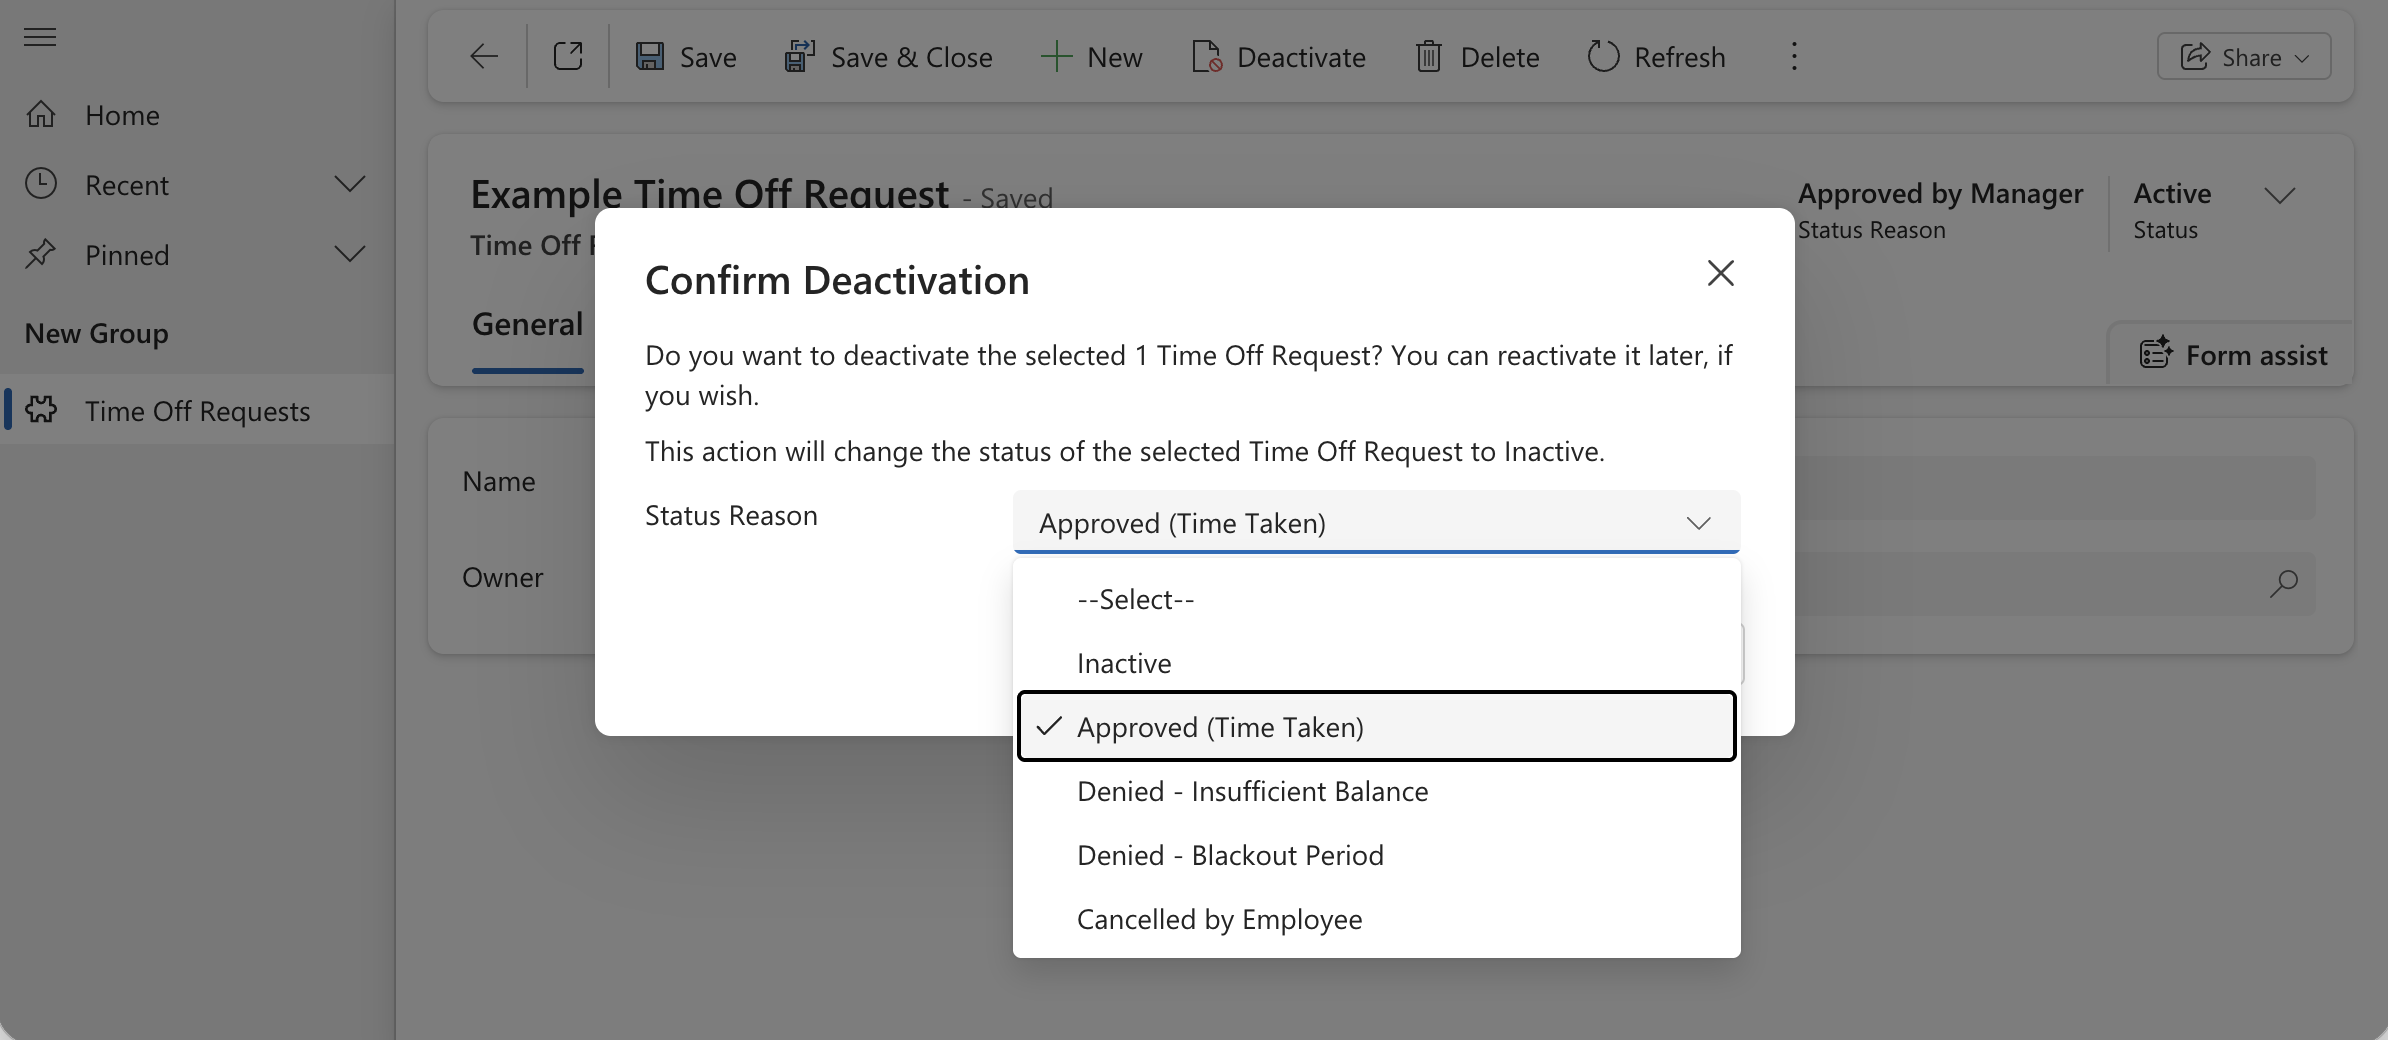
The Confirm Deactivation dialog now showed a Status Reason dropdown — this only appeared because Status Reason was on the form. The dialog listed the Inactive options.
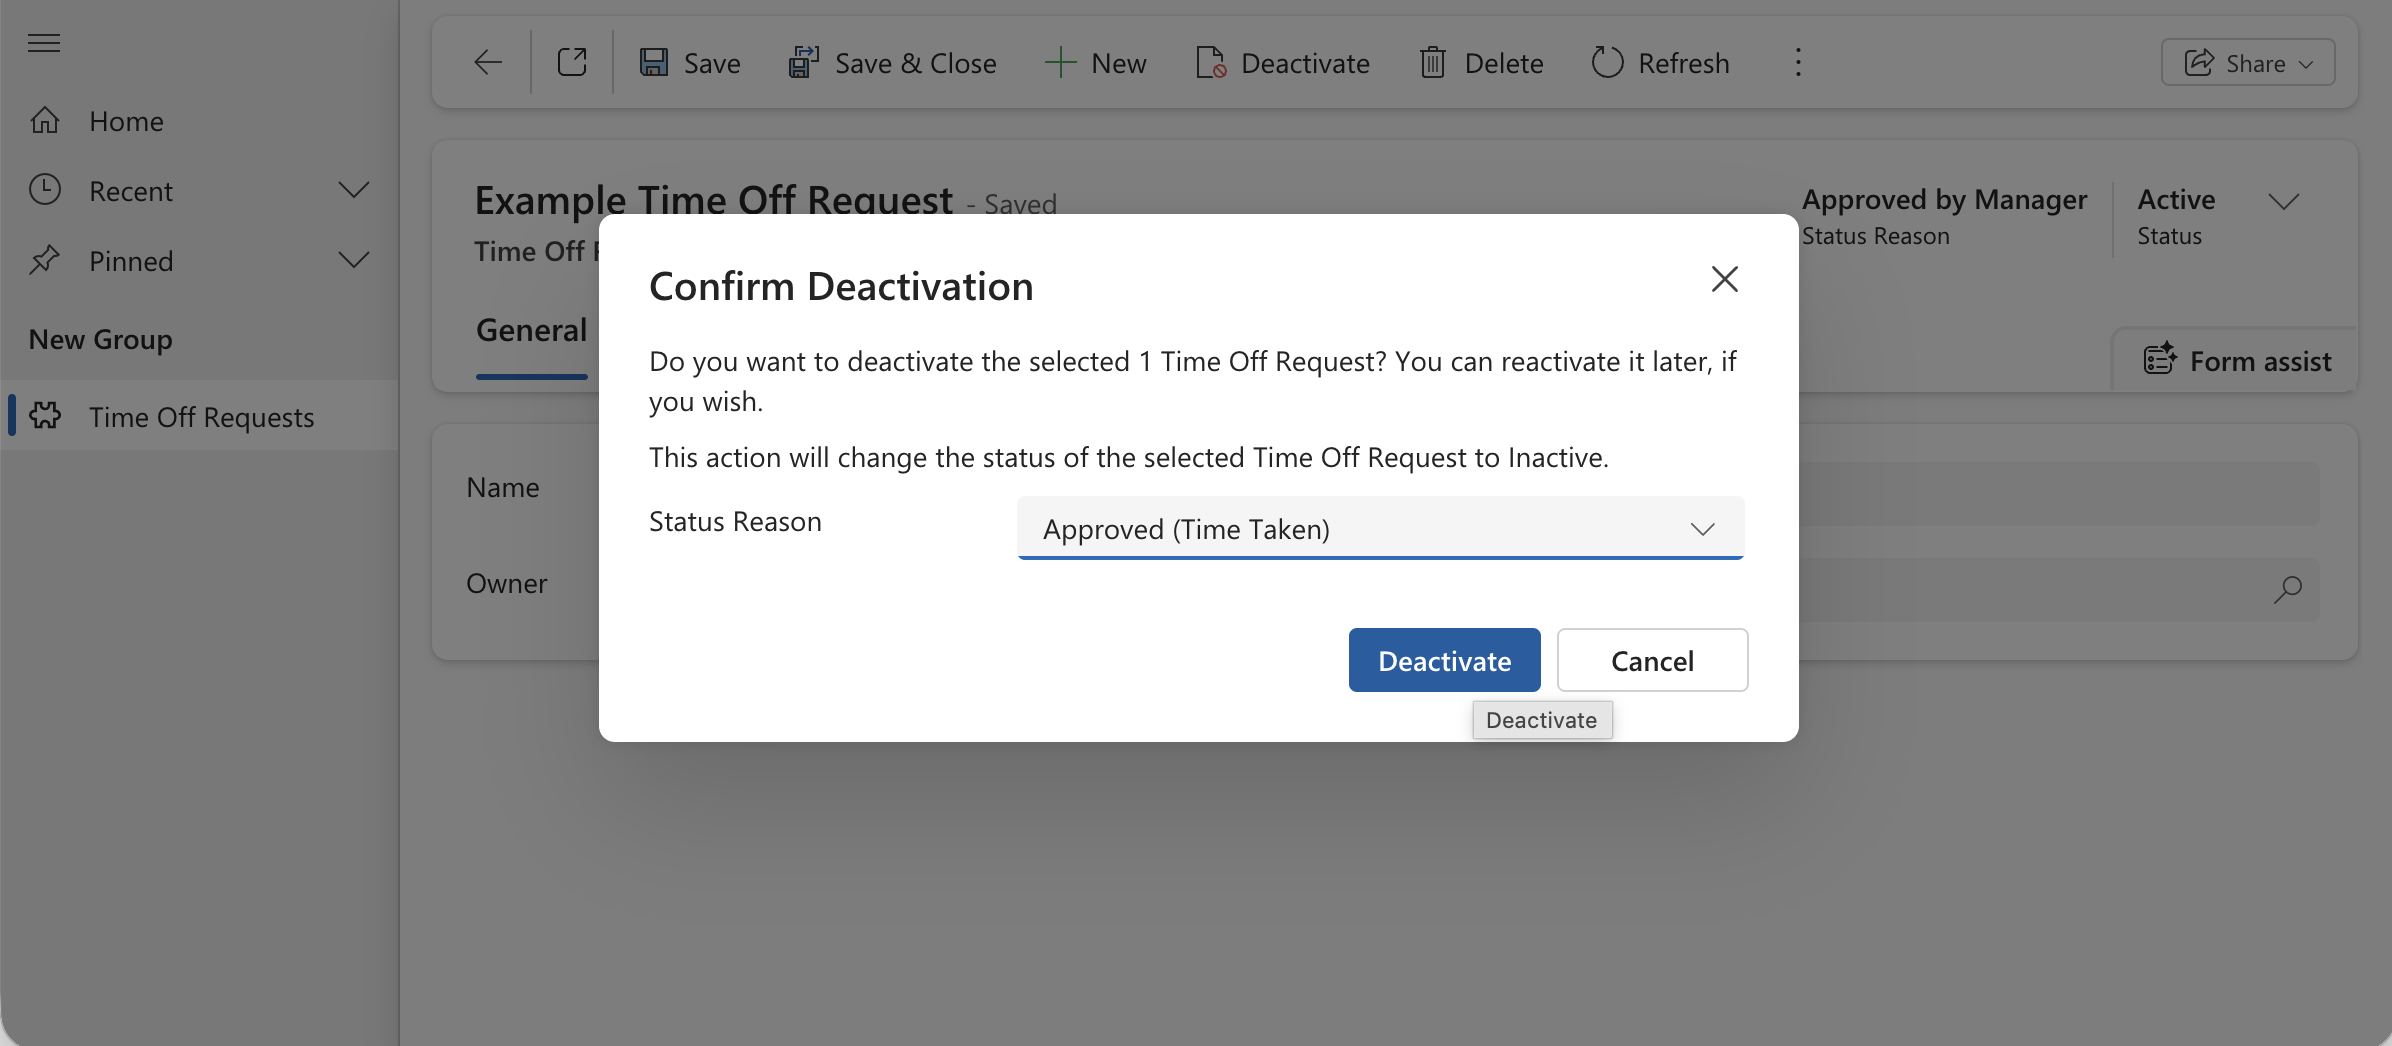
I selected "Approved (Time Taken)" from the Inactive Status Reason options before confirming.
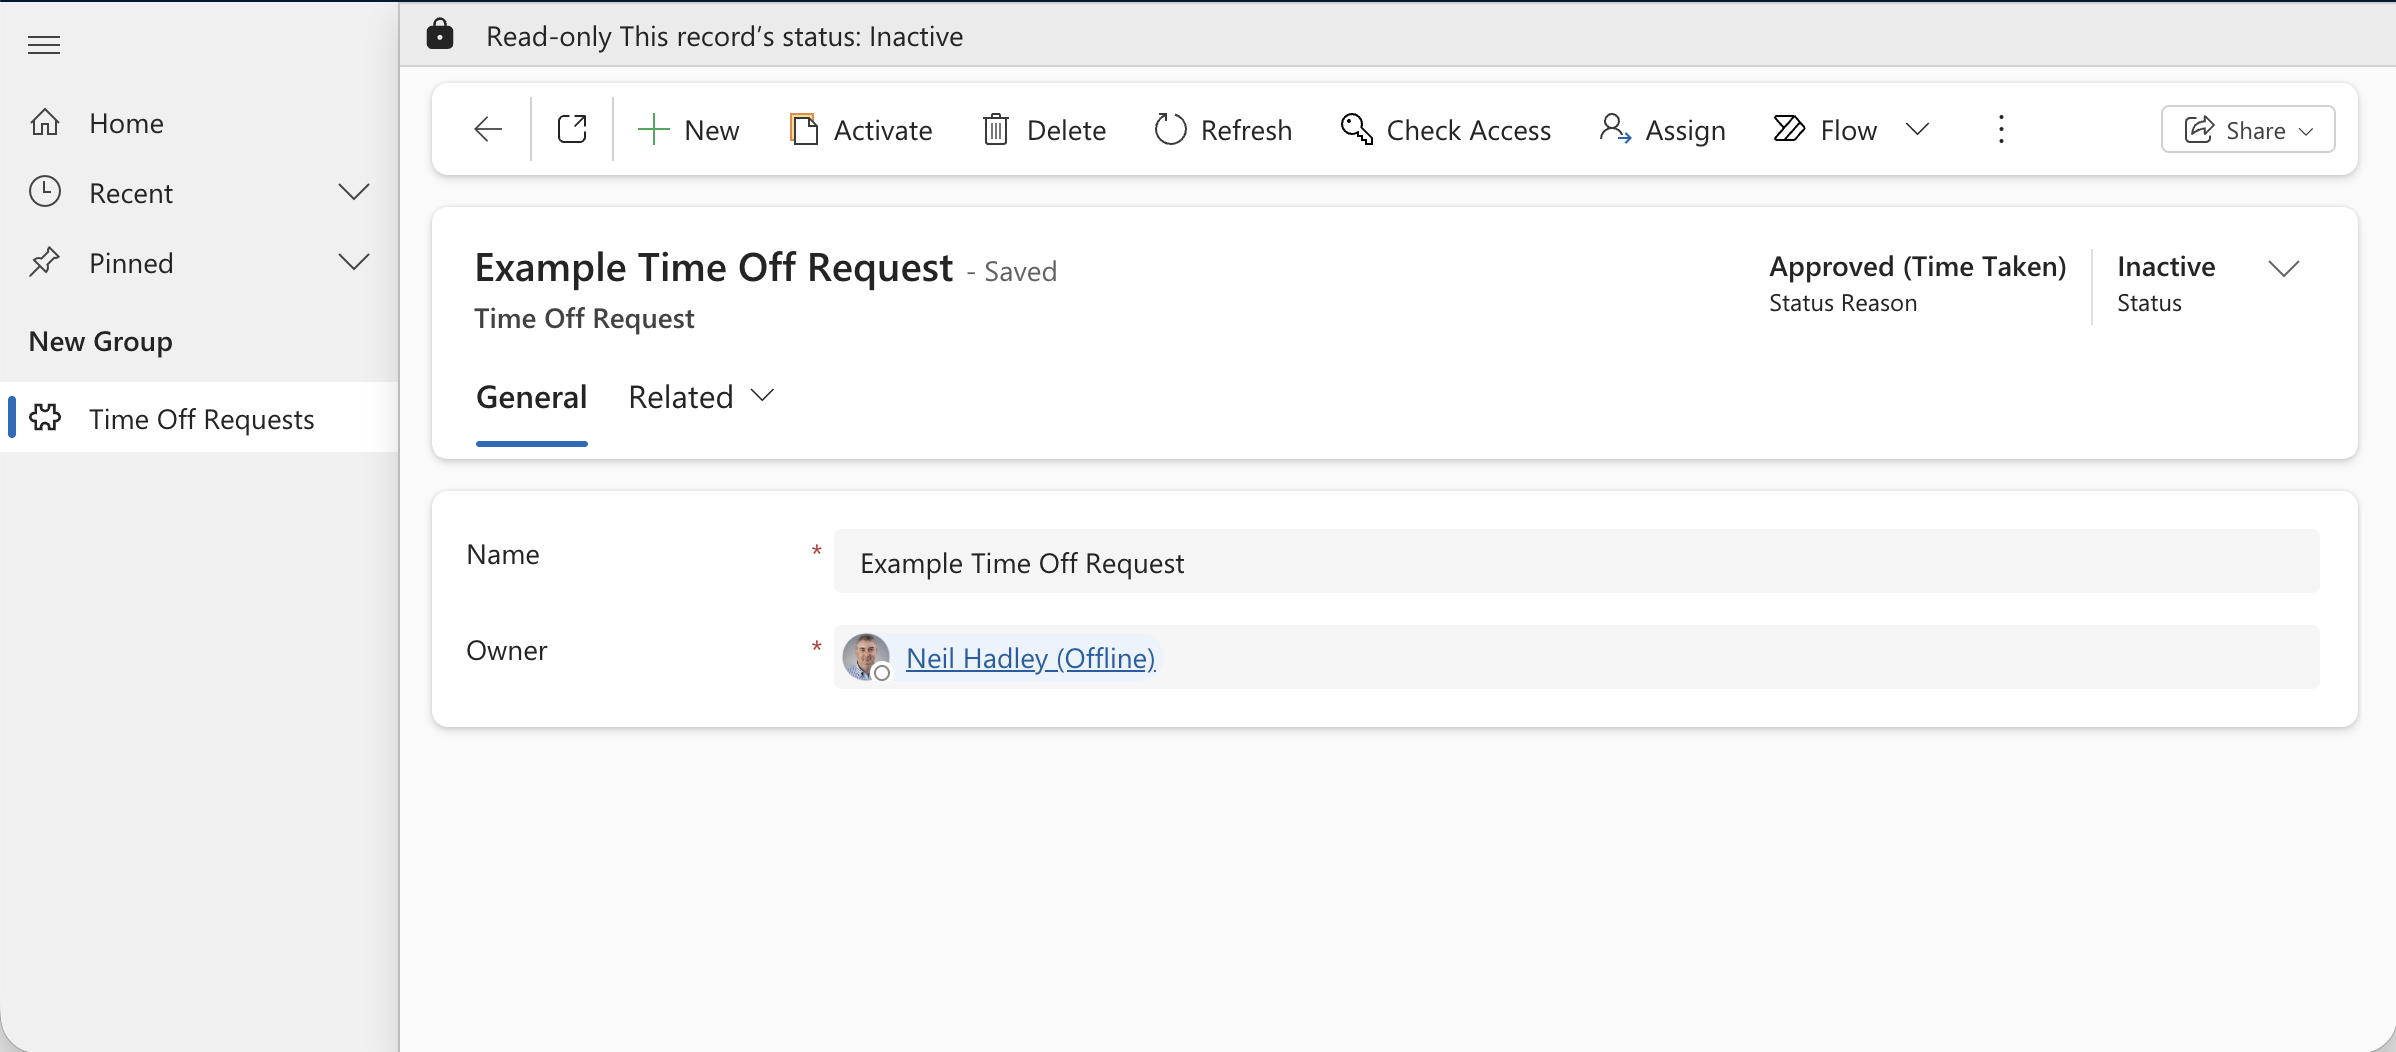
The record was now read-only showing "Approved (Time Taken)" as the Status Reason and "Inactive" as the Status.
Adding Status Reason to the form header is the mechanism that makes the Deactivate dialog prompt for a reason. Without it on the form, the Confirm Deactivation dialog skips the picker entirely.
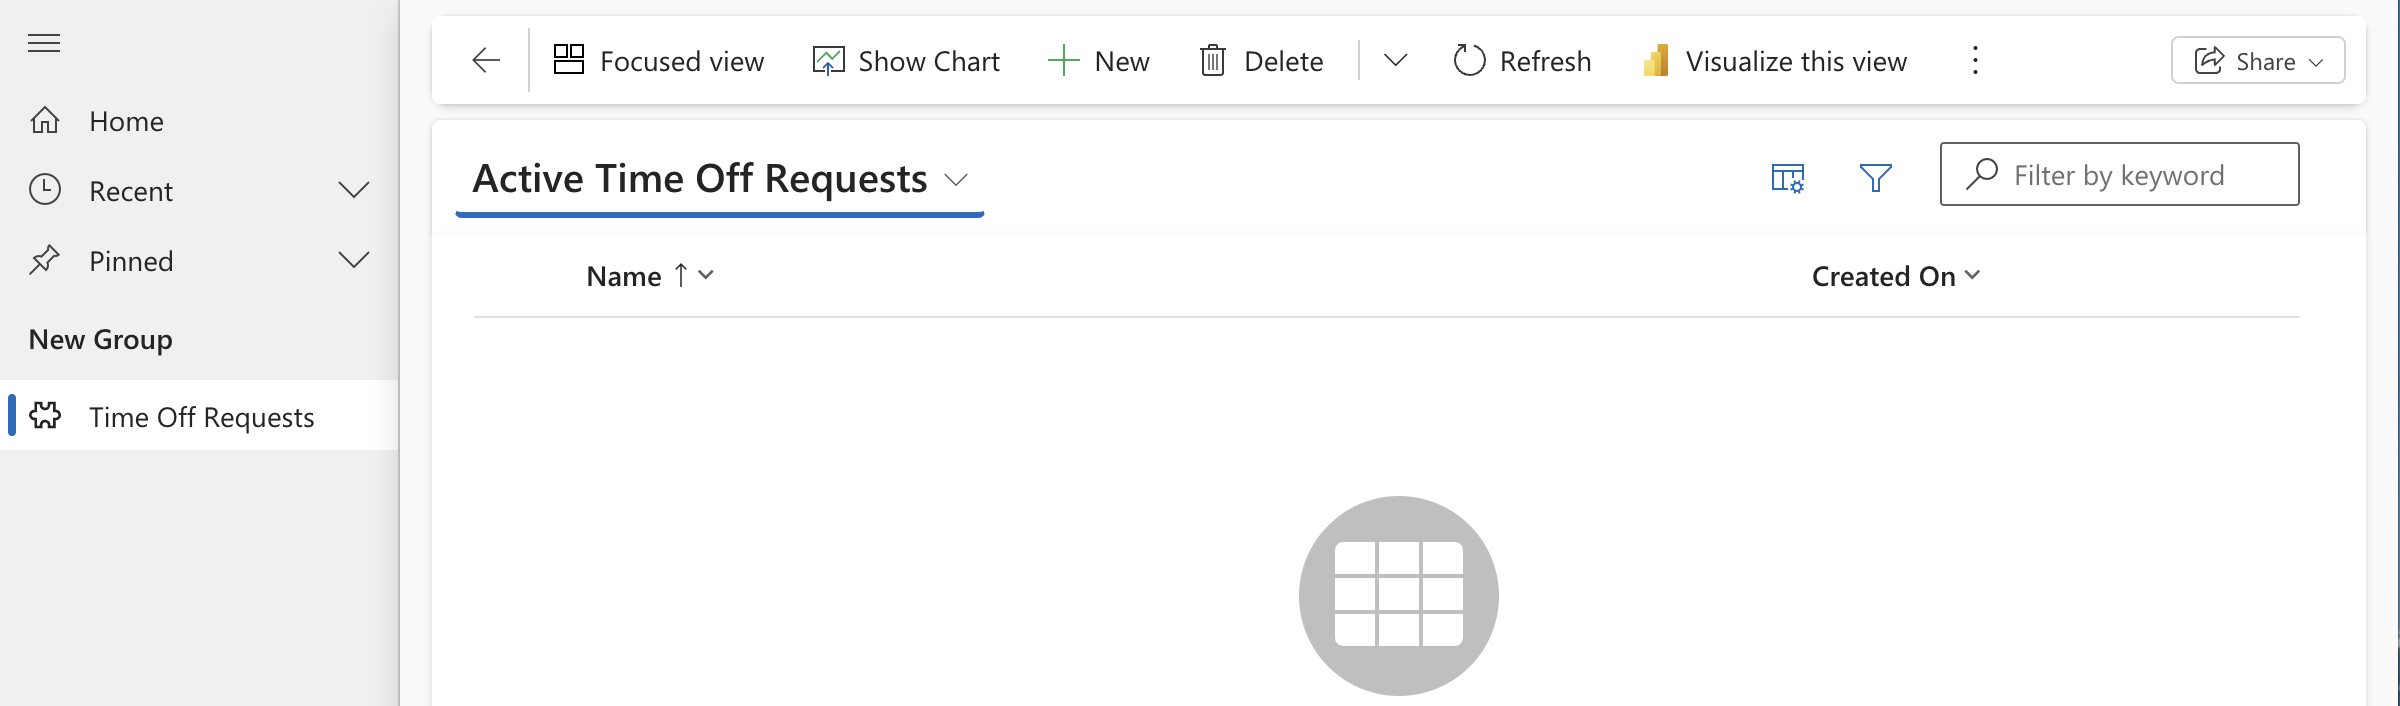
The Active Time Off Requests view was empty — the record had been moved to Inactive.
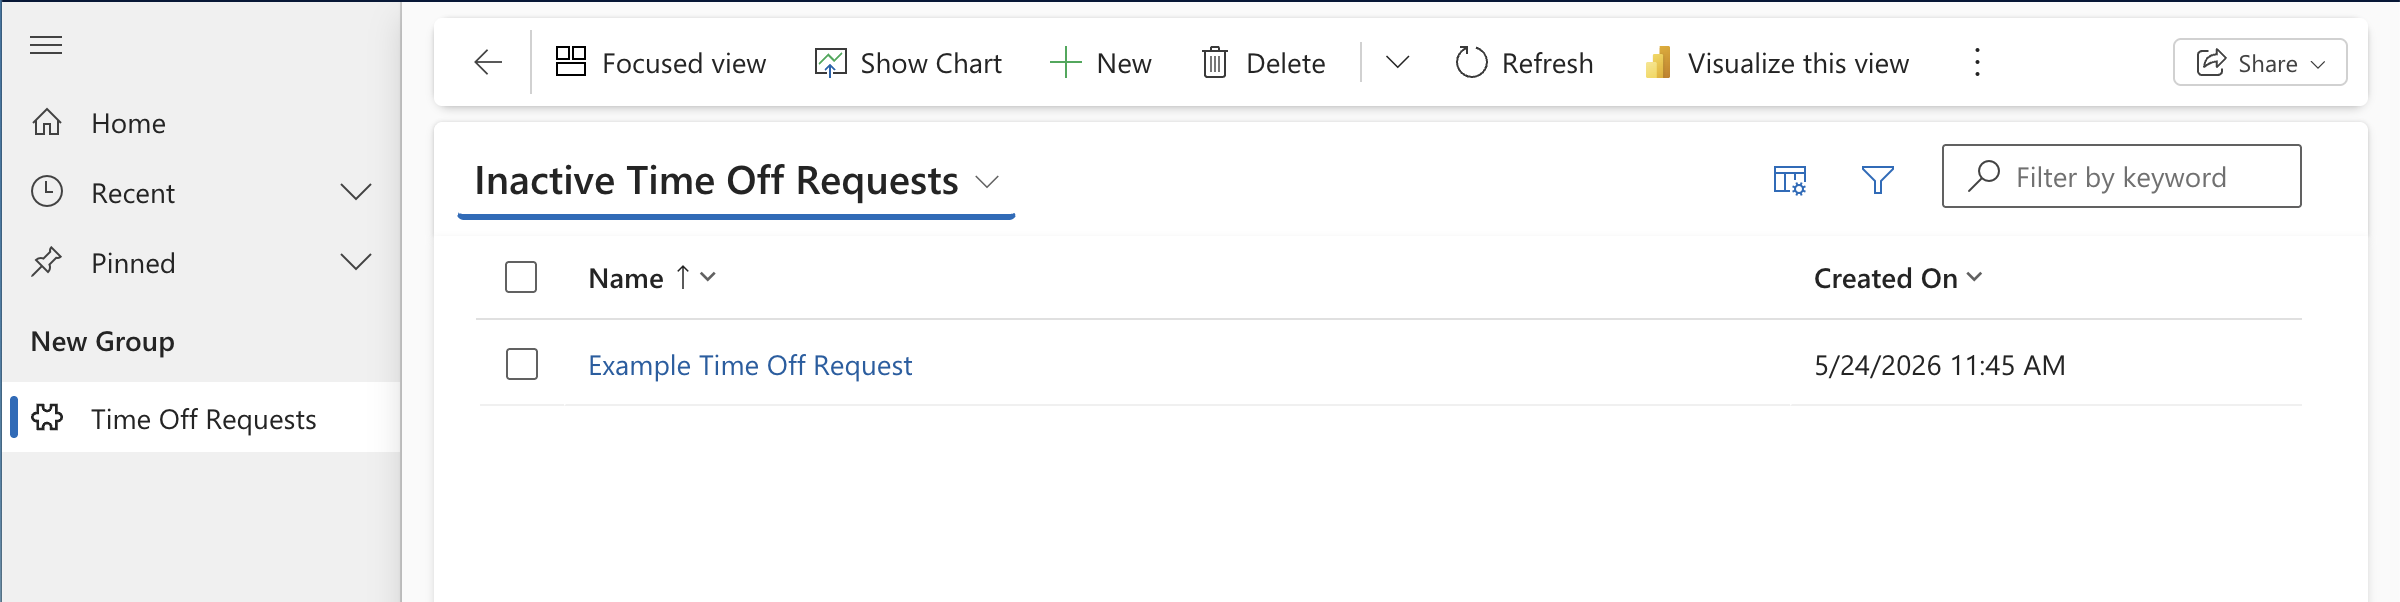
The Inactive view showed "Example Time Off Request".
Adding Status Reason to views
To surface the Status Reason in list views, I opened the table's Views in the modern maker portal and added the Status Reason column.
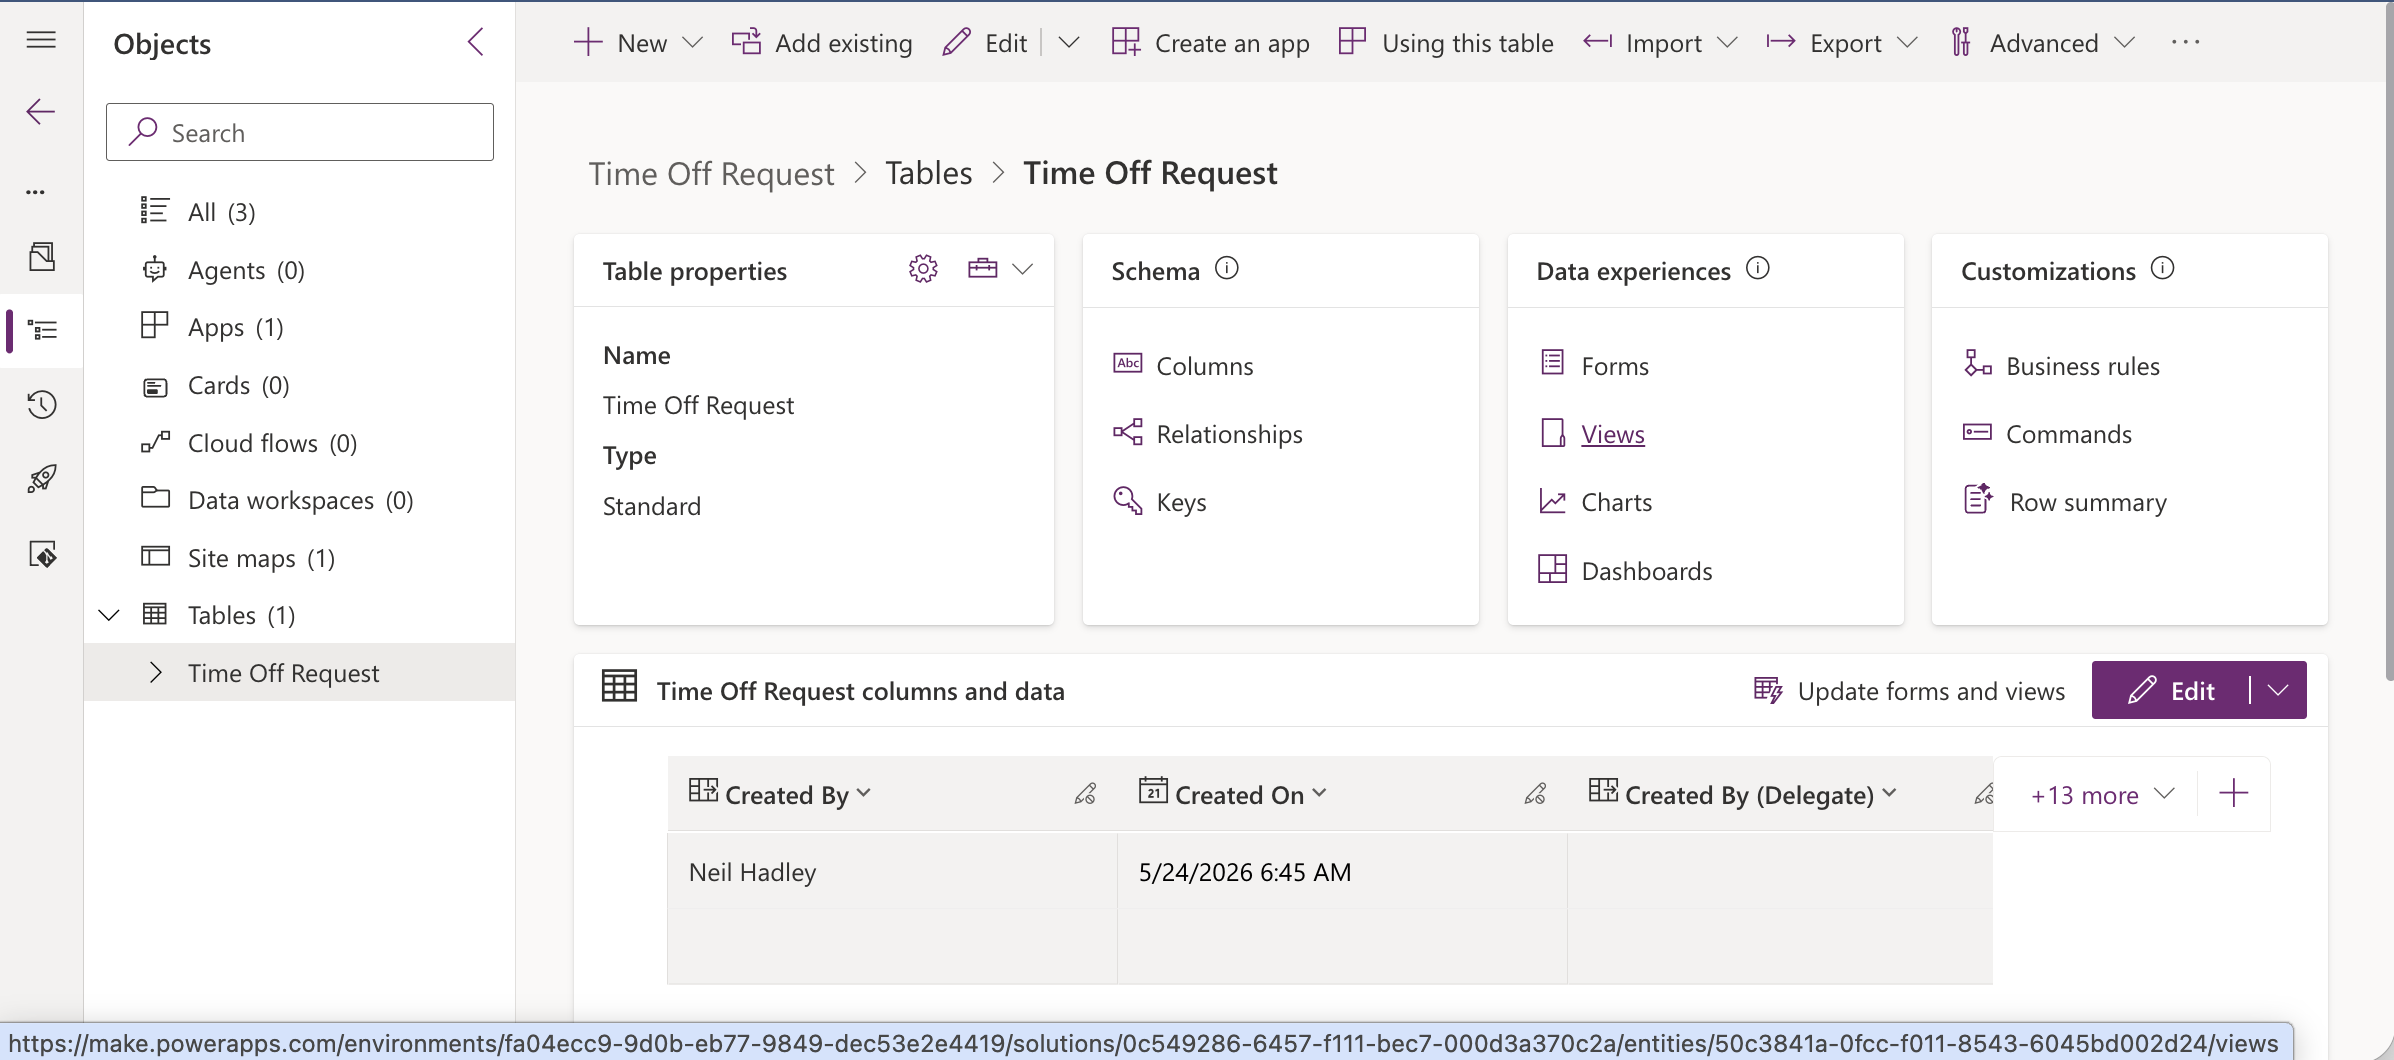
I navigated to the Time Off Request table overview in the Power Apps maker portal and clicked Views.
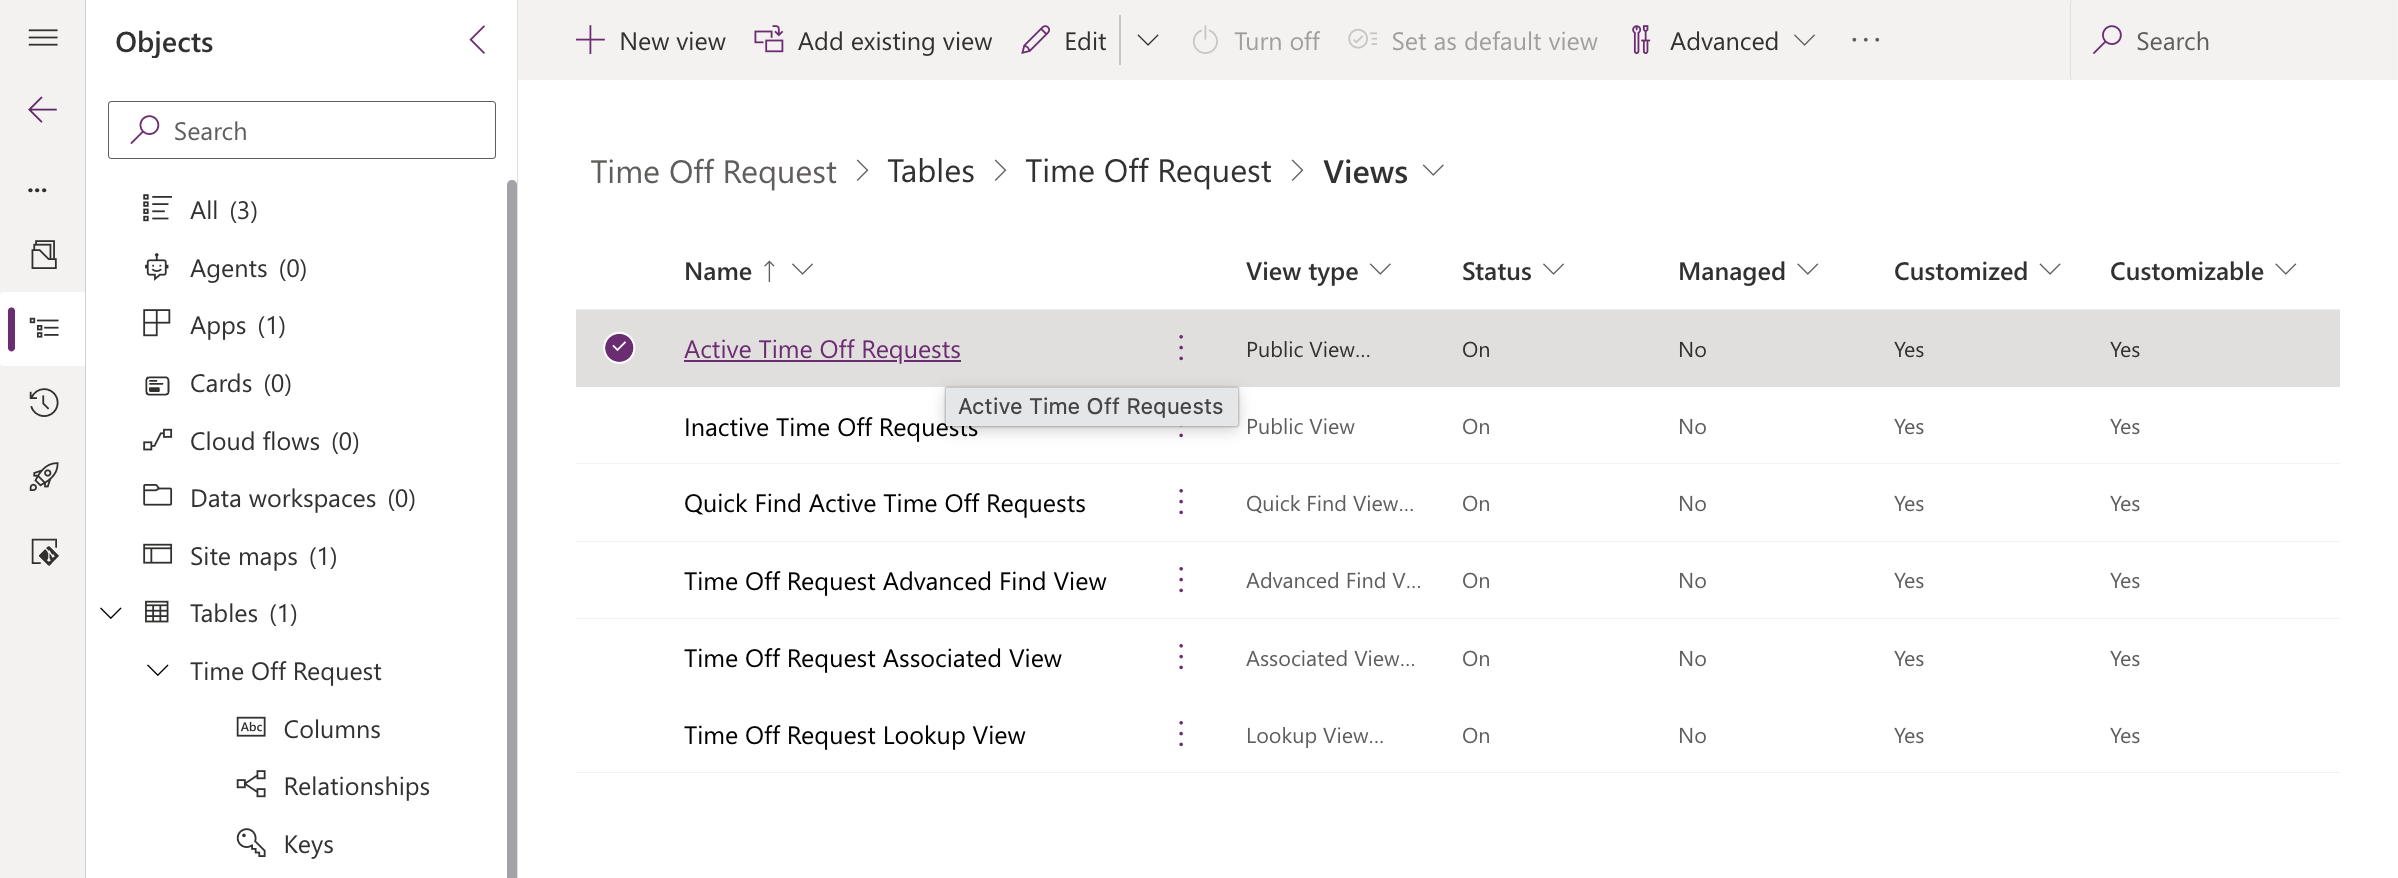
The views list showed all default views for the table — I opened "Active Time Off Requests" first.
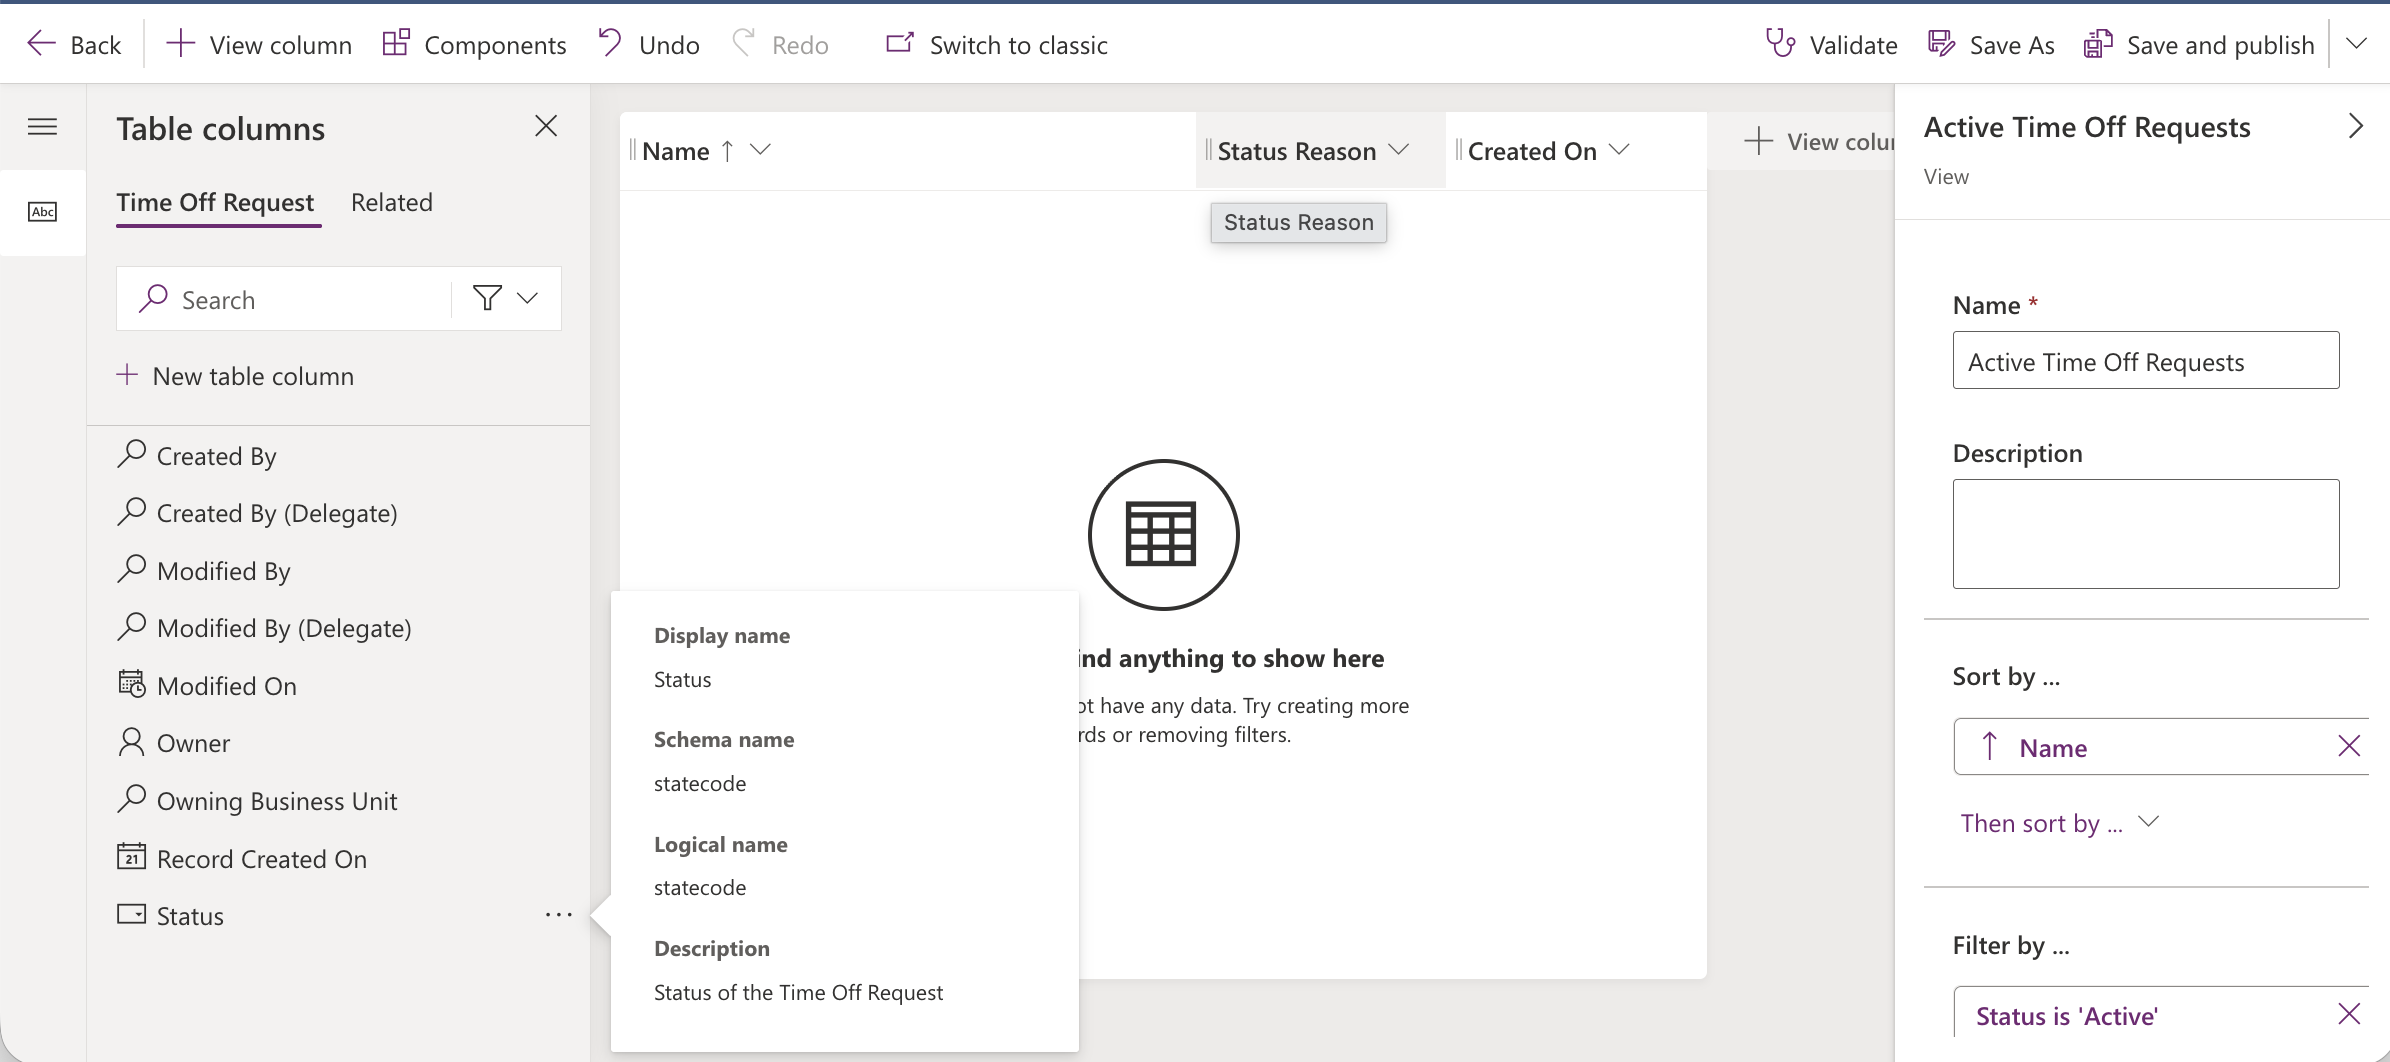
In the view editor I could see Status Reason was now in the column header, and the Status field (statecode) properties panel was visible on the left.

The view editor saved and published the Active view with Status Reason added as a column.
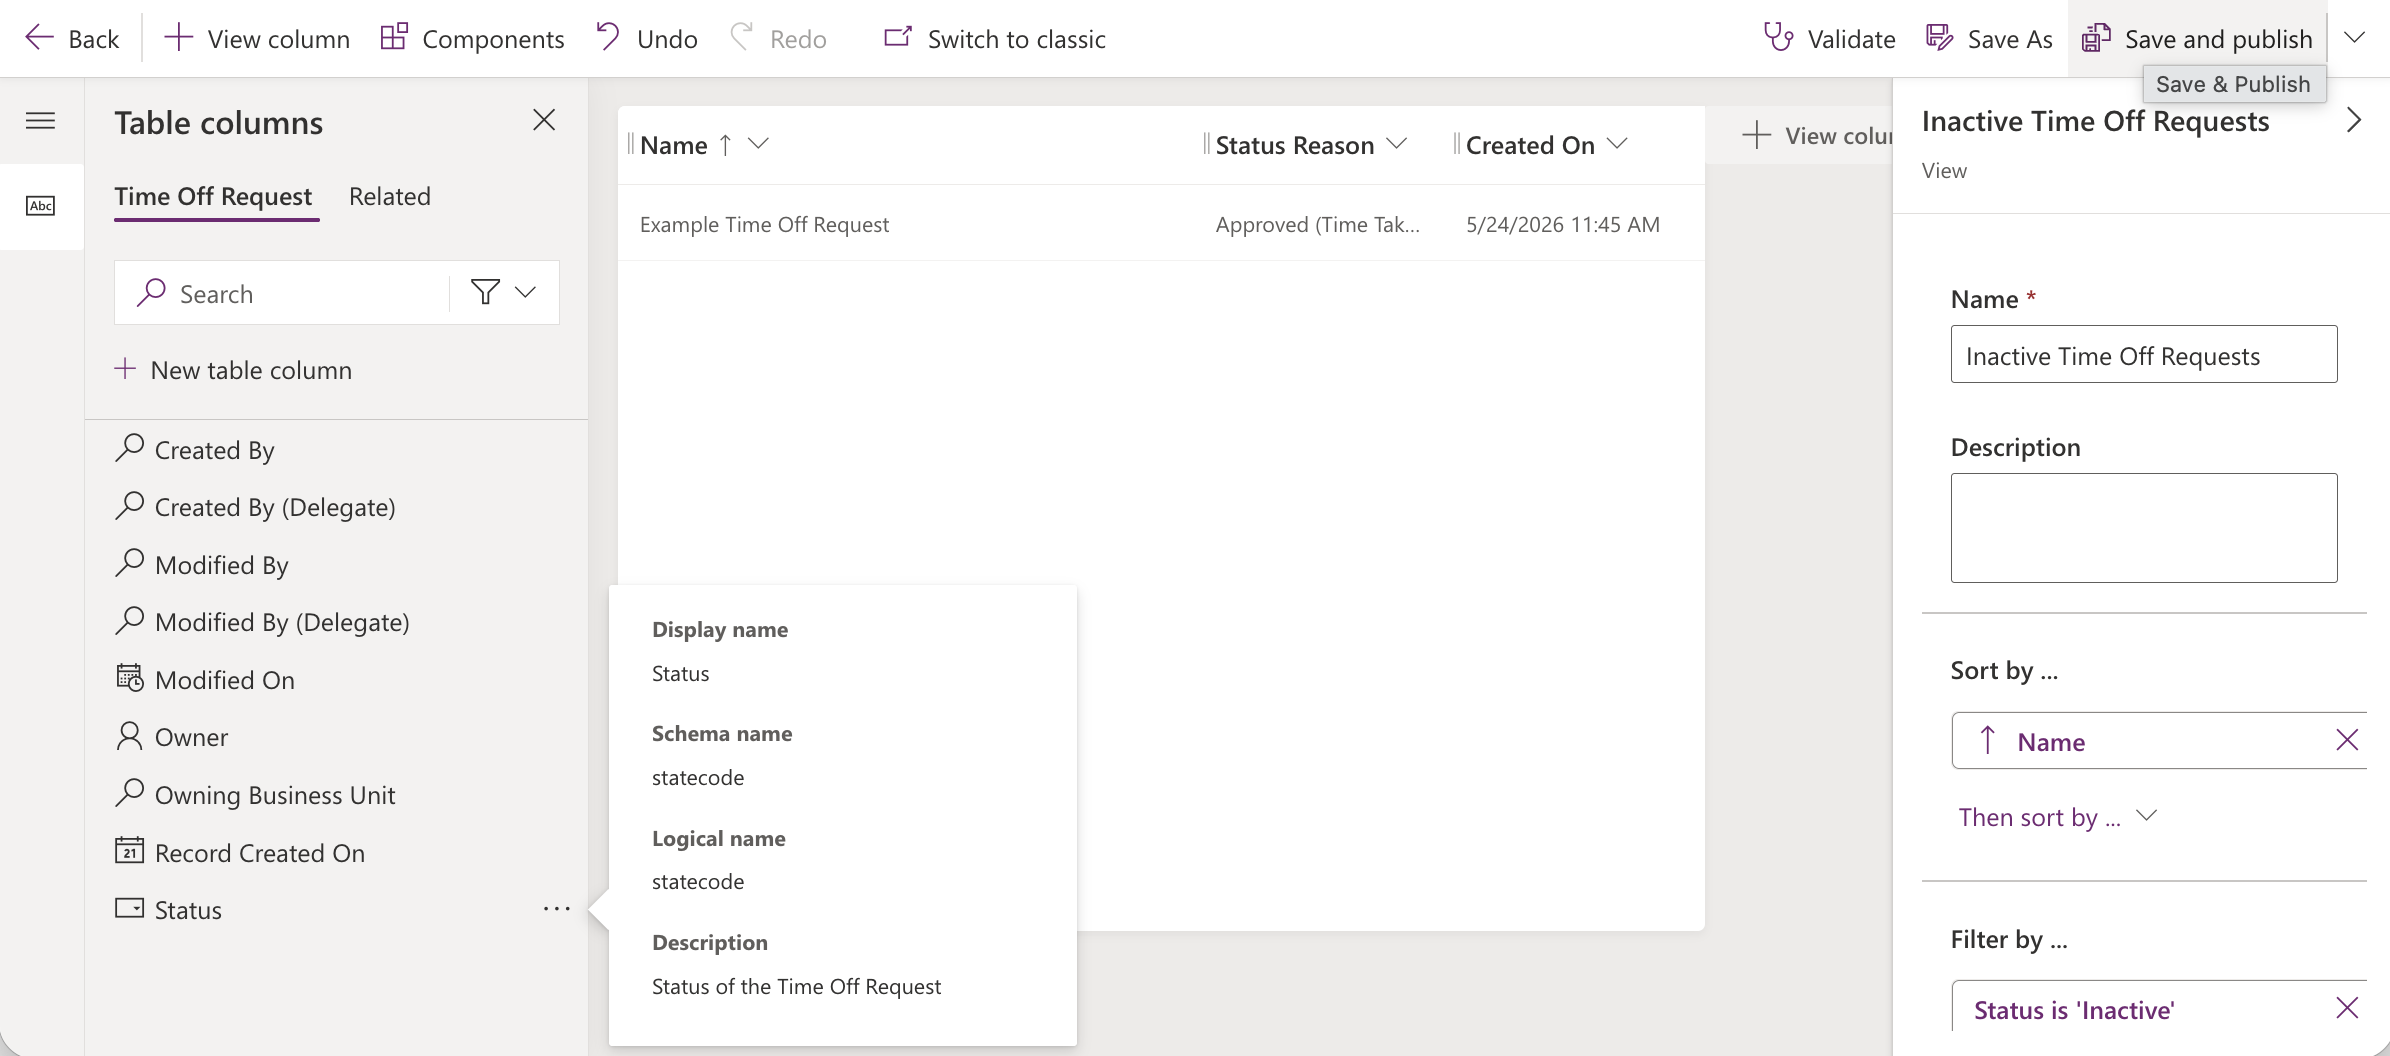
I updated the Inactive view the same way — the "Example Time Off Request" record now showed "Approved (Time Tak..." in the Status Reason column.
Status Reason Transitions
So far the Status Reason dropdown showed all options for the current status group — a user could jump from "Submitted (Pending Approval)" straight to "HR Review" without going through "Approved by Manager". Status Reason Transitions locks that down: you define which reasons can follow which, so the dropdown only shows valid next steps.
This feature lives in the classic Solution Explorer, not the modern maker portal. To get there I clicked the "..." menu on the Solutions page and selected Switch to classic.
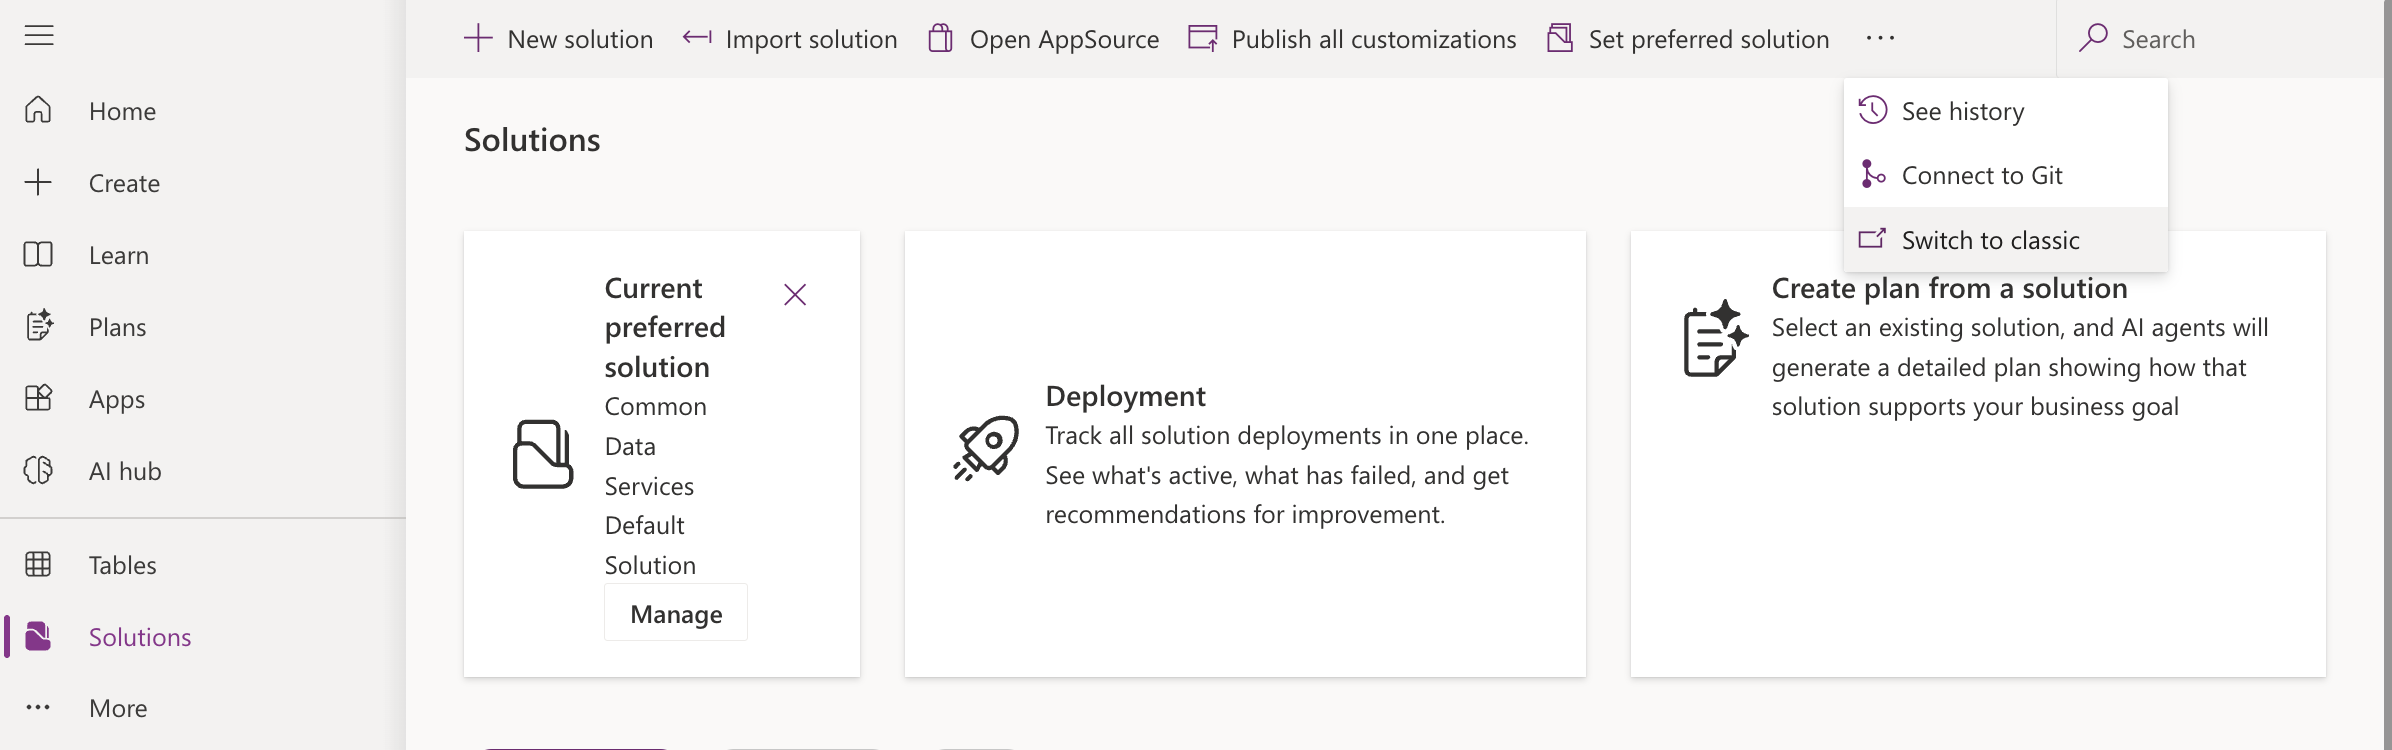
I clicked the "..." menu on the Solutions page and selected "Switch to classic" to open the legacy Solution Explorer.

The classic Solution Explorer listed all solutions — I selected the Time Off Request solution.
Inside the solution I navigated to Entities > Time Off Request > Fields, found statuscode (Status Reason), and opened it.
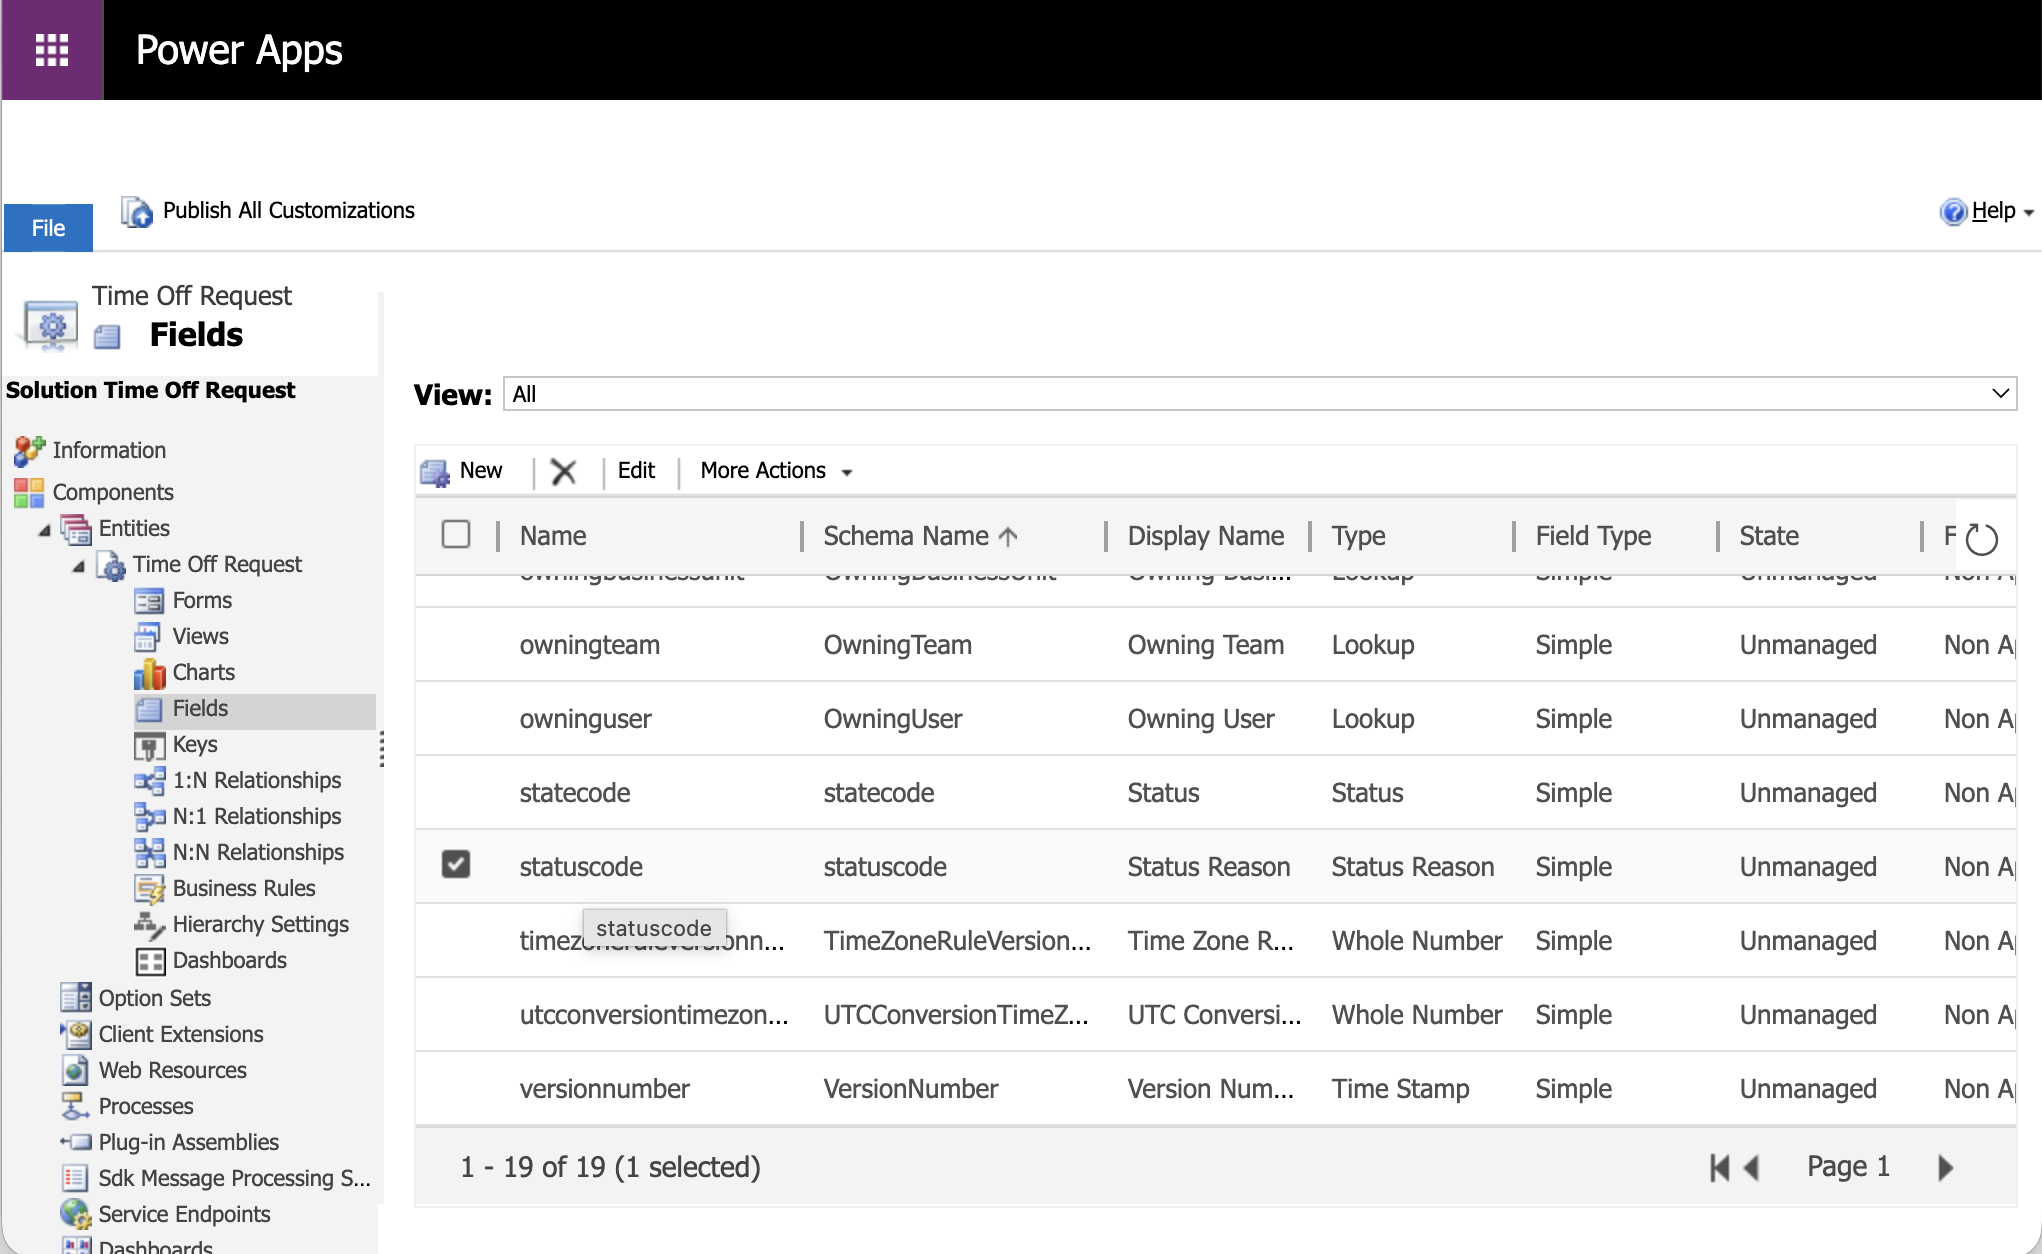
The Fields list showed statuscode (Status Reason) selected — I clicked to open it.
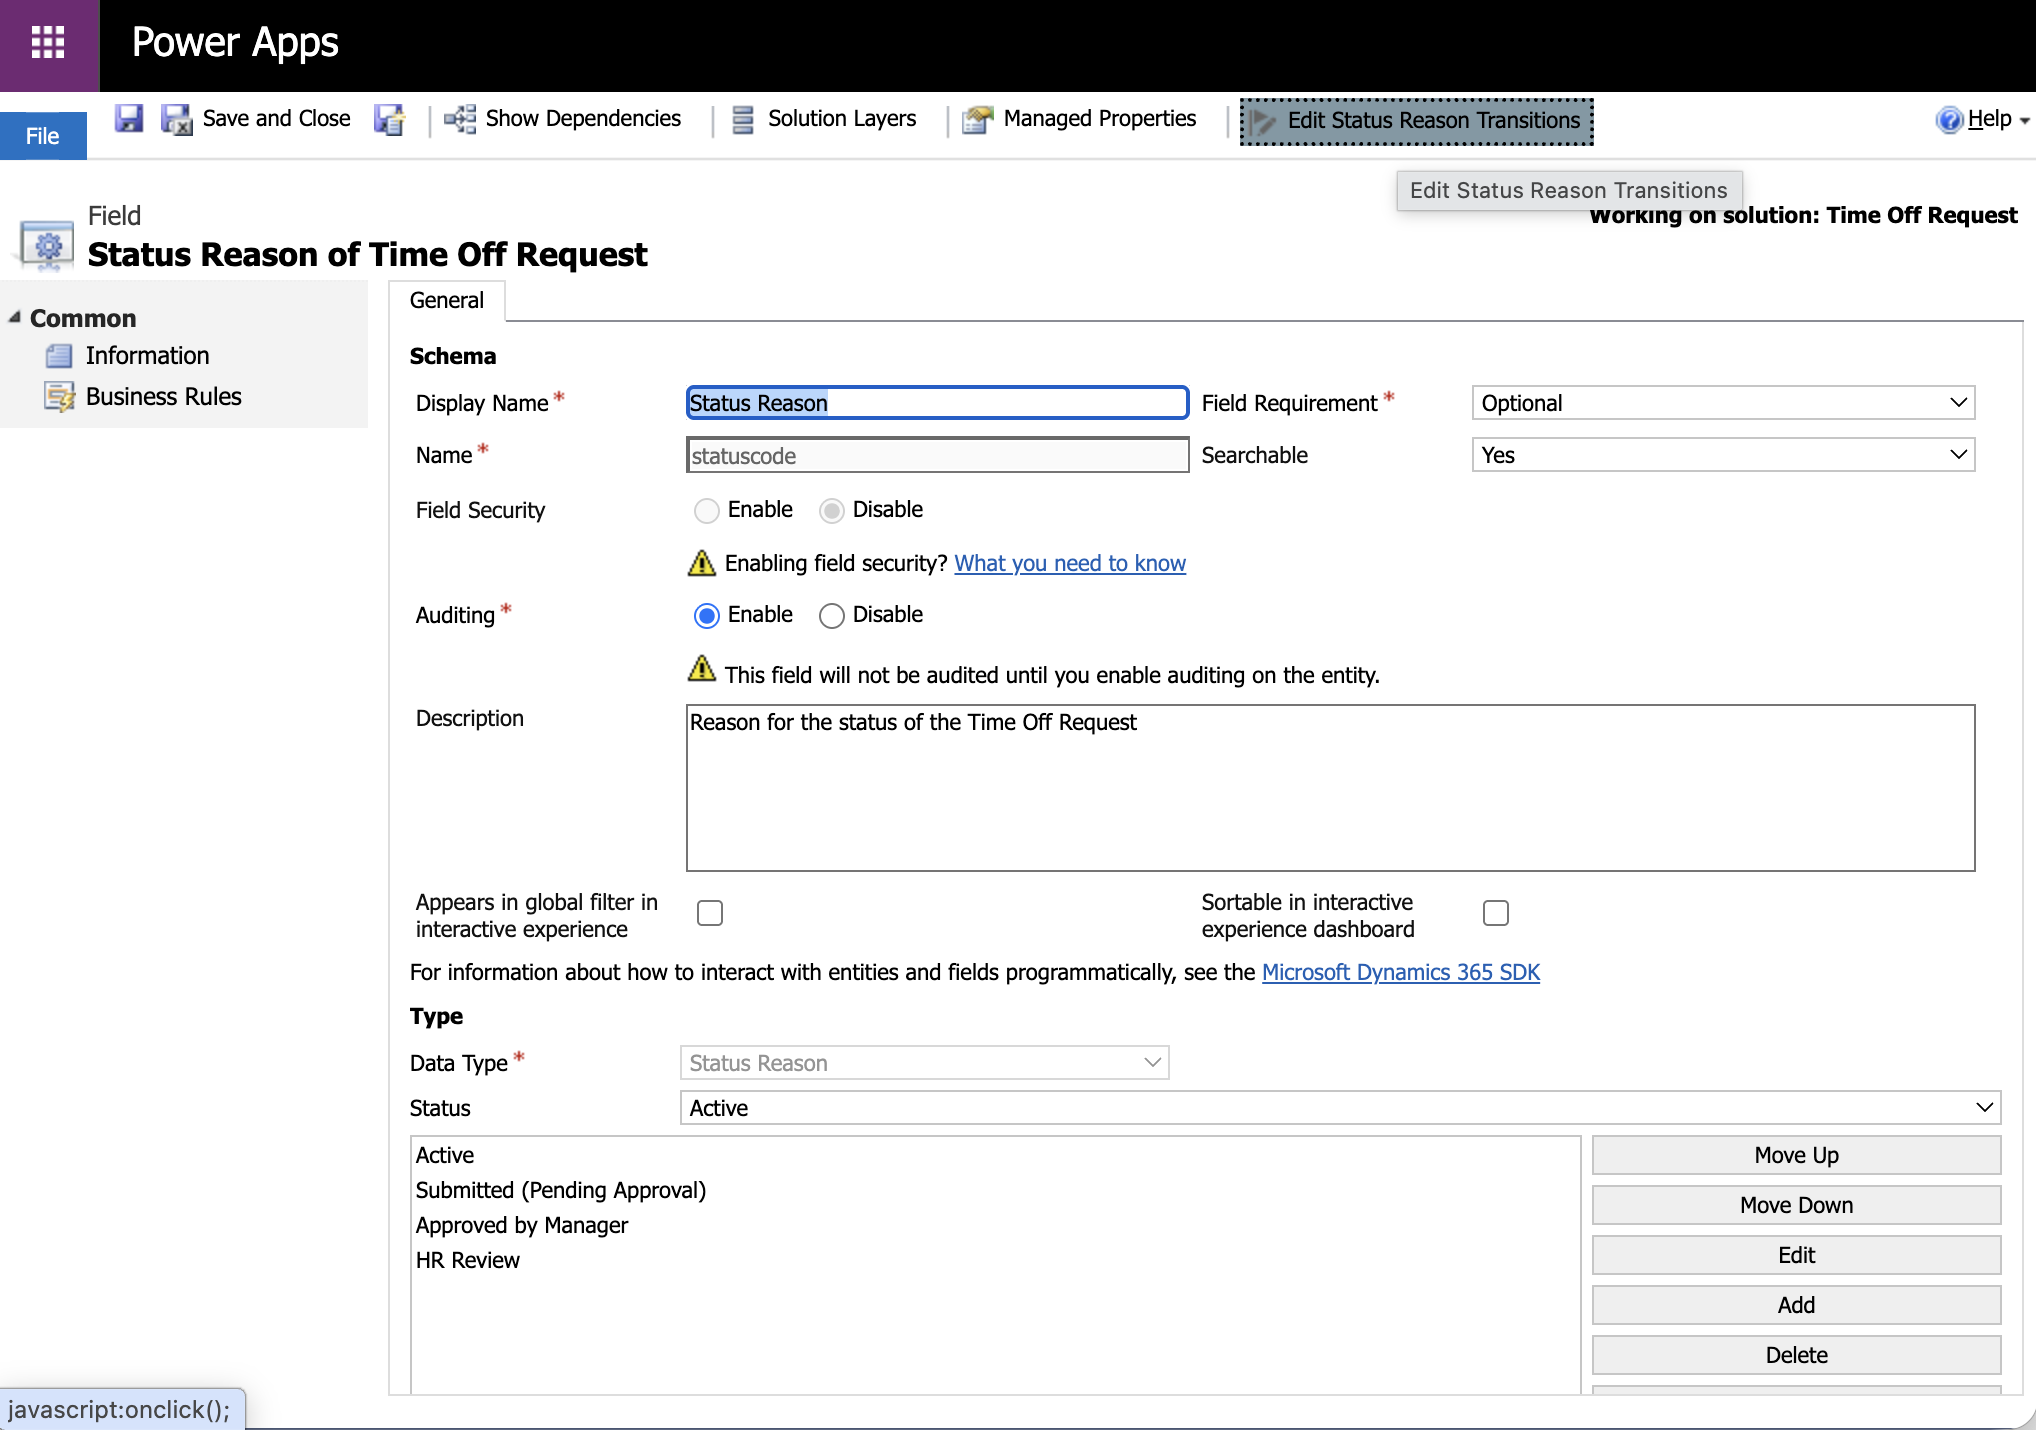
The Status Reason field editor in the classic Solution Explorer. The "Edit Status Reason Transitions" button appeared in the ribbon at the top.
I clicked Edit Status Reason Transitions to open the transitions dialog.
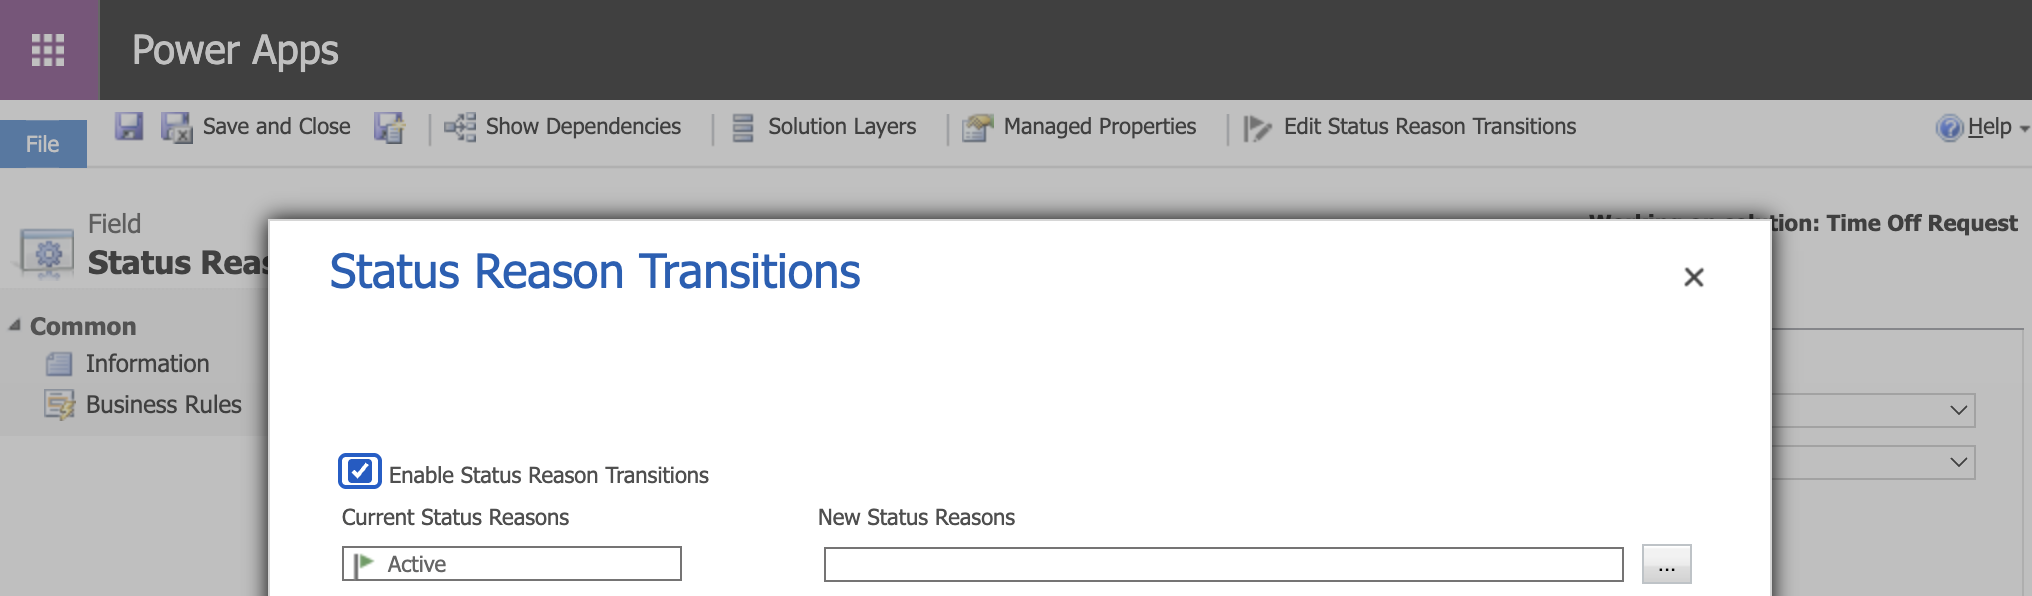
The Status Reason Transitions dialog opened. I checked "Enable Status Reason Transitions" to activate the feature. The dialog showed all Status Reasons in the Current Status Reasons column, with empty New Status Reasons fields to define allowed transitions.
For each current Status Reason I clicked the "..." button to open the Select Status Reason picker and chose which options should be reachable next. The transition logic I configured:
- Submitted (Pending Approval) → Approved by Manager, Denied - Insufficient Balance, Denied - Blackout Period, Cancelled by Employee
- Approved by Manager → HR Review, Denied - Blackout Period, Cancelled by Employee
- HR Review → Approved (Time Taken), Denied - Insufficient Balance
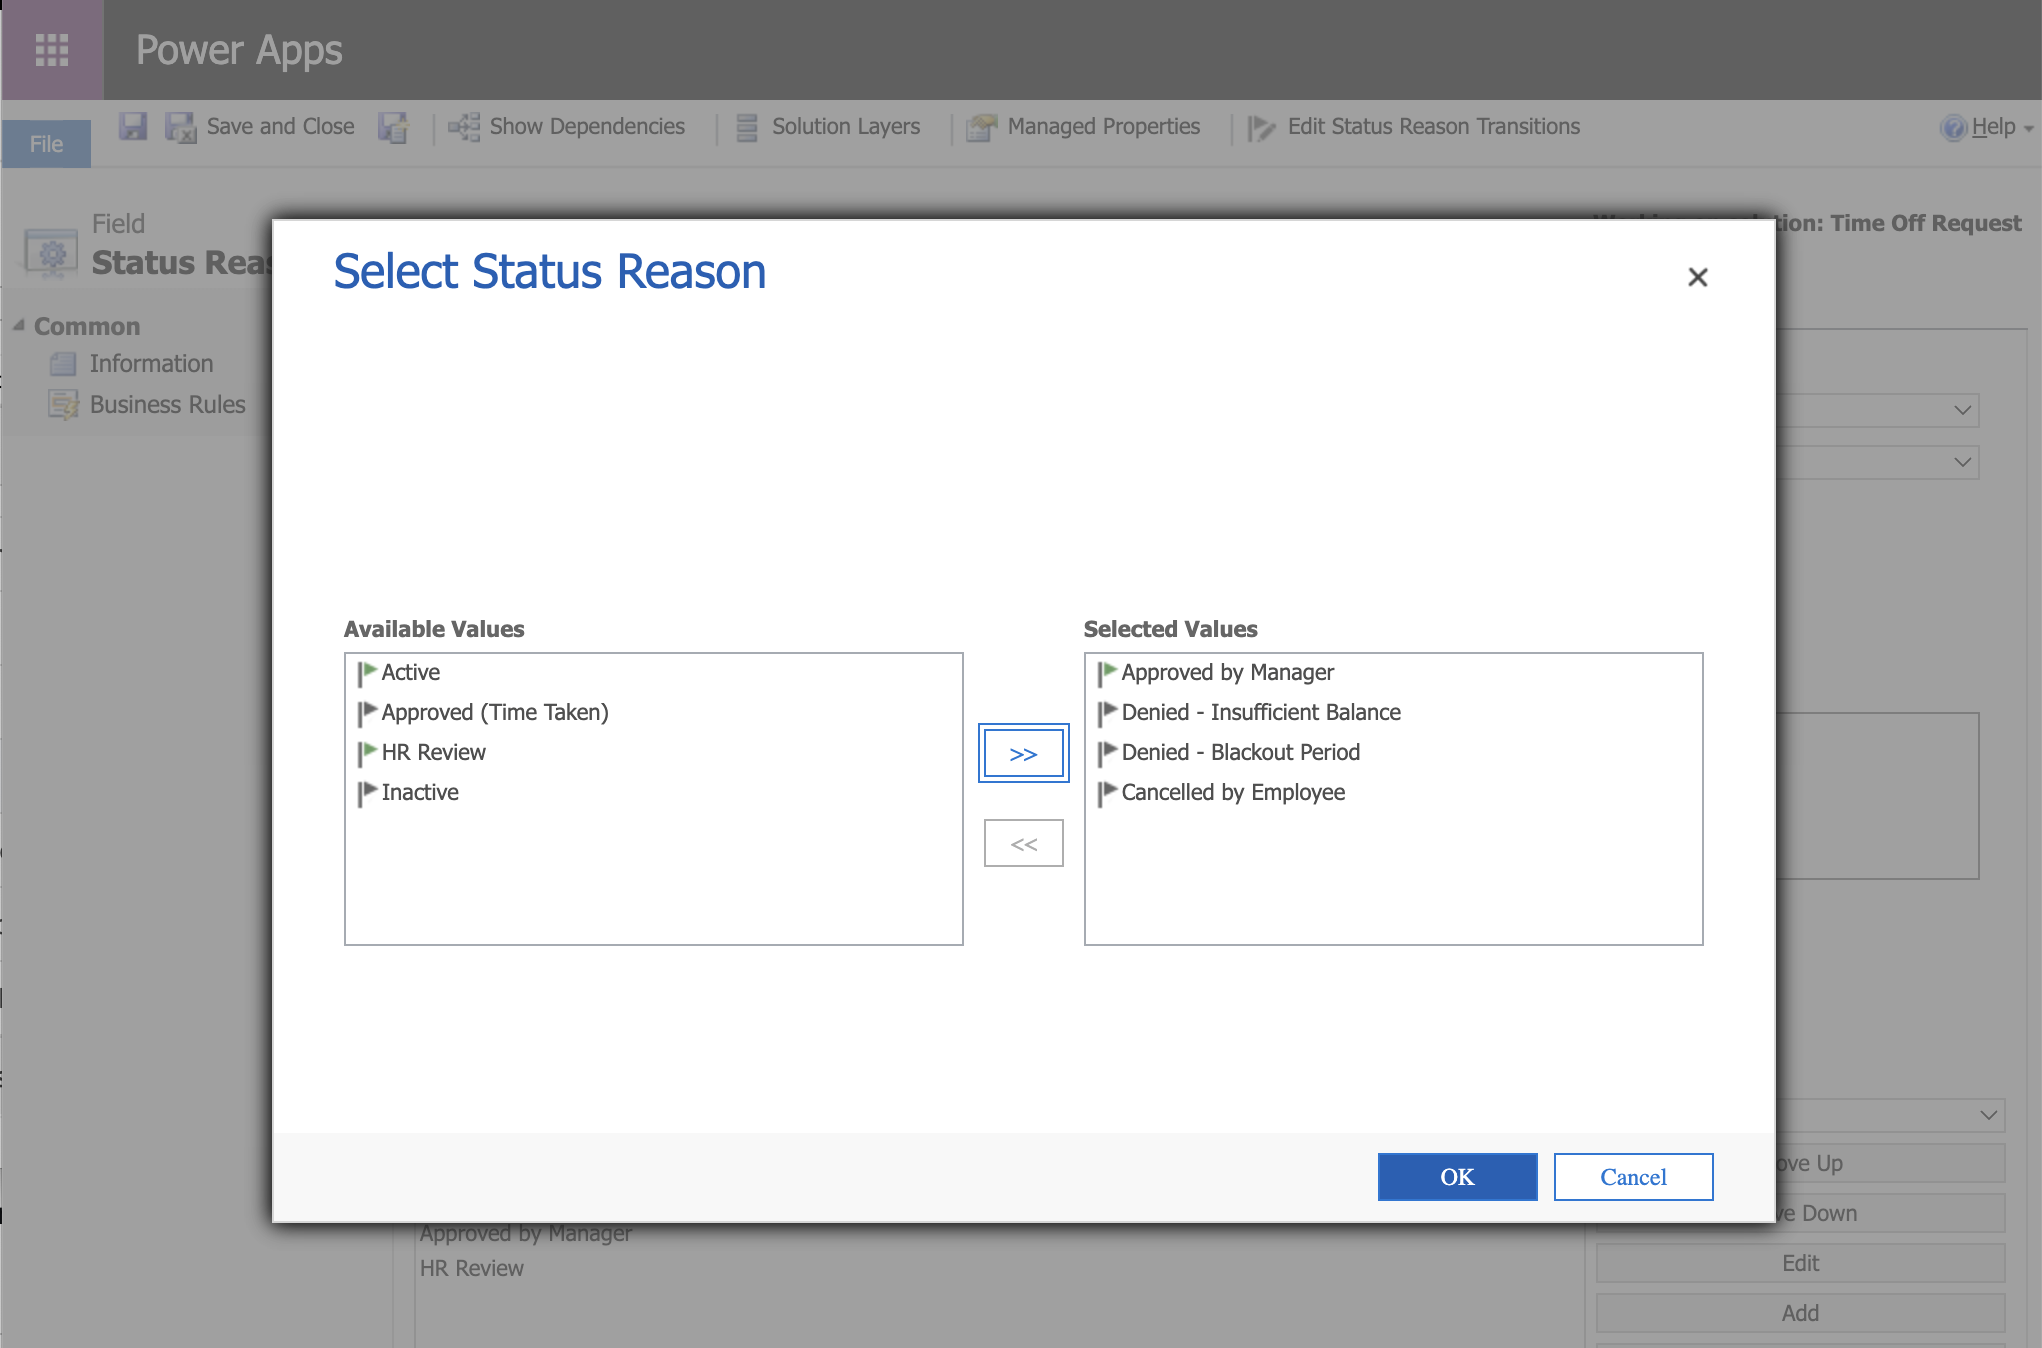
The Select Status Reason picker for "Submitted (Pending Approval)" — I moved Approved by Manager, Denied - Insufficient Balance, Denied - Blackout Period, and Cancelled by Employee to the Selected Values list.
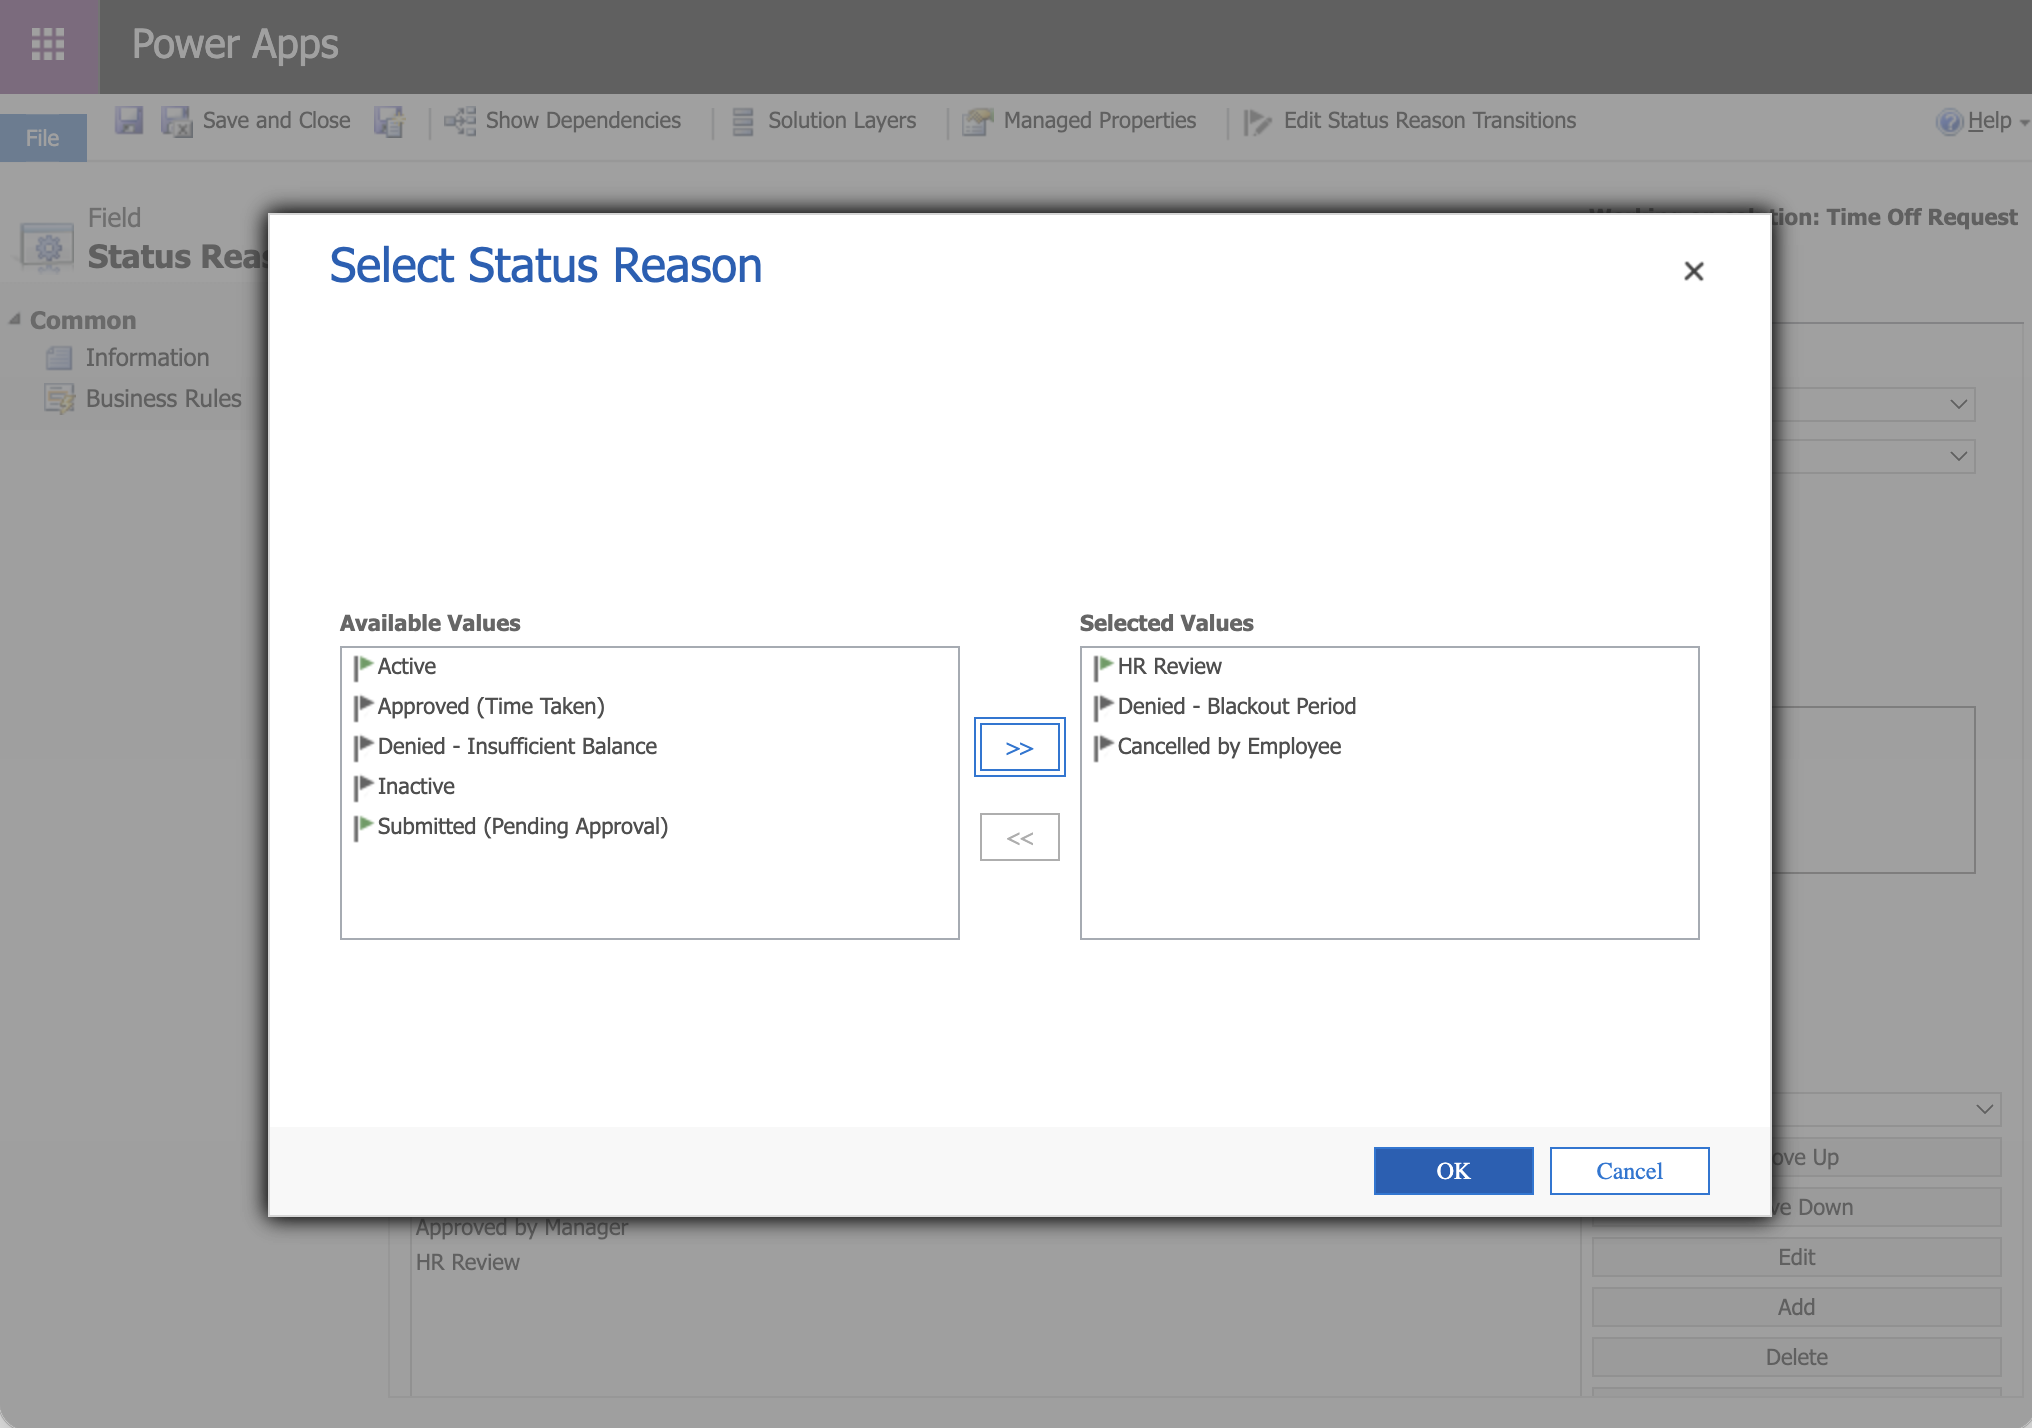
The picker for "Approved by Manager" — I selected HR Review, Denied - Blackout Period, and Cancelled by Employee as valid next steps.
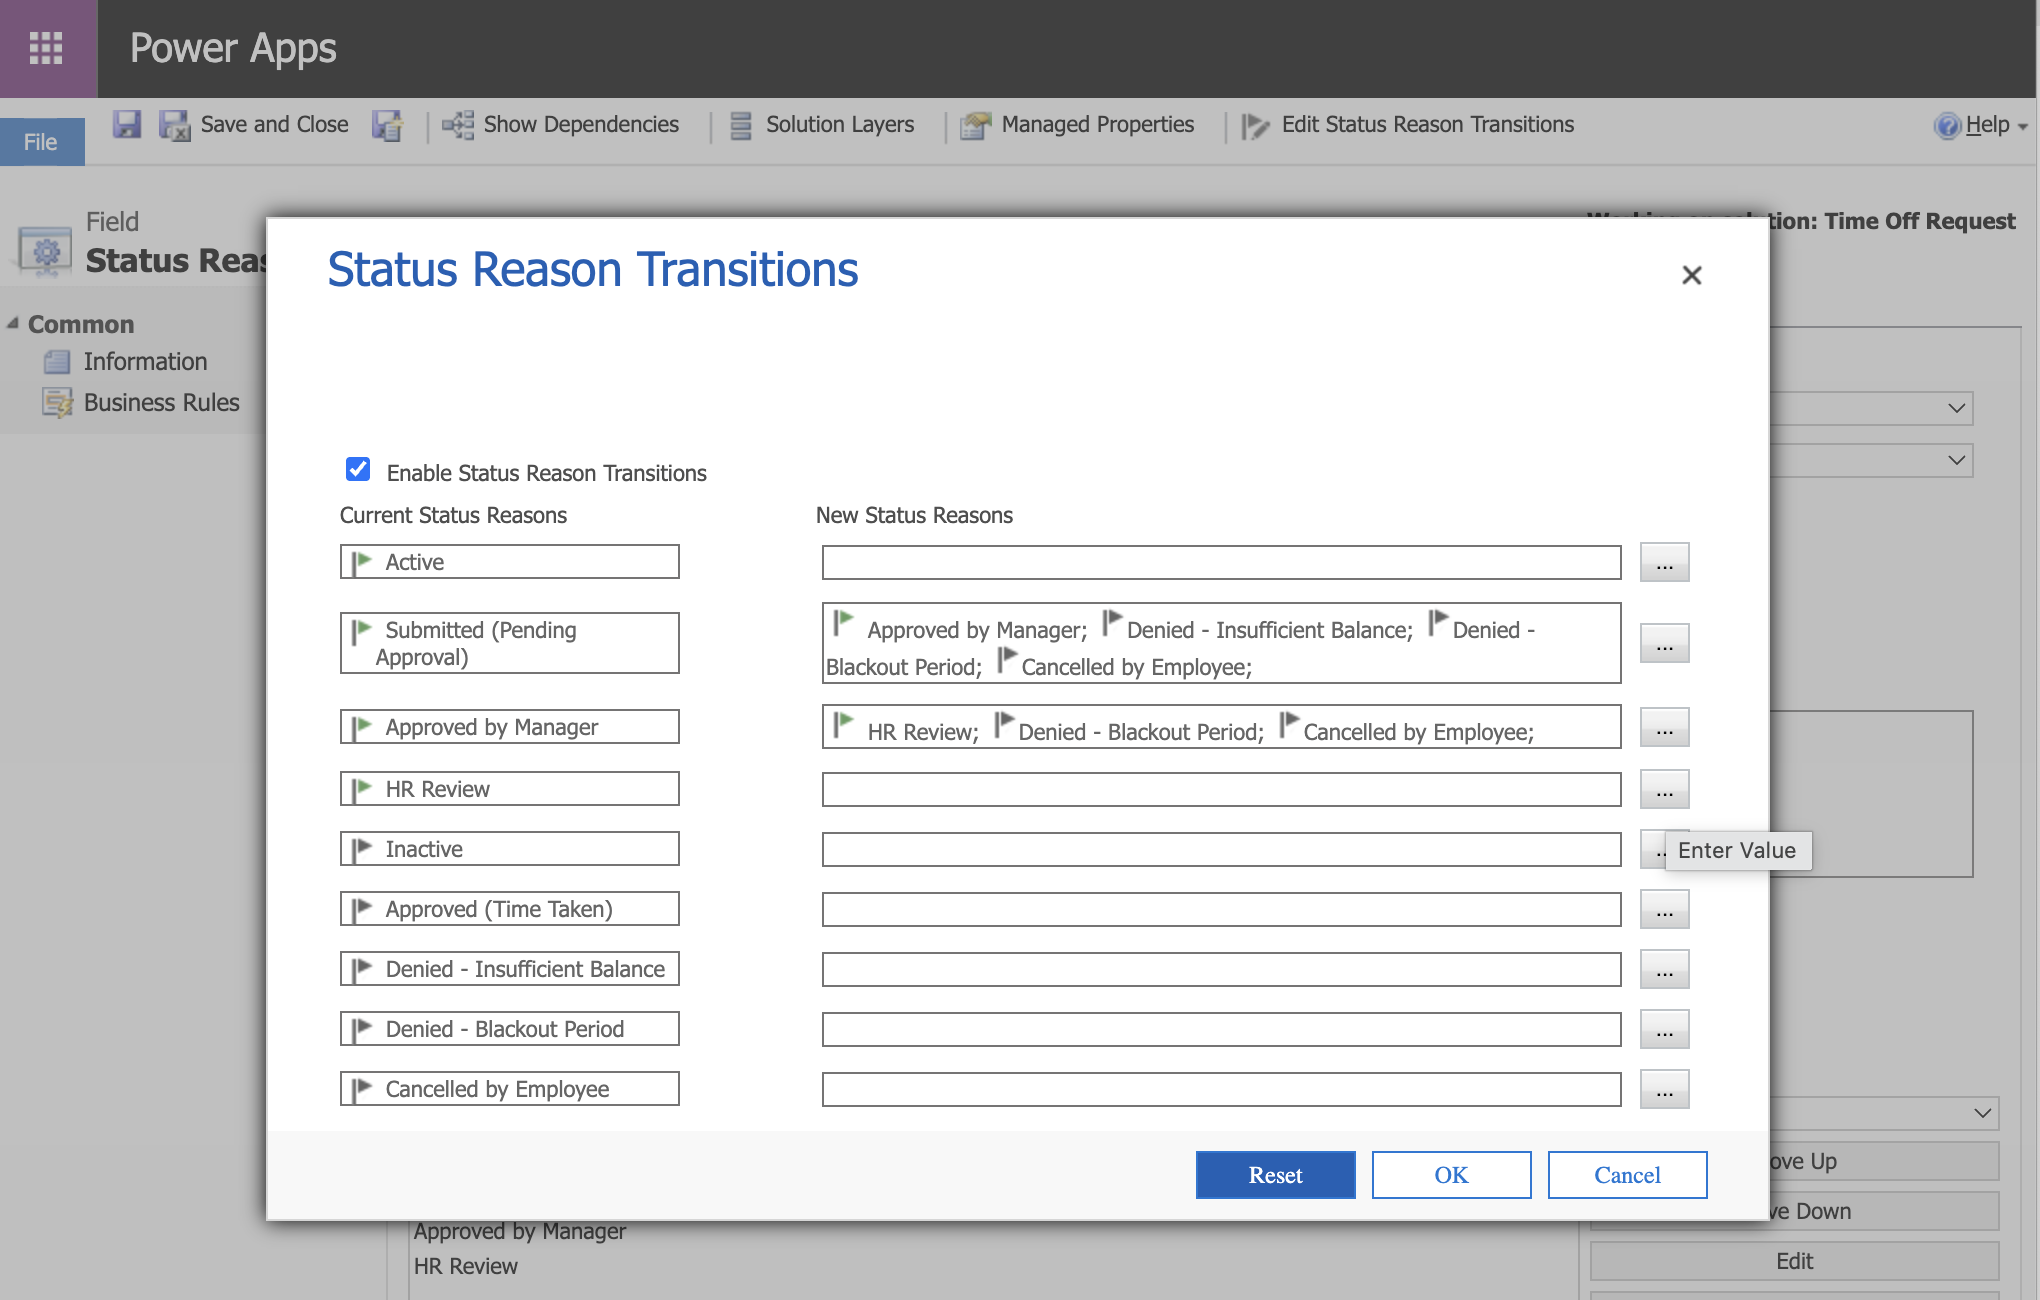
The Transitions dialog after configuring the first two rows — Submitted (Pending Approval) and Approved by Manager each showed their allowed next options.
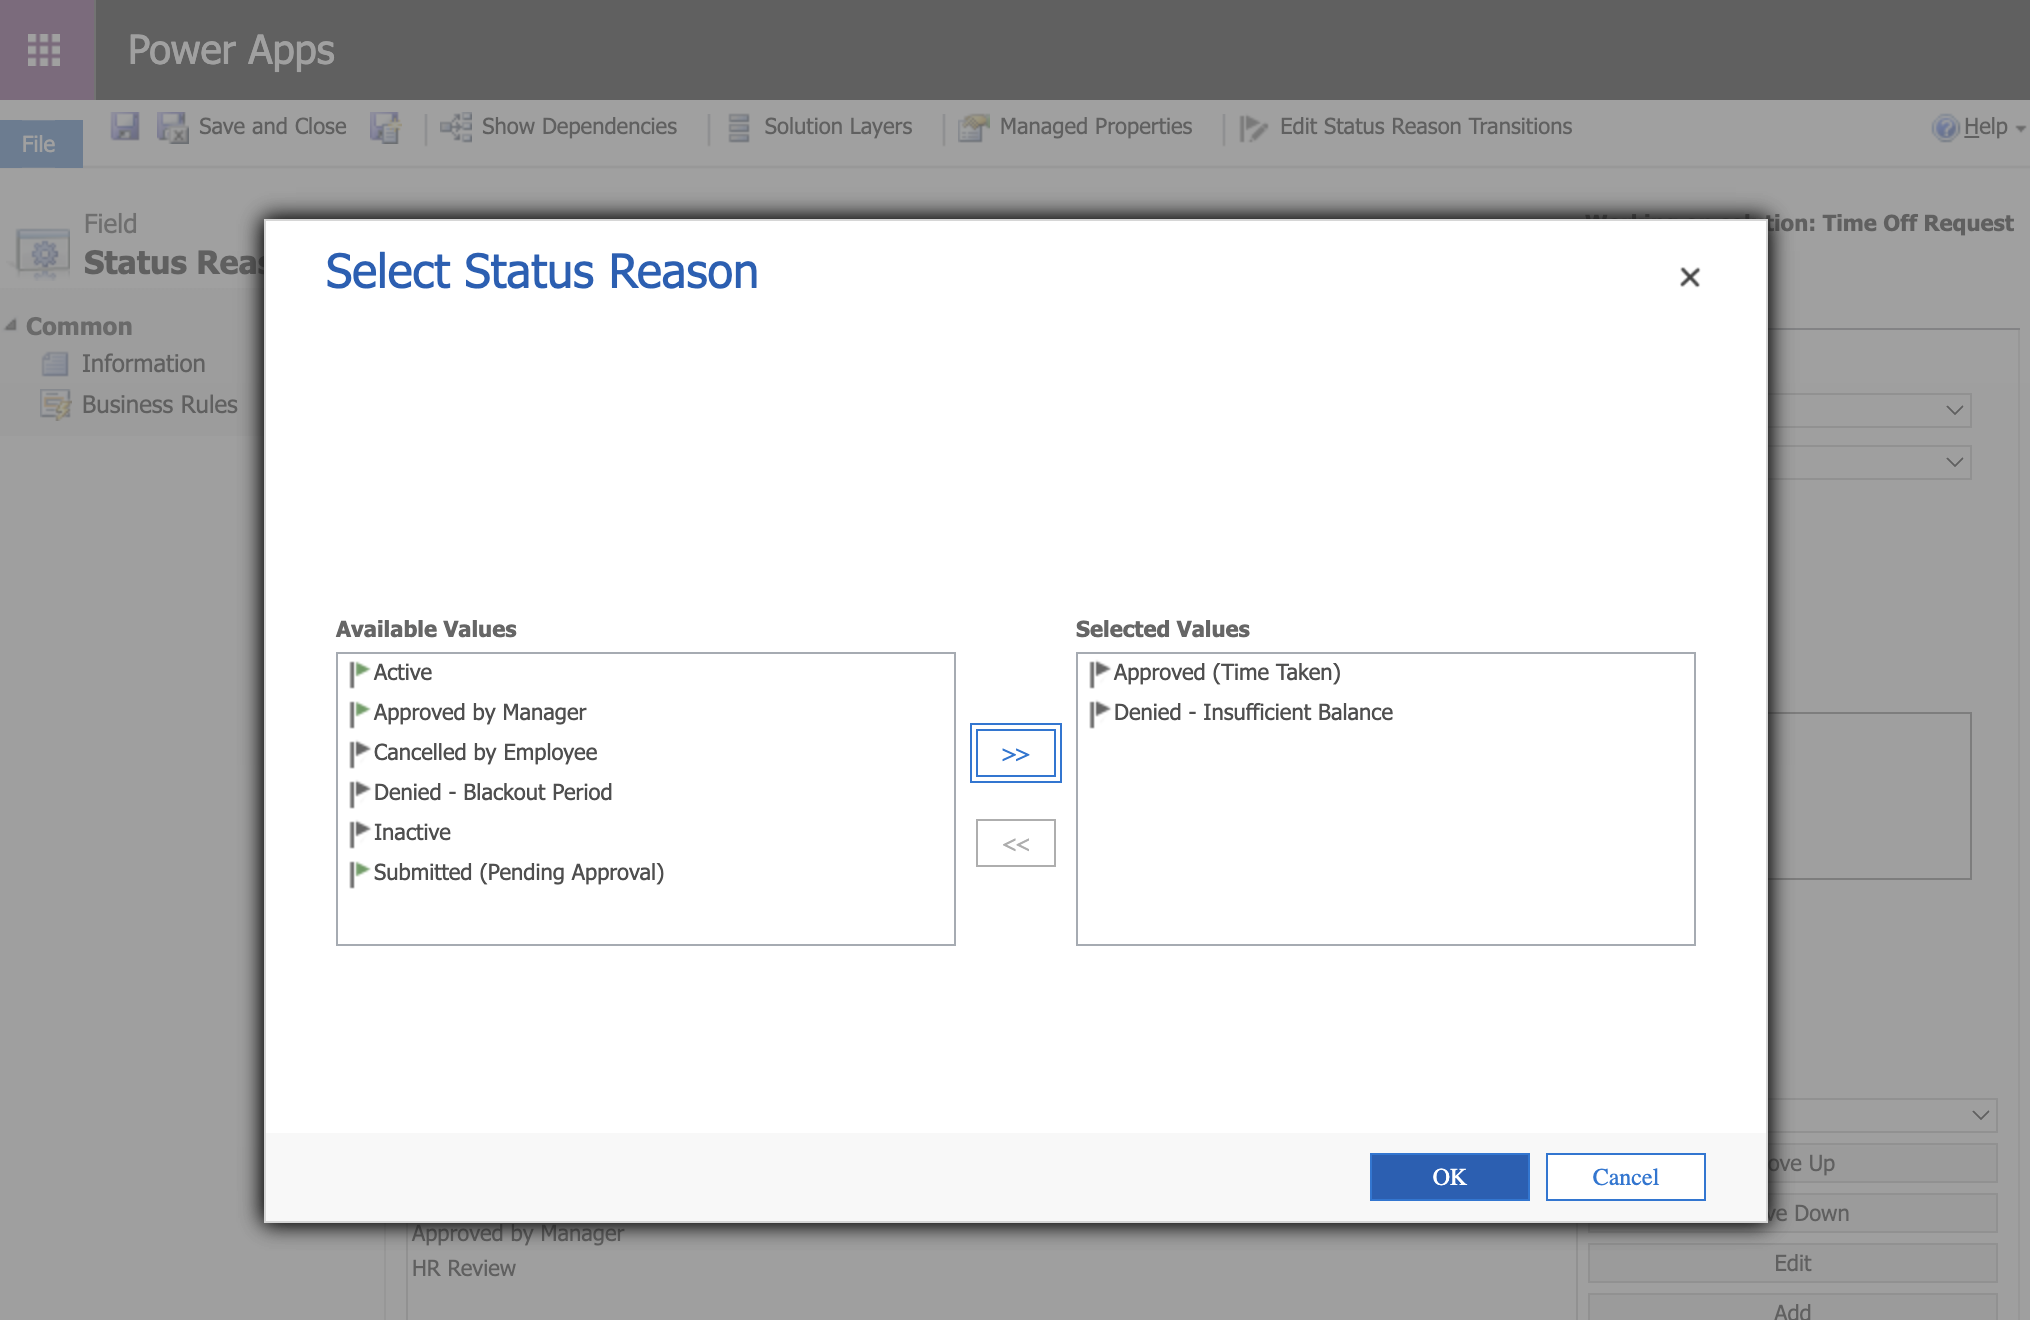
The picker for "HR Review" — I selected Approved (Time Taken) and Denied - Insufficient Balance as the terminal outcomes from this stage.
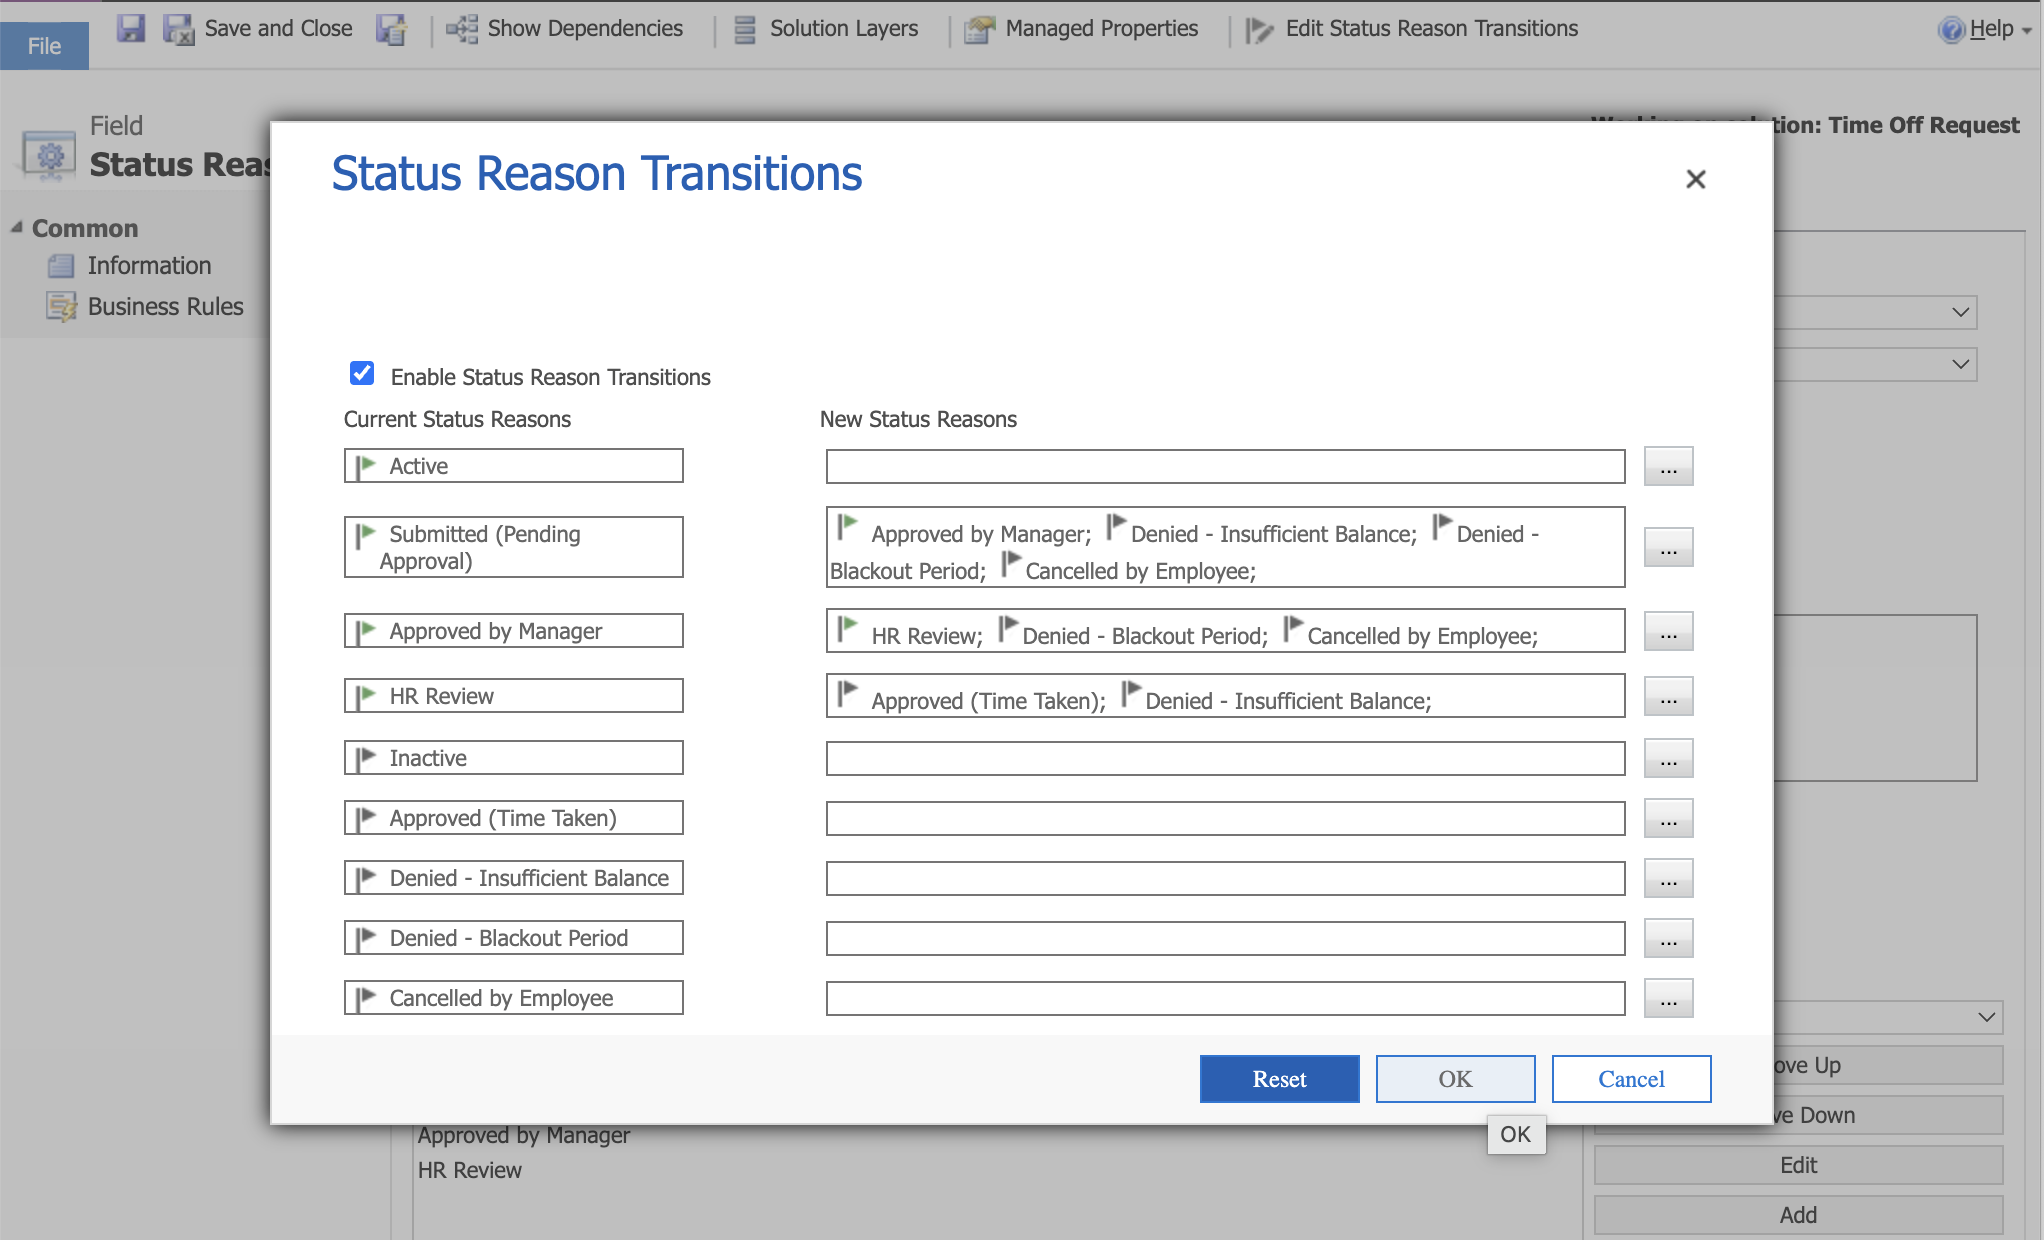
The Transitions dialog with all three active-state rows configured. The Inactive reasons were left with no transitions — once inactive, the record stays inactive.
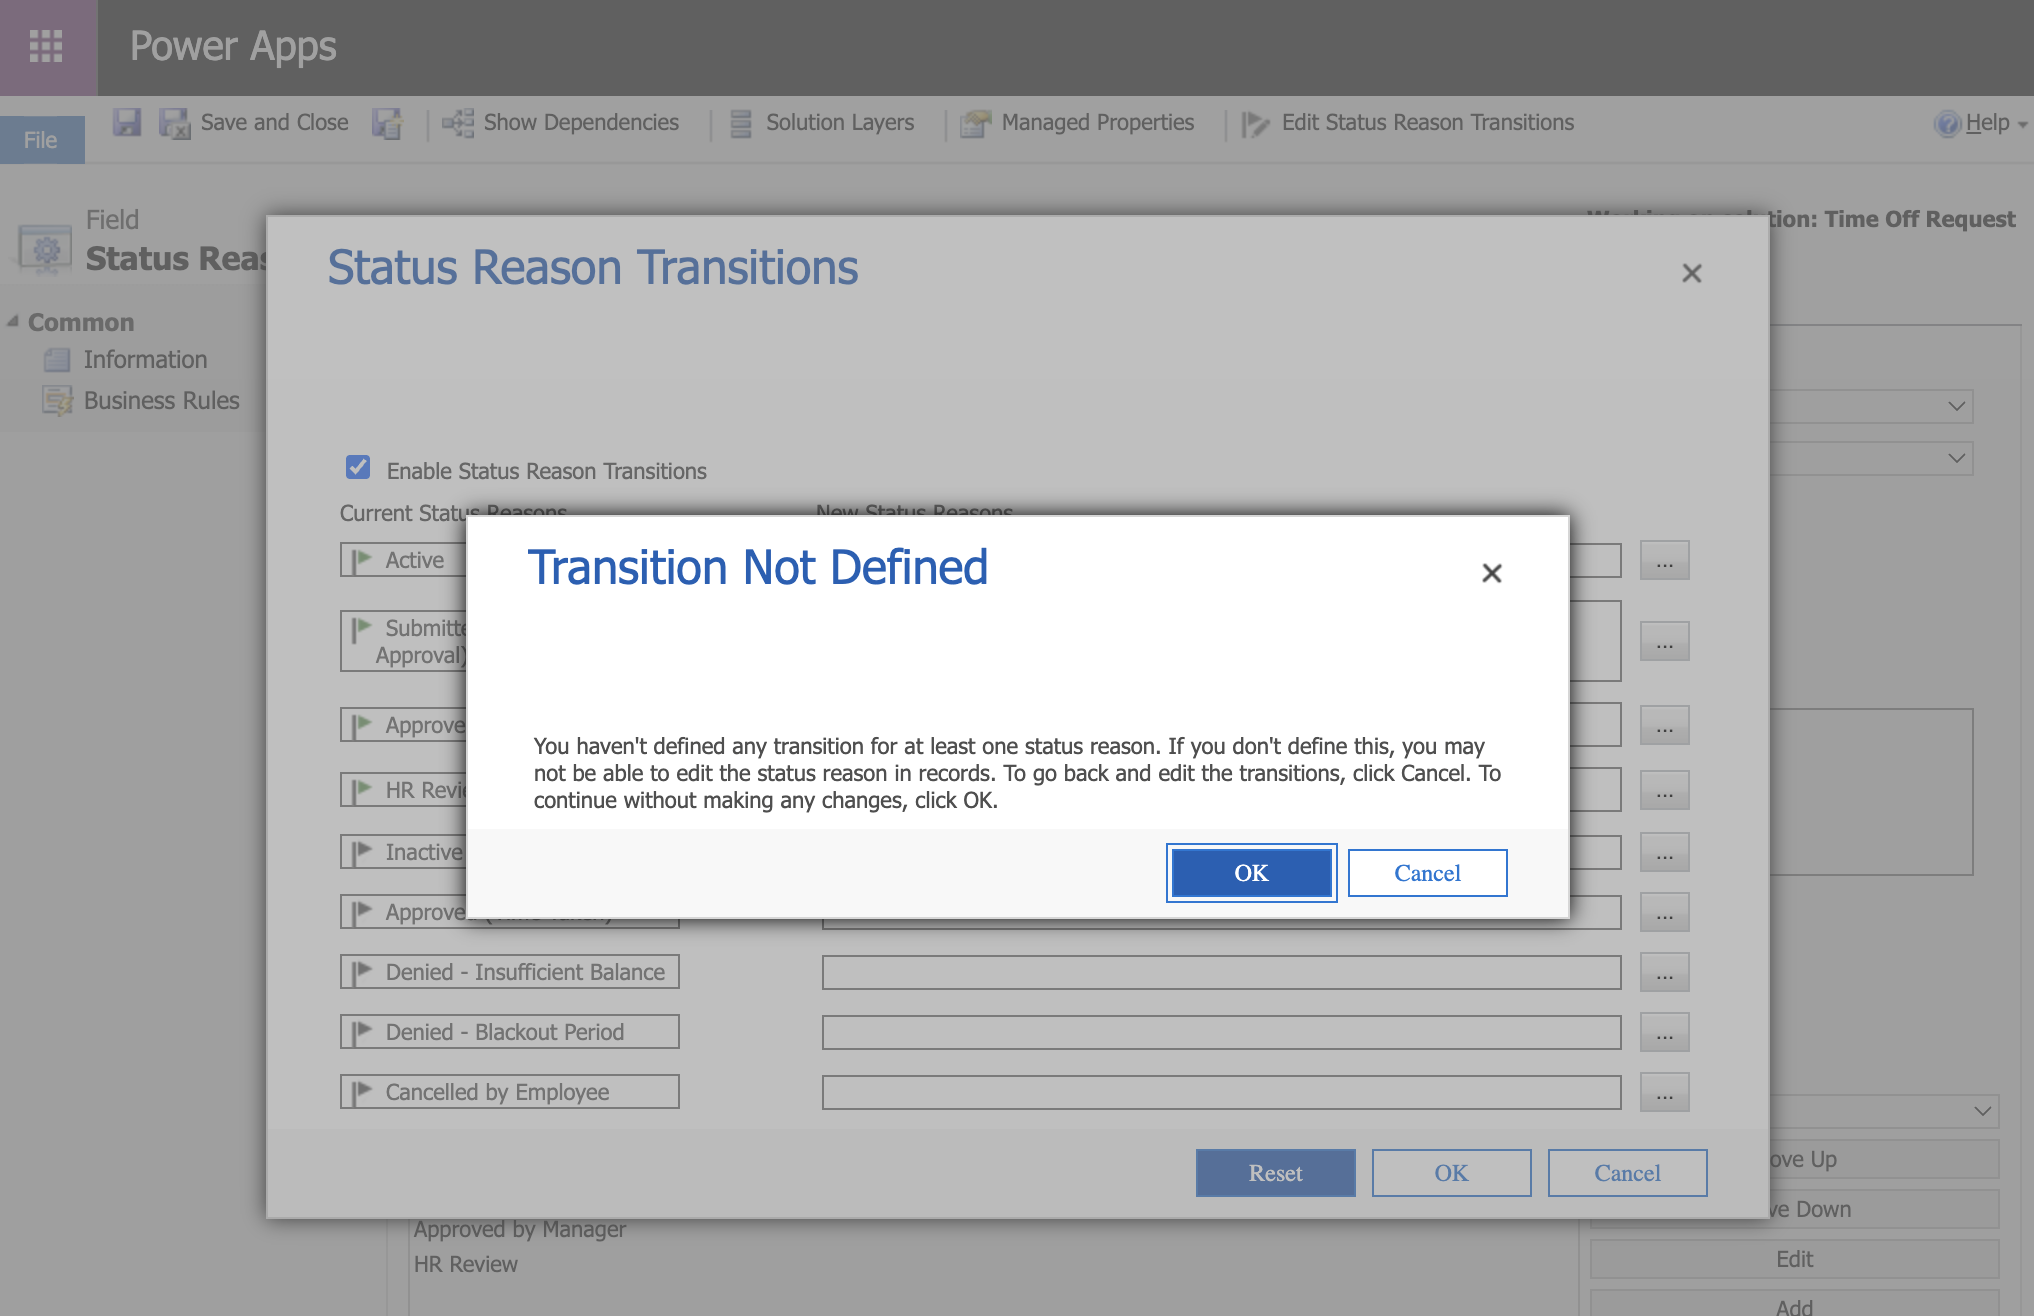
Clicking OK produced a "Transition Not Defined" warning because the terminal Inactive states had no outgoing transitions. I clicked OK to continue — dead-end states are intentional.
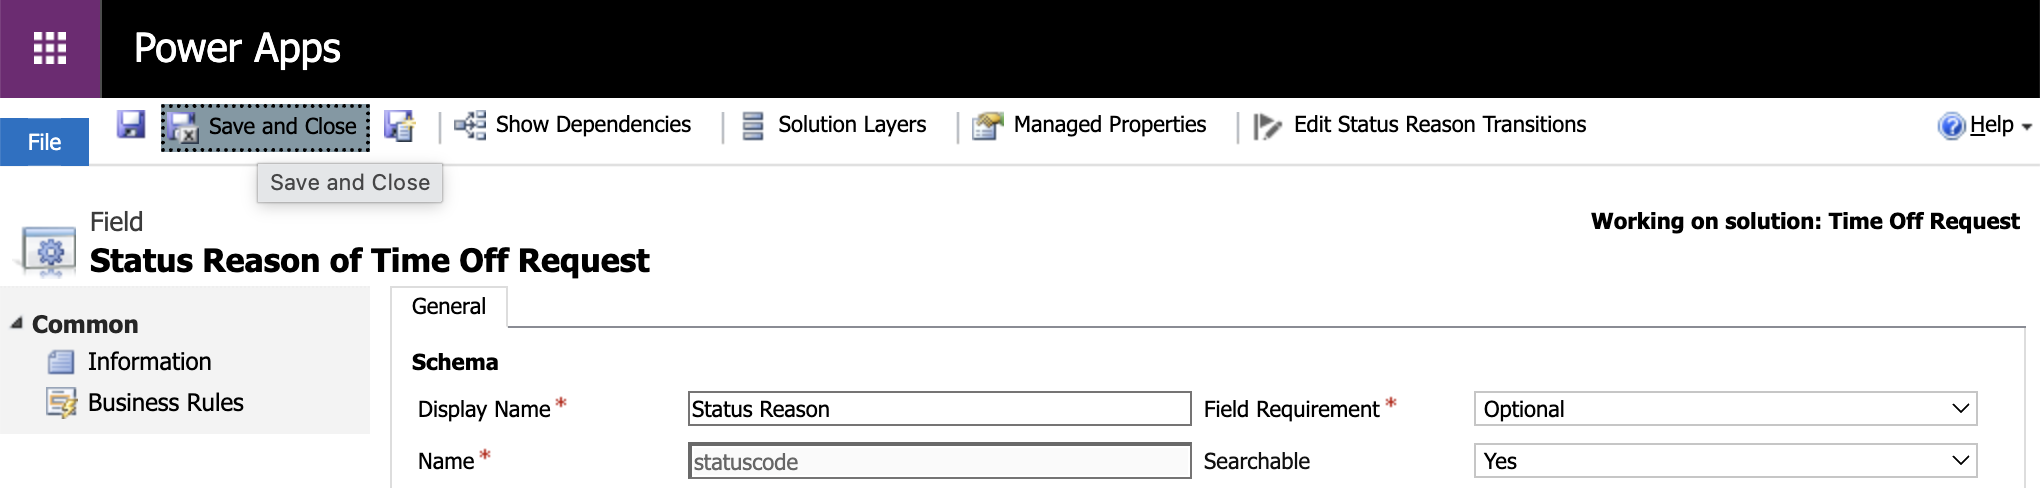
Back in the Status Reason field editor I clicked "Save and Close" to save the field with its transition configuration.
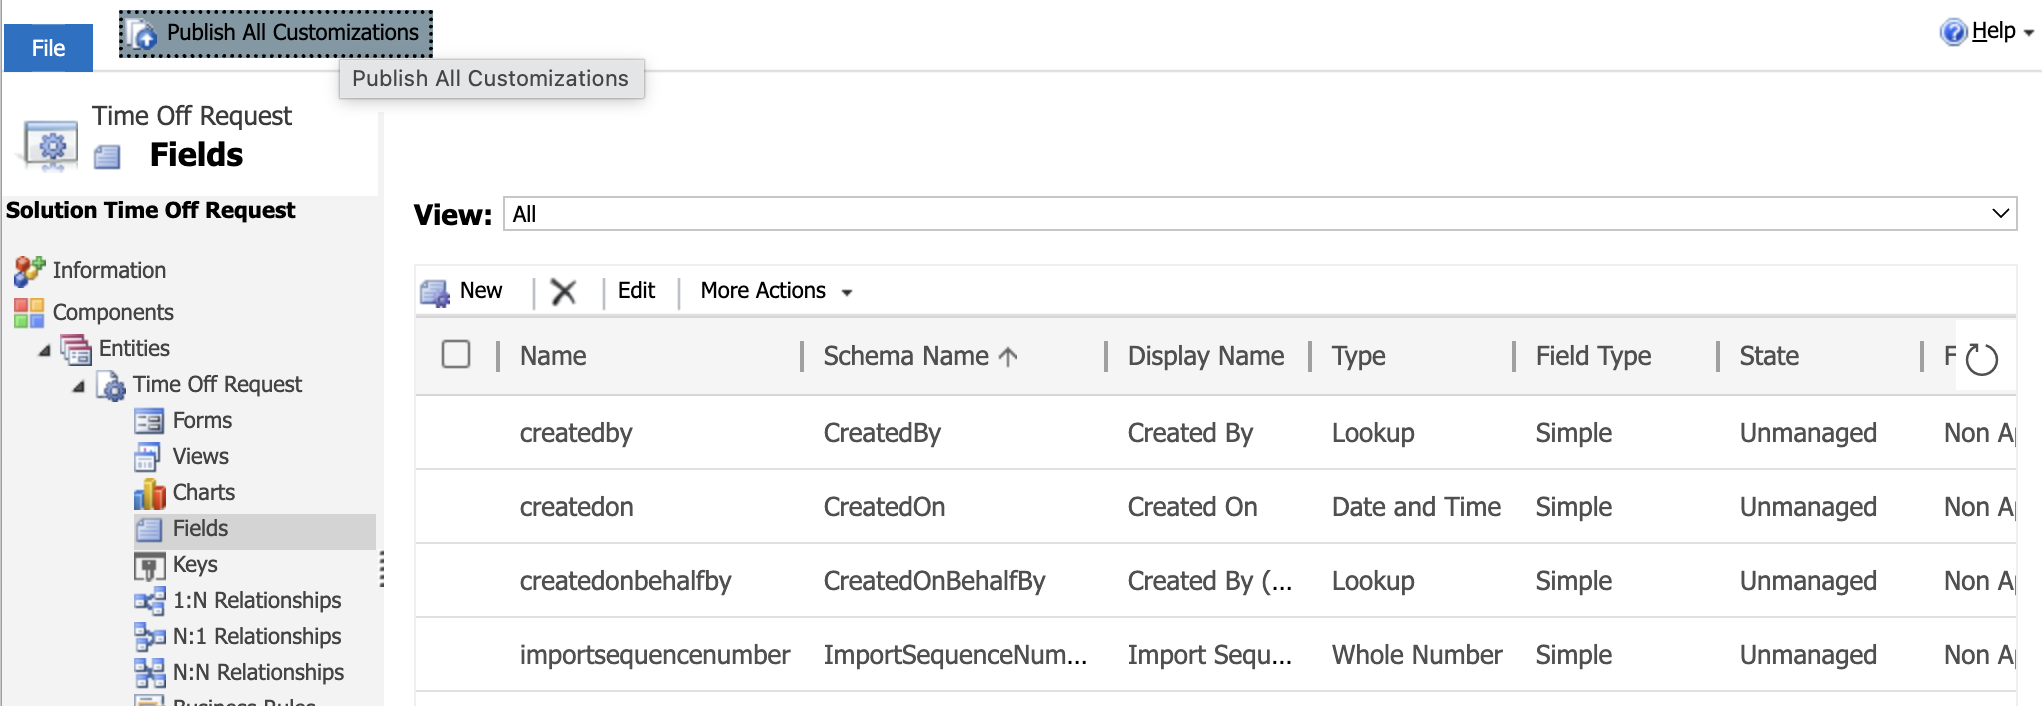
I clicked "Publish All Customizations" from the solution's Fields list to push the transitions live.
Seeing transitions in action
I created a new record — "Second Example Time Off Request" — to walk through the enforced workflow.
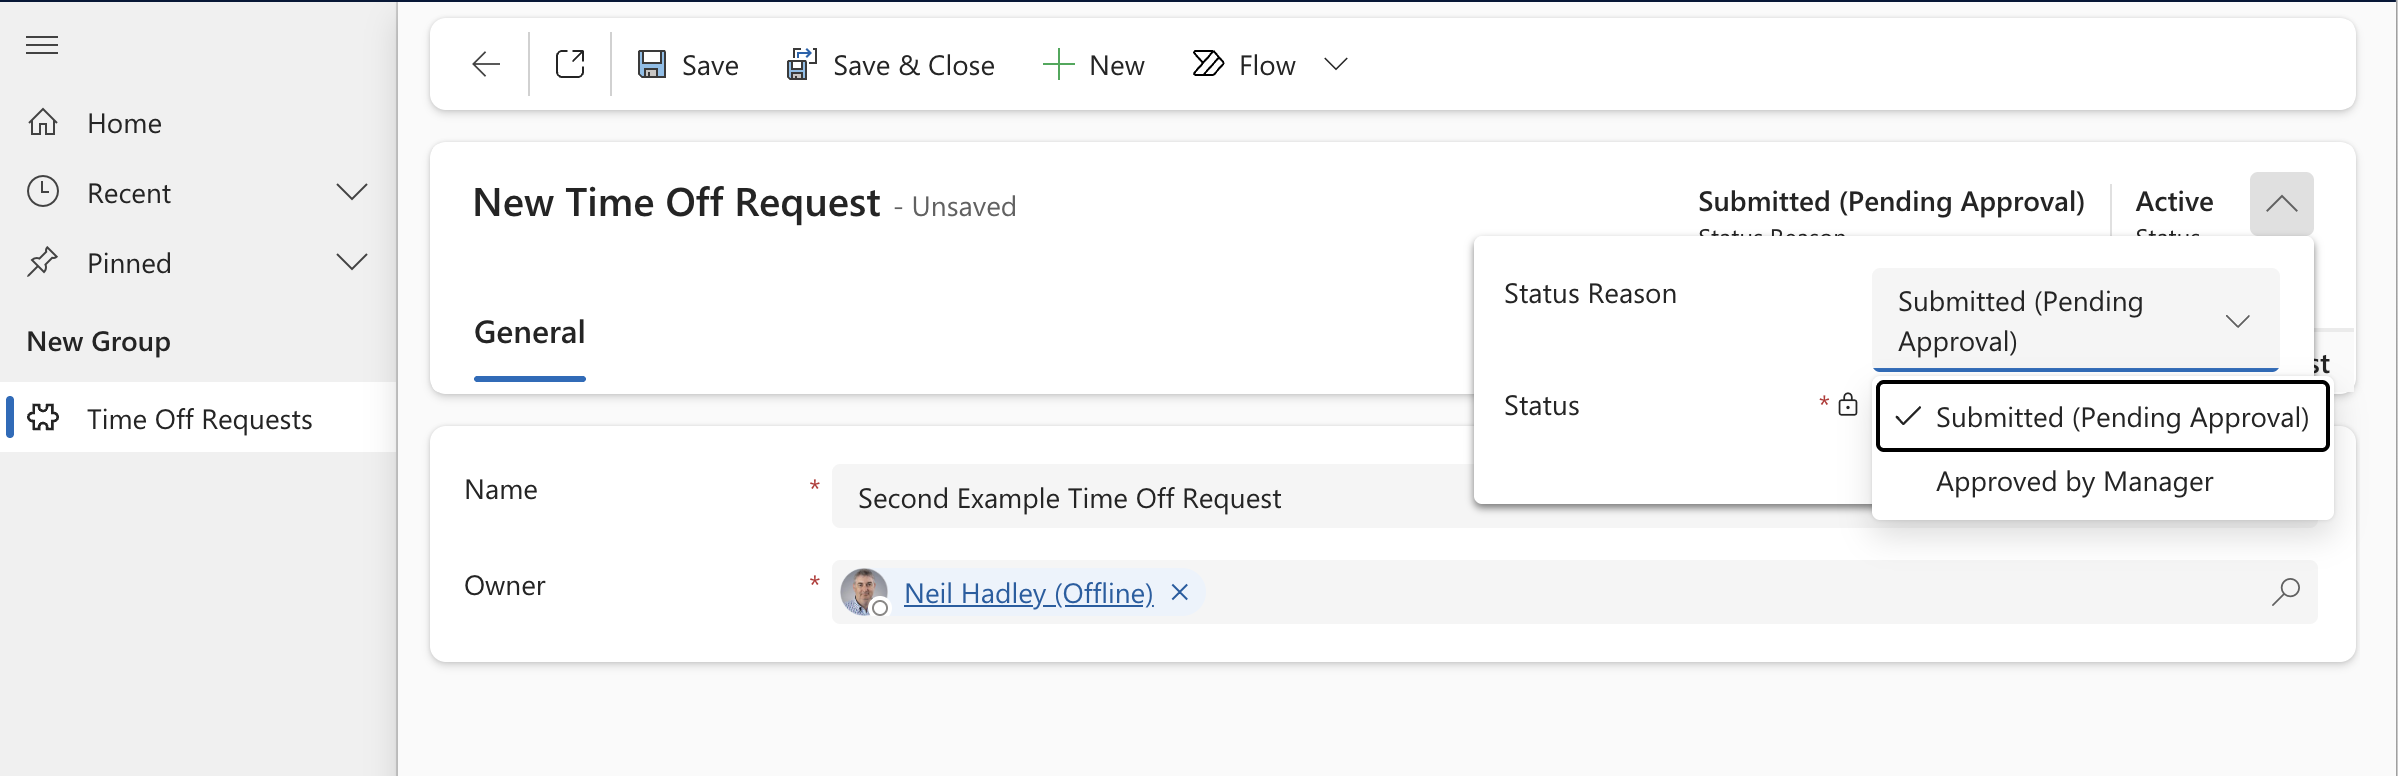
On the new unsaved record, the Status Reason dropdown showed only "Submitted (Pending Approval)" and "Approved by Manager" as starting options — "HR Review" wasn't reachable directly because no transition leads to it from the beginning.
I saved the record, then advanced the Status Reason step by step.
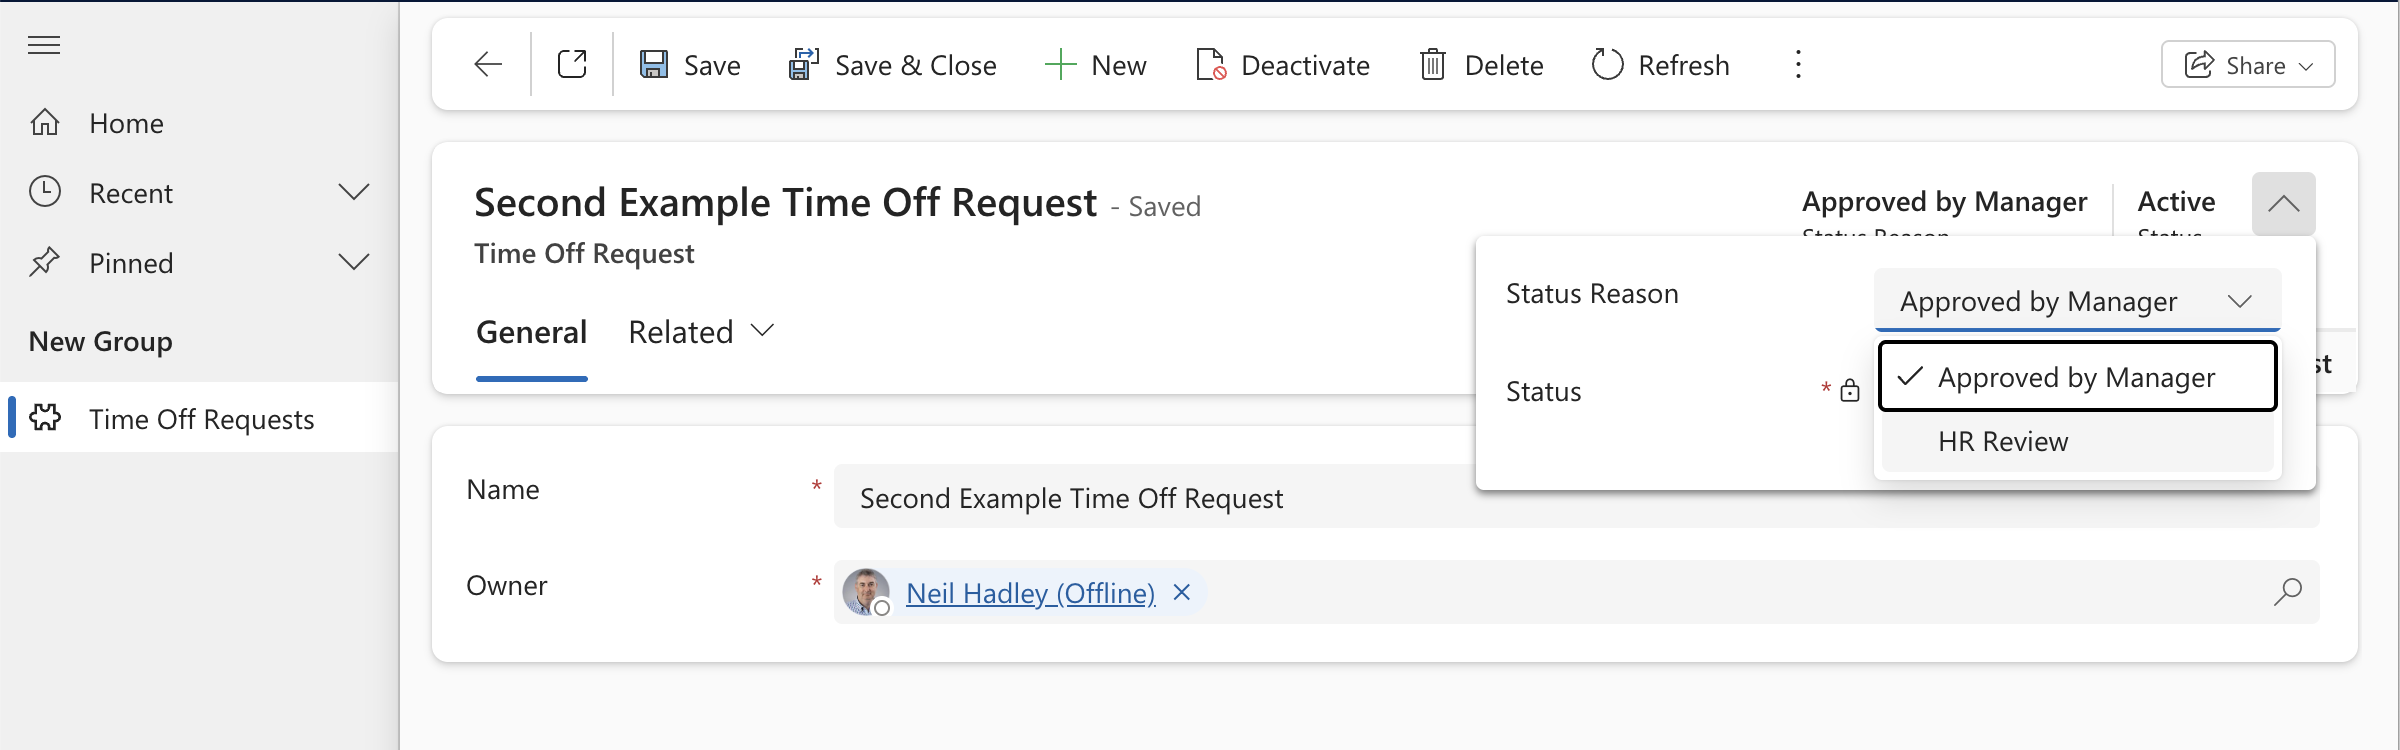
With Status Reason set to "Approved by Manager", the dropdown now offered only "Approved by Manager" and "HR Review" — transitions restricted the allowable next step.
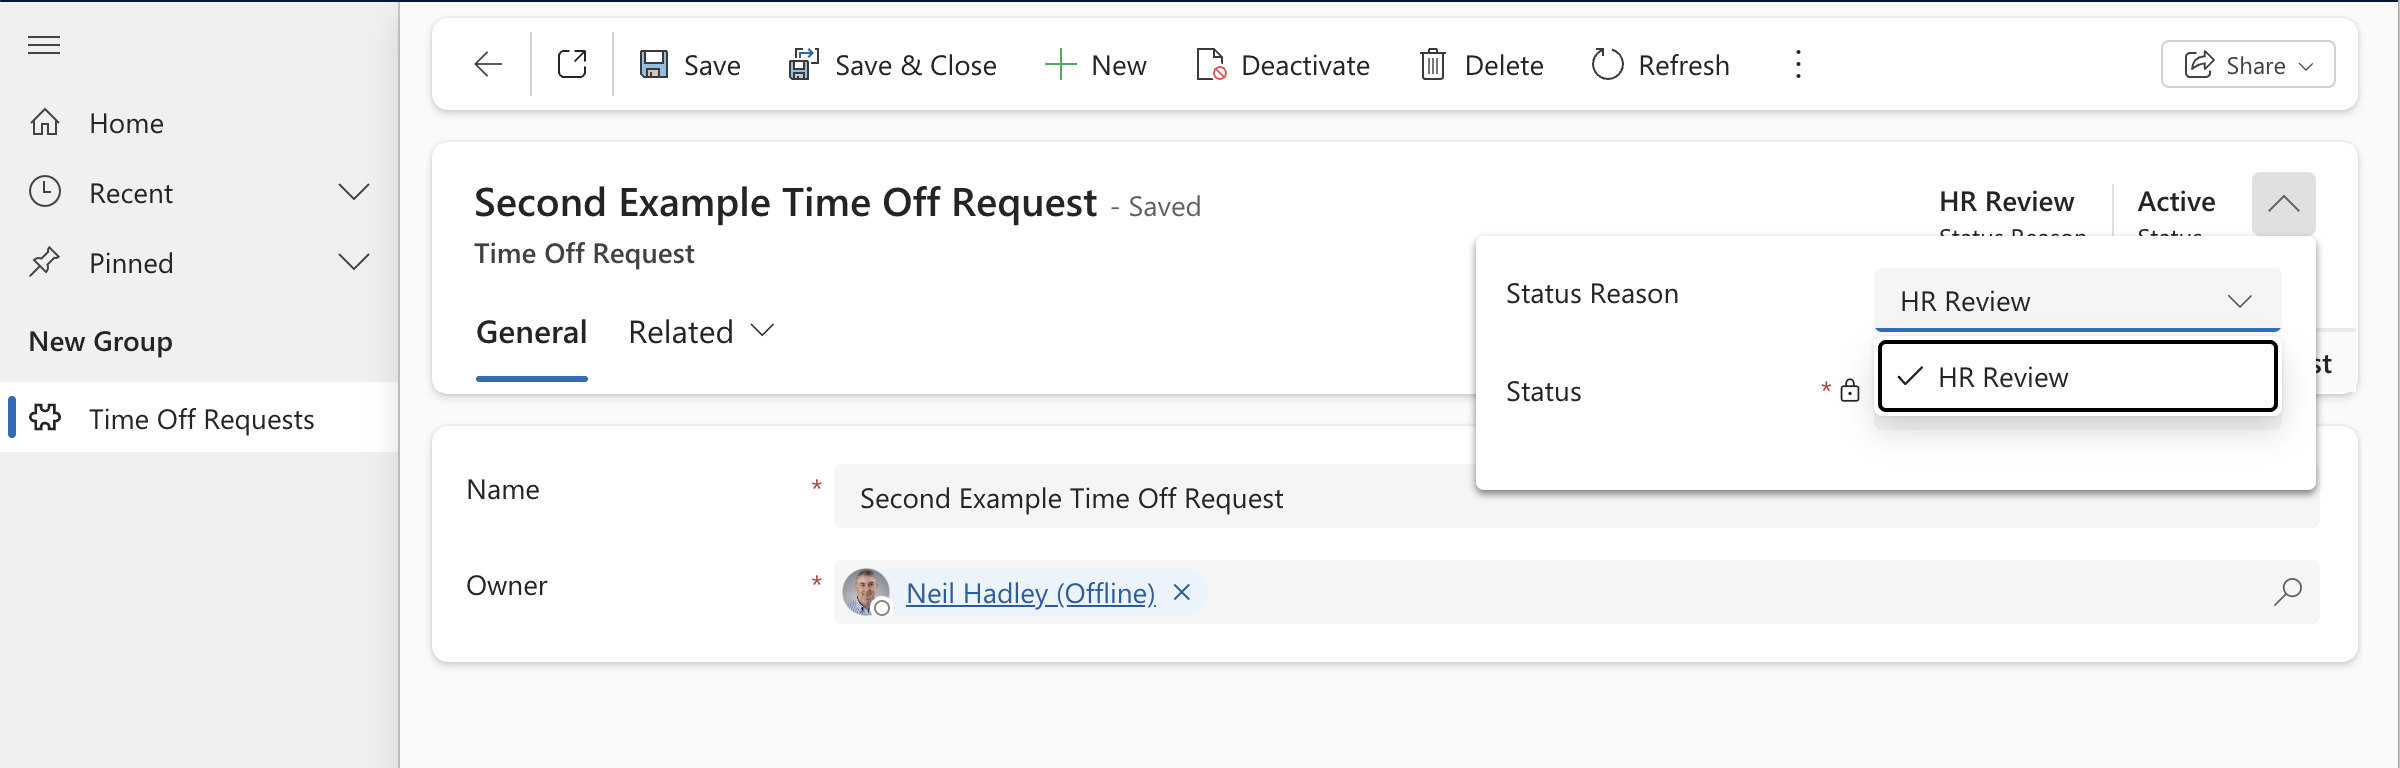
After moving to "HR Review", the dropdown showed only "HR Review" — users couldn't go backwards or skip ahead.
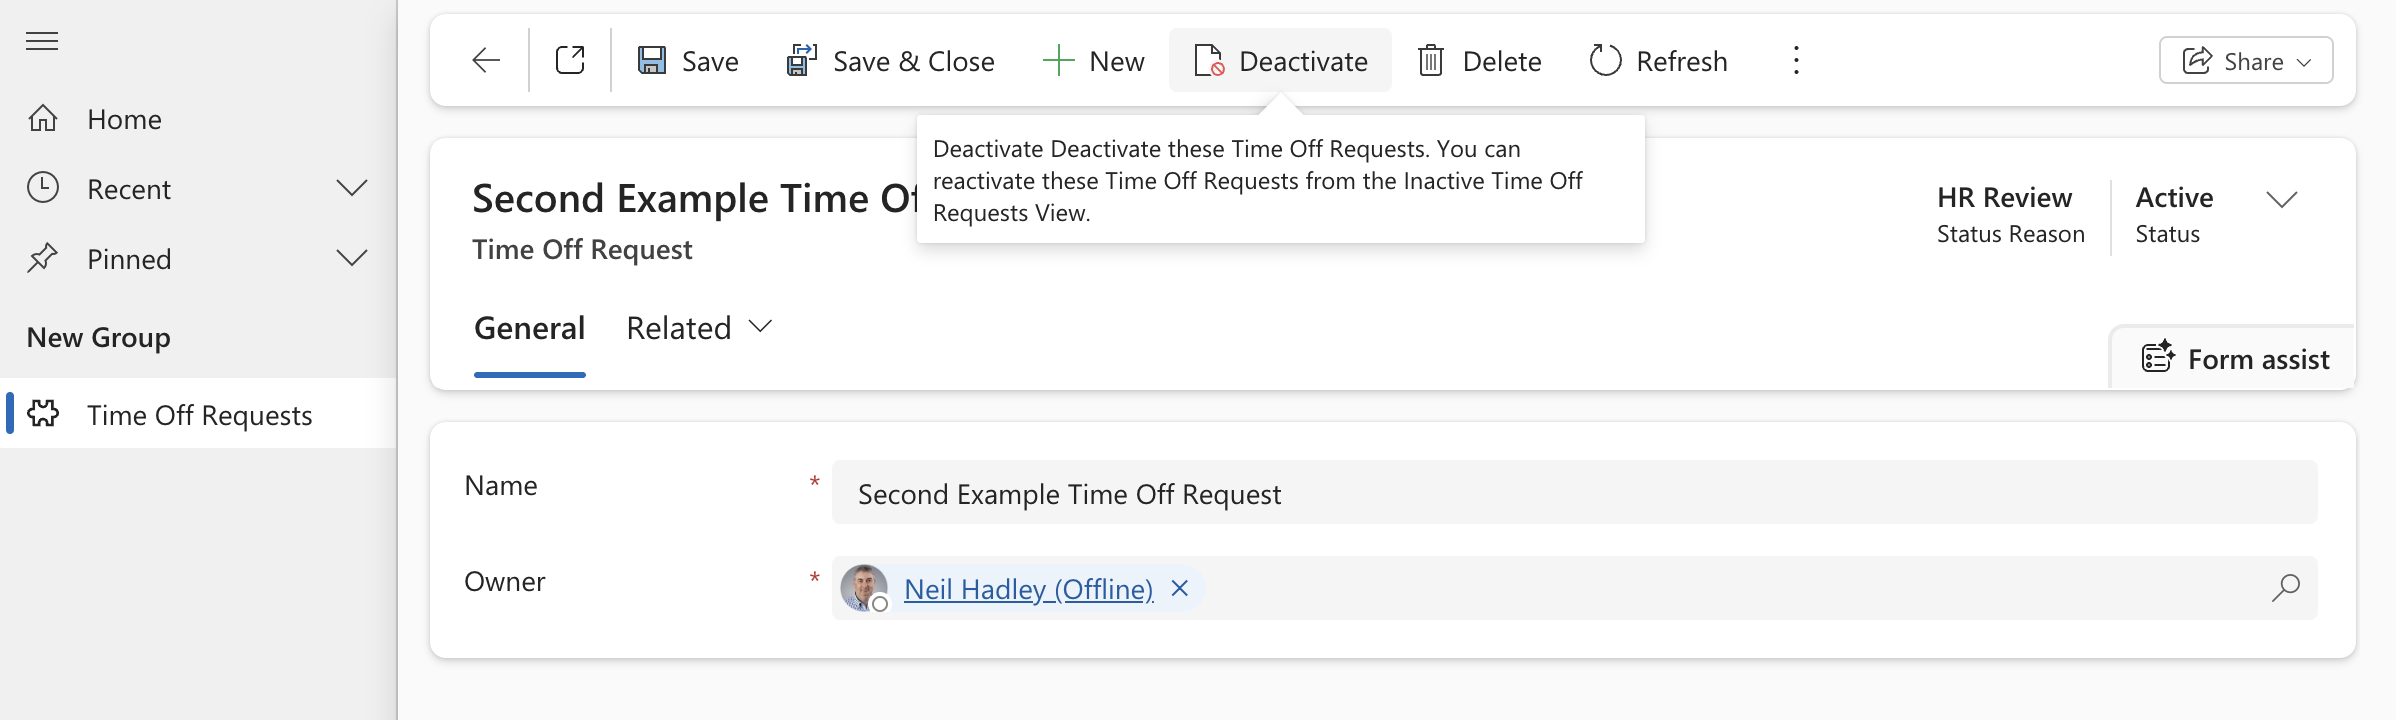
I hovered over the Deactivate button with the record in "HR Review" status.
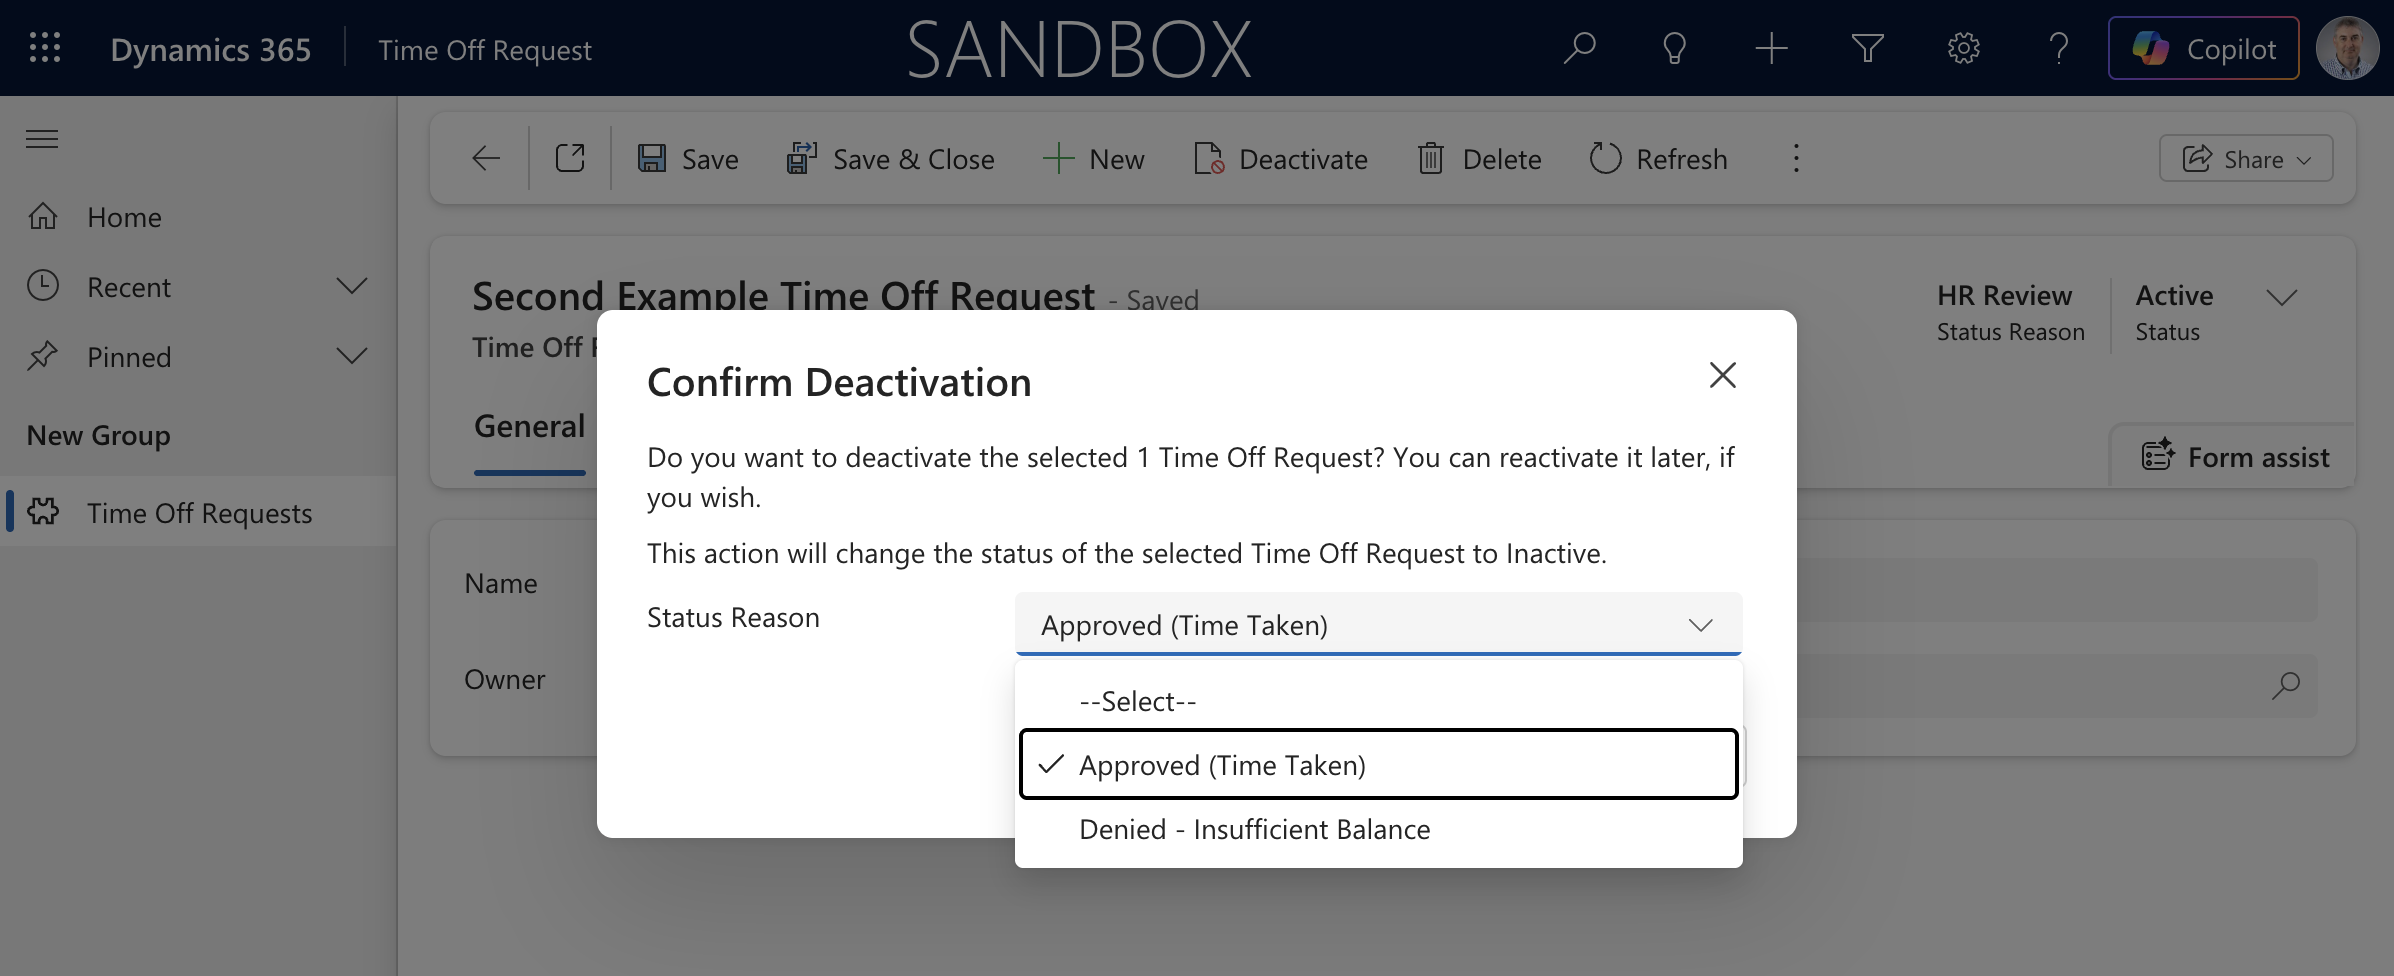
The Confirm Deactivation dialog showed only "Approved (Time Taken)" and "Denied - Insufficient Balance" — the only Inactive reasons reachable from "HR Review" according to the transitions I configured.
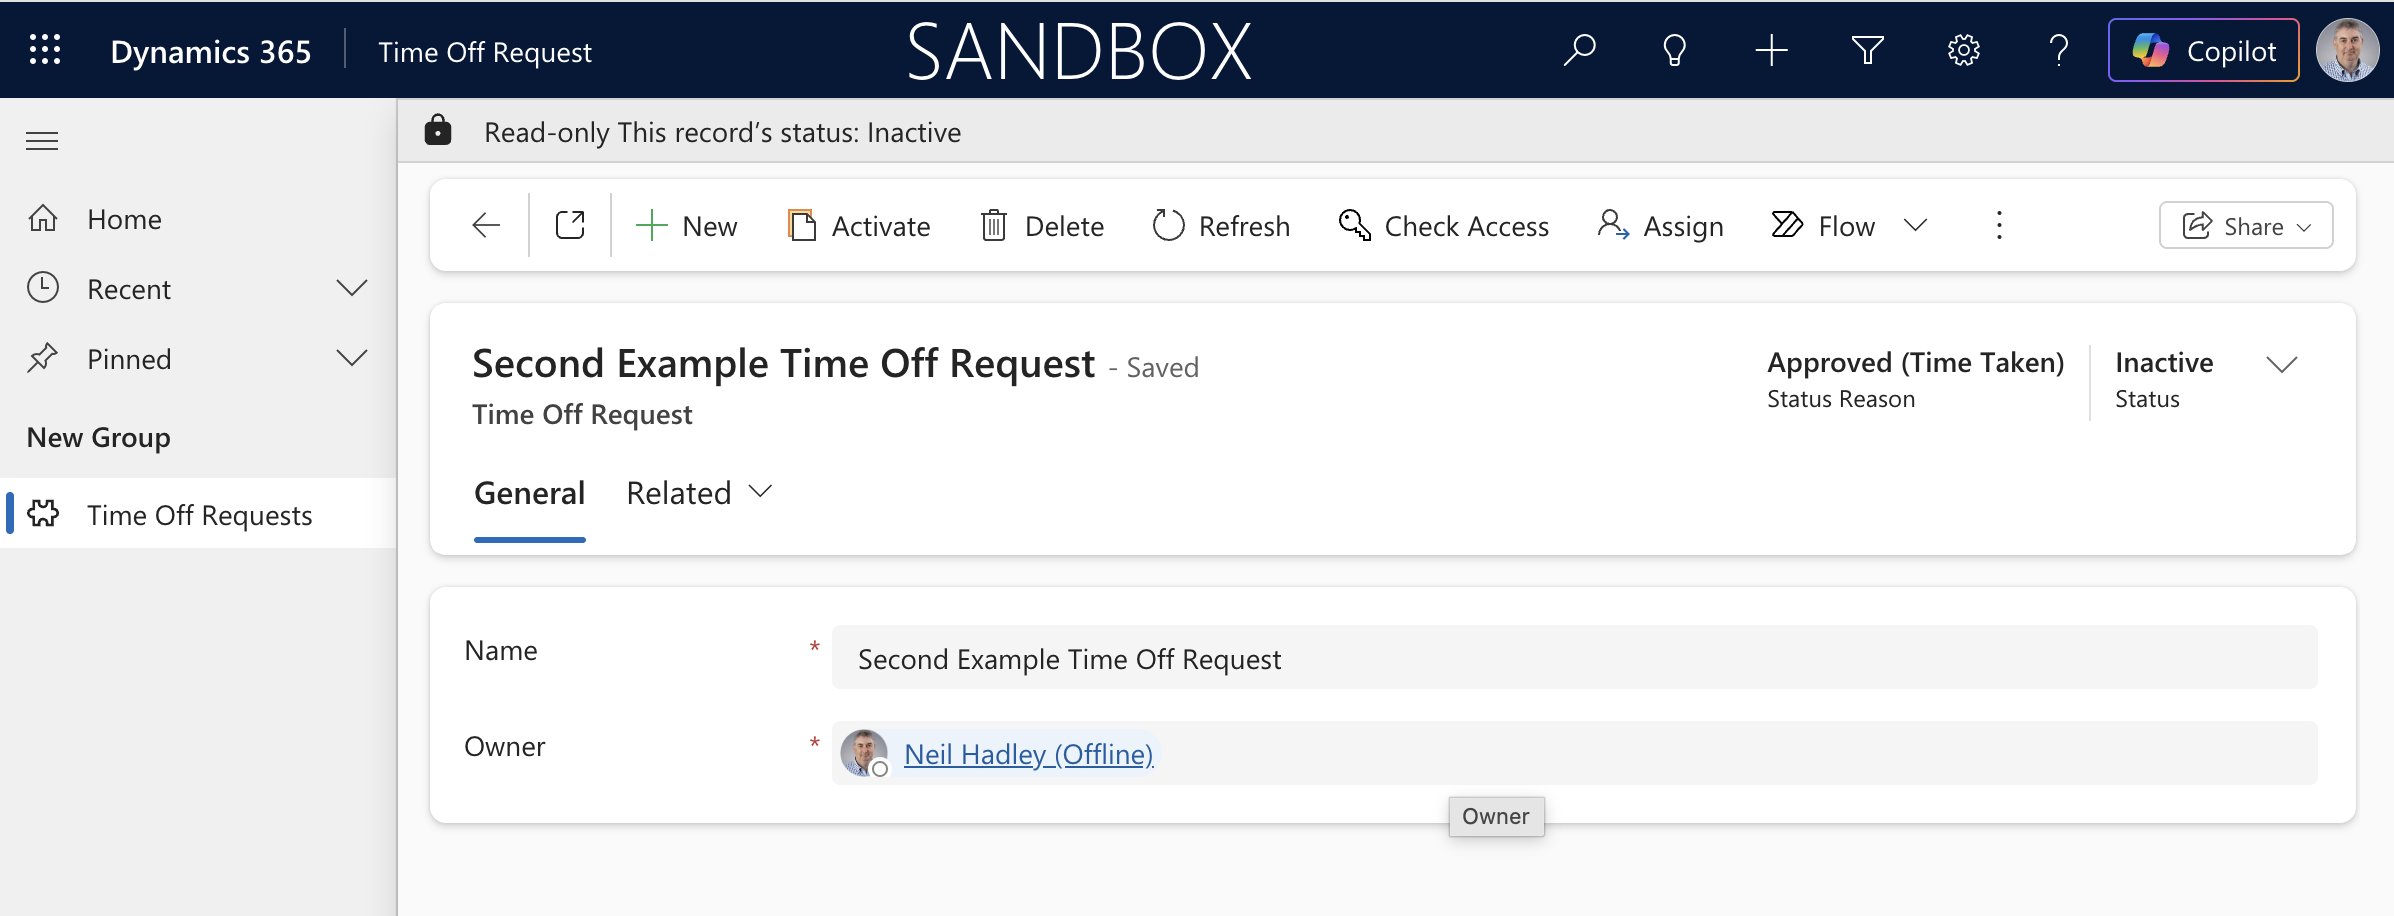
The final deactivated record showed "Approved (Time Taken)" / "Inactive" — the complete Status Reason Transitions workflow working end to end.
Summary
Status and Status Reason are powerful columns that ship with every Dataverse table. The key things to know:
- Status is expected (Active/Inactive only) and managed by the platform — you should not add choices to it.
- Status Reason accepts custom choices grouped under Active or Inactive — add as many as your process needs.
- Status Reason Transitions (only available in the classic Solution Explorer) lets you define which reasons can follow which, turning a free dropdown into an enforced approval path.